This post may contain affiliate links. Please see our full Disclosure Policy for details.
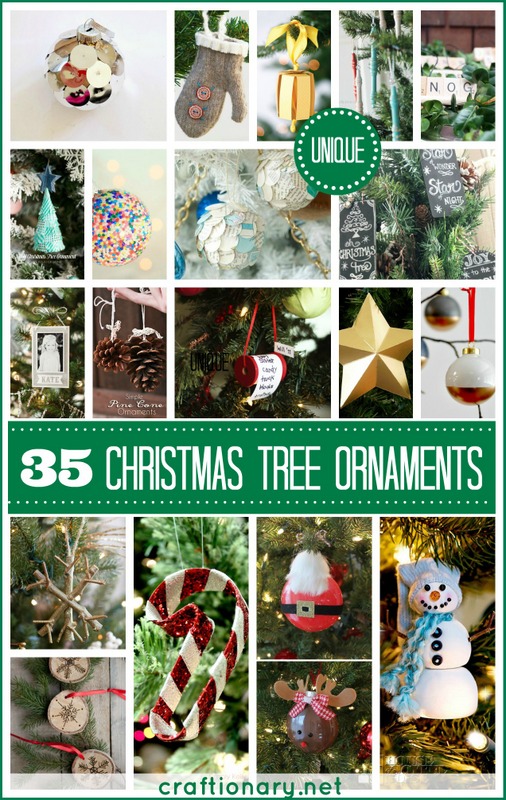
There’s nothing more magical than decorating your Christmas tree with ornaments that you’ve made yourself. DIY Christmas ornaments are not only budget-friendly but also meaningful, making your holiday décor unique and personal. From classic salt dough ornaments to modern styles like etched wood slices and glitter snowflakes, this list of 35 creative ornament tutorials will inspire your holiday crafting.
Whether you’re crafting with kids, making personalized gifts, or simply looking to upgrade your holiday décor, these ideas will bring festive joy to your tree.
Creative DIY Christmas Ornaments
You will find step by step instructions for DIY Christmas ornaments crafts. Make ornaments with a variety of different materials. Here is our comprehensive list of DIY Christmas ornaments, categorized by material and style to help you find the perfect project:
Classic and Keepsake Ornaments
1. Salt Dough Ornaments:
A timeless favorite. Mix flour, salt, and water, roll out, cut with cookie cutters, bake, and paint. Perfect for handprints!
Related: Your Complete Air Dry Clay Guide
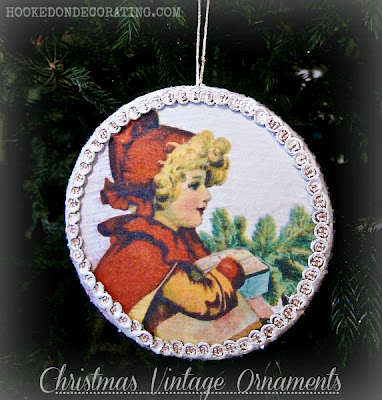
2. Mod Podge Photo Ornament:
Print a favorite family photo, cut it into a circle or shape, and adhere it to a wooden or chipboard disc using Mod Podge. Seal with a clear coat.
Related: 80 One-of-a-kind Personalized Christmas Ornaments
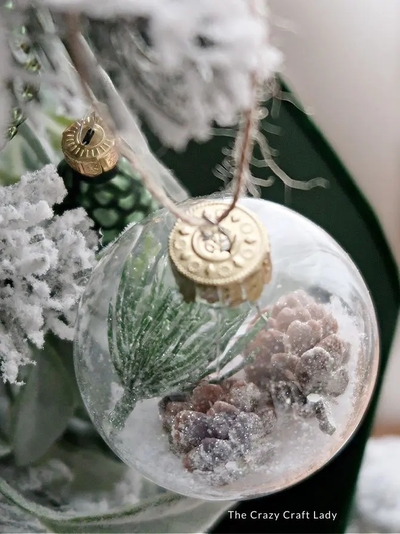
3. Make a Photo Ornament (Clear Glass):
Roll a printed photo into a tube and insert it into a clear glass or plastic bauble. Fill the remaining space with fake snow, glitter, or ribbon.
4. Cookie Cutter Ornaments:
Instead of dough, use your favorite cookie cutter as a frame. Fill the center with melted plastic beads (for a “stained glass” look) or stretch fabric across the opening.
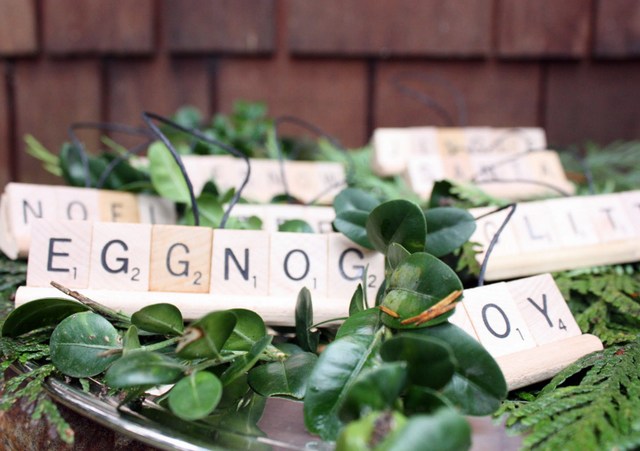
5. Scrabble Ornament:
Glue Scrabble tiles onto a painted craft stick or small wooden block to spell festive words like “JOY,” “NOEL,” or family names.
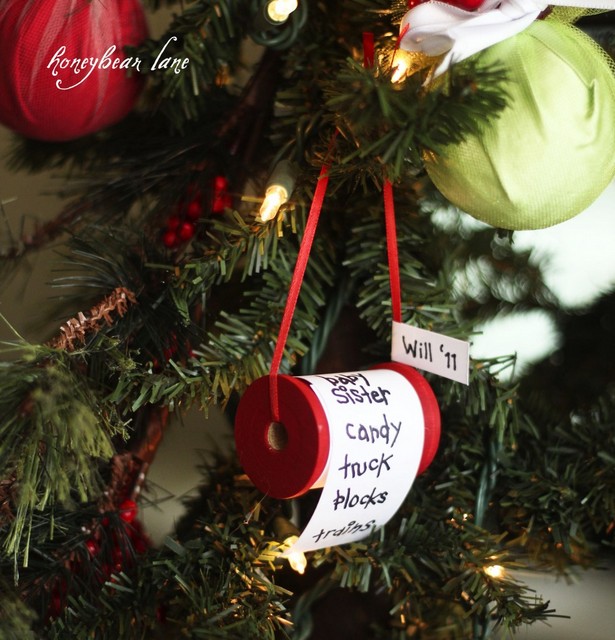
6. Santa’s List Ornament:
Roll up a piece of aged-looking paper (like a burnt edge) with a simple ‘nice list’ or a child’s Christmas wishes. Tie with a ribbon and hang on a wooden spool.
7. Mini Snow Globe Ornament:
Glue tiny figurines (like a snowman, reindeer, or mini bottle brush tree) onto the inside of a clear plastic bauble and fill with glitter and water (or leave dry for an easier version).
Related: DIY Snow Globes – 12 Best Things to Use as Water Globe
Rustic and Nature-Inspired Designs
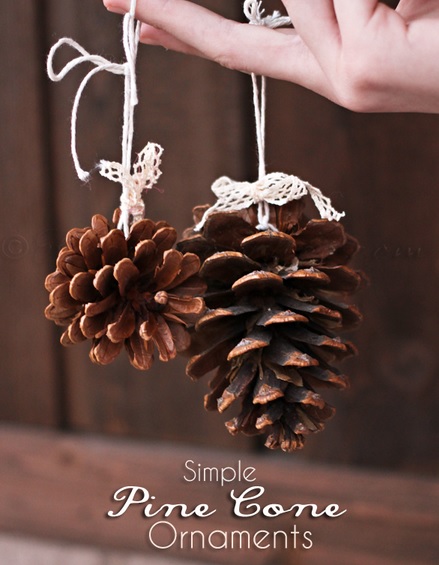
8. Pinecone Ornament:
Simply tie a loop of twine to a natural pinecone. For extra elegance, lightly tip the edges with metallic gold paint or white “snow” paint.
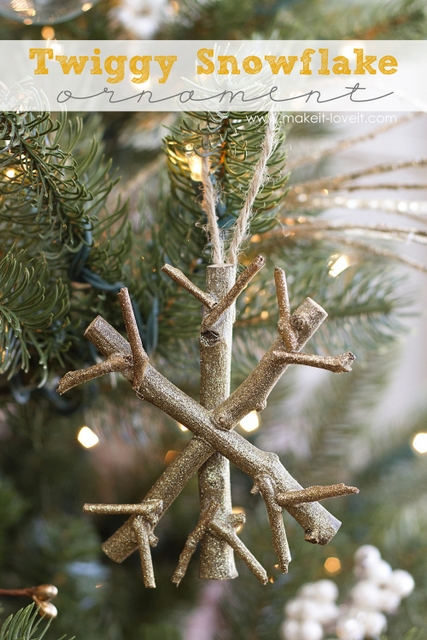
9. Twig Snowflake:
Gather thin twigs, cut them to size, and hot glue them together in a six-pointed snowflake pattern. Paint them white or leave them natural. This can also be made using cinnamon sticks.
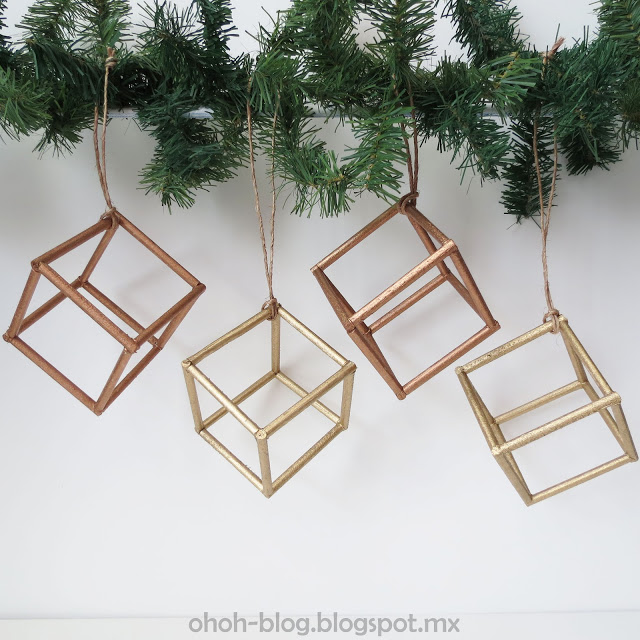
10. Geometric Faux Metal Ornaments:
Use wooden dowels to make geometric shapes and spray paint with metallic paint.
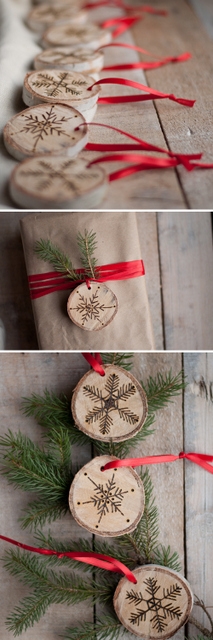
11. Etched Birch Wood Slice:
Purchase small birch wood slices (often pre-drilled). Use wood-burning tools to etch a design, or simply stamp or paint on a message like “JOY” or the year. These can also be faux etched with sharpie.
Related: 150 Wood Burning Ideas – Objects and Designs
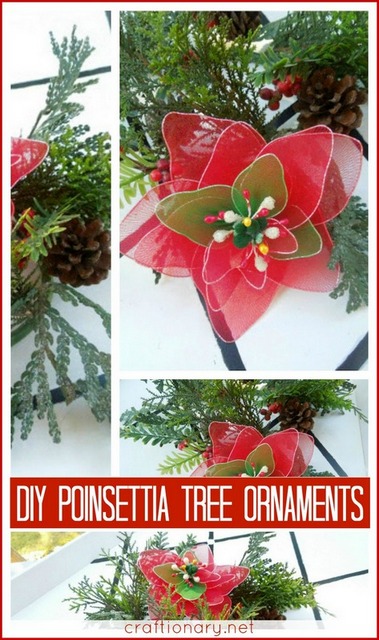
12. Poinsettia Ornament:
Use felt or layered cardstock to cut out the classic poinsettia petal shapes. Stack and glue them, adding a button or small pom-pom to the center.
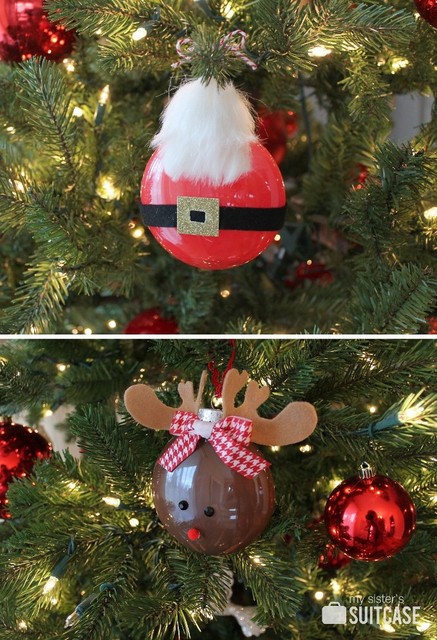
13. Painted Rudolph Reindeer:
Paint a plain wooden or ceramic disc brown, add googly eyes, felt antlers, and a bright red nose for a simple painted Rudolph reindeer. Alternatively, paint a clear glass ornament from inside.
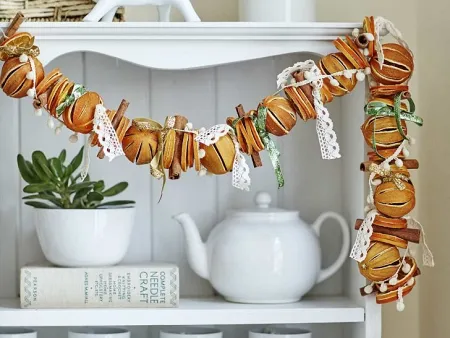
14. Dried Orange Slices:
Thinly slice oranges and bake them at a low temperature until dried. They make fragrant, beautiful, natural ornaments.
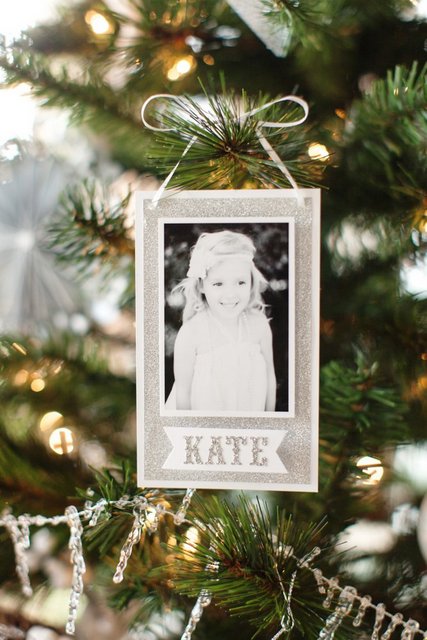
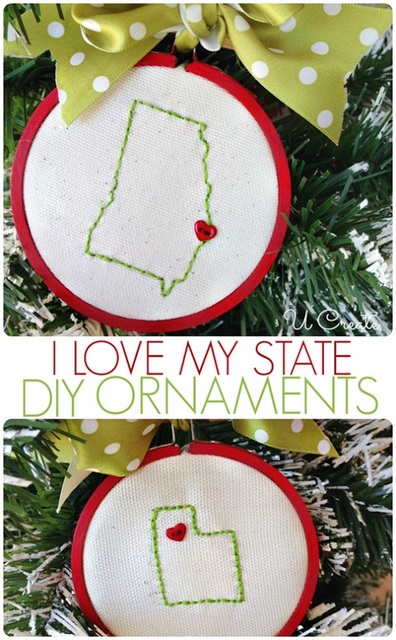
15. Keepsake Framed Ornaments:
Cute embroidery hoop state art ornaments created with stem stitch on canvas.
Related: 40 Meaningful Memory Keepsake Ideas to Treasure Life
Glitter and Shine Ornaments
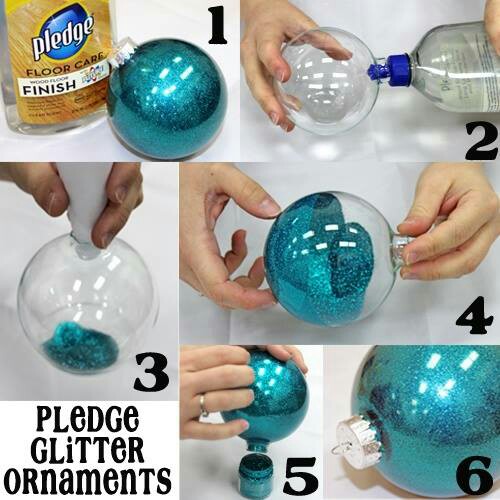
16. Glitter Ornament (Inside):
Pour a clear glue (like Mod Podge) inside a clear glass bauble, swirl to coat, pour out the excess, and then pour in fine glitter. Swirl again until coated. Alternatively, you can use pledge or clear nail polish.
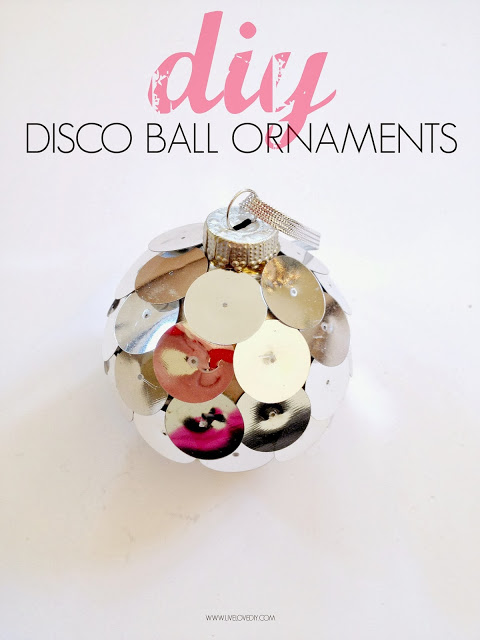
17. Disco Ball Ornament:
Cover a small foam or plastic ball with tiny square mirrors, sequins, or shiny silver paper cutouts to create a stunning miniature disco ball effect.
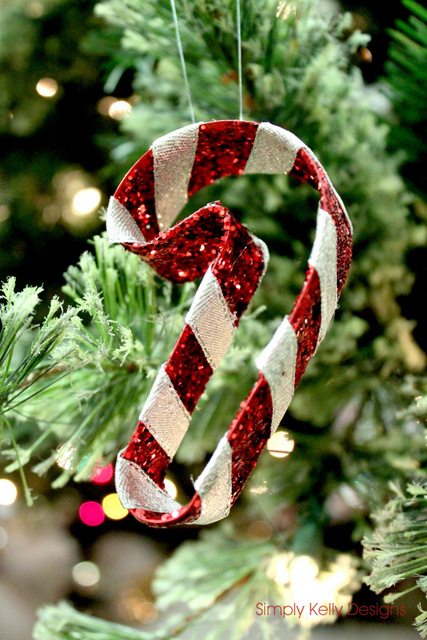
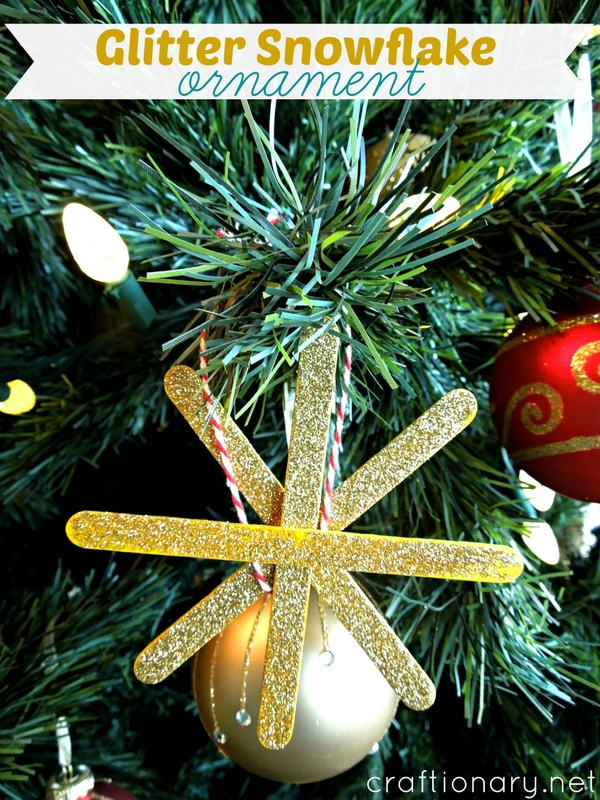
18. Glitter Snowflake:
Apply glue to a flat foam or popsicle stick snowflake shape and heavily coat it with fine white or silver glitter.
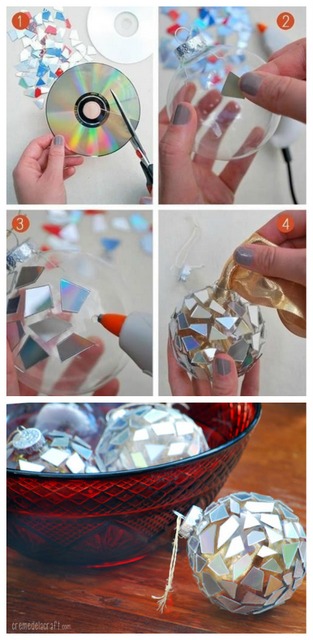
19. Recycled CD Mosaic:
Cut up an old recycled CD into small, irregular mosaic pieces. Glue the iridescent pieces onto a plain bauble for an incredibly sparkly, modern look.
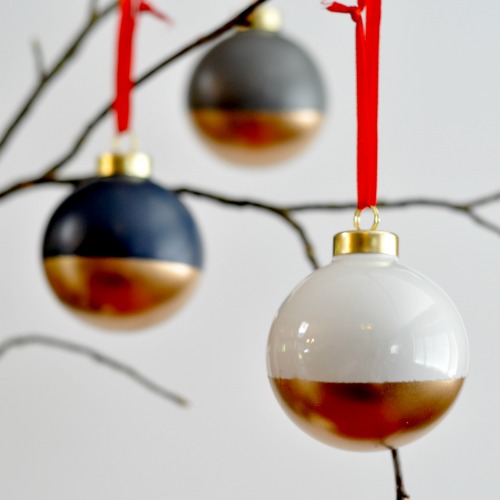
20. Gold Dipped Ornament:
Dip the bottom half of a plain white or neutral bauble into metallic gold paint or use gold leaf for an elegant, gold dipped finish.
Paper and Cardboard Crafts
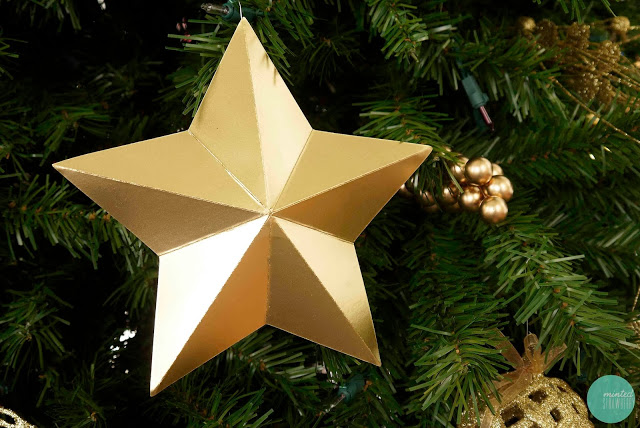
21. Cardboard Gold Star:
Cut a simple five-pointed cardboard star shape. Spray paint it with metallic gold paint or wrap it in gold foil/glitter cardstock.
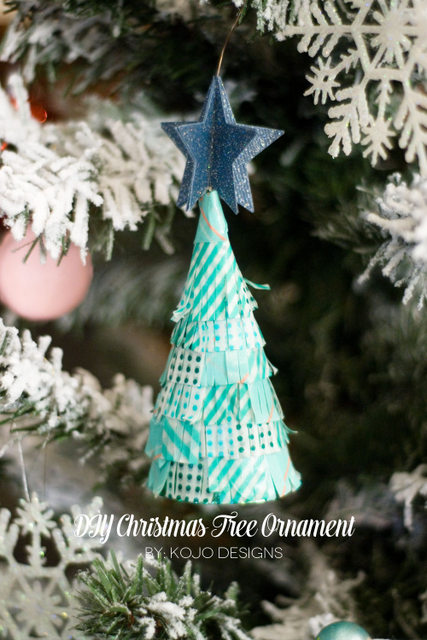
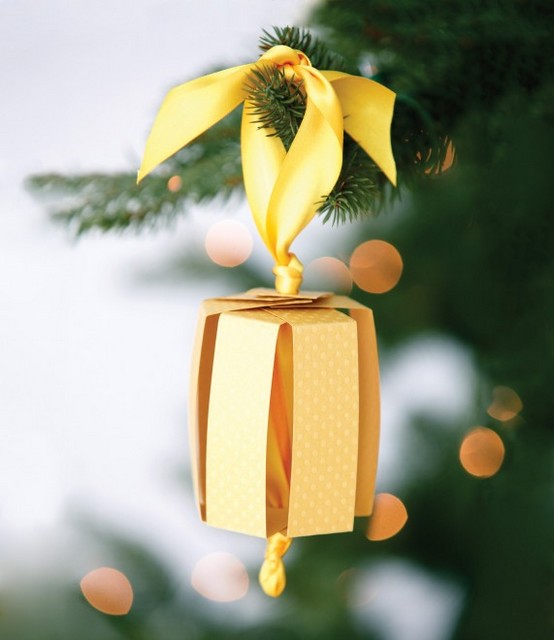
22. Paper Tree (3D):
Cut multiple identical tree shapes from patterned cardstock. Fold them down the middle and glue the halves together to create a 3D standing or hanging paper tree. Alternatively decorate a paper cones with washi tape.
23. Paper Circle Garland/Ornament:
Cut out various sizes of patterned paper, old book pages, or old map circles. Fold and glue them together to form a spherical paper ball or star-like ornament.

24. Vintage Christmas Fold:
Use old sheet music or vintage Christmas print paper to fold into intricate 3D stars or folded medallion shapes.
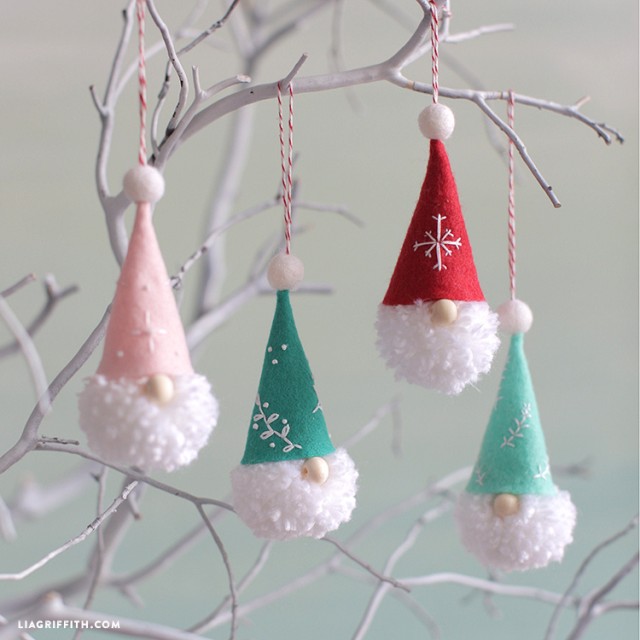
25. Paper Cone Gnomes:
Roll patterned paper into a cone shape, adding a small wooden bead for a nose and a strip of faux fur for a beard to create a cute gnome.
Related: 30 Cute DIY gnomes home decor projects for good luck
Fabric, Yarn and Mixed Media
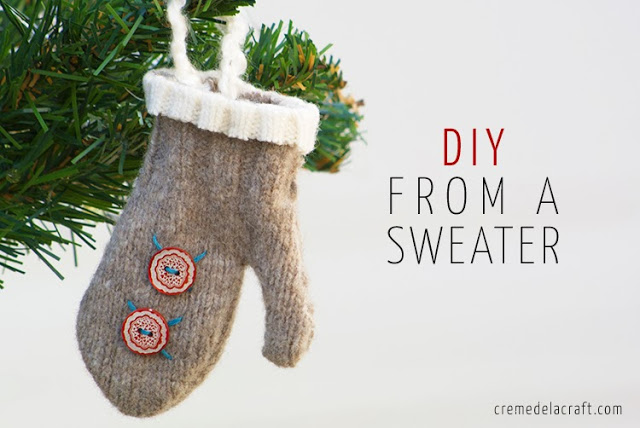
26. Mitten Ornament (Felt):
Cut out two identical mitten shapes from felt or old sweater. Stitch them together and lightly stuff them with poly-fil for a cozy look. Add a tiny button for detail.
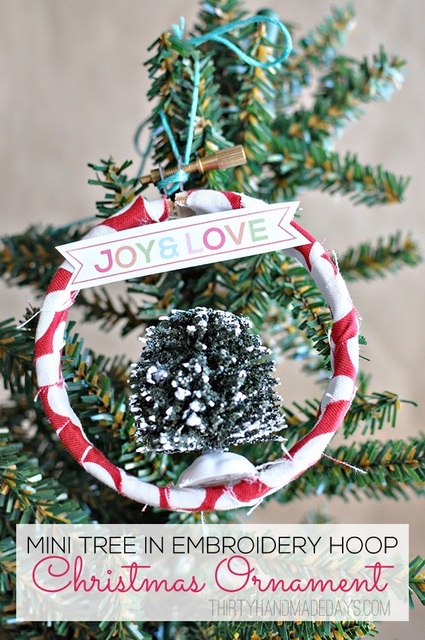
27. Hoop Ornament (Embroidery):
Use a tiny embroidery hoop to frame a piece of festive fabric, cross-stitch, or a simple holiday silhouette cut from felt to make a winter wreath.
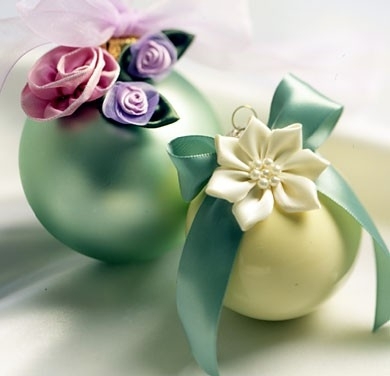
28. Ribbon Flower:
Form small loops and bows with festive ribbon to create a textural flower or wreath shape, gluing them onto a small cardstock base.
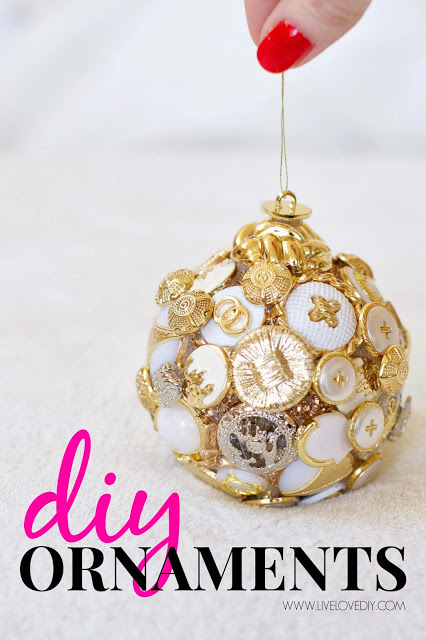
29. Button Ornament:
Glue various sizes of festive button or vintage embellishemnts onto a cardboard or foam base shaped like a tree or star or clear ornament.
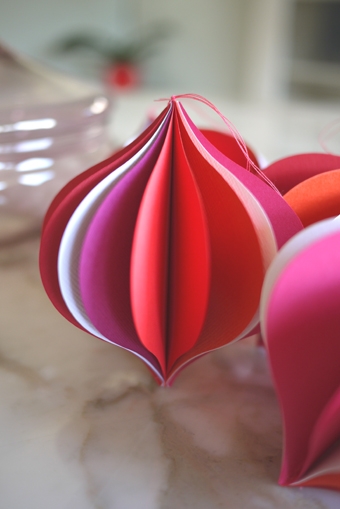
30. Felt Paper (Layered):
Cut small shapes from layered felt paper and stitch or glue them together (e.g., a layered felt star or stocking). Find a circle template and cutout circles. Now fold in halves and glue together. Keep going to create a fan.
Origami paper ornaments
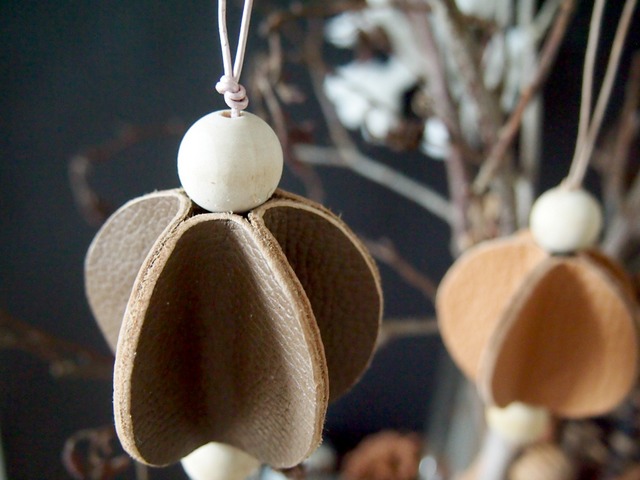
Origami leather ornaments
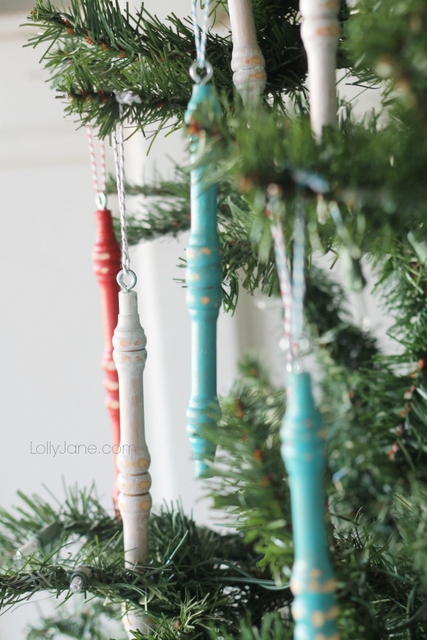
31. Spindle Ornament (Repurposed):
Paint a small, wooden furniture spindle or bobbin in festive colors and add a ribbon for hanging.
Modern and Unique Designs
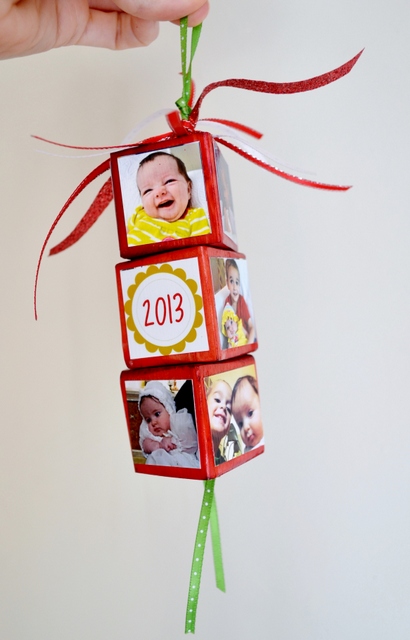
32. Modern Cube Ornament:
Cut small wooden or foam blocks and paint them in a modern geometric pattern or solid color (like matte black or deep teal). Paper folding technique like origami can make wonderful designs and patterns.
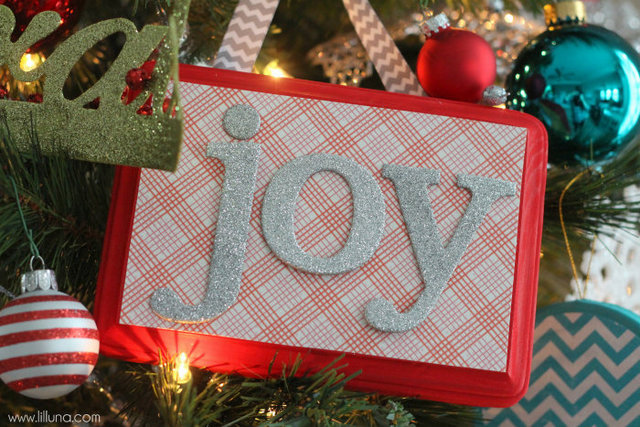
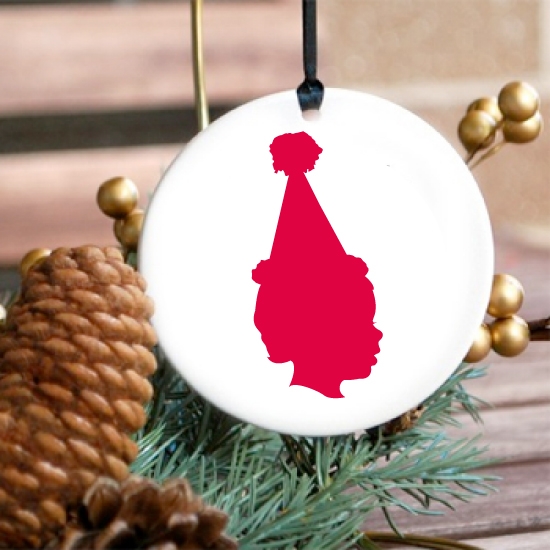
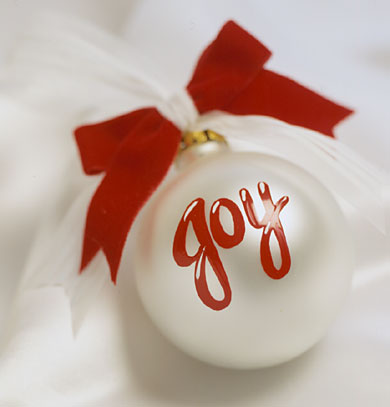
33. Painted Joy/Silhouette:
Paint a simple, one-color silhouette (e.g., a deer or a vintage car) onto a round white ornament, or simply hand-letter a word like “JOY” in a modern script using photo cutouts and clay discs as base.
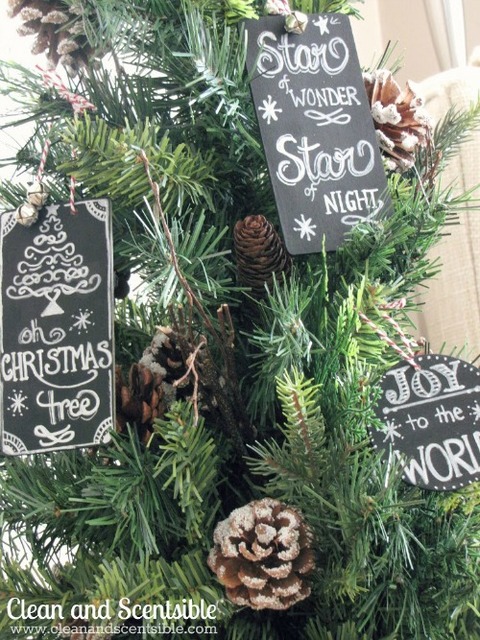
34. Chalkboard Ornament:
Paint a wooden tag or disc with chalkboard paint. Once dry, use a chalk pen to write a seasonal message or name.
35. Sprinkle Ornament:
Coat the inside of a clear glass bauble with clear varnish or glue, then pour in colorful Christmas sprinkles (make sure they are not edible and are fully sealed!).

36. Melted Crayon Ornament:
Remove the wrapper from small pieces of melted crayon and place them inside a clear glass bauble. Use a hairdryer to melt the crayons and swirl the colors inside the ornament.
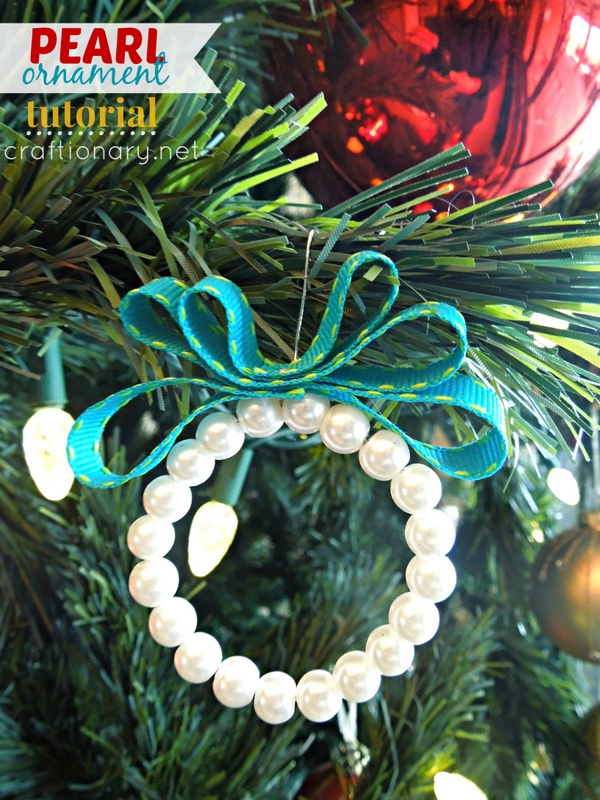
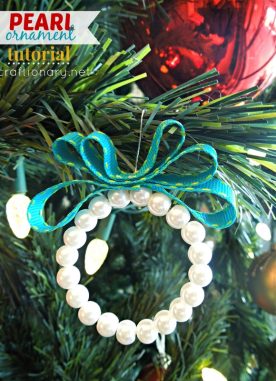
37. Pearl Ornament:
Glue small faux pearl beads onto a foam ball or plain bauble to give it an elegant, textured, pearl covered look.
FAQs: DIY Christmas Ornament
To ensure a smooth crafting experience, here are the most common questions people ask about making homemade Christmas ornaments.
1. What is the easiest homemade Christmas ornament to make?
The easiest ornaments are usually the Glitter Ornament (Inside) (using clear glue and a plastic bauble) or the Pinecone Ornament (just add a ribbon loop). For kids, Salt Dough is the simplest base material, as it’s just like playing with playdough.
2. How do you make salt dough ornaments that last?
The key is proper baking and sealing.
- Baking: Bake at a very low temperature (around 250°F / 120°C) for a long time (2-4 hours) until fully hard and dry. The dough should be about 1/4 inch thick.
- Sealing: Once cooled, paint them (if desired), and then apply 2-3 coats of a durable sealant like polyurethane, acrylic spray sealant, or Mod Podge to protect them from humidity and moisture.
3. What is the best glue for DIY ornaments?
- Hot Glue: Best for immediate, strong bonds on items like ribbon, pinecones, twigs, buttons, and securing a hanger.
- Mod Podge: Excellent for decoupage projects like the Photo Ornament and for sealing painted or glittered surfaces.
- E6000 or Super Glue: Used for permanent, high-strength bonds on materials like recycled CD mosaic pieces, pearls, or attaching a loop to glass.
Related: Best Sealer: How to Waterproof Acrylic Paint on Rocks, Wood, Glass Crafts
4. How do you seal glitter onto your ornaments so it doesn’t shed?
After applying the glitter, let it dry completely. Then, use a clear spray sealant (a few thin coats work better than one thick coat) or brush on a clear-drying adhesive like Mod Podge over the top. This creates a hard, clear shell that locks the glitter in place.
5. How can you personalize an ornament?
Personalization is what makes a DIY ornament special! You can personalize them by:
- Adding a Mod Podge Photo or a printout of your child’s artwork.
- Stamping a name or date onto Salt Dough or Birch Wood Slice ornaments.
- Using a paint pen to hand-letter a name, date, or message on a plain bauble (like the Painted Joy idea).
- Creating a State Art ornament by painting or stamping your home state’s silhouette.


Cute and creative ornaments! Thanks much for the feature! XO
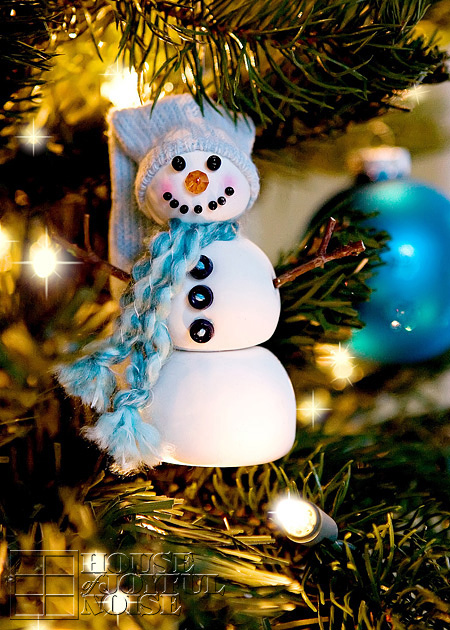
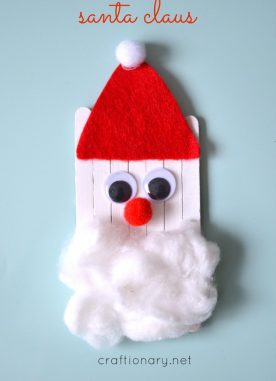
THANKS for featuring my snowman ornament! I had so much fun making it.
You really round up a whole LOT of wonderful ornaments here! I’ve enjoyed checking them out.
Merry Christmas! (…almost. 🙂 )
~ Laura
Can you please tell me how to cut the CDs? I used scissors but it cracks and ruins the pieces…
It looks easy in the photo!
You can follow the link below the CD ornament, there is a video to demonstrate how to cut CDs with scissors! Hope that helps.
Thank you so much for sharing those wonderful ideas. I’m a french teacher in a nursery school and my pupils are 5 years old. I would like to make “ornament from felt paper” (red, pink and white). Could you send me the pattern please.
Thank you 🙂
Géraldine
Hi, since the original source is no longer available you can find source for circle template, print, fold in halves and glue as you go to make these ornaments. I have found a template and emailed it to you! I hope that helps!