This post may contain affiliate links. Please see our full Disclosure Policy for details.
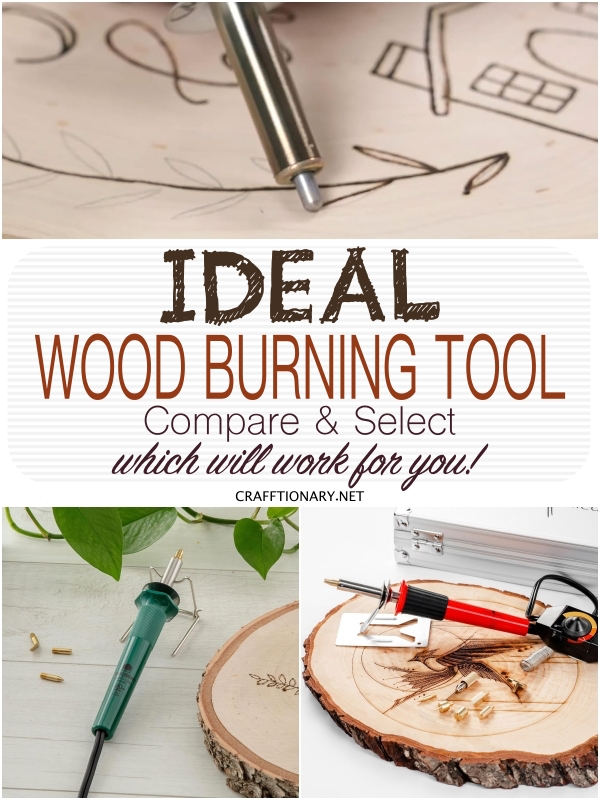
Pyrography is a unique and modern artwork that helps create creative and eye-catching designs on wood, leather, and other materials using heated objects such as pyrography pens and burners. We asked a skilled wood burning artist for tips to choose the ideal wood burning tool. Wood burning artwork refines with practice, therefore, choose a tool that falls in your comfort level.
Choosing YOUR ideal wood burning tool depends on a number of factors like the price point, your patience level, and probably you might not be aware of the options you might have! Therefore, we will guide you through the variety of options, and answer your questions, to help you choose your ideal tool for burning wood.
The precision and accuracy of this artwork depend on numerous factors, including the selection of an ideal wood-burning tool and practice. Here you will find the top five wood burning pens and wood burning kits to compare and make a selection for yourself. You will also find a guide, care and maintenance tips, and other material information later in the article.
You will also like: Wood burning ideas and projects
Types of wood burning tools:
Solid point burner:
Pyrography pens shaped as soldering irons are known as solid point burners. They are easy to store and carry around but their handle is thick.
These wood-burning tools are the cheaper; however, they take a lot of time to heat up, and cool down, and are a little difficult for beginners. Yet, the finest pyrography artists create remarkable art using these pens.
Wire-nib burners:
Compared to solid-point burners, wire-nib pyrography tools are faster, easier, and more convenient to use and are ideal for outlining, shading, and detailing the design.
They have a thinner pen-like handle and offer more control on heat and nib/point options.
These pyrography tools are pricey; however, they offer the best ROI by saving time, providing accuracy, and providing better results for all.
Wood Burning Tool
Select an ideal wood burning tool:
A person cannot excel in wood burning artwork without the right equipment. Here is a list of recommendations and specific features that will help you purchase your ideal wood burning tool quickly.
Related: How To Add Color To Wood Burning Projects?
Wood burning pens with FIXED tips:
1. Trade Mint wood burning pen:
A versatile and ergonomic wood burning and pyrography tool with a durable tip to complete your wood burning tool kit. This ideal wood burning tool is suitable for both beginners and professionals offering high precision and control of their wood burning projects.
2. Wire-nib type replacement wood scorching pen:
Complete your wood burning station by adding a Wire nib type wood scorching pyrography pen with GX16 aviation sockets.
Wood burning pens with REPLACEABLE tips:
1. Walnut Hollow Wood Burning Pen:
This ballpoint style pen is a popular choice and an ideal companion for beginners with complete instructions for operation. This tool has an ON/OFF switch. The pen also has a tool stand to protect your working space from heat.
Temperature Range: Upto 950°C
Voltage: 25 watts
Material: Plastic and metal
4 assorted wood carving tips: Cone Point, Shading Point, Universal Point, and Flow Point
Price: $13.67
2. Walnut Hollow Versa Tool:
This popular basic pack Walnut Hollow wood burning tool comes with variable temperature control and 11 points including shading point for creating masterpieces. This novel tool comes with a storage case, a stand and complete instructions to work effectively. The easy-grip pen takes 4-5 minutes to heat-up and must be stored after removing points after use.
Temperature Range: Upto 510°C
Voltage: 25 watts
Material: Plastic
11 assorted wood carving tips: Cone Point, Shading Point, Universal Point, Mini Universal Point, Tapered Point, Calligraphy Point, Hot Knife Point, Soldering Point, Stamping Point, Flow Point, and Mini Flow Point
Price: $24.99
3. AOUTK Wood burning pen:
AOUTK’s professional wood burning pen is a cost-effective DIY engraving and wood burning tool with 8 assorted wood carving tips, 2 hot blades, a user manual, a holder, and a storage unit.
Heat sink provides excellent heat dissipation which lowers the temperature and increases work efficiency. The tool can be heated within 90 seconds and offers a non-slip, convenient design that is easy to handle at different angles without hassle.
Temperature Range: Upto 950°C
Voltage: 30 watts
Material: Rubber
8 assorted wood carving tips: Soldering Point, Stamping Point, Flow Point, Mini Flow Point, Cone Point, Shading Point, Universal Point, and Mini Universal Point
Price: $14.99
4. FOXGOR Wood burning pen:
Looking for a wireless wood burning tool? FOXGOR’s professional wood burning, engraving, and embossing pen offers corded electric and portable wireless options. It comes with 9 assorted wood carving tips, 10 carbon papers, a hot chuck, a soldering holder, a cleaning sponge, a tip storage box, and a user manual. It has an LED digital display with an inner-heated ceramic core that allows quick heating; hence, it is an efficient pyrography solution for everyone.
Temperature Range: Upto 500°C in 15 seconds
Voltage: 100 watts
Handle: Plastic
9 assorted wood carving tips: Soldering Point, Stamping Point, Flow Point, Mini Flow Point, Cone Point, Shading Point, Universal Point, Mini Universal Point, and Tapered Point
Price: $25.99
5. Artskills Wood Burning Pen:
Elevate your wood burning skills by choosing an Artskills wood burning tool that helps create a variety of strokes with 14 interchangeable tips. The wood burning tool also includes 2 hot knife tips for burning, cutting and carving design, ensuring precision and accuracy.
Temperature Range: N/A
Voltage: N/A
Handle: Metal
14 interchangeable wood burner pen tips: Curved tips, Standard tips, Soldering Point, Stamping Point, Flow Point, Mini Flow Point, Cone Point, Shading Point, Universal Point, Mini Universal Point, Tapered Point, Stippling tips, and Hatching tips
Price: $15.99
Ideal wood burning pen:
While selecting an ideal wood burning tool is a tough choice due to the wide range of features, qualities, and personal preferences, FOXGOR’s professional wood burning pen is perfect. This tool comes with an adjustable switch, an LED display, a wide range of tips, and using, cleaning and storage solutions all in one pack.
Most importantly, this device can be used as a wireless soldering tool that makes it practical, efficient, and easy to handle. Also this tool heats up fast, saving time and energy for its users and can be used for mini house repairs as well.
Wood burning KITS:
1. WEP Woodburning Kit:
If you are looking for an all-in-one wood burning tool kit with a compact design and LED display, then this wood burning kit is the right choice for you. This wood burning station is a remarkable choice for both beginners and professionals.
The most prodigious aspect of this wood burning tool kit is the ability to turn ON the wood burning pens or wire nibs simultaneously.
Temperature Range: adjustable from 200°C – 750°C
The temperature of the pyrography pens can be adjusted between 200°C ~ and 480°C, whereas the temperature of the wire nibs can be maintained between 250~750°C via an analogue dial.
Voltage: 110 volts/ 48 watts
Features: 2 detachable soft-grip pyrography pens (solid-point and wire-nib type pens), 23 wire-nib tips, 51 solid-point tips, 6 wood pieces, integrated holder, tip storage, 2 tip sleeves, pliers and screwdriver.
Price: $119.99
2. YIHUA 939-VI Dual Wood Burning Pen:
This innovative kit comes with 23 wire nibs of different sizes and shapes to help in creating fantastic engraving, stippling and shading effects on a number of selected surfaces. The compact design of this tool kit makes it ideal for storage in a small space and takes less space on the desk.
It offers dual-pen pyrography station meaning it holds two pens on a single station unlike conventional stations that are larger.
Temperature Range: adjustable dial for 250°C – 750°C
Voltage: 110 – 127 volts
Features: 2 Wood Burning Pens, 23 Wire Nib Pyrography Tips, 6 Wood Pieces, tweezers, 6 Pyrography Stencils, Screwdriver
Price: $47.99
3. ACRSIKR Wood Burning Kit:
If you are looking for a lightweight, beginner-friendly ergonomic wood burning pen at a low price, then this wood burning kit is the right choice.
Temperature Range: Upto 450°C
Voltage: 110 volts
Features: Pyrography Wood burning Pen, 20 Wood Burning Tips, 10 Solder Tips, Hot Knife, Wood Burning Pen Holder, 12 Stencils (numbers, letters and basic symbols set)
Price: $20.99
4. Firelood Wood Burning Kit:
Firelood’s professional woodburning tool kit is an optimum machine that can reach high temperature in 5-10 seconds and create different shades at different temperature settings. The material of the woodburning tool is insulated and covered with silicone, making it easy to work with at high temperatures.
Temperature Range: Upto 700°C
Voltage: 110 volts
Features: Wood burning Machine, Two pyrography pens, 23 pen tips, one-pen shelf, one screwdriver, one sponge, small wooden board, engraving pens, user manual, and various wood burning tips.
Price: $35.99
5. Scissor-Tailed Wood Burning Kit:
Scissor-Tailed has crafted a 42 pieces beginner-friendly wood burning kit ideal for people looking for a new hobby. The premium wood burning tool offers excellent heat retention and adjustable heat settings.
This UL certified kit is organized in a high quality aluminum box with extra long cord.
Temperature Range: 200°C – 450°C
Voltage: 30 watts
Features: Wood burning pen, complete guide book, safety stand, 36 tips for drawing and stamping, soldering and knife tip, metallic stencils, and a plier in an aluminum box
Price: $51.99
Ideal wood burning kit:
Firelood’s Wood burning kit is the most suitable option for beginners based on the features, diversity, and cost-effectiveness. The kit has an integrated thermometer, fast heating system, various tips and stencils to help one master wood burning easily. The size of the tips, ability to work effectively at both high and low temperatures, and firm easy grip make it an optimum choice to be considered as your first wood burning kit.
Replaceable tip vs Fixed tip wood burning tool:
Selecting a replaceable tip vs a fixed-tip tool for burning wood is a matter of choice.
A fixed tool for wood burning offers more stability, is easy on the hands, and doesn’t heat up at connection points. However, the downside of fixed-tip wood burning pens is that they require large storage space and are costly.
Replaceable tip wood burning pens, on the other hand, are cheaper and easy to store in compact storage spaces. Yet, the biggest downside of these wood burning tools is that they heat up at their junction points near the fingertips, which may cause pain to the users. In addition, the screws may lose up at the junction points while heating with time.
Once you practice, you’ll develop your own set of preferences and tricks to deal with these problems.
Material required for wood burning:
The primary requirement for wood burning is a good quality wood burning tool. Apart from it, a person requires other tools and equipment to prepare the surface for pyrography. The list of all essential items is given as follows:
- Carbon paper to transfer a pattern or design on the wood.
- Sandpaper for preparing wood for a project
- Tape to keep the selected design affixed.
- A wet paper towel for cleaning the tip from the residues.
- Stencils, design, or artwork for wood burning.
- Tools for cleaning, tips, nibs, and points of the wood burning tool.
- Square unfinished wooden cutouts for practice.
- Natural wood slices for ornaments and gifts.
- Protective gear to protect oneself from micro-particles and fumes arising from wood burning.
- Burning gel to prepare the surface
- Varnish to seal and protect the finished project
Beginner’s guide to start a wood burning project:
It’s okay to be anxious or nervous while selecting your first wood burning project; however, keeping a clear working plan and a checklist will help you master this art quickly. Here are a few simple tips and tricks to facilitate your first wood burning project.
Learn from the basics – from theory to practice:
It is always a good idea to learn a new skill or artwork by reading books and practice to learn the skill. For this purpose, purchase the handbook on Pyrography Basics: Techniques and Exercises for Beginners, which provides patterns and instructions for wood burning skill development. This book exclusively includes expert advice by Lora Irish on Texture and Layering to master the ark of creating artistic tonal values.
Another significant resource for learning pyrography is the book titled Pyrography Workbook, written by Sue Walters. It is a step-by-step guide for beginners, intermediate, and advanced wood turners with original patterns.
In addition, enrolling in an online wood burning program is an excellent way of mastering this art in no time. If none of these fascinate you, you can always look for free tutorials on YouTube or udemy.
Test your tool before working:
Once you learn the basic principles of operations, familiarize yourself with your selected tool. This part is tricky as one requires a steady hand and a lot of patience while working with the chosen tool for the first time.
The easiest way to test a wood burning tool is to preheat it for five minutes and test it on square wooden blanks by drawing any pattern or design by changing tips. This will also provide you with a reference blank where you can label each tested tip.
Prepare a wooden surface:
The selection of the surface is as important as the selection of the wood burning tool due to its material nature. If you are a beginner, select a soft wooden surface as it will burn at lower temperatures. In contrast, hardwood requires an excellent-quality pen that can work efficiently at high temperatures.
Sanding and keeping the direction of the pattern (either horizontal or vertical) in alignment are also crucial steps before starting your selected design. One can use wood burning gel for better results.
Affix and trace your design:
Tape carbon paper and trace your selected design on the wooden surface before you start burning outlines using your tool. It’s okay if your mistakes are visible at first. Trust the process and keep on experimenting till you get the desired results.
Related: How To Add Color To Wood Burning Projects?
Basic wood burning project steps:
Mastering your wood burning tool is the first step in creating a stunning project. Apply adequate pressure to the pliers to secure the tips of the pen. Turn on and preheat the wood burning tool before commencing a project.
Practice different types of strokes and pressure to create depth in your artwork. For instance, press and hold your wood burning pen down for dramatic large dots, however, gently use fine tips to make small dots and patterns. Use light back-and-forth strokes gearing from side to side for shading.
Start your project by following the outline drawn earlier on the wood. Once completed, wipe off the residue or dust particles with a cloth and apply wood oil to protect your artwork. Place your artwork in a dry, cool place away from direct sunlight to avoid damage.
Alternatives to wood burning device?
If you are unsure about making your first wood burning tool purchase, or want to test your interest in wood art first, or just want to craft a fun ornament without a long-term commitment, then you can still practice this artwork using a scorching marker.
Use basic science principles by using a scorching marker for wood burning without a wood burning tool. Create your selected pattern or design on the wooden surface using a scorching marker and use an open-torch flame for ignition. This will create a burned impression on the wood, deep enough to be permanent but shallow enough to remove mistakes easily using sanding paper.
Care and Maintenance of wood burning gear:
Wood burning tools are sophisticated and delicate, requiring continuous maintenance and cleaning to keep them efficient and long-lasting. Here are five important things that should be kept in mind for their care and safety:
Follow the instructions carefully: Wood Burning is a difficult artwork that requires substantial focus and guidance. Follow your tool’s instructions and user manual for specific care and maintenance of your wood burning tool.
Regular cleaning of tips: Keeping the tip clean during and after use is vital to avoid carbon residue build-up. Keep a paper towel in hand while working to transfer heat in the gadget consistently. Once completed, clean the tip with sandpaper and store it separately from the pen.
Temperature control: Keep the temperature under control while working. Avoid overheating and use lower temperatures to create multiple shades in the design.
Storage: Allow the gadget to cool down after unplugging for storage and tips changing. It is advisable to store tips separately in a protective container or case to avoid damage to the tips. Store the wood burning tool in a cool and dry place away from dampness and moisture.
Handle with care: Avoid excessive bending and twisting of the cords to avoid internal damage. Handle the tool with care and always unplug the tool after use to avoid accidents.
NOTE: Wood Burning is a fun activity; however, it requires great care due to using electricity and heated tools. Due to its sensitive nature, this activity must be practiced in a controlled environment with diligence. Children under 14 must be extra careful and practice under adult supervision.
You will also like:
50 Creative Driftwood art and decor ideas
60 Wood Craft Ideas for home decor and gifts
DIY wooden log and slice home decor ideas
Written by: Nageen Sohail