This post may contain affiliate links. Please see our full Disclosure Policy for details.
Air-dry clay has become a leading material for clay art due to its malleable properties. Whether you’re looking for creative ways to spend quality time with loved ones, craft miniature items for children, or work on a special project, clay art offers a therapeutic way to unwind and bring your imagination to life.
This comprehensive guide to air-dry clay is designed for beginners, offering all the information you need to achieve great results. Get inspired to create functional and decorative clay projects with these ideas and techniques.
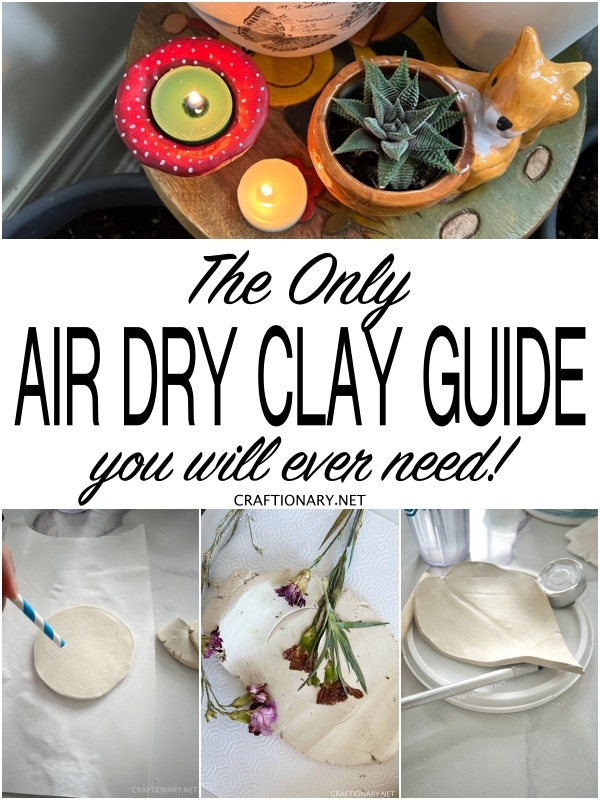
Air Dry Clay Guide
What is Air Dry Clay?
Air-dry clay is a modeling material that hardens when exposed to air, eliminating the need for baking in an oven or kiln. It is lightweight, durable, and beginner-friendly, making it an excellent choice for crafting and sculpting projects.
Typically, air-dry clay takes 24–72 hours to dry, but it’s less water-resistant than other clays, requiring a sealant or glaze for durability. Learn more about how long does it take air dry clay to dry?
What are the Types of Air Dry Clay
Air-dry clay comes in various types, each suited to specific crafting needs. Popular brands like DAS, Creative Paperclay, Crayola, and Sculpey offer great options, but here are the key categories:
Natural Air Dry Clay
Paper Air Dry Clay
- Contains a mix of paper fibers.
- Lightweight and soft texture like Creative Paperclay.
Resin Air Dry Clay
- It resembles polymer clay and contains synthetic materials.
- Elastic and pliable like sculpey and Daiso Soft Clay.
- However, it is not durable.
Foam Air Dry Clay
- Made from ultra-light polymer materials.
- It very soft and spongy like Magic clay and Calpalmy foam clay.
- However, it is not durable.
Cellulose Clay
- Made from cellulose and binders.
- It is soft and sticky like Artista soft clay.
- Ideal for making mask, wall art, and intricate crafts.
- However, it dries quickly.
Starch Air Dry Clay
- Homemade, eco-friendly clay made with cornstarch.
- It is not durable and water-resistant.
- Find three recipes below.
Epoxy Air Dry Clay
- Made from a mix of resin and hardener that air dries rock-hard.
- It is firm but moldable like Apoxie Sculpt.
- It is ideal for making jewelry, repairs, and high-detail sculptures.
- It is expensive and requires mixing.
Other types
- Include colored, specialty, and glow in the dark air-dry clay.
Which Air Dry Clay is Ideal for Beginners?
Selecting the right type of air-dry clay depends on the type of project:
1. Crayola air-dry clay offers ease of use and versatility. It is ideal for simple projects, school crafts, and beginners exploring clay modeling.
2. Jovi air-hardening clay is non-stick and lightweight. It is ideal for making jewelry, craft projects and small figurines.
3. Das air-dry modeling clay provides a smooth texture, is easy to shape, and dries with less cracks. Use it for sculptures, decorative items, or intricate design works.
4. Amaco marblex self-hardening clay is a great option for projects that look like pottery. It is similar to traditional clay with a bit denser properties. Ideal for large sculptures or pottery projects.
5. Finally polymer-based Magic Clay is very soft but not durable. Ideal for making small items, school crafts, charms, and miniatures. You can substitute it for Calpalmy foam clay.
How to Make Air-Dry Clay at Home?
There are three popular recipes to making air dry clay at home:
1. Make a Salt Dough
Mix 3/4 cup of water, 3/4 cup of salt, and 2 cups of flour.
2. Craft Clay
Heat 1 + 1/4 cups of water, 1 cup of cornstarch, and 2 cups of baking soda on a low flame until dough consistency is achieved.
3. Glue Clay
Add 1/2 cup cornstarch, 4 oz of school glue, 2 tbsp of vegetable oil, and 1 tbsp of lemon. Microwave it for 30 mins and mix together.
Advantages of Homemade Clay:
• Budget-friendly and uses common household ingredients.
• Fun for kids and Eco-conscious projects.
Disadvantages of Homemade Clay:
- Less durable and prone to cracking.
- Time-consuming, and the finished projects might be inconsistent, affecting the quality of projects.
- It has limited shelf-life and must be used quickly before turning into a solid waste mass.
How to Use Air Dry Clay?
Given air dry clay’s simple nature it has easy instructions to get started. However, it is important to keep it soft and pliable for longevity and excellent results.
Soften air-dry clay:
Start using the clay after wetting your hands and mist it if it’s hard. This step will help you have a smooth texture and reduce cracks on the surface. One can also keep a spray bottle to mist the clay gently or can apply hand lotion, skin oil, or petroleum for lubrication before usage.
Use a non-stick surface:
The porosity and texture of the surface you are working on can complicate air-dry clay handling, leading to stickiness. Therefore, use a non-stick work surface such as marble cutting board or glass cutting board, wax paper or parchment paper, and a non-stick silicone mat for hassle-free work.
Use a rolling pin:
The most common mistake beginners make is starting their work directly with the air-dry clay. It is important to obtain a smooth, flat, and even surface for flawless end results without uneven thickness and lumps. One can use any marble, ceramic, wooden, or plastic rolling pin to apply gentle pressure. In addition, textured rolling pins can also elevate the look and feel of the final results.
Fix imperfections:
Smooth cracks with water or slip. Slip is a clay paste made by mixing clay with water to form a smooth paste to apply on cracks and fix it. It is also used to join different pieces to form a large one.
Painting the projects:
If you wish to paint your project in the desired color, select white clay as dark-colored clay requires additional paint coats. Acrylic paints are the most suitable non-toxic paints for air-dry clay projects.
Store Clay Properly:
Wrap unused clay in cling film and seal in an airtight container. These different-sized quality airtight containers work great.
How to Seal Air-Dry Clay?
Usually the terms varnish, seal, and glaze are used alternatively. However, they all mean the same thing. Air-dry clay is not naturally waterproof, and the finished projects must be protected from moisture and exposure to water to avoid damage to the project.
Varnishing the air-dry clay projects minimizes the chances of wear and tear with time. It also reduces the chances of peeling off the paint due to contact and moisture and helps retain the project’s aesthetic and sentimental value.
1) Acrylic Sealers or Glazes:
One can apply an acrylic paint sealer to obtain a soft sheen and protect the paint underneath. Use acrylic sealer or clay glaze. Apply 2-3 coats for fast and effective results, however, they are not waterproof.
2) Polyurethane or Clear glaze:
The most durable and water-resistant sealants are either polyurethane or clear glaze that protect dry clay and prevent it from yellowing.
3) Alternative Clay Varnish:
The best and most convenient way of protecting a project is by using a polyurethane varnish. Clay glaze is ideal for matte, gloss, or glittered finishing projects but offers low water resistance. A cheap alternative for varnish is PVA glue or mod podge can help you protect your projects however, it is prone to yellowing over time.
4) DIY sealant Recipe for air-dry clay:
Using only three ingredients, one can make a homemade clear and water-resistant DIY varnish.
Take a larger container and mix one bottle or 13 ml of clear nail varnish, two tablespoons of clear glue, and three tablespoons of water.
Apply the prepared mixture on the chosen air-dry clay project using a flat or foam brush. Apply two to three thin layers of this varnish for optimum results.
How to Store Air-Dry Clay?
Five important guide lines should be kept in mind while storing air-dry clay.
- Use cling film to tightly wrap the leftover clay, removing excess air to retain its moisture and prevent it from drying. For extra protection, place the wrapped clay inside a plastic or ziplock bag.
- Place your clay in an airtight container to avoid dehydration, and contamination of your clay with dust and other types of clay. These different-sized quality airtight containers work great.
- Store the clay in a cool, dark place away from direct sunlight and potential heat sources. Too much heat and exposure to sunlight will dry out the clay faster, reducing its shelf life.
- If your clay is drying around the edges, keep a wet paper towel around it to retain its moisture. If the clay is hardening, try adding a little water to keep moisture in it. Add water in small batches and knead repeatedly until it becomes pliable and soft again.
- Store different types of air-dry clay separately to avoid contamination. It is not recommended to mix and use different types of clay as it may result in uneven finish and cracks.
Tips and Tricks for Air-Dry Clay
Here are some simple yet effective guide to commence your air-dry clay projects with perfection.
1. Prepare Your Work Surface:
First, choose a flat, clean, and non-sticky surface. Keep your clay containers and tools aligned in your workspace for quick access.
2. Invest in Quality Tools:
Invest in good quality tools before starting clay art projects is always good. Get wooden texture rollers, stamps, and other shaping and smoothing tools to detail your clay artwork. Similarly, stainless steel sculpting tools are used for detailing with hands and removing excess clay from the project.
3. Condition the Clay:
Removing the clay from its packaging and kneading it until it is smooth and soft is called “conditioning the clay.” This step is integral as it helps to make clay pliable and easier to shape.
4. Handle With Care:
Air-dry clay can be messy due to its stickiness therefore, it is advisable to lubricate your hands using petroleum, lotions, or any skin oil to control sticky clay.
5. Roll to the Right Thickness:
Rolling smooths the uneven shape and texture of the clay by removing lumps, however, it is important to maintain the thickness of the clay to avoid cracks in too thin clay. It is recommended to roll the clay to about a quarter of an inch. It is neither too thick nor too thin to crack or dry. Use 1/4″ high boards on the sides to assist with rolling, to the right thickness.
6. Smooth the Edges:
Once you start working, use a small damp sponge or water-dipped fingers to smooth out imperfections. If you notice small cracks on the project after finishing, mix a small amount of clay with water, making a paste known as “Slip”. Once your project has dried completely, use this paste to fill in the gaps and leave it again till it dries off again. Use sandpaper to smoothen out rough edges on the final project.
7. Join Clay Pieces Securely:
Joining two pieces of clay together requires great attention to detail and focus. Use a sculpting tool or a toothpick to join two surfaces and add a little slip to the scored areas. Apply gentle pressure with the help of your fingers or sculpturing tool to join them together.
8. Drying Projects Properly:
Once your project is finished, leave it for 48-72 hours for complete drying. Remember to flip its sizes for fast drying. If you are using a mould, leave your clay in the mould to dry long enough to hold its shape for at least 24 hours.
9. Store Leftover Clay Safely:
Once you finish your project, wrap the clay in a cling film and place it in an airtight container in a cool, dark place.
10 Time and Money Saving Clay Tool Kits:
While popular modeling clay brands like DAS, creative paperclay, crayola, and sculpey are great to start. Here are some of the finest beginner-friendly clay kits that are easy to use and reasonably priced to guide you if you want a complete experience.
1. Complete Pottery Kit:
An all-encompassing pottery kit carries every essential item for beginners. Ranging from the best white air-drying clay to molding, sculpturing, sanding, and painting essentials, this exclusive kit comes with 12 acrylic air-dry paints and four special colors for an extensive color palette experience.
2. Beginners DIY Air Dry Clay Kit:
If you are looking for fun, relaxing, and creative holiday or festival activity pottery kits, then the Funseedrr Air-Dry clay kit is the right choice for you. This beginner pottery kit comes with 500g air-dry clay in four bags, 5 sculpturing tools, 10 color paints, a base coat, gloss varnish, 3 paint brushes, a palette, a spray bottle, a potter sponge, and a step-by-step guide to using this kit.
3. Colorful Air Dry Clay Kit:
If you are looking for a diverse range of air-dry color kits, the Aestd-St Air-dry colorful clay kit is the perfect solution. With a diverse range of 102 colors of air-dry clay, zip-lock bags, and sculpting tools that are safe to use for children, this kit is a splendid gift for fun and creative activities.
4. GleamKid Air Dry Clay Kit for Adults:
Personalize unique and out-of-the-box pottery items at home using the Gleam Air-Dry Clay kit for adults. With six intricate stamps and ink, six decorative clay stickers featuring animal and plant designs, and an alphabet stamp set, it will transform your free time into fun. This 43-piece air-dry kit includes 2 bags of magical air-dry clay, paints, and 7-piece clay sculpturing tools for detailing, smoothing, and cleaning your final clay projects.
5. S-KICHO Air Dry Pottery Kit for Beginners:
If you are looking for a new hobby, then the S-KICHO Air Dry Pottery Kit for Beginners is the perfect and budget-friendly solution. This 34-piece clay and pottery tool comes with 8 pounds of pottery clay, sufficient for crafting 10 pieces. The kit includes a set of 12 paints, brushes, sponge, tools, spray bottle, and a step-by-step guide to help you master clay artwork.
6. Hawarsi Air-dry Clay Kit:
If you want to get all clay crafting supplies from one source, then Hawarsi Air-Dry Clay kit is the best all-in-one starter kit for you. This remarkable 66-piece air-dry kit includes 4 packs of 1.1lbs air-dry clay, 2x20ml glossy varnish, 8 plastic clay tools, 5 wooden clay tools, 6 artist brushes and palette set, 1 foldable bucket, 1 cutter knife, 1 mini scissors, 1 rolling pin with rings, 1 silicone pad, a sponge, a spray bottle, 24 color paints, sandpapers, and a stainless steel ruler to complete your air-dry clay crafting kit. The kit also comes with a storage bag to help you keep all of your supplies together after usage.
7. ReArt Natural Air-Dry Clay:
Find your artistic side with ReArt’s 40 piece pottery tool set with 10 lbs of natural air-dry clay. This high-quality clay tool kit is an excellent investment for beginners and skilled professionals, offering durable, handy, and easy-to-use tools that are suitable for everyone. With a unique blend of pottery tools set and a sculpting tools set, the ReArt Natural Air-dry kit will help you with all types of clay artwork.
8. Roaxkois Air-Dry Clay Kit for adults:
Personalize your clay crafts by purchasing this super saver Roaxkois Air-Dry Clay for adults. The kits come with all necessary clay crafting tools, a collapsible bucket, letter stamps, and 3.3 lbs of clay. This beginner-friendly molding and pottery painting kit has a vibrant color palette essential for creating outstanding displays. The kit also includes a canvas bag and a zip bag for keeping your crafting essentials and remnant clay secured and organized.
9. Cuure Air-Dry Clay kit:
Cuure Air-Dry Clay kit is a complete clay art partner for beginners and adults, offering its buyers a compact air-dry crafting experience. This budget and beginner-friendly clay kit provides detailing tools, vibrant acrylic paints, easily-to-apply varnish, 2 packs of 500g of modeling clay, and a two-tier storage box to assist your projects.
10. Bright Stripe Flower Power Pottery Kit:
This unique clay crafting kit is something everyone must buy due to its delicate detailing and remarkable experience. The Bright Stripe Flower Power Pottery Kit comes with 1 lb of air-dry clay, 7 botanical stamps, a rolling pin, 6 vibrant paints, metallic gold, glaze, jewelry pendants, essential tools for creating trinket dishes, wall art, and much more!
I hope you found this air dry clay guide and resource useful. Let me know down in the comments if you have any question! Happy crafting!
Written by: Nageen Sohail
Reviewed by: Hani Shabbir
Try These Air Dry Clay Projects
Here are some air-dry clay projects with tutorial guide that are great for beginners:


Thank you for this great, concise guide to starting out with airdry clay. You pointed me in all the right directions and I feel confident about beginning!