This post may contain affiliate links. Please see our full Disclosure Policy for details.
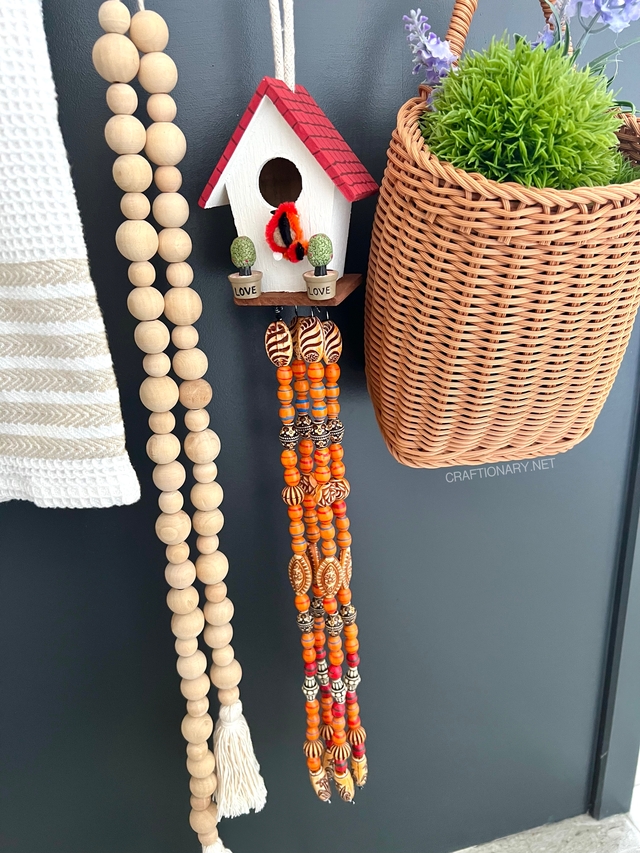
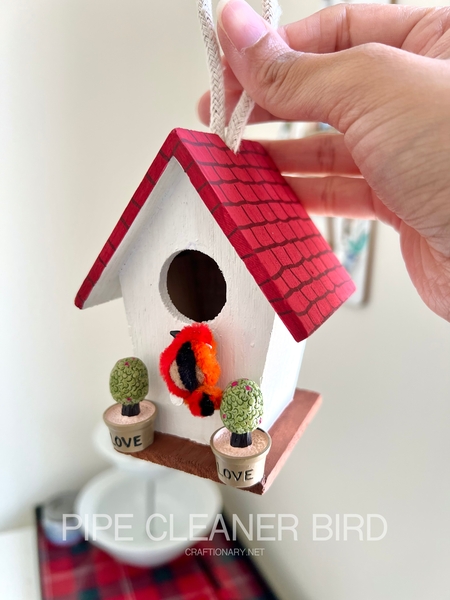
Whether you’re a seasoned crafter or looking for a weekend project with the kids, there is something incredibly satisfying about creating a miniature world. A hand-painted birdhouse is a classic, but the real magic happens in the details—specifically, a miniature pipe cleaner bird that brings the whole scene to life and beaded strings that add charm.
You will learn professional painting techniques with a clever loop-and-bud pipe cleaner method and bead-and-wire sun catcher/ wind chime to create a weather-resistant, whimsical garden craft that feels playful and polished.
The Birdhouse Base – Bold, Striking, and Weatherproof
To outrank the standard slap-some-paint-on-it tutorials, we focus on durability and visual depth.
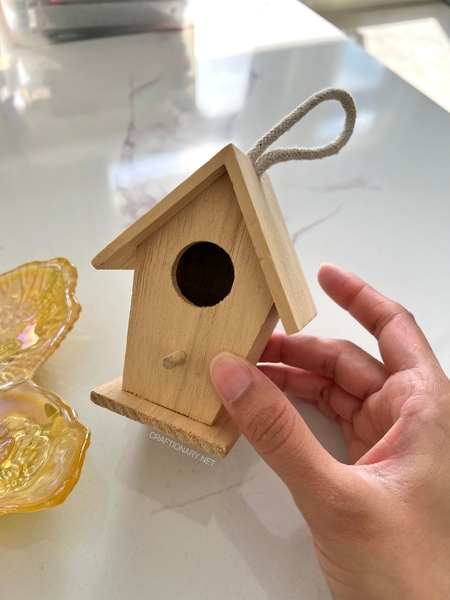
Materials Needed:
- Wooden Birdhouse (unfinished)
- Acrylic Paints: Bold Red, Crisp White, and Earthy Brown
- Detailing: Brown Permanent Marker (Sharpie)
- Adhesives: Gorilla Wood Glue or Tacky Glue
- Finish: Clear Acrylic Sealer (Spray or Brush-on)
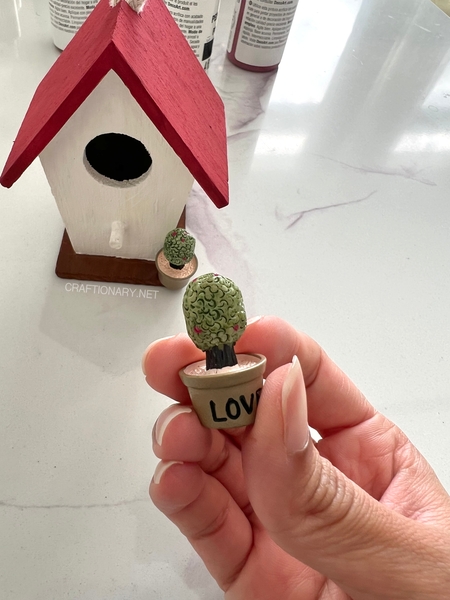
- Accents: Two miniature clay pots
The Professional Painting Process
1. The Triple Coat Rule: For that bold and striking look, don’t settle for one layer. Apply 2-3 coats of acrylic paint. Use Red for the roof, White for the walls, and Brown for the base. This provides a high-contrast, cottage-core aesthetic.
2. The Shingle Hack: Painting fine lines with a brush can be shaky. Once the red roof is completely dry, use a Brown Sharpie to draw uniform shingle lines. This adds architectural interest without the frustration of a fine-tip brush.
3. The Planter Accents: To give your birdhouse a lived-in feel, glue miniature clay pots to the sides using Gorilla Wood Glue. It’s waterproof and holds much better than standard school glue for outdoor items.
Related: 30 Mini Clay Art Ideas for Tiny DIY Projects
4. Weatherproofing: Since acrylic paint can peel when exposed to moisture, apply a generous coat of acrylic sealer. This ensures your hard work survives the sun and rain.
Related: Best Sealer: How to Waterproof Acrylic Paint on Rocks, Wood, Glass Crafts
2. The Miniature Pipe Cleaner Bird Tutorial
Most pipe cleaner birds look like flat stick figures. This Bud Method creates a 3D, rounded bird that looks professionally made.
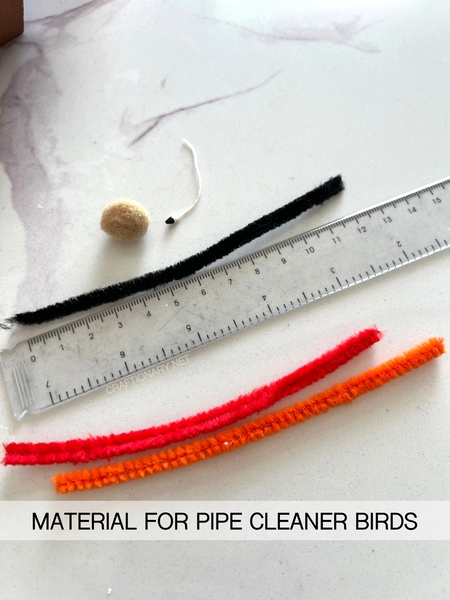
The Recipe for a 12-Inch Tiny Bird:
- 1 Red and 1 Orange Pipe Cleaner (The body)
- 1 Black Pipe Cleaner (The accent/wing)
- 1 Beige Small Pom-Pom (The internal structure/softness)
- 1 Black Stamen (The beak or head detail)
Step-By-Step Assembly:
- The Plus-Sign Loop: Lay your Red and Orange pipe cleaners across each other to form a + sign. Bend them at the center to loop them together. They should hang into each other, adjacent, with the open ends facing outward.
- The Heart of the Bird: Place your beige pom-pom and the black stamen right at the center where the wires are looped. The pom-pom gives the bird its plump 3D shape.
- The Black Overlay: Place the black pipe cleaner adjacent to the looped ones on top.
- The Bud Closure: Gather all the red, orange, and black ends in your hand, folding them over the pom-pom to form a tight bud.

5. Secure and Shape: Twist all the ends together at the back to secure the structure. This twist becomes the base of the tail.
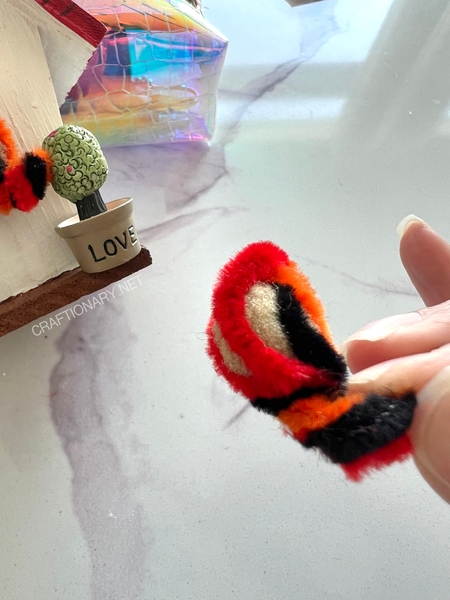
6. The Final Trim: Rearrange the fibers to ensure the colors are balanced. Use sharp scissors to cut the excess wire from the tail to your desired length.
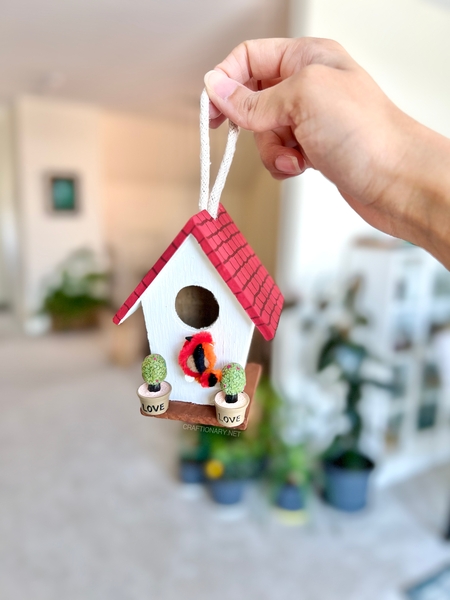
7. Pro Tip: Glue your finished bird directly onto the birdhouse perch or roof using a dab of tacky glue for a permanent resident.
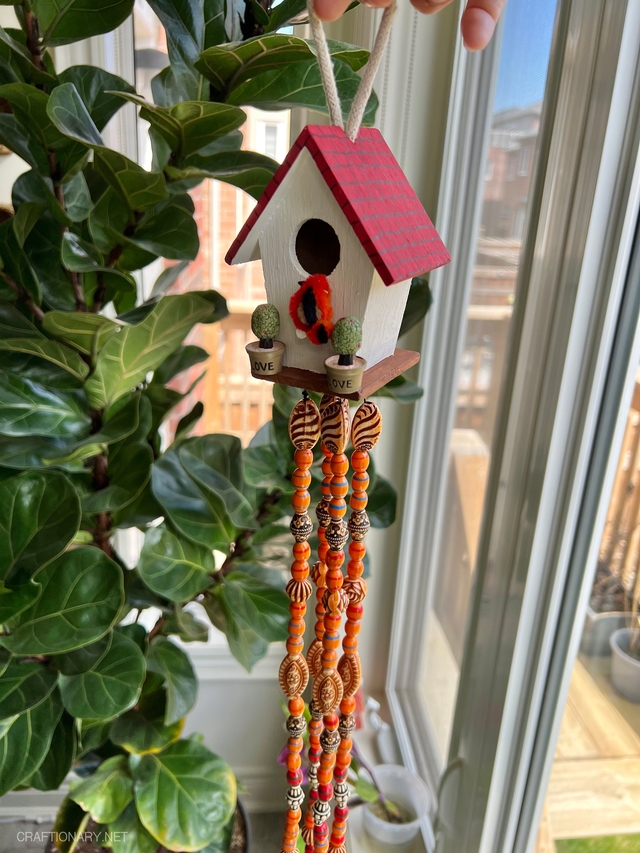
3. Beaded Suncatcher Windchime Birdhouse
Add beaded strings under your birdhouse for an extra creative feature:
Why stop at a birdhouse when you can have a sensory garden piece?
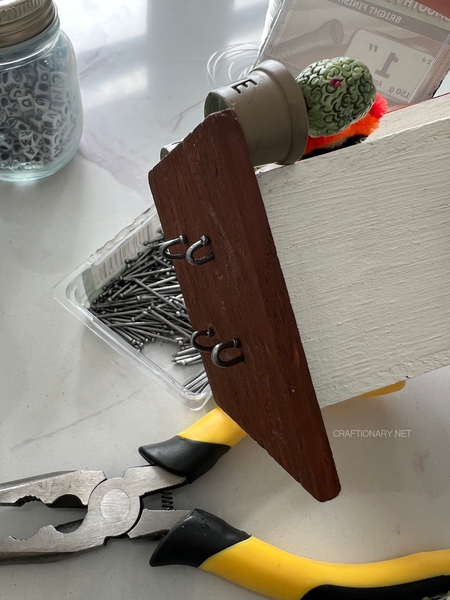
1. The Hooks: Insert small screw-eye hooks into the bottom of the brown base. You can also twist and turn 1 inch nails from the head to make hooks and hammer in.

2. The Stringing: Use fishing wire or thin jewelry wire for a floating look. I used yarn string because my beads had large holes.
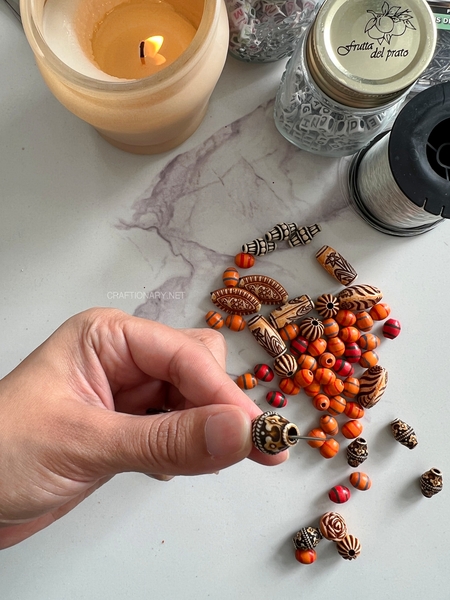
3. The Beads: String glass or acrylic beads onto the wire. When the sun hits them, they act as a suncatcher, reflecting light across your porch.
I used wooden and decorated beads for my indoor garden birdhouse hanging decor.
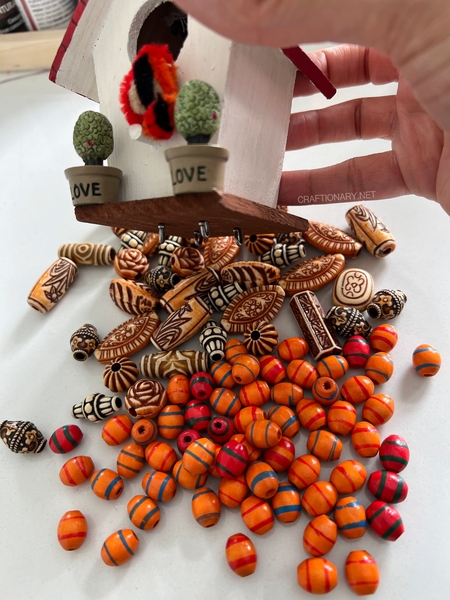
4. The Sound: Ensure the beads are close enough to clink together gently in the breeze.
Frequently Asked Questions
1. What glue is best for birdhouses?
For outdoor birdhouses, Gorilla Wood Glue or a high-quality Tacky Glue is preferred. If the house is purely decorative (indoor), a hot glue gun works for the pipe cleaner bird, but it may melt in direct summer sun.
2. How do you make pipe cleaner crafts weather-resistant?
While pipe cleaners are fabric-based, you can lightly spray the finished bird with the same acrylic sealer used on the house. This helps repel water and prevents the wire core from rusting.
3. What is the best paint for wooden birdhouses?
Acrylic paint is the gold standard for birdhouse crafts because it’s opaque, dries fast, and is widely available. Always seal it with a UV-resistant clear coat to prevent fading.
4. Can you use this birdhouse outdoors?
Yes, but because the pipe cleaner bird and pom-pom are delicate, outdoor placement should be under a porch, awning, or protected garden space.
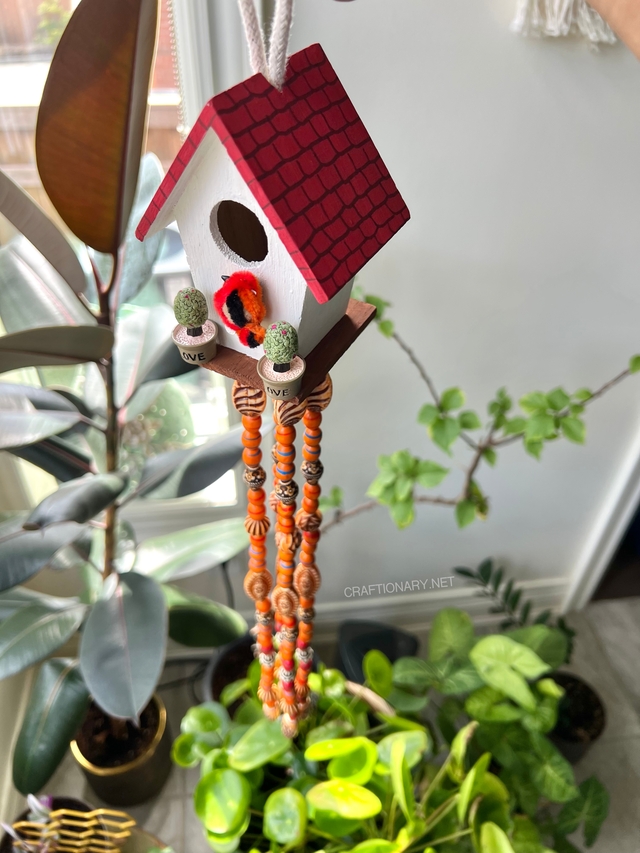
The bird gives the birdhouse a sense of life. It makes the project feel like a tiny scene rather than a stand-alone object.
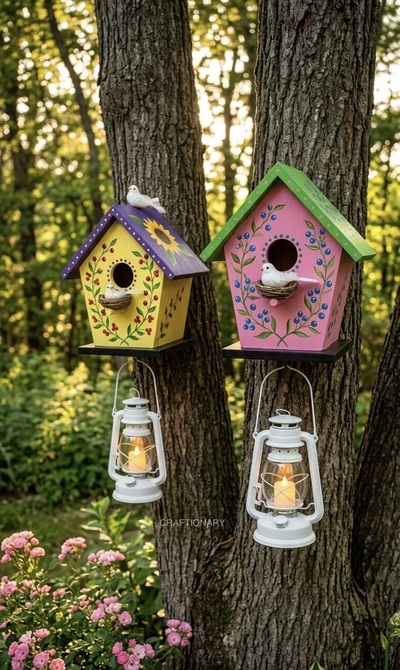
Here’s another cute idea to make hanging lantern painted birdhouses.
You will also like:
32 Pom Pom Winter Crafts: Cute and Cozy Ideas for the Season