This post may contain affiliate links. Please see our full Disclosure Policy for details.
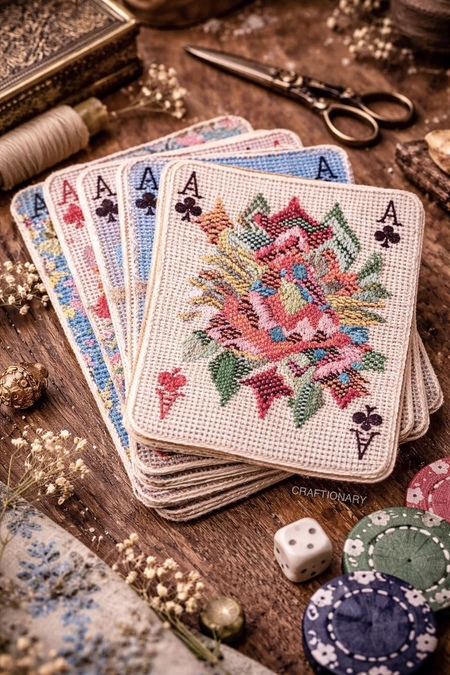
These embroidered playing cards combine traditional needlepoint with a vintage parlor game aesthetic. This project is best approached using plastic canvas or a very stiff Aida cloth to ensure the cards hold their shape without wilting.
Materials Needed
- Base: 14-count plastic canvas (clear or cream) or heavy-weight stiffened Aida cloth.
- Thread: Embroidery floss (use all 6 strands for fullness) or fine tapestry wool.
- Needles: Size 24 tapestry needle.
- Backing: Thin adhesive felt or kraft paper (to hide the messy back of your stitches).
- Finishing: Thick cotton twine or pearl cotton thread for the whipped edges.
- Tools: Sharp scissors and a fabric marker.
How to Make Needlepoint Playing Cards:
1. Size and Cut the Base
- Standard playing cards are 2.5 x 3.5 inches.
- Count the grid on your canvas to match these dimensions.
- Cut your rectangles, ensuring you leave a smooth edge. If using plastic canvas, trim the nubs as close as possible to the grid to prevent snagging later.
2. Map the Design
Before stitching, use a fine-tip marker to lightly map out your layout:
- The Indices: Mark the A and the suit symbol (spade, club, heart, diamond) in the top-left and bottom-right corners.
- The Centerpiece: The image features a large, stylized floral motif. You can use a cross-stitch for a pixelated look or a tent stitch (half-stitch) for a smoother, traditional needlepoint texture.
3. Stitch the Artwork
- Start with the border elements: Stitch the letters and small corner suits first to anchor your layout.
- Fill the center: Use vibrant, contrasting colors for the floral design. To achieve the textured look in the photo, vary your stitches—try a French knot for the flower centers or a satin stitch for the leaves to add dimension.
- Background: Fill the entire remaining grid with a neutral parchment or off-white thread. This makes the piece feel like a solid card rather than a piece of mesh.
4. Apply the Backing
- Since the back of needlepoint can be chaotic, you’ll want a clean finish.
- Cut a piece of felt or heavy cardstock slightly smaller than the card.
- Affix it to the back using a thin layer of fabric glue or double-sided adhesive sheets.
5. The Whipped Edge Finish
- This is the secret to making them look like professional boutique items.
- Take your twine or thick thread and perform an overcast stitch (also known as a whip stitch) around the entire perimeter of the card.
- Go through every single hole along the edge, wrapping the thread over the side to completely hide the plastic or fabric border.
Related: Complete Guide: How to make your own cross stitch pattern?
Pro-Tips for an Authentic Look
- Color Palette: Use muted versions of primary colors—think mustard yellow instead of bright yellow, and brick red instead of cherry red—to get that antique vibe.
- Stiffness: If using Aida cloth instead of plastic canvas, give the finished card a heavy coat of fabric stiffener spray before adding the backing.
- Tea Staining: For a truly weathered look, you can soak your white embroidery floss in black tea for 10 minutes before stitching to give it an aged, sepia tone.
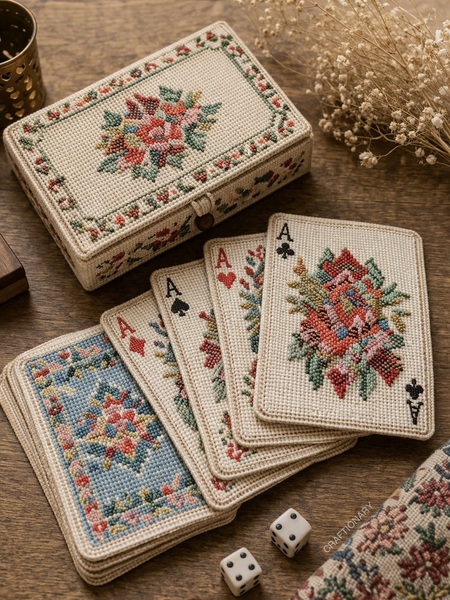
Here’s another inspiration to create a custom box to keep your collection organized.
You will also like:
30 Practical Craft Uses for Cross Stitch Artwork