This post may contain affiliate links. Please see our full Disclosure Policy for details.
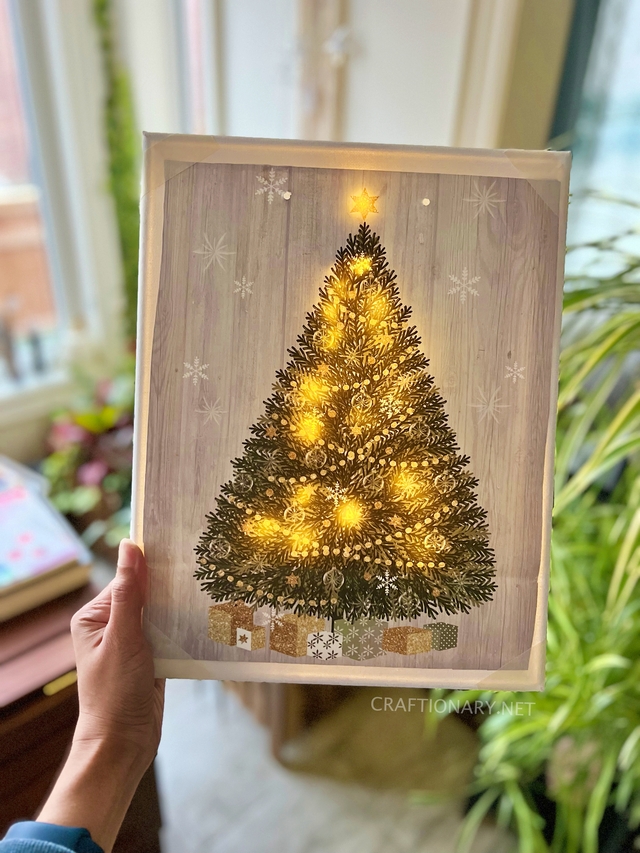
Learn how to frame a canvas with gift bag or any paper canvas print to make an instant festive wall art for your home like lighted Christmas tree canvas art using string lights. Ideas to use this technique are endless.
You must have seen ways to stretch canvas on frame by measuring length and width of the canvas painting to choose frame size. Cut your frame and secure it together. Then put the canvas face down making sure the surface is clean and then fold the sides on the wooden frame. Use a staple gun to fit it in place and turn it over to see it has been stretched properly before you proceed to staple the remaining sides. Fold the corners for neat look.
This is exactly what we will be doing today. The only difference is that instead of using a staple gun we will be using school glue or mod podge.
Material
To frame a canvas you will need the following materials:
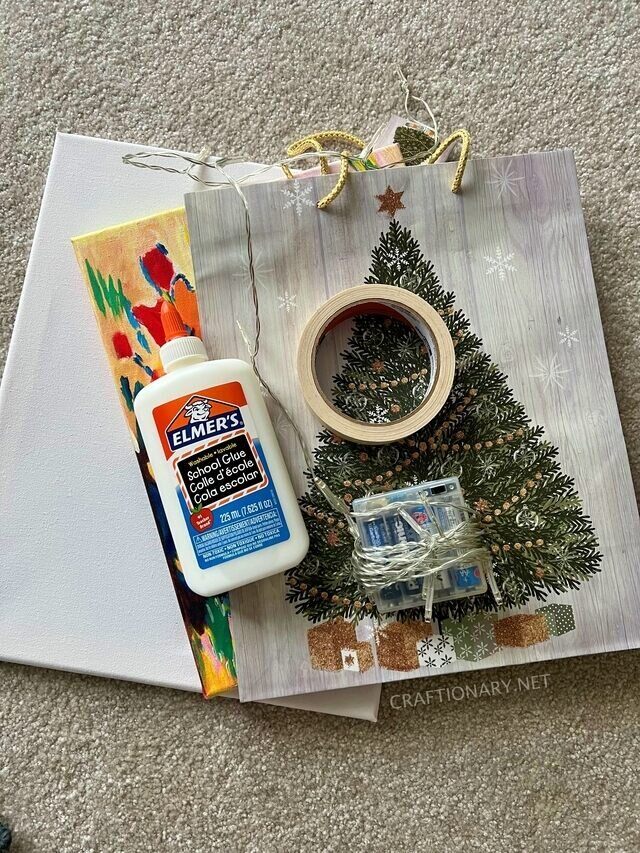
- Canvas
- Gift bag – this can be any beautiful image that brings sparkle in your eyes, especially the ones during holiday seasons for Christmas gift wrapping that you just can’t get over. To keep it cheap and less expensive you can checkout dollar store and dollar tree for there cool collection as well. You will find similar fun images and designs throughout the year and can simply frame it for a quick makeover at home.
- Paper print (optional) – you can find many festive printables for any occasion that you can print for free and use.
- School glue (white PVA glue) or mod podge – to stick and seal the canvas
- Scissors or exacto knife with self healing PVA cutting mat to cut.
- Table cloth to cover the surface.
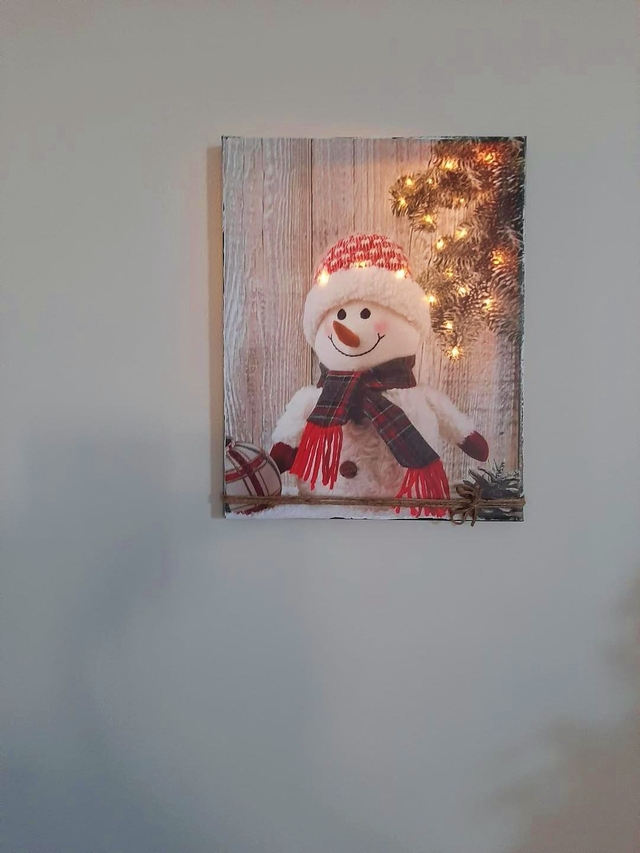
- String lights to make it look festive. I used basic battery operated string lights but you can use app based string lights that are operated with a phone app or remote control timer string lights on your frame for convenience once you hang it on the wall.
- General purpose masking tape/ Paper tape to fix strings on the canvas.
Instructions on how to frame a canvas?
Today I am going to show you how to wrap a canvas with your favorite shopping bag or any printable on paper the easy way and for less. I will show you how to make it festive later.
Here’s a video tutorial that you can follow on how to frame a canvas with gift bag:
1) Measure the photo and choose a canvas size that can fit your choice of image or picture.
2) Then cut of the excess paper from the side making sure you leave about 2 inches for the frame of canvas. This will allow you to work easily.
3) Now place the paper on canvas and with your fingers or a scoring tool score the lines where the canvas frame ends. Use scissors to neatly cut off the sides. You can also use a blade to cut neatly on a cutting mat.
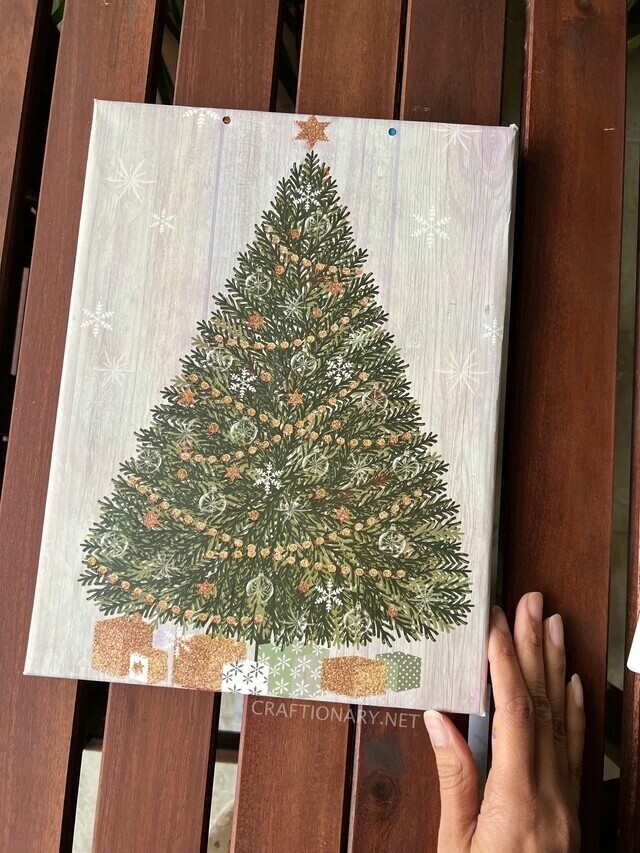
4) I am using regular school glue, which works like mod podge to affix my paper on canvas and a colored canvas that was painted earlier but you can use any plain canvas. I will show you the difference later.
5) Drizzle some glue on the canvas and use a paintbrush to layer it evenly.
6) Now carefully place the image on it making sure you have enough paper on all the four sides to wrap the frame. Move it while the glue is dry to set it right. Apply some pressure and smooth it to stick properly.
7) We will now work on each side. Drizzle and brush PVA glue and fold the side. Hold it for sometime till it stops unfolding and then flip it to apply base pressure while we do the same on the other side.
8) Now cut small 45 degree angle slits on the sides to fold and wrap the remaining 2 sides. Repeat the process.
9) Once it has dried apply an even coat of white glue on the edges to make it firm. You can also apply it on your paper to seal it but I didn’t since I am using it indoors.
How to make a basic canvas festive?
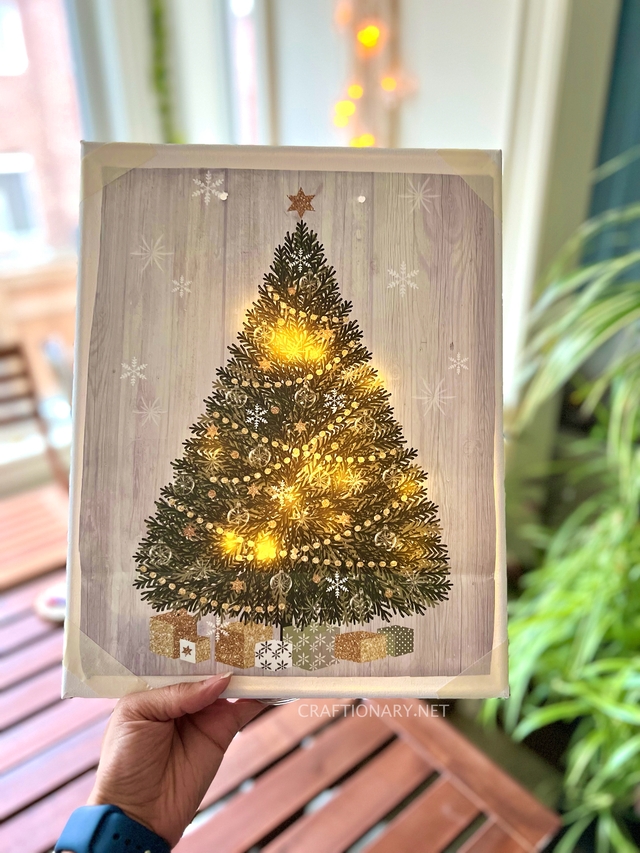
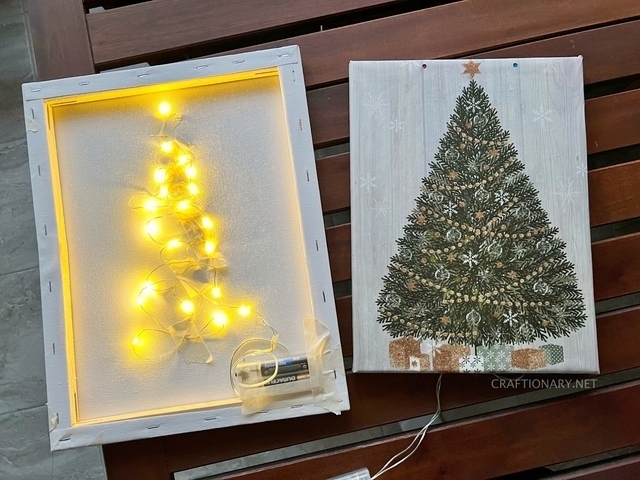
1) To light it up use string lights and paper tape.
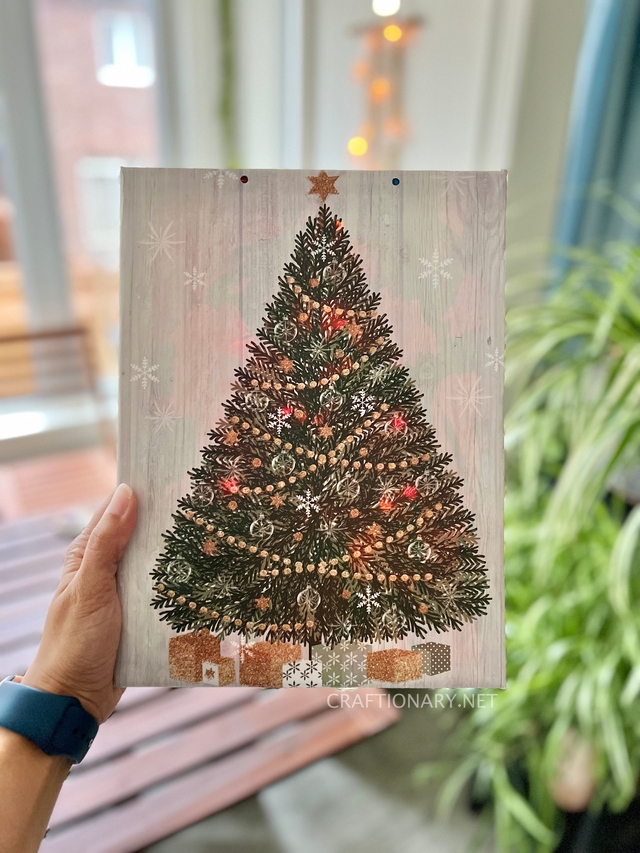
2) Stick the lights where you want your image to glow. Here I want the tree and star to glow so I follow that pattern.
Tip: You can use a second image for reference and keep it besides you as guideline for arranging the lights or turn on the lights and tilt the canvas to see the location before sticking it in place. With paper tape you can always relocate your lights.
This is how it looks with a colored image which is red. You can change the color of light by painting the canvas.
However if you like the original white yellow glow you can stick your image directly on a plain canvas. For comparison purposes I used masking tape to stick the image on a plain canvas and light it up to show you how it glows with yellow warm light. I think I like the later more.
Tip: It is also important to keep the light bulbs of string light closer to the canvas so that the glow on the front is brighter. If you are concerned about the heat, in my experience LED lights have little to no heat therefore a chance of burning the canvas is minimum. However, please follow the care guidelines per manufacturer.
You will also like:
Here’s another cool LED cloud light that was created earlier on the kids bedroom focal wall.
Winter snowglobes lighted village mantel decor using string lights and mason jars.
Decorating with lights – 20 DIY String Light Projects
Finally here’s the inspiration by Debbie Carifelle that made me craft this adorable Christmas tree on canvas.
I hope you enjoyed this tutorial.


Love your lighted canvas, and it’s so easy. Thanks so much for sharing this simple way to light up a corner, or even highlight the mantel.
Thank you Barbara. 🙂