This post may contain affiliate links. Please see our full Disclosure Policy for details.
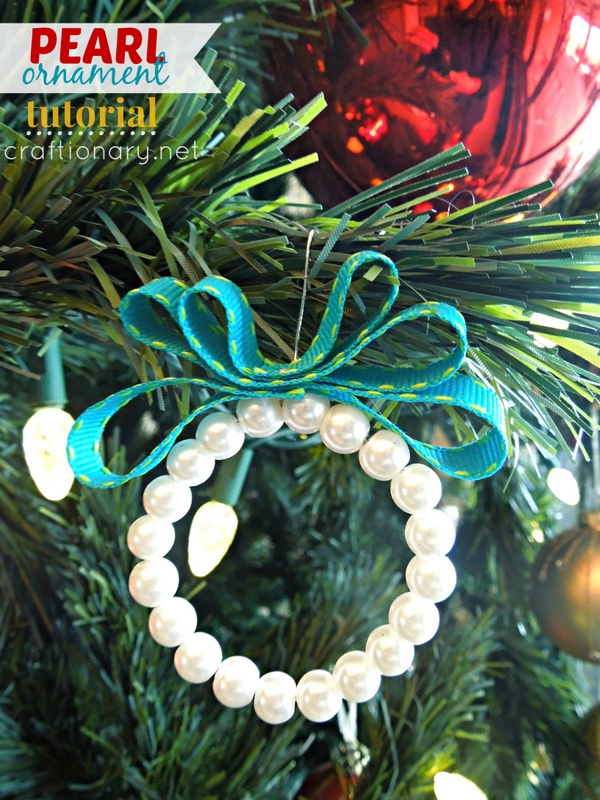
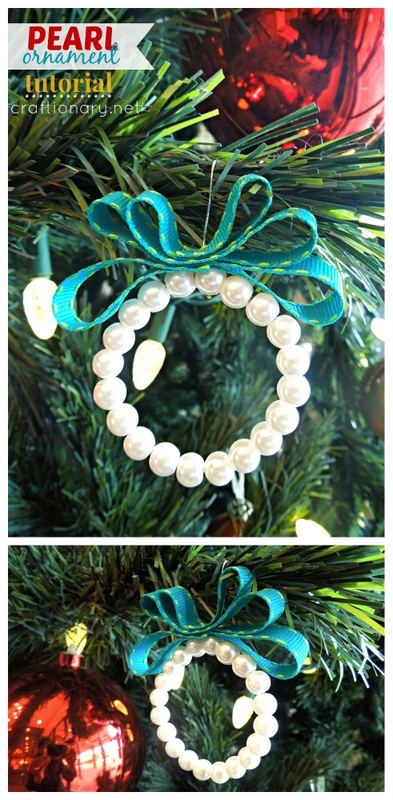
Elevate your holiday décor with these exquisite, yet surprisingly simple, DIY beaded pearl ornaments! Perfect for adding a touch of classic elegance to your Christmas tree, as a charming gift topper, or even as a unique party favor. This tutorial focuses on a popular and accessible method: looping beautiful beads into a circular shape and finishing them with a festive ribbon bow.
You don’t need to be an experienced crafter to create these stunning ornaments. We’ll walk you through each step, cover the essential materials, variations to try, and answer all your common questions to ensure your pearl ornaments sparkle with handmade perfection.
Each ornament takes 5–10 minutes, making it perfect for batch crafting. These will make great Christmas gifts or favors.
DIY Pearl Ornaments Creative Variations
- Gold and Pearl Combo: Alternate gold beads with pearls for a glamorous look.
- Mini Pearl Wreaths: Use small beads to create mini wreaths for napkin rings.
- Clustered Bow: Add a layered bow with two or three ribbons for a more dramatic effect.
- Color Themes: Try red beads with a green ribbon for traditional Christmas vibes.
Materials You’ll Need
Creating these elegant ornaments requires just a few key components. The beauty is in the simplicity!
- 8-12 mm Pearl beads (plastic, glass, or faux pearls in your choice of size)
- Elastic cord, beading gauge wire #24, or strong thread
- Ribbon (satin or organza works best for bows)
- Scissors
- Needle (optional, makes threading easier)
- Plier (for twisting and cutting the wire)
- Glue gun (for sticking the bow)
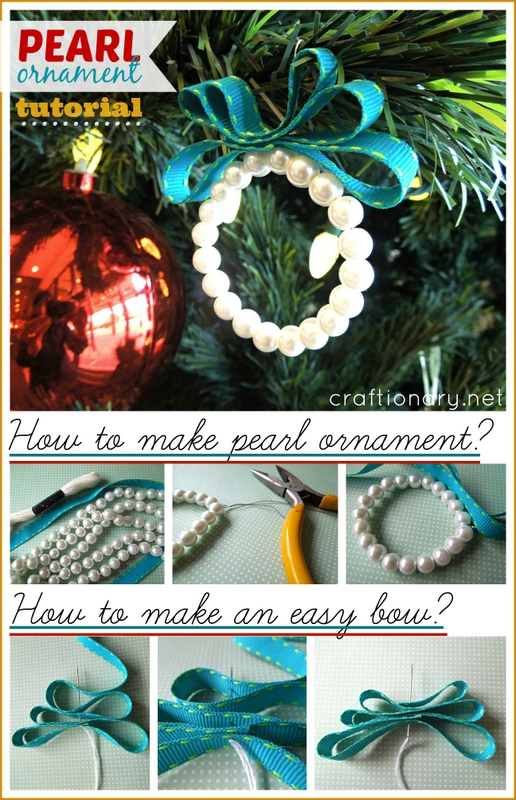
1. Forming the Beaded Circle
Cut Your Wire:
Using your wire cutters, cut a piece of craft wire approximately 12-18 inches long. The exact length will depend on the desired diameter of your ornament and the size of your beads. It’s better to start longer and trim later.
Create a Starting Loop:
Using your round-nose pliers, create a small, secure loop at one end of your wire. This loop will prevent your beads from sliding off and will be used to connect the circle later. Make sure to wrap the wire end around the base of the loop a couple of times to secure it firmly.
Thread Your Beads:
Begin threading your pearl beads onto the wire. You can use all the same size pearls, or alternate sizes for visual interest. Continue adding beads until the string of beads, when curved, forms a circle that is your desired ornament size. Typically, you’ll need enough beads to create a circumference of about 3-4 inches for a standard ornament.
Tip: To estimate, loosely curve the beaded wire into a circle as you go, leaving a little extra room for the connecting loops.
Form the Circle and Secure:
Once you have enough beads, bring the beaded wire around to meet your starting loop. Thread the unlooped end of the wire through the starting loop.
Create the Finishing Loop:
Using your round-nose pliers, create another secure loop with the working end of the wire, connecting it firmly to the starting loop. Trim any excess wire with your wire cutters, making sure there are no sharp ends protruding. Use your flat-nose pliers to gently crimp down any sharp wire ends. You should now have a continuous circle of beads.
2. Adding the Ribbon Bow and Hanger
Prepare the Ribbon Hanger:
Cut a piece of your chosen ribbon about 8-10 inches long. Fold it in half to create a loop. Gather and glue varying size loops at the center to make a bow.
Related: 25 Best bow tutorials – learn to make stylish bows
Attach the Hanger:
Feed the folded end of the ribbon through one of the loops you created at the top of your beaded circle. Then, pull the two loose ends of the ribbon through the ribbon loop itself (this is a simple larks head knot). Pull gently to secure the ribbon to your beaded circle. This creates your ornament hanger.
Tie the Decorative Bow:
Take the two loose ends of the ribbon and tie a pretty bow at the top, just above your beaded circle. Adjust the loops of the bow until they are even and attractive. Trim the ribbon ends at an angle or a swallowtail cut for a neat finish.
Pro Tip: A dab of hot glue (adult supervision required) under the bow can help keep it in place and prevent it from untying, especially if it’s a very slippery ribbon.
FAQs about Pearl Ornaments:
1. What kind of beads are best for this craft?
Faux pearl beads are classic and affordable. You can use plastic, glass, or even shell pearls. Sizes from 4mm to 8mm work well, but you can experiment!
2. What gauge wire should you use?
20-gauge or 22-gauge craft wire is ideal. It’s flexible enough to manipulate but strong enough to hold the shape of your ornament and the weight of the beads.
3. How do you make sure the wire ends are not sharp?
After cutting and making your loops, use flat-nose pliers to gently crimp down any sharp wire ends. Ensure they are tucked securely into the loops or against another wire.
4. Can kids make these ornaments?
This craft is best suited for older children (tweens/teens) and adults due to the use of wire cutters and pliers, which require fine motor skills and caution. Younger children could thread beads if an adult handles all the wire cutting and looping.
5. How do you prevent the ribbon from unraveling?
For satin or sheer ribbons, you can gently heat-seal the ends by quickly passing them near a flame (use extreme caution and adult supervision!). Alternatively, a tiny dab of clear fabric glue or fray check can prevent fraying.
6. Can you make different shapes?
While this tutorial focuses on a circle, you could experiment with other shapes like an oval or a heart, but a circular shape is the easiest to achieve and secure with this simple looping method.
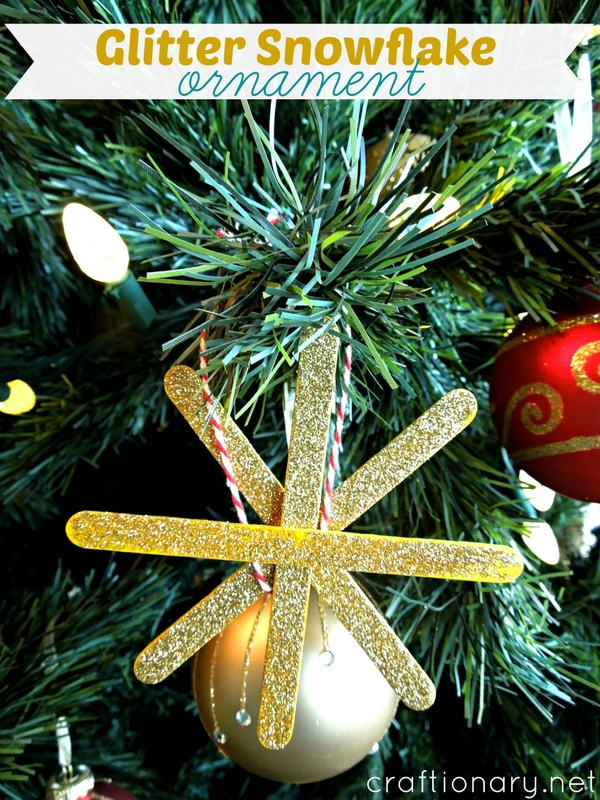
Make DIY glitter snowflake ornaments. Yet another easy, cheap and less time consuming project.


I love your pearl ornaments! They looks so classy and then your paired them with fun colorful ribbon… turned out great!
Love it!
It’s really pretty! It reminds me of ornaments that my Grandma had hanging on her tree when I was a kid 🙂
Love this idea! I have extra strands of pearls for the Christmas tree (I like them better than tinsel) so I can see me making some of these. Fab idea!
Popping over from The Weekly Creative.
Sweet and simple. I like it!
Thank you so much for linking up your adorable DIY Pearl Ornaments at the Link It or Lump It Link party last week. I wanted to let you know that one of my co-hosts picked your ornament as a feature this week.
These are so elegant. We have some glass bead pearls, so I feel a project coming on! Gorgeous!