This post may contain affiliate links. Please see our full Disclosure Policy for details.
Please welcome Carrie! She is sharing a beautiful vintage. Christmas ornaments project today. You will love the tissue paper image transfer technique tutorial. There are so many great ideas, you can use this DIY printable tree ornaments technique.
Hello there! My name is Carrie and I blog over at Hooked on decorating. I am so excited and flattered to be a guest at Craftionary today! I would like to share an easy and inexpensive project with you that I think you will really enjoy with the Christmas holiday season almost amongst us. Why not get a head start on your holiday decorating and make these super cute vintage ornaments for your tee or as a gift tags for someone special on your list?

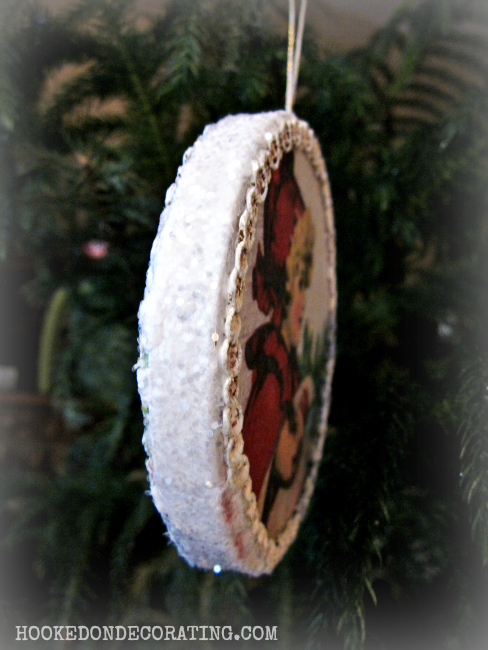
Make Vintage Christmas Ornaments
(Tissue paper image transfer technique)
You will need:
- Ornament template (source: The Graphics Fairy) or an image of your choice
- An inkjet color printer
- White tissue paper
- Letter-sized printer paper
- Scotch tape
- Cardboard circle-shaped ornaments (I purchased mine at Michaels craft store)
- White acrylic craft paint
- Scissors
- Paper trimmer (optional)
- Pencil with eraser
- Mod podge or Golden gel medium (I used semi-gloss gel medium)
- 2 paint brushes or make-up sponge wedges
- Glitter (I used Martha Stewart’s coarse clear glitter)
- Craft glue that dries clear
- Plastic drop cloth or newspaper to protect wordspace
Ornament template
Find the template here.
Note: I used an inkjet printer to print my images on tissue paper. Since laser printer ca get hot, catch fire or melt the scotch tape to your printer, therefore, I will suggest not to use laser printer for this project.
Directions to make vintage Christmas ornaments:
- Open the provided template in your photo editing program. It has been formatted to print onto the letter-sized paper already.
- Cut the tissue paper sheet about 1/4″ to 1/2″ smaller than your piece of paper (approx 8″x10 5″). Use paper trimmer or scissors for a neat tissue paper trim.
- Now place your tissue paper on to a blank paper (shiny side down). Carefully flatten and tape it leaving an even border around. It is especially important to make sure that the top edge of the paper that will be fed up by the printer is completely smooth and covered with tape to prevent jamming. Also trim any excess tape that hangs over the edge of the paper.
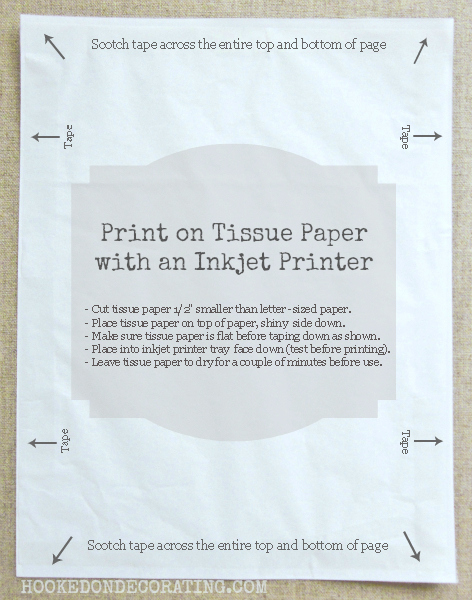
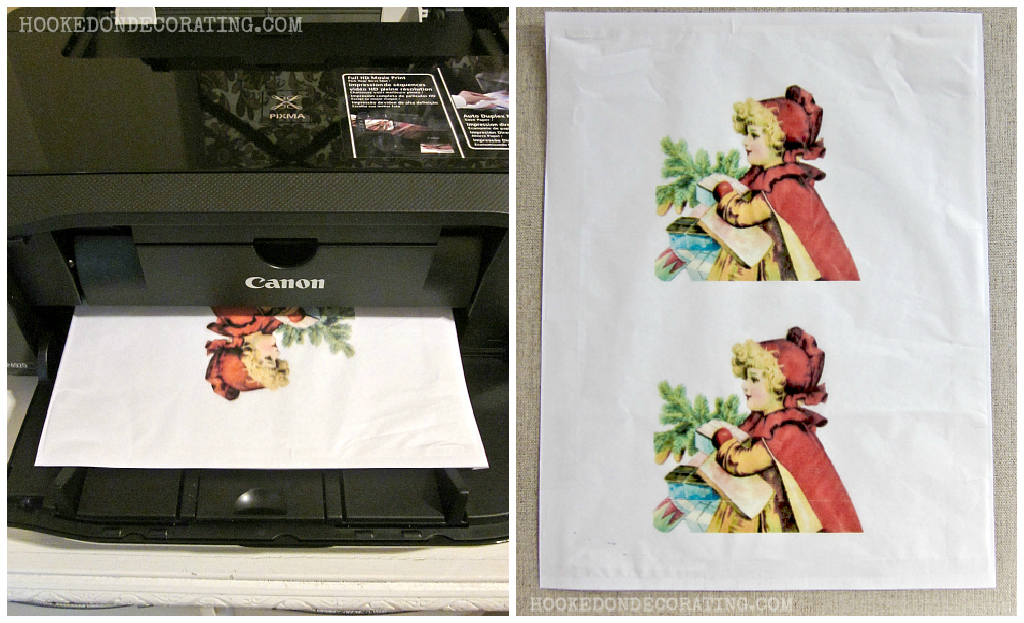
- Place the prepared paper into the printer with the tissue paper side facing down.
note: Since every printer is different, make sure which side your printer prints on before doing this! - Print out your template and allow the ink to dry for a couple of minutes.
- Now place and trace the cardboard ornament over the printed image.
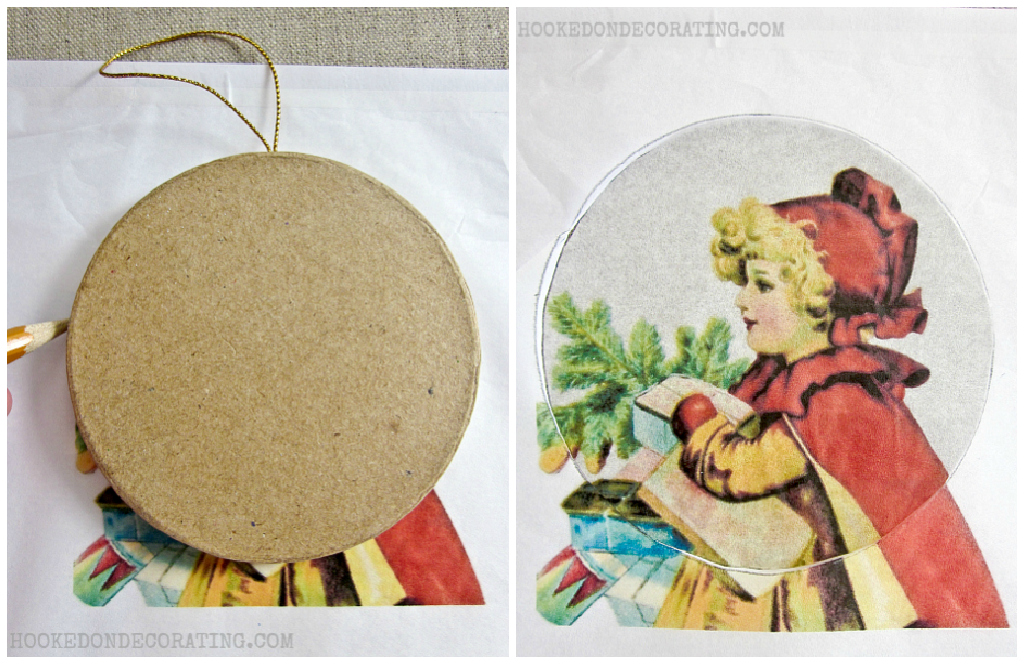
- Now cut the circle, it is easier to cut while the paper is still attached to it.
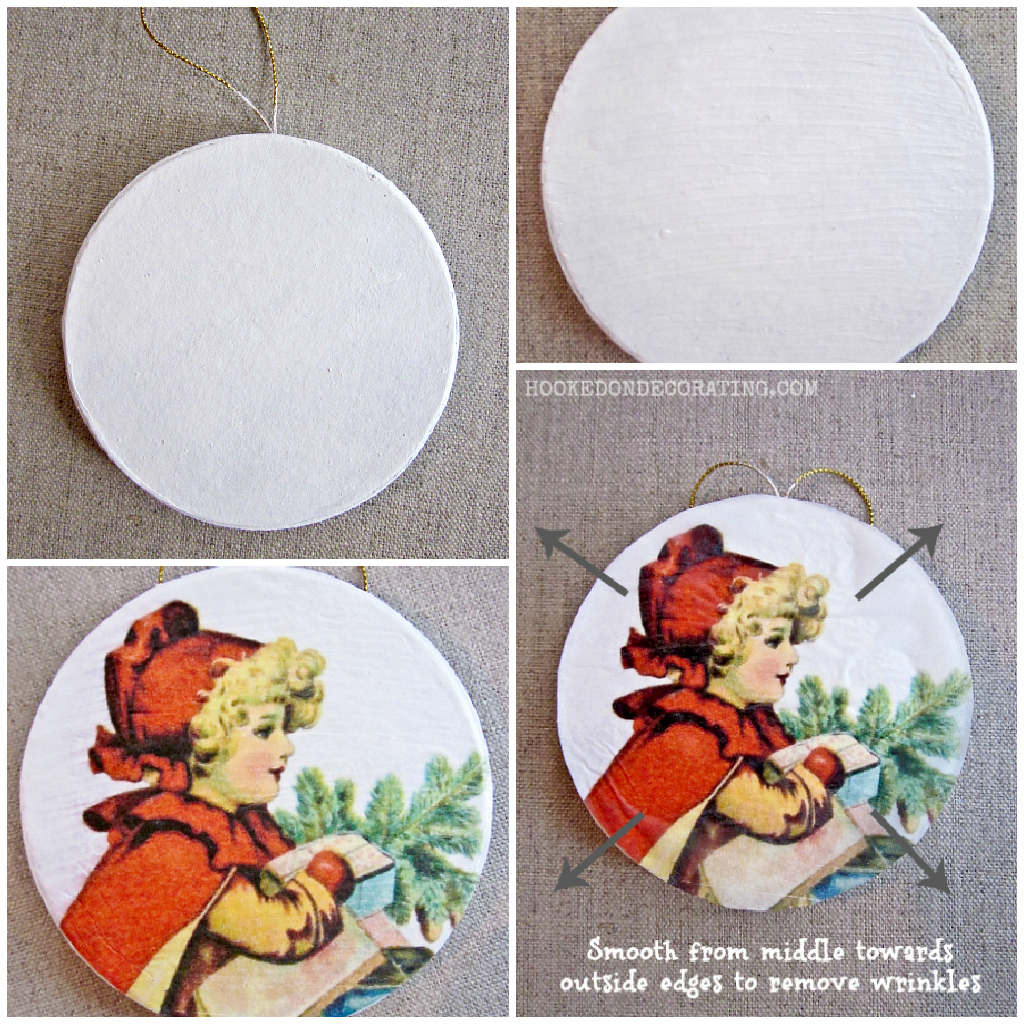
- Paint the cardboard ornaments with 2 coats of white paint. It is easier to apply a smooth coat of paint using wedge sponge. When it dries apply an even coat of Mod Podge or gel medium.
- Flip the image so that the shiny side is face up and carefully place it onto the ornament.
- Use your finger to remove any unwanted wrinkles and bubbles in a middle- outside motion note: Do not rub excessively or the ink may bleed into the glue underneath.
- Let it dry and repeat on the other side.
- Paint the trim or use a white trim to decorate the ornaments and make a pretty border around it using glue.
- Add some shine to the ornaments using glitter by sprinkling it over the glue layered edges all around the ornament and tapping the excess off. tip: Do this over a piece of tissue paper and you can easily fold the paper and tap the excess back into the container.
- Finally attach a gold string to the top and you are all done!

There you have it. These ornaments are cute and very easy to make.
You can also make:
-Ornaments with different images for fun!
– Use Christmas cards from last year. All you will have to do is scan, resize and print them.
– Vintage Christmas ornaments with make great gifts especially for Grandparents with photos on them.

Thanks for sharing this simple and fun technique for making special ornaments Carrie.
Check out her blog for more great projects like:
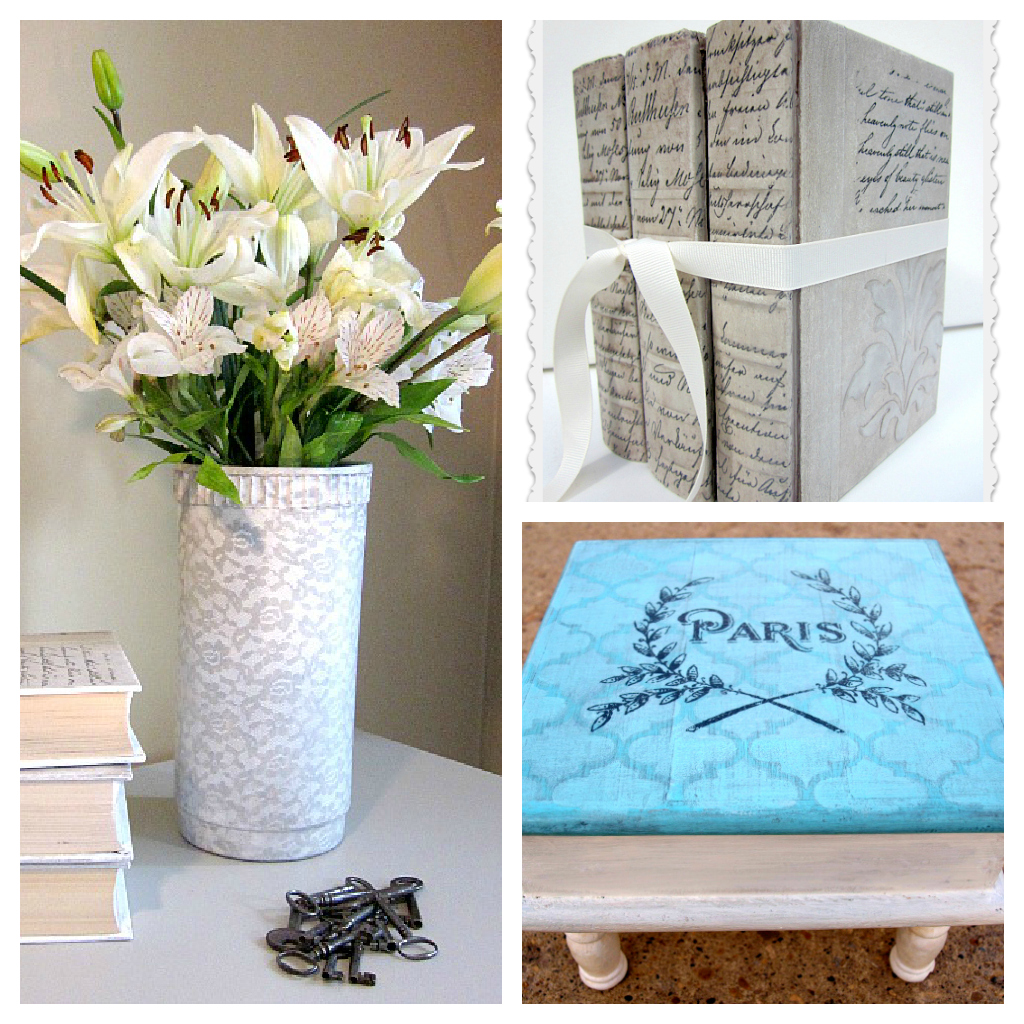
* Lace vase * Decorative books * Quatrefoil step stool
You will also like:
DIY Christmas Candy Lollipops


Thanks so much Hani for featuring my tissue paper ornaments and for allowing me to provide a guest post for your amazing blog. I just wanted to let you know that for some reason the template I included with my tutorial is only showing up as a small sized one. The full sized template for use with this tutorial can be found here. http://hookedondecorating.com/wp-content/uploads/2012/09/Vintage-Tissue-Paper-Christmas-Ornaments-.jpg
I hope you and your family have a wonderful Christmas!
Take care,
Carrie