This post may contain affiliate links. Please see our full Disclosure Policy for details.
Hello friends, I have been lately experimenting with epoxy resin a lot. I started by making resin paperweights, butterfly mason jars and even tried to make some basic silicone molds. Today, I want to share my most enjoyed resin technique that can help you make epoxy resin crafts in any shape or design you wish for your resin projects.
DIY Resin Tray
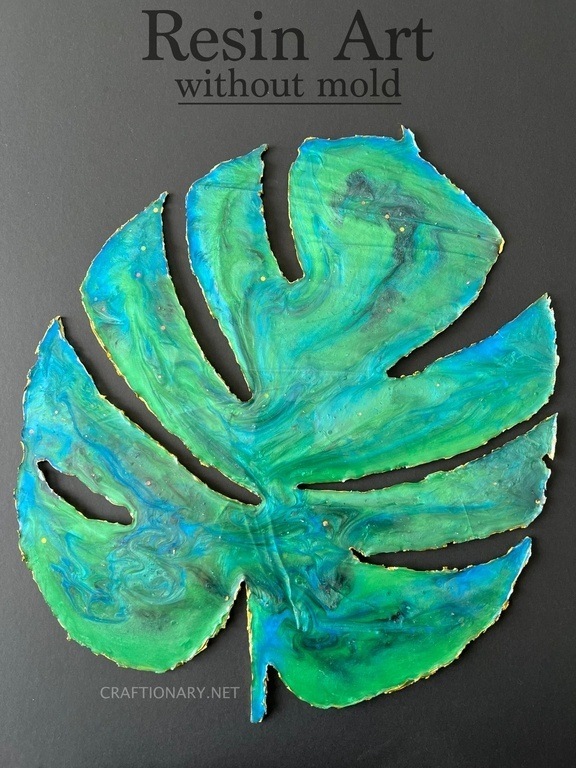
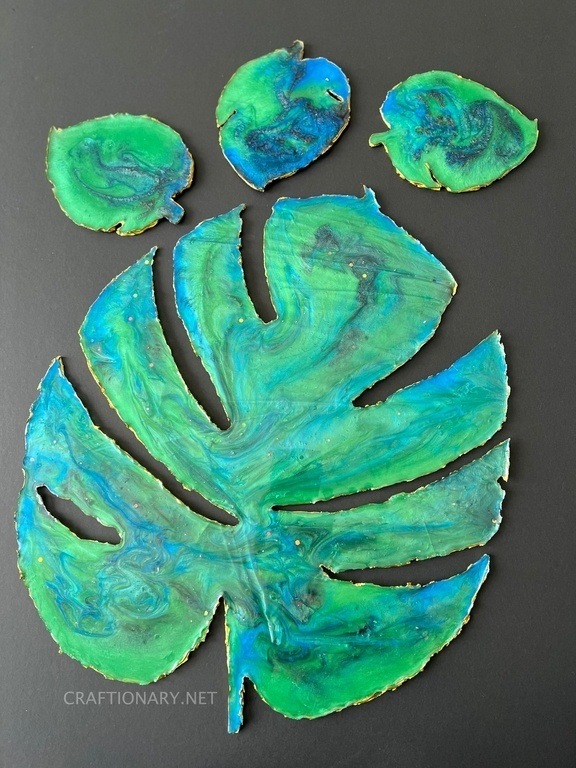
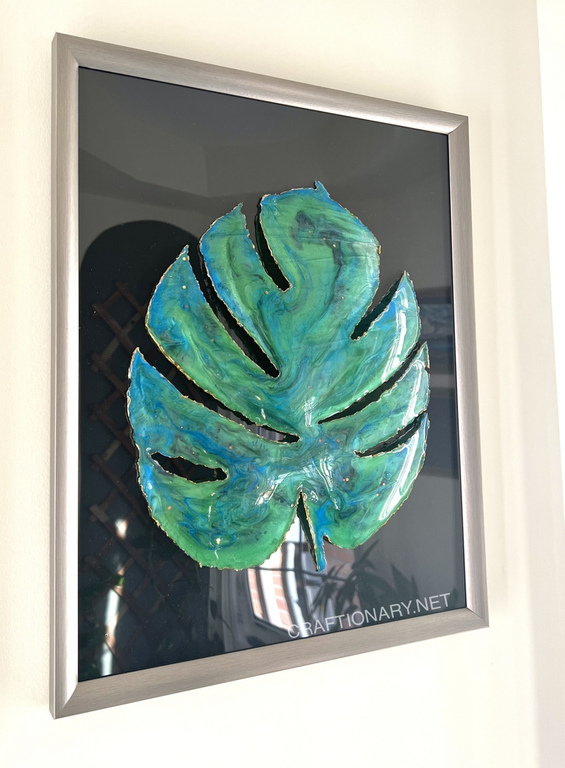
I made a DIY large Monstera leaf art with hot glue gun and cling wrap without mold. This custom resin tray idea can be used to make statement wall art pieces but I enjoy using it as a decorative tray on my living room table. It cures and naturally bends to form a curve which is ideal for decorative accent pieces and even resin art display in a frame. I am sure you are going to love this idea without resin tray mold!
If you are new to resin crafts I have written a beginners guide to resin crafts and my first project resin paperweights is filled with all details and tips you can ask for! Now let’s get started:
Material to make leaf resin tray
- Leaf
- Foam board
- Cling wrap (saran wrap or plastic wrap)
- Hot glue gun
- Glue sticks
- Epoxy resin and hardener
- Measuring cups
- Wooden mixing sticks
- Gloves
- Mica powder (blue, green and black)
- Chunky glitter
- Paint brush
- Metallic gold acrylic paint
Related: DIY Resin Crafting: Everything You Need To Know To Get Started

Resin Tray Step by step instructions with pictures
Trace your design
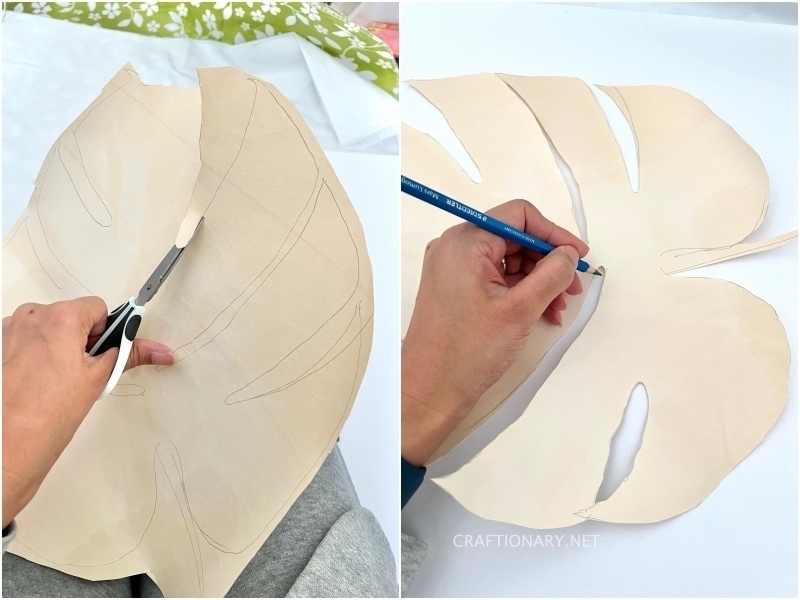
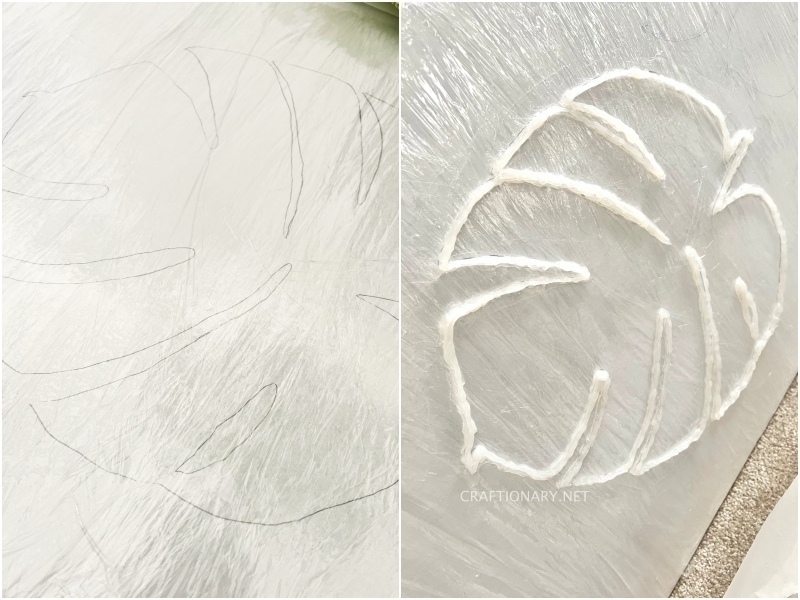
I love the shape of Monstera leaf. I am using a dropped-off Monstera Deliciosa leaf to freehand trace on a piece of paper from my friend. Keep the original for future projects and on another sheet copy and cutout the original leaf design. You can use any image or freehand draw a leaf as well.
I have also put a video tutorial together for this project for you.
Make a custom mold with hot glue gun
Next I wanted to experiment and try this new technique not knowing if it works. I traced my design on the foam board that you get at dollar store using the cutout. Then I wrapped the foam board with two layers of cling wrap making sure it is tightly wrapped. With the help of my hot glue gun I traced the design onto the cling wrapped foam board. You will need lots of glue sticks for this project.
Make a thick layer of two three rounds of tracing the leaf design enough to make a good thick leaf tray. Now close any possible openings on the outside of the design with hot glue pressing inside the walls of your pattern from the outer sides to seal any space between the cling wrap and glue walls.
I tried one with parchment paper (wax paper) which is more successful. Make resin coasters with wax paper and glue gun.
Prepare epoxy resin mixture
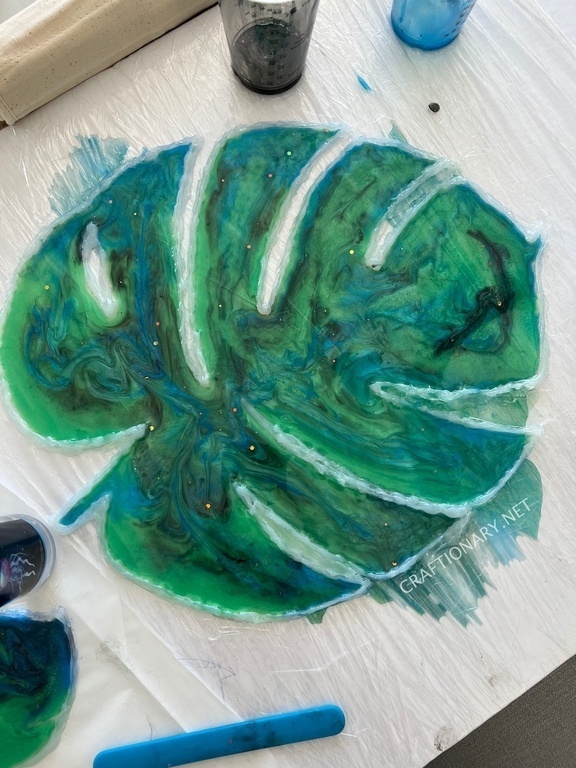
While you wait for it to settle, lets make epoxy resin solution. Based on the scale of your design you can choose the quantity of mixture, I started with 5 oz of resin for each color.
Wear your gloves and cover your surface. In three different measuring cups mix 2.5 oz of resin and 2.5 oz of hardener. Mix for a good 2-3 minutes using a mixing stick. Let it sit for a minute. Now add blue, green and black mica powder to each cup respectively. Mix still a smooth color is formed. I also added a very small quantity of chunky glitter to my solutions. You can add pressed flowers and other fillers if you like. In a 4 oz solution 1/2 tsp of mica powder is reasonable.
Pour epoxy resin into the mold
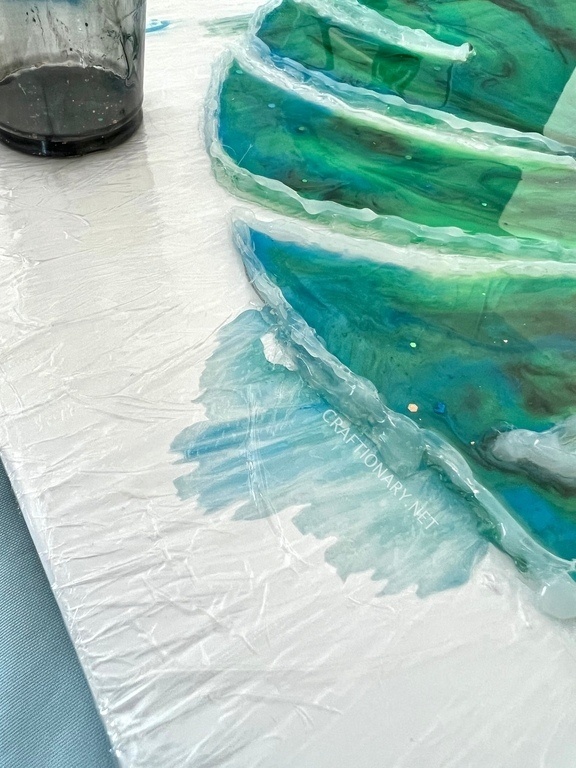
Slowly and carefully pour each color randomly. Use a stir stick to mix the colors at random places and let it cure for 24 hours.
If you notice the resin is leaking at the edges push the solution in and use glue stick to seal the space. Don’t worry too much if some resin escapes the mold, it will not ruin your project.
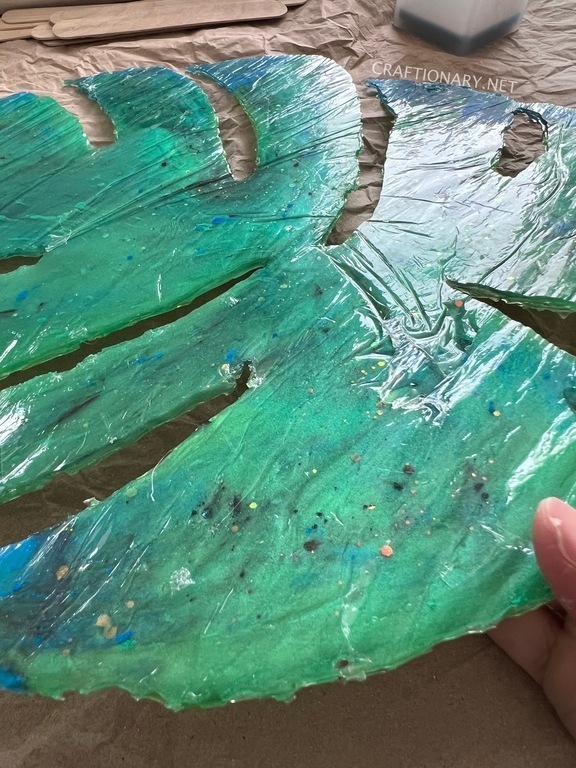
Remove from the mold
Next day, remove the leaf resin tray from the hot glue mold. Cut the cling wrap from the sides of the foam board. Now peel the cling from the base of the resin art. Carefully pull the glue wall away from the sides. Do not apply too much force if your design is delicate like this Monstera leaf tray.
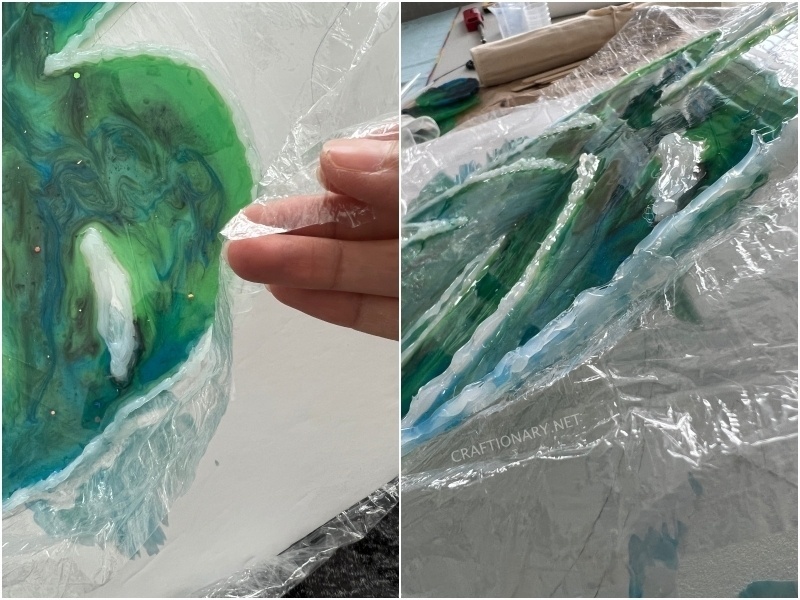
You will notice some of the cling wrap will stick to the bottom and will not come off. Use a torch or low flame to melt the plastic and get a smooth look. This is the only thing that I didn’t like about this resin method. However, it does give it some rough texture at the base (another idea!). I recommend using parchment paper instead as it peels off smoothly leaving no remnants.
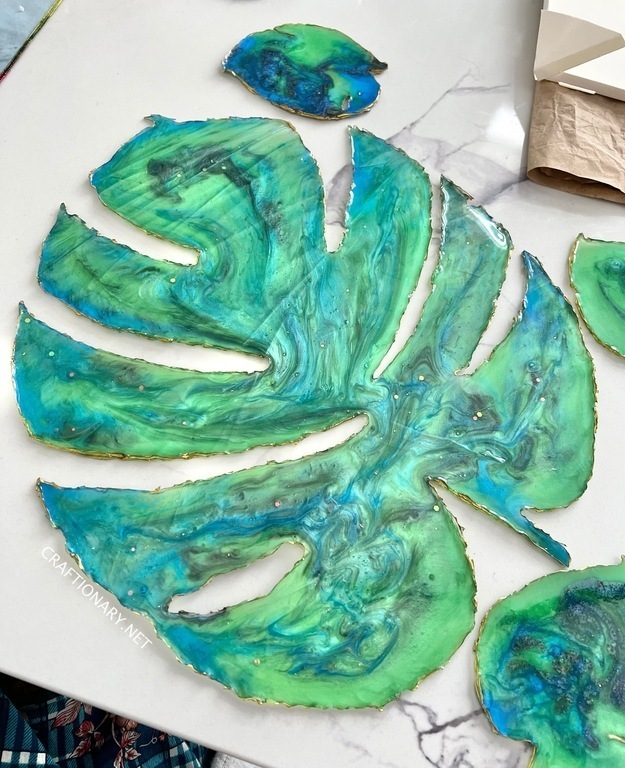
Gold Paint the edges
I love the irregular sides of this resin tray. It adds more value to the decorative accent. Use a paint brush and paint the edges of the leaf to make it stand out. I used metallic gold acrylic paint, however, you can use any paint you like.
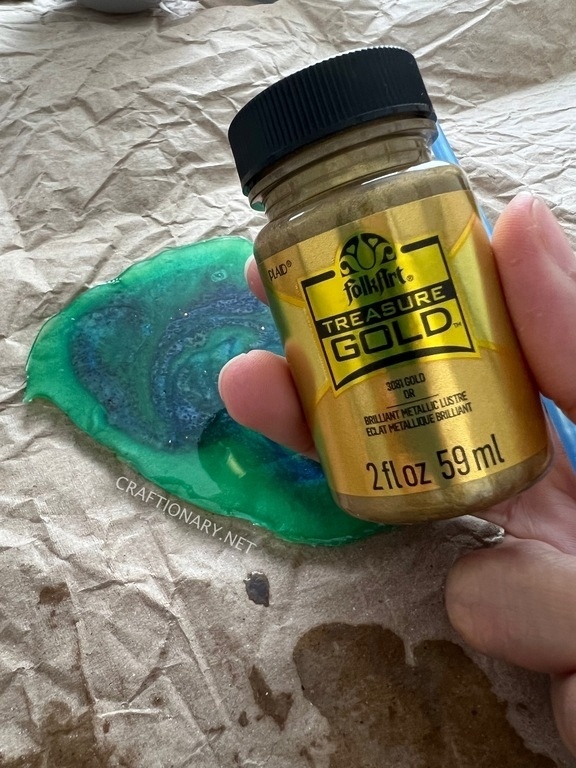
You can covers the sides completely or leave empty spaces in-between to get the same look as mine.
I hope you enjoyed this tutorial. You can use this idea to make resin bowls and DIY resin tray with handles. Till next time!
Also check out these cool ideas:
Bas-Relief Dried Flowers Casting Art