This post may contain affiliate links. Please see our full Disclosure Policy for details.
There are so many fun and creative ideas to make resin coasters with coaster molds and each being so unique and impressive. Old but popular ideas using agate, geode, ocean, glitter, flower, and wood as well as alcohol ink, marble effect, and uv resin coasters can be made with this technique. How about we make resin coasters with Hot Glue Gun without using silicone molds. This idea opens up a wide variety of options to play with shapes and patterns.
In this post I have shared direct instructions to make DIY resin coasters. However, you can benefit from Beginners guide to resin crafts.
How to make resin coasters without molds?
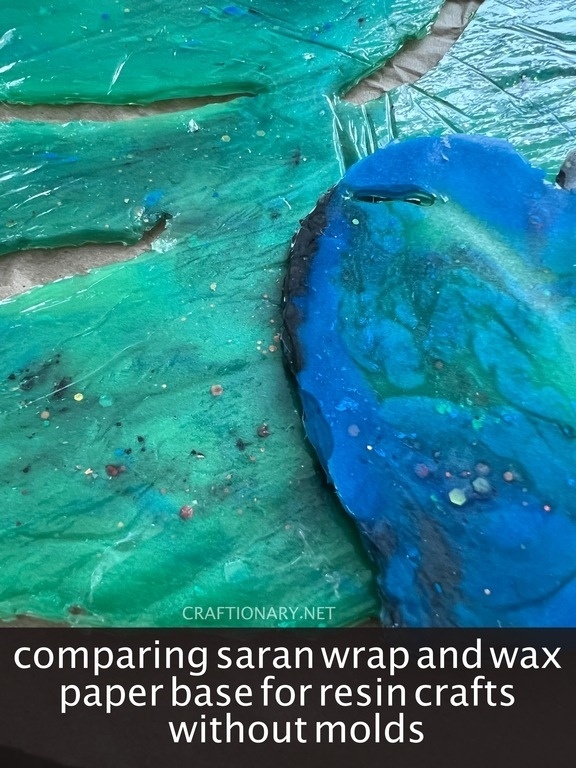
I initially made a large leaf resin tray with hot glue sticks and cling wrap. However, I am using wax paper as base for this project with glue gun.
This process will help you in making unique coasters without using kits that are heat resistant.
Material
- wax paper or thick parchment paper
- Epoxy resin
- Mica powder (blue, green and black)
- Chunky glitter
- Hot glue gun
- Glue sticks
- Measuring cups
- Wooden stir sticks or craft sticks
- Gloves
- Paint brush
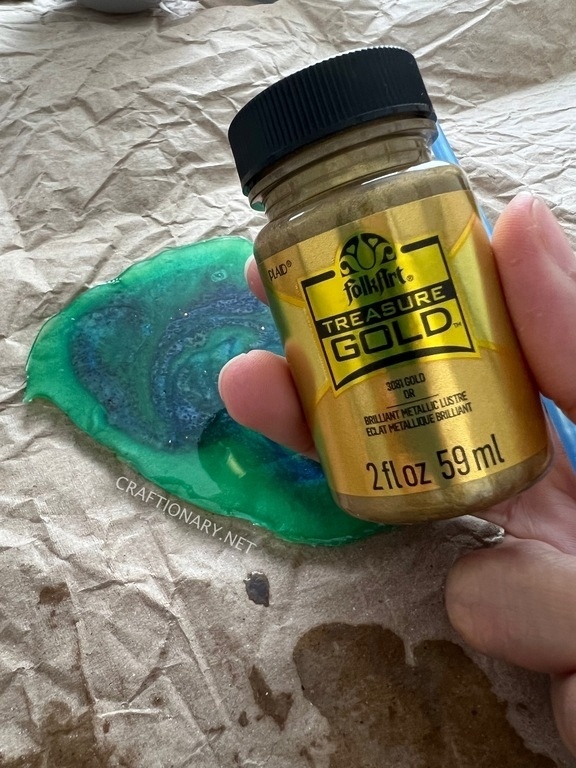
- Metallic gold acrylic paint
- Heat gun or torch (optional)
- Toothpicks
- Pressed flowers and fillers (optional)
Video Instructions
If you are fond of video instructions you can checkout this tutorial to make resin coasters using this technique.
Written Instructions with pictures
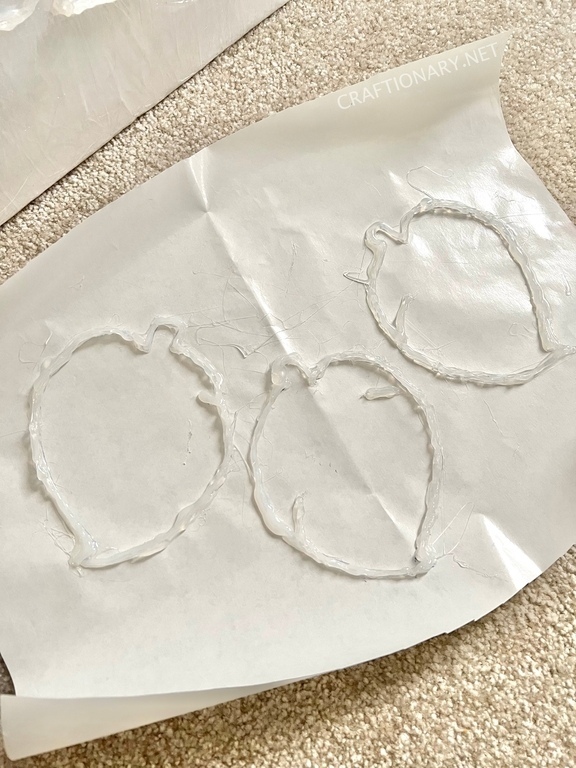
- Trace on wax paper: Cut a piece of wax paper and sketch your leaves with a pencil. You can also use a stencil or print your favorite design to trace on the wax paper.
- Make hot glue mold: Once the glue melts using the hot glue gun to outline your leaf coasters. You will have to go over the pattern three to four times until the desired thickness of the coaster is achieved.
- Mix the resin: Now follow the instructions on the resin manual to mix clear epoxy resin and hardener in 1:1 mixing ratio in a measuring silicone cup or plastic cup. Find detailed instructions with mistakes to avoid in this tutorial to make paperweights with epoxy resin molds.
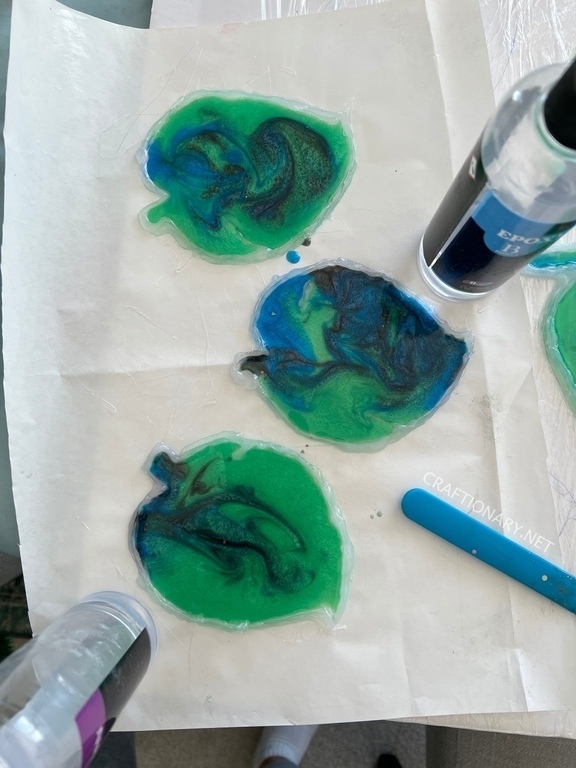
- Add color: Pour the solution in three different cups and add little mica powder to it. I started with 4 oz mixture for each color. You can add more for a darker color but be careful not to over pour the powder as it can hinder the curing process. In a 4 oz solution 1/2 tsp of mica powder is reasonable. I added champagne gold chunky glitter to black resin.
- Pour epoxy resin into mold: Let it sit for a while and then pour green resin at the center, followed by blue resin at the top sides near the leaf. Layer with black resin randomly dropped to fill the shape. Use a stir stick or toothpick to create some random mix. You may use heat gun to remove bubbles from the surface (optional).
- Base for making resin projects: Notice that unlike with the saran wrap the solution doesn’t run out of the mold with wax paper. Making this method more effective and hence recommended.
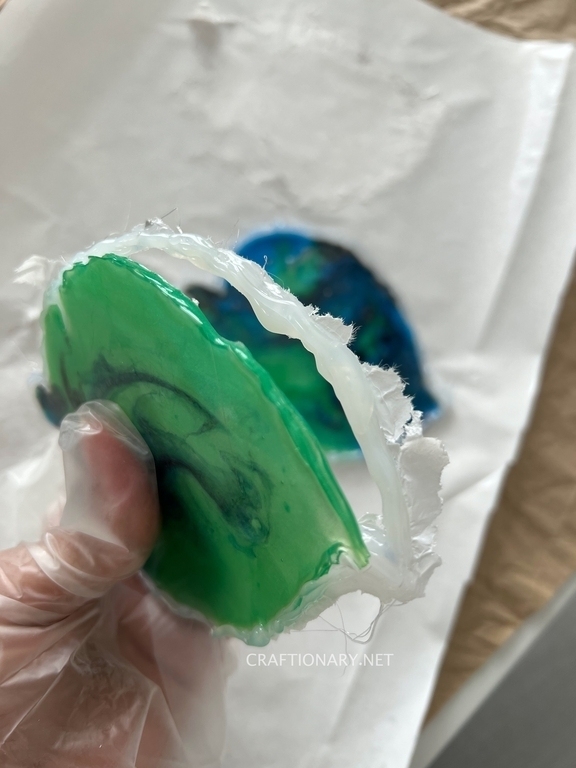
- Cure resin: Let it cure for 24 hours.
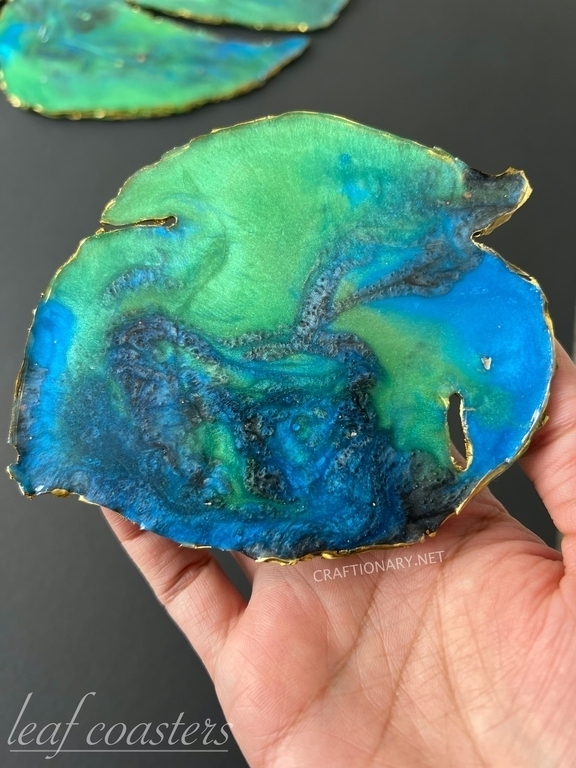
- Remove coasters from the mold: Next day gently remove the mold and enjoy your resin coasters.
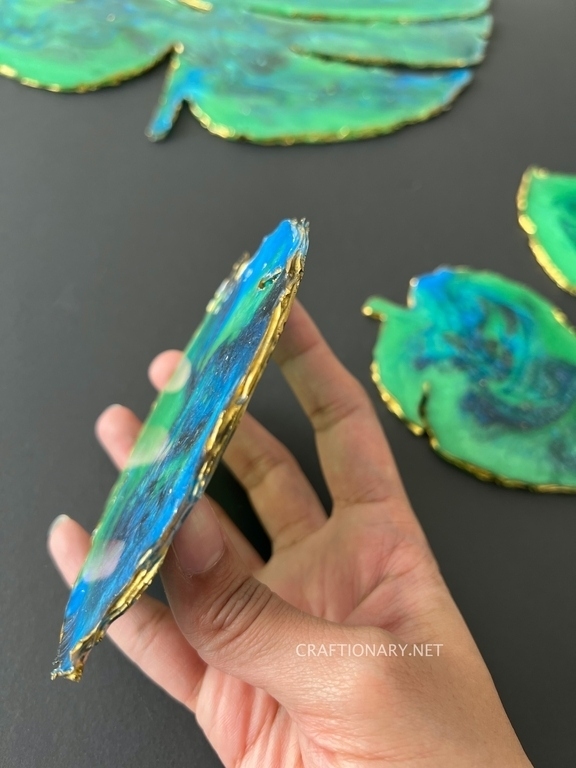
- Gold edges on resin coasters: You can also paint the sides with metallic gold acrylic paint and a brush to give the edging some finishing touch.
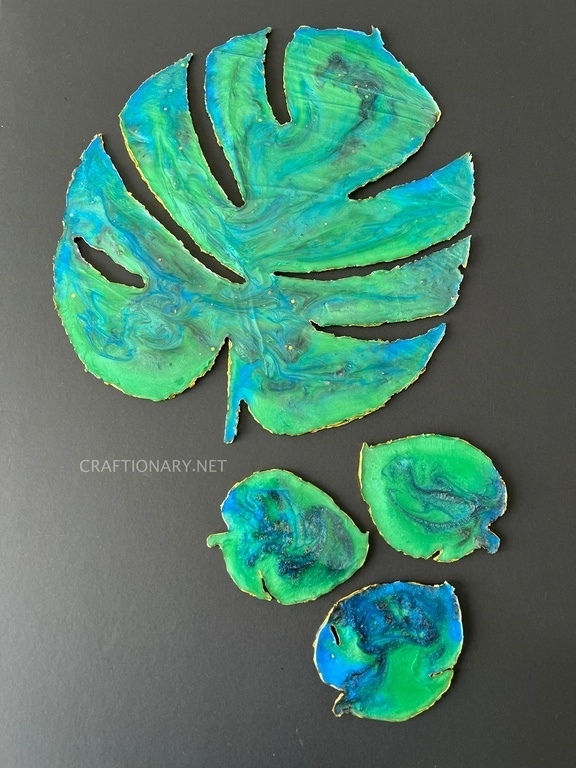
This set of resin coasters look stunning paired with Monstera leaf resin tray art.
Resin Coaster FAQs
How much resin do I need to make 2 coasters?
For this project, I used 4 oz resin in three colors to make three coasters. So approximately, 4 oz per coaster.
What kind of resin you use to make coasters?
I used Lets Resin epoxy resin for crafts to make durable coasters that are heat resistant. I have tested resin epoxy coasters with hot tea and coffee mugs and it has not been damaged by heat for more than 60 days.
How much does it cost to make resin coasters?
It depends on the size of your resin coaster and filler choices. However, based on the one I used you get 80 oz of epoxy resin for about $60 with all supplies included. Therefore, one resin coaster would cost $3 roughly.
How do you make acrylic resin coasters?
You can paint on a layer of 24 hour cured resin and let it dry before filling it with the second layer. The key is to make sure acrylic has dried completely so there is no water to mess up the resin curing process.
How do I calculate how much resin I need?
You calculate the volume of the mold in mm and then convert it into ounces or liters. For example:
Resin needed = Volume of the mold
= Area (Length x width) X Depth (height)
= 4x3x2 mm = 24 mm
(1 milliliter is equal to 0.03381402 ounces)
Covert into oz = 24 x 0.03381402 = 0.8 oz
I hope you enjoyed this tutorial. For more fun resin crafts and projects check these out:
