This post may contain affiliate links. Please see our full Disclosure Policy for details.
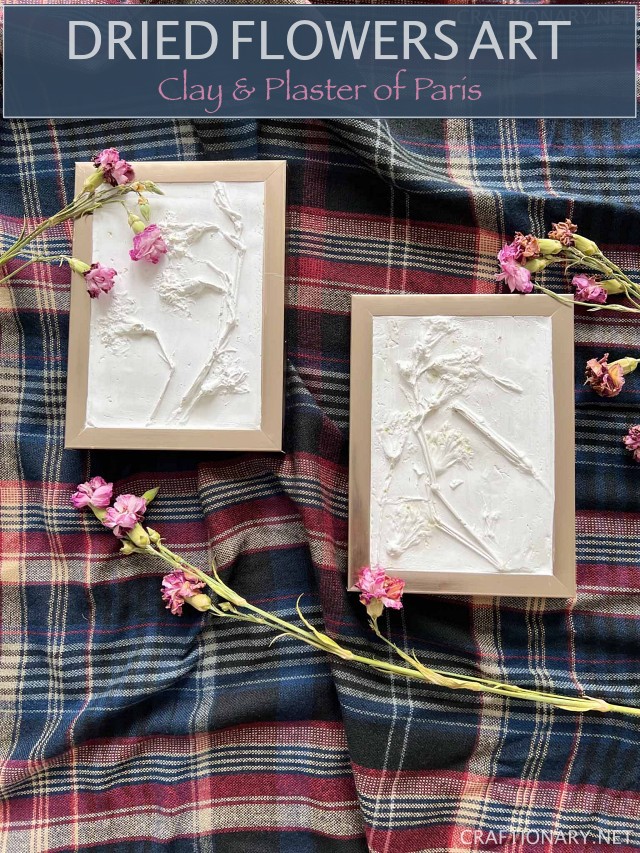
Today I want to share with you how to make Bas-Relief botanical casting art using clay and Plaster of Paris. Make pressed dried flowers art with botanical sculptural relief projected impression onto the modelling clay and casting of plaster. It is also popular by the name botanical plaster casting and can be imprinted using cement or any clay.
I am so excited to share today’s dried flower art. You can call it dried floral art or botanical art whichever you prefer better! It involves creating a mold with clay and printing it with plaster of Paris!
Video to make Bas Relief Casting Art
Here’s a complete video with step-by-step instructions and details to make Bas Relief casting art using modelling clay and plaster of paris.
You can use this trick/ idea to imprint tremendous amount of creativity! Use playdoh molds, handheld tools to freehand draw or even dry food items to make cool art for your home. You can even use artificial flowers or evergreens from your nearby park.
I wanted to make dried plant art for my front door plant space and I find using dried flowers the best for this casting art project.
I bought a few supplies and had a few things on hand to complete the botanical casting art.
Bas-relief botanical casting art
Supplies needed for Dried Flowers Casting Art
You will need the following materials to make dried flowers art:
- Natural Modelling clay or air dry clay
- Plaster of Paris
- Cutting board/ plastic pad or liner
- Rolling Pin
- Oil (I prefer olive oil)
- Blade or cutting tool
- Frames
- Dried flowers
- Tweezer or plucker
- Paint brush
- Acrylic paints in your color choice (I used white acrylic paint)
About the material to make Botanical casting art:
I bought this modelling clay from dollarama or dollar store.
The plaster of paris I bought has the following features:
- Sets hard in 20 to 30 minutes.
- Non-shrinking.
- Easy to sand and paint.
- Smooth bubble-free formula.
It’s available at the home depot for a great price. Don’t pay extraordinary for this product on Amazon.
Find cheap liners at dollar store to use for rolling clay. You can also use glue gun pad. This way you can either wash and reuse it or throw it away without any sweat.
You can buy any type or any size frame to your preference. I bought these small sized ones from dollar store as well. Just make sure it has a front face that lies flat on the surface.
I air dried my flowers on the counter table. You can place them on a piece of paper or cloth but really they don’t give out any color or stain the surface.
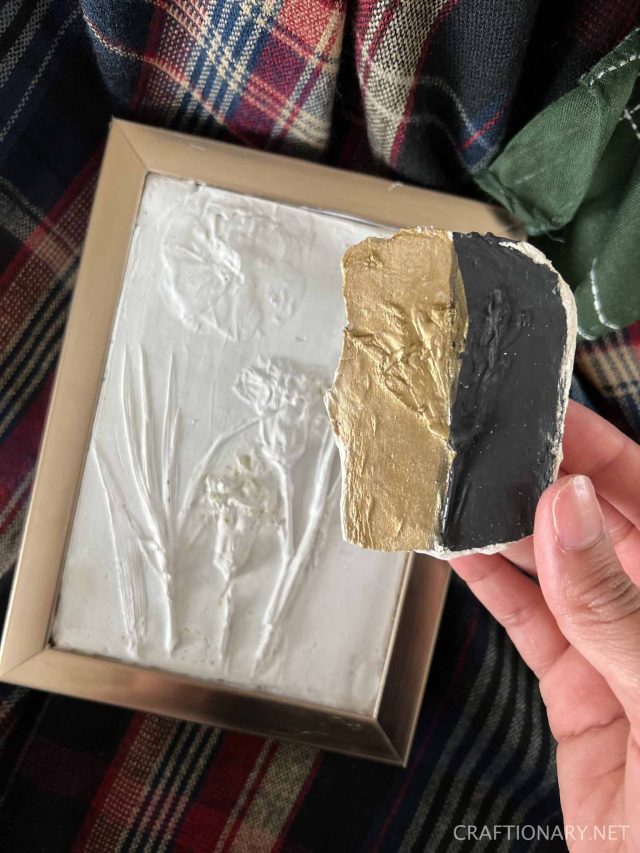
I used white acrylic paint for a classic look. You can paint them in any color or even use color on the plants to make them stand out against a background.
These also look fabulous in gold acrylic paint and black acrylic paint. See this below:
Step by step instructions on how to make dried flowers casting art
Here are the directions to make bas-relief sculpture dried flowers casting art or botanical art:
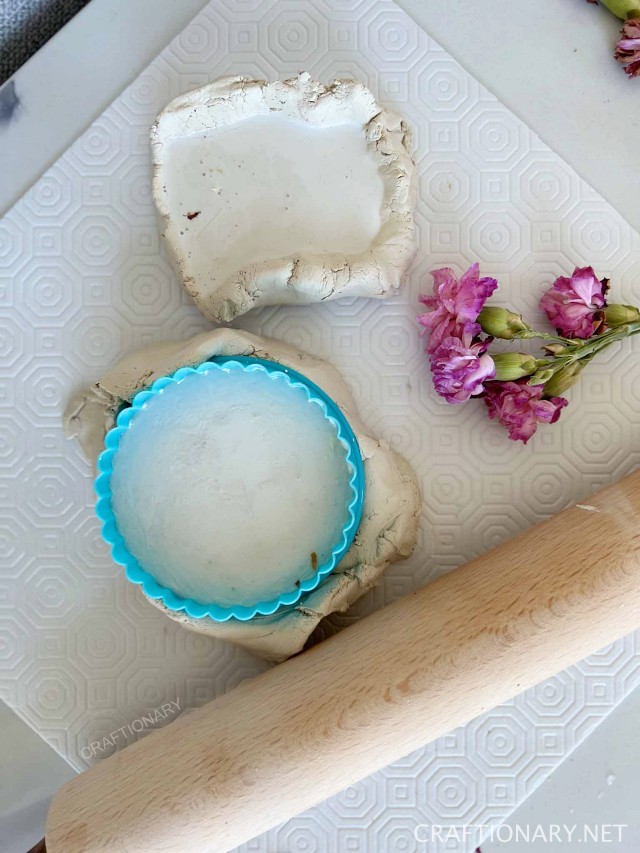
1. Start by placing the liner or kneading pad on your surface.
2. Now take out the modelling clay from your packet and start kneading it flat with a rolling pin.
Please note: DO NOT use your rolling pin that you use for edible items or in the kitchen. Keep a separate rolling pin for your craft projects. It can contain particles which may make you sick if absorbed into the wood of the rolling pin.
3. Place the frame of your choice upside down on the clay to ensure it covers the open surface. If required remove the frame and knead more to make the clay larger than the frame.
4. Also make sure that the clay is thick enough to have space for imprinting and rolling after placing dried flowers.
5. Use a blade or knife to mark the borders of the frame to know your working space with flower print design.
6. Now place your dried flowers on the clay and arrange them till you are pleased with your design.
How to quickly dry flowers
I’ve heard people dry flowers in the microwave for quick use. Just layer them in kitchen towel sheets or fabric. Use some weight on top like brick or heavy plates to press them. For this project heat them without pressing them flat. This step removes any moisture from the flowers and makes them ready for use.
Related: Nine Proven Methods to Dry Flowers
Create your design
7. With the help of rolling pin press the dried flowers into the clay. The best way to do this is by putting the pin on top of your flower and pushing it down rather than rolling to create impression so that it stays in place. Do this for all the various areas of the floral design. Once pressed in then roll the pin over for an even layer.
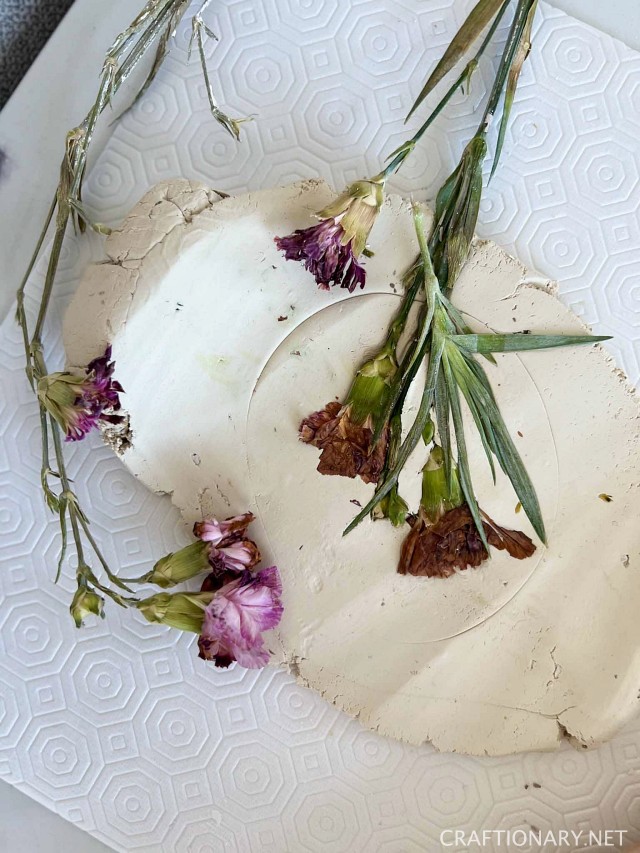
8. This way you get a neat print and there is less chance of your print moving from place and giving you a misplaced look!
9. Now remove the stems, buds and flower petals from the clay using your barehands. You can use a tweezer or plucker to remove remaining dried flowers from hard to reach parts.
10. Use a brush to brush off small remnants.
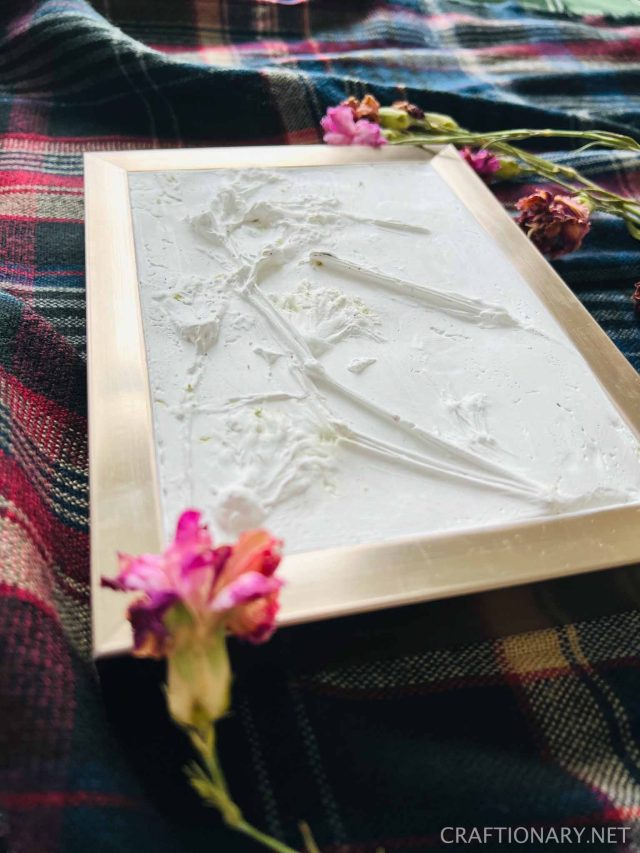
11. Now cover the surface with olive oil using a brush. By coating the surface with oil you ensure the clay comes of the dried plaster of Paris with ease.
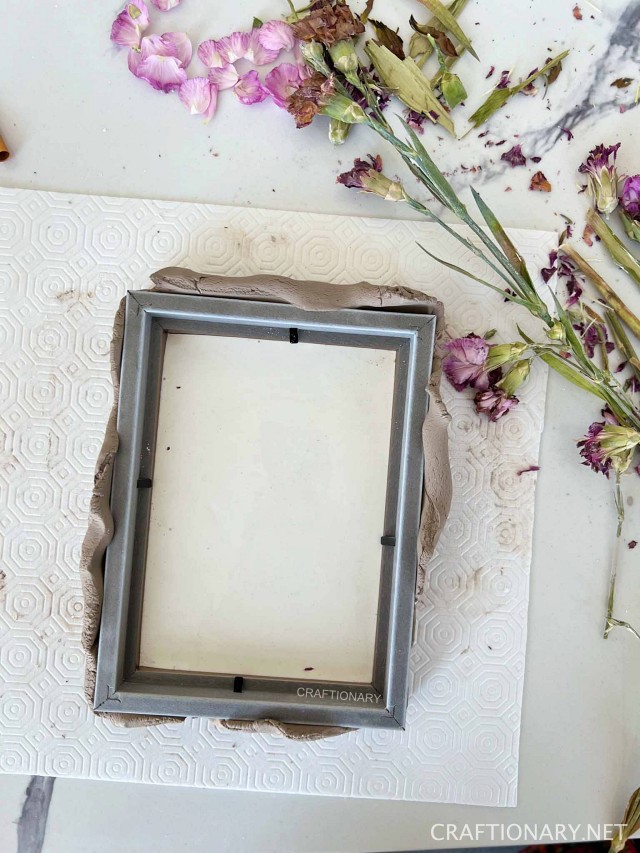
12. Place the frame upside down on the dried flowers motif. Push it hard to ensure there is no space between the frame front face and clay dough.
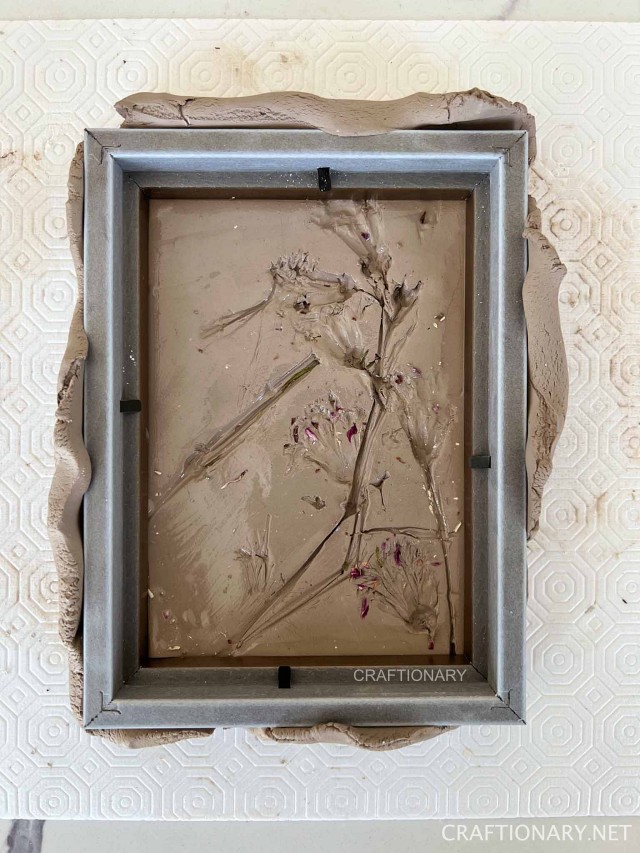
Tip to avoid Plaster of Paris to leak or overflow
It is important to push the frame into the imprint. This step ensures the water and plaster of Paris mixture doesn’t overflow or leak when you pour it. I also like to flap the sides of the clay onto the frame sides for extra precaution.
Pour the plaster
13. Now we make the mixture. This step required some quick work because the plaster of Paris sets very quick.

How much water and Plaster of Paris to make mixture?
Make a mixture of water and plaster of Paris. There is no right or wrong amount in this process. The great part about this material is that it does set no matter how you make it. For the purpose of our project we need to make a cake batter type consistency.
- I used 10-12 tablespoons of plaster of Paris in 1/2 cup water for each frame.
- After making 4 frames and 4 ornaments and a failed attempt, still have half of the box remaining. Now let it set and you enjoy your coffee.
Let it set
14. It sets quick! In about 30 minutes it had hardened. I removed the clay and placed the frame backing in place. Then allowed it to set overnight! This step allowed me to reuse clay to make more molds and casting art.
Bas relief botanical art
How to check the Plaster of Paris is set?
By set enough I mean not completely dry but dry enough to remove the clay so that the mixture won’t leak. I checked it by tapping the mixture to see it doesn’t stick and is completely dry. Be careful when you remove it and with soft hands place the frame, motif up and flat surface down on a paper towel.
If you don’t intend to reuse the clay it is ok to let it dry overnight in the clay only. I intended to not let the clay air dry and become useless for more attempts.
Tip for keeping clay from drying fast
- You can reuse the same clay and even the mold as many times as you want. The trick is to remove the plaster of paris mold from the clay once it sets and let it air dry over night on a piece of tissue paper.
- This way your clay is not exposed to air for longer and can be reused for making more casts. Or you can use the same mold for more imprints.
- Just make sure that if you are not reusing the clay the same day to place it in an airtight plastic bag and then into a airtight container. This gives it double the prevention from drying out.
- I also like to take out any excess of air from the airtight sealed plastic bags to ensure it is in as little air contact as possible.
Dry and finalize:
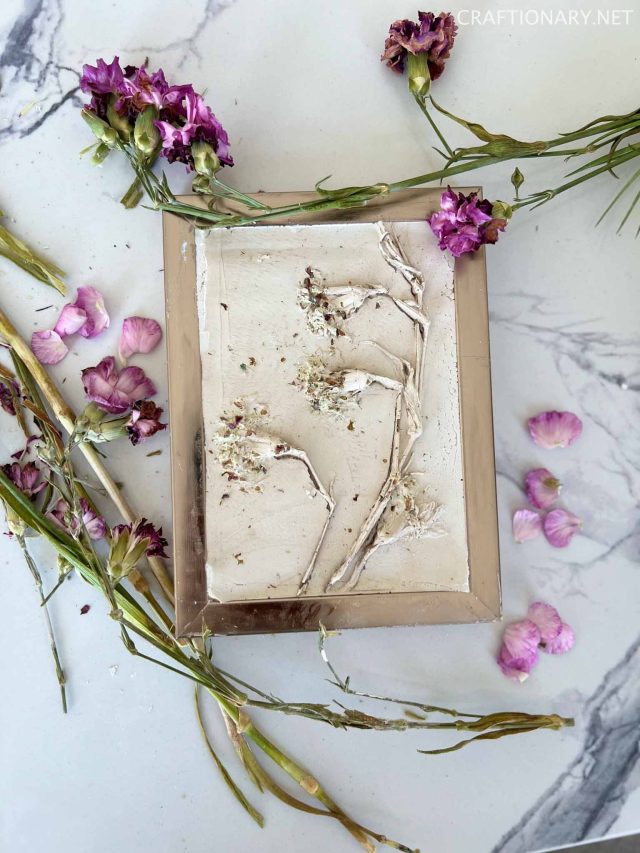
16. Next day after letting the mold dry overnight, remove the dried flowers remnants using a brush and hang it in natural form or paint it.
Bas-relief botanical art
Painting:
17. I preferred the paint look so I just brushed it up with some white acrylic paint.
Learn more about painting and sealing bas relief art

Bas-relief art
You can use black, gold or even color the plant to make it stand out against a background.
18. Also touched some gold paint with finger on random places and buds for a distressed look.
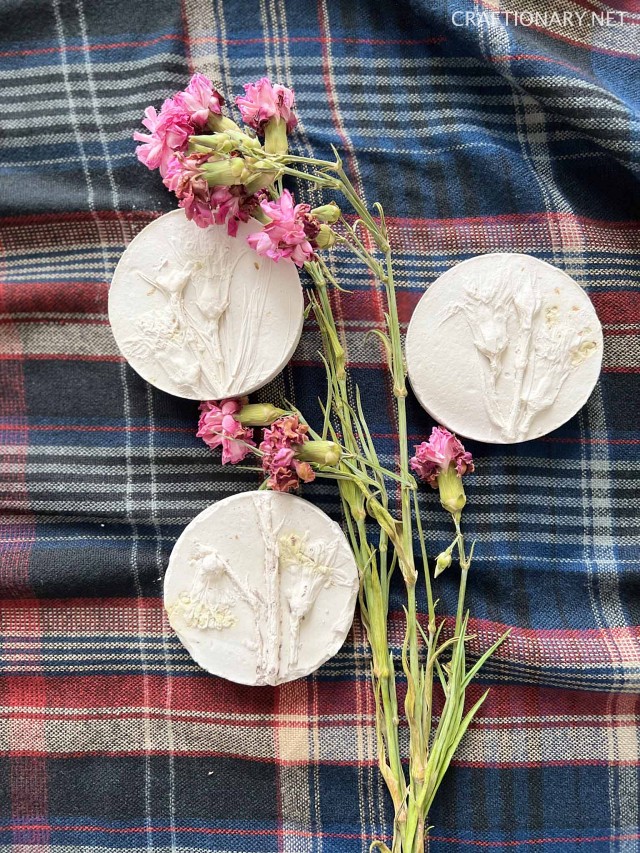
Pressed and Dried Flowers Ornaments
Make casting art ornaments and tiles for the wall using cookie cutters.
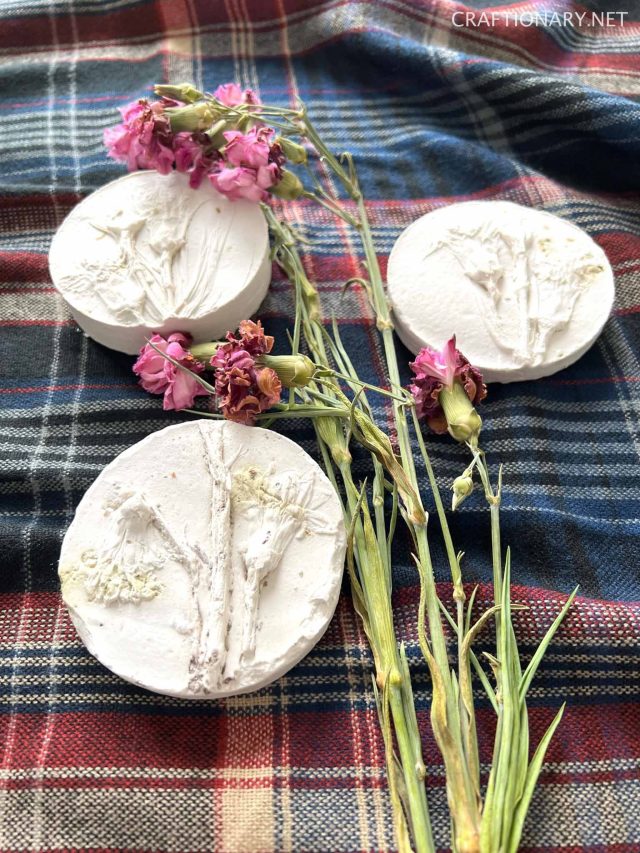
Botanical casting art
Dried Flowers Art without frame
You can make an uneven natural art using clay as the mold itself.
How to hang Plaster of Paris Art?
I used a string and clay to make the hanging attachment on the backside. Use water to make the clay wet and easy to affix to the surface and flatten it with fingers.
update: It didn’t work as a hanging instead I used Gorilla glue to stick the string.
I hope you enjoyed this project as much as I did making and sharing with you. Let me know down in the comments what you think and if you have any questions!
SHARING IS CARING:
I would also love love love and appreciate you sharing this project to help me be found!
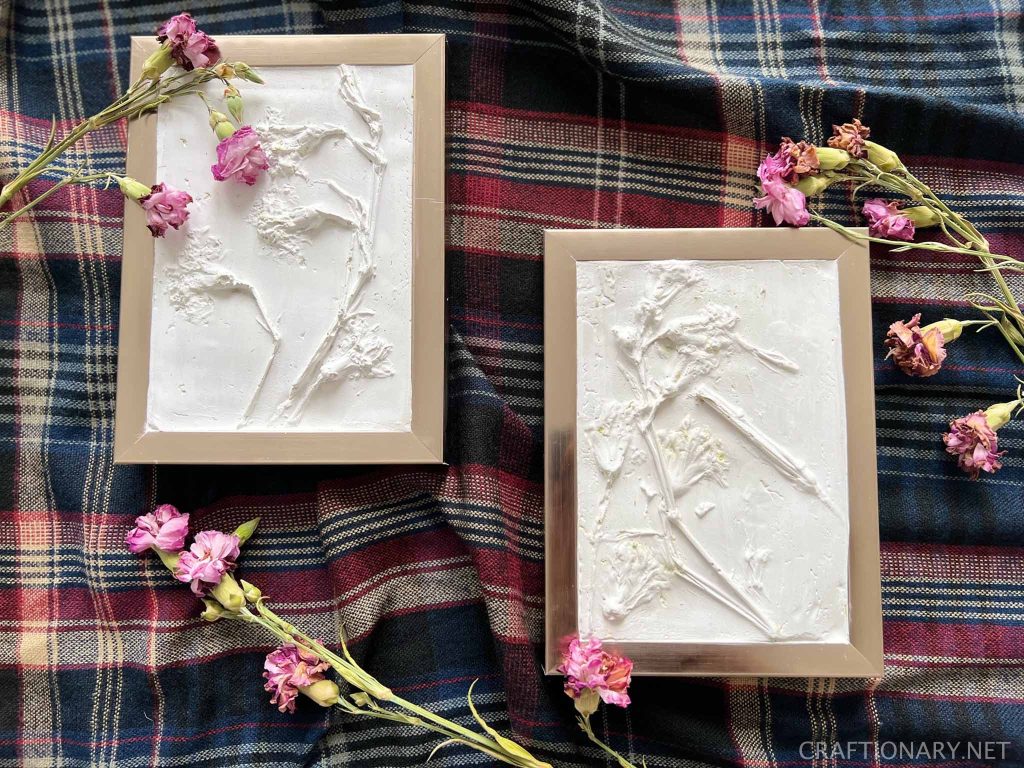
Bas-relief botanical frame art
Similarly, you can create designs with fruits, vegetables, and even toys. Here’s one made with radishes:

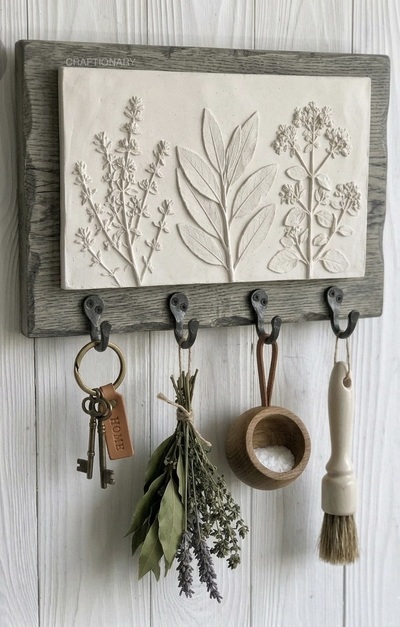
A slate made with herb impressions is then attached to a wooden board with UV resin or E6000 to make a hanging holder.
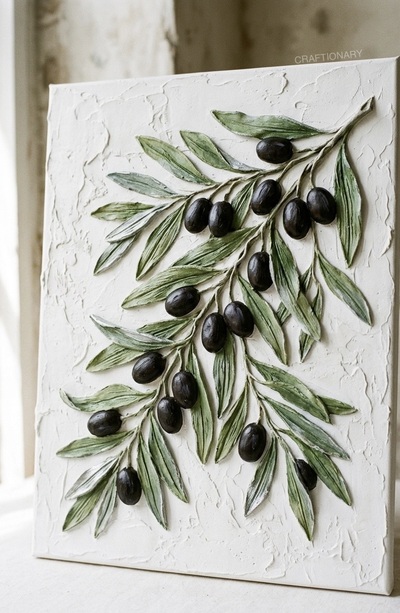
Use a faux olive branch or real leaves and olives to create an impression in clay to make a bas relief art. Use modeling paste and spatula to create textured background once the slate dries. Paint and seal the details for long lasting results.
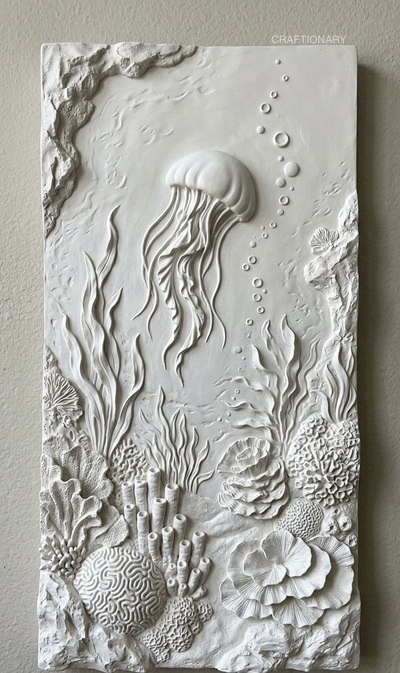
Here’s another popular art form with a textured art technique. This coral reef art is made with modeling paste. Some people also use spackle and plaster mixture to create more sturdy results and control paste flow. To create some affects a combination of air dry clay sculpture and paste are also use, for example, to create brain coral, pipe corals, the cliff edging on the top left, and jellyfish body.
You may also like:
30 ways to make Abstract Art projects