This post may contain affiliate links. Please see our full Disclosure Policy for details.
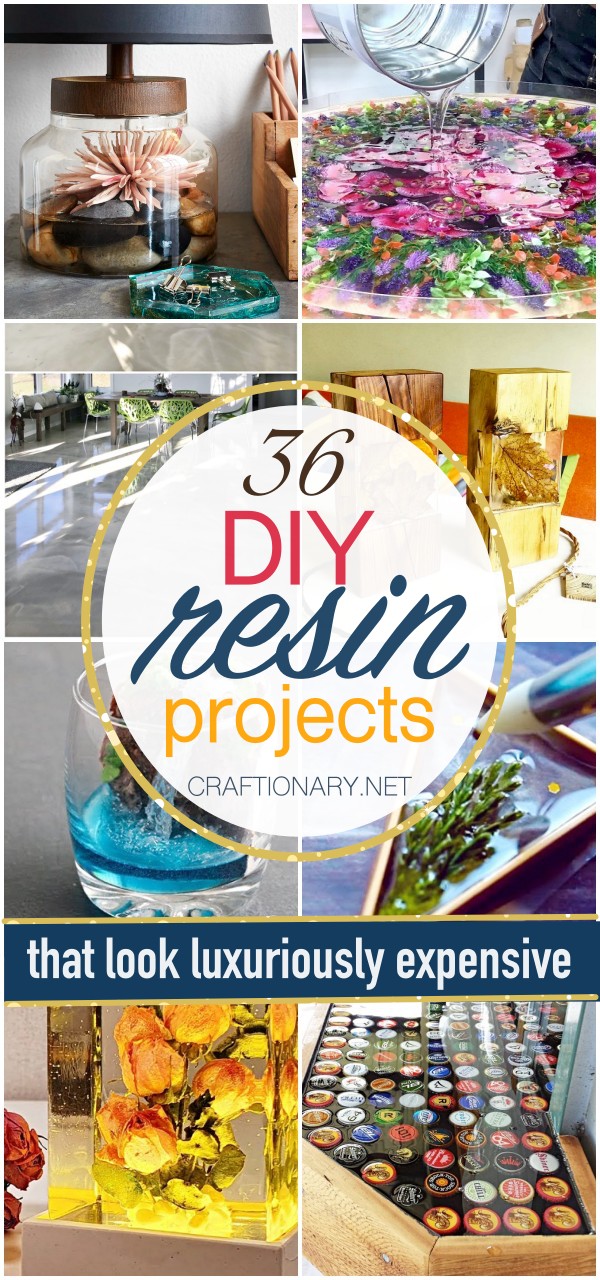
36 Stunning epoxy resin projects that are sure to amaze. Resins more specifically epoxy resin is used in making stunning projects for resin crafts and jewelry. Epoxy countertops and epoxy art have gained a lot of popularity over years. It gives beautiful and clear results. Resin crafts and resin projects using wood and metal, as well as plastic and silicone molds are easy and simple resin projects for beginners to try. Jewelry making and wood working ranges from simple designs to super extraordinary as the challenge grows. However, the concept of epoxy resin is very simple. Once your project is complete simply pour the resin and hardener mixture and viola!
Before looking at some stunning projects for your hobby, business, or online selling lets read a bit about epoxy resins.
What is resin?
Resin is mainly used as a glue. It helps transfer stress between the fibers, protects the surface from external factors and clasps things together. The first resins were found in nature in the plants, insects and trees. Amber or shellac are common natural resins.
How strong is resin?
Resin has a strength of 55.7 MPa and an elasticity of 2.7GPa. It can withstand stress and strain and is a perfect choice for building strong and functional projects.
What is epoxy resin and how to use it in crafts and DIY projects?
There are three different forms of resin. They are different based on cost and properties. Our focus is on epoxy resin as it is used commonly for crafts and DIY projects. Epoxy resin is a liquid form adhesive that dries clear with a shiny look. It is used in manufacture of plastics and paints. Resin works as a primer and coating on flooring and countertops as well. And it is popular in diy projects and art as a sealer.
What is the difference between resin and epoxy resin?
Epoxy and resin are different only due to drying time. Epoxy hardens faster than resin and both require mixing before use. Resin can take about 8-10 hours while epoxy resin dries in only 6-30 minutes making it more popular in home based crafts and DIY projects.
Is resin dangerous?
The answer to this question is no. Epoxy resin is generally non toxic. However, precaution should be taken to keep it away from mouth, and hands should be thoroughly washed after completing the project. Work in a ventilated area as it releases unnoticeable amounts of fumes when curing. If you are sensitive you should consider wearing a respirator, mask, and eyewear. Wear gloves and long sleeves to avoid skin irritation.
Epoxy resin maintenance
Epoxy resin is generally strong and requires basic maintenance only. It doesn’t break or stain easily. However, it can start to yellow overtime if exposed to sunlight. The UV light from the sun tends to degrade the epoxy polymers causing discoloration. Even the most scratch resistant, crystal clear and colorless epoxy resin require precaution from sunlight to keep it beautiful and white.
Moreover, epoxy resin is not heat resistant. Epoxy resin coated countertops like granite countertops require care and precaution. Hot pans should not be directly placed over it. Heat resistance works for coasters.
How to polish epoxy resin projects?
1. To return your project to its clear shine use any polishing compound of your choice. The process is fairly simple, clean the surface with a slightly moist cotton or linen cloth. Now dab some polish on the cloth and rub the resin surface. Use a slow and circular motion with little pressure till the desired shine is achieved.
2. Use a fine grit paper to sand your resin craft and clean of the dust with a cloth. Use clear nail polish or clear coat of resin to polish. The dome coat or flood coat brings the shine in finished product.
How to clean resin if it comes in contact with your skin?
In case epoxy resin comes in contact with your skin simply remove it using either of the following:
- Vinegar
- Acetone
- Waterless citrus-based hand cleaner
Where can I find epoxy resin?
Epoxy resin is easily available for resin projects at Walmart, Amazon, michaels, hobby lobby, home depot or any home hardware store.
The most commonly used is the ArtResins gallons. It comes in two components. The hardener and the resin which should be mixed per mixing ratio as per instructions before pouring on your project. Another one used by crafters is envirotex lite.
How much resin do I need for my project?
A rough estimate can be made based on the area and volume of the project’s surface. This calculation is based on the depth of your project. If the surface is flat length times width (L x W) can give you an estimated area. For depth simply multiply height of the project to get the estimated volume (L x W x H).
How can I make epoxy resin projects diy and crafts?
A variety of amazing art and DIY projects can be made using resin epoxy by LetsResin. This product is especially for crafters and artists to make projects at the convenience of their homes. Various pigments and dyes can be mixed with it to make paint projects.
When the hardener and resin (the two components) are mixed together a chemical reaction takes place. Use a torch to remove the air bubbles from the surface. Most resins have 30-50 mins of working time. As a result, the epoxy resin starts to solidify and gradually hardens or cures. Most resin solutions cure in 18-24 hours. However, UV Resin dries faster within 20-25 mins. The final product is glossy clear surface. I also wrote a beginners guide to resin crafts for you.
Related: DIY Resin Crafting: Everything You Need To Know To Get Started
What supplies are needed for resin projects?
A typical resin project requires the following supplies:
- Epoxy Resin
- Gloves
- Spreader or plastic spoons
- Plastic mixing cups
- Stir stick or popsicle stick for stirring
- Covered working space
- Heat gun
- Torch
What materials can I add to epoxy resins?
A variety of materials can be mixed into epoxy resin for your projects. In short, anything! Some things that are popular to add to epoxy resin crafts and diy projects are:
- Fresh flowers
- Pigments and dyes
- Mica powder
- Glitter
- Gold leaf
- Pressed or artificial flowers
- Food colors
- Spices
- eyeshadow powders
- Beads etc.
What surfaces can I pour resins on?
You can pour epoxy resin on almost every surface. Some popular ones include:
- Metal
- Wood
- Stone
- Concrete
- Canvas
- Silicone molds
- Cookie cutters
- Silly putty
- Paper
- Textured tiles
- Frames
What epoxy resins projects diy and crafts can I make?
Epoxy resin can be used in a variety of projects and crafts. Such as:
- Woodworking
- Jewelry making
- Coasters
- Ashtrays
- Countertops
- Ornaments
- Decorative accents
- Paint Pouring art
- Geodes
- Flooring
What material epoxy resin doesn’t stick to?
- silicone
- parchment paper
- wax paper
- painters tape
- hot glue
- rubber
- plastics
- acrylic sheets
- cling wrap
- wet acrylic paints
- oil
- dirt
- water
How long does epoxy resin last uncombined?
If not mixed together epoxy shelf life can last for many years. Store resin and hardener at room temperature in closed bottles to prevent contamination. You can also test old resin by mixing a small batch together and see if it cures. According to west system epoxy 3 years for resin and 2 years for hardener.
DIY EPOXY RESIN PROJECTS FOR BEGINNERS:
Based on your interest the various epoxy resin crafts and projects have been categorized below for convenience. These projects based on the size will allow you to decide whether you are comfortable to initiate the project as a beginner.
EPOXY RESIN COASTERS
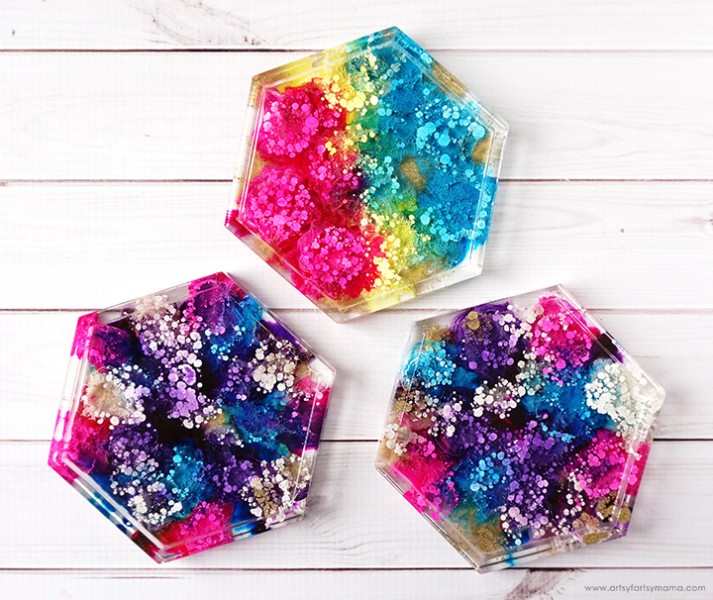
1. Petri dish coasters by artsy fartsy mama.
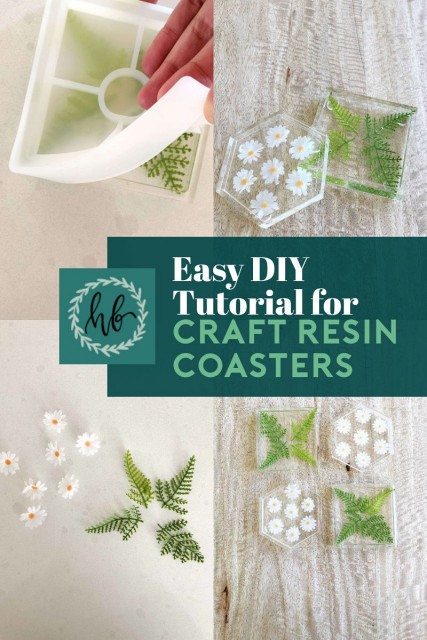
2. Diy make craft resin coasters step by step tutorial by that home bird life.
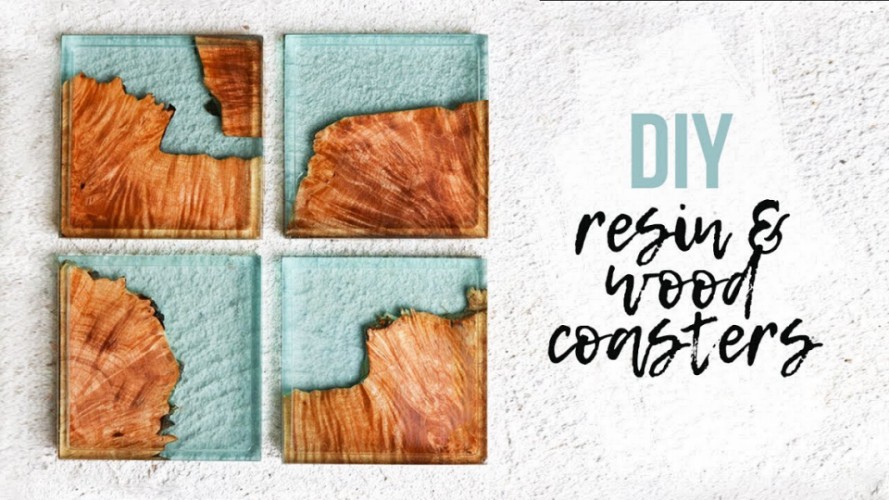
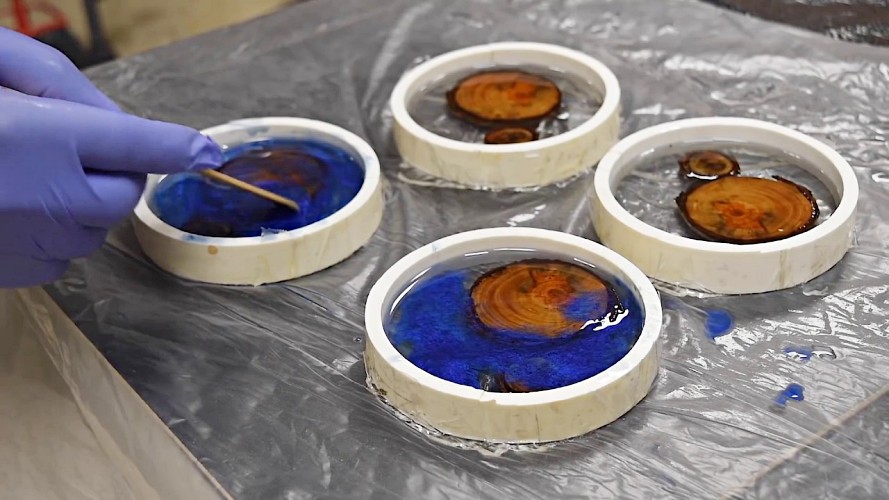
3. DIY epoxy resin wood coasters via diy huntress.
4. Real flower coasters botanical resin via etsy.

5. Resin art tutorial make freeform geode coasters by Edna Wargon Art.
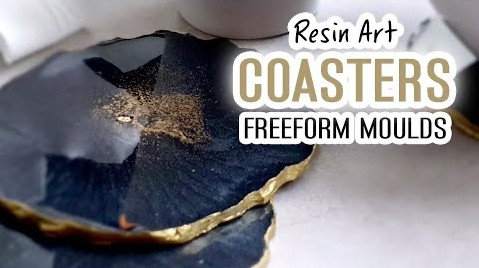
6. How to make geode agate resin coasters by sunshine and rosebugs.

EPOXY RESIN ARTWORK
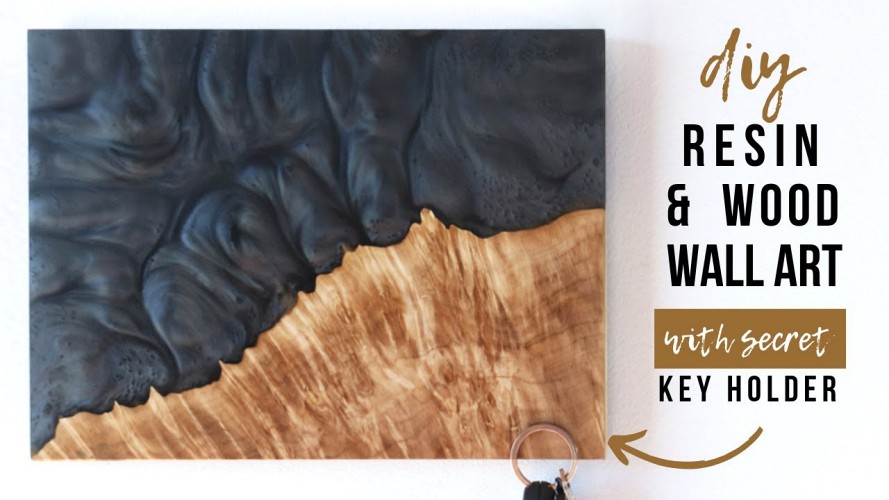
7. DIY resin and wood wall art with hidden key storage via diy huntress.
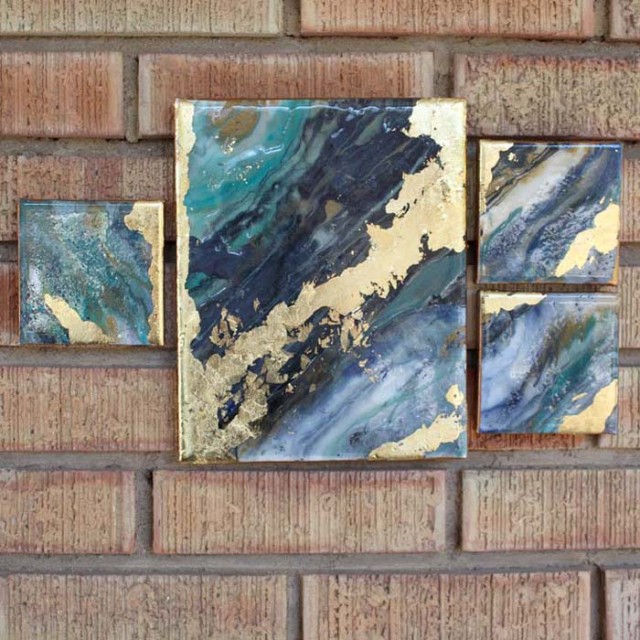
8. Poured resin gold leaf canvas gallery art by resin crafts blog.
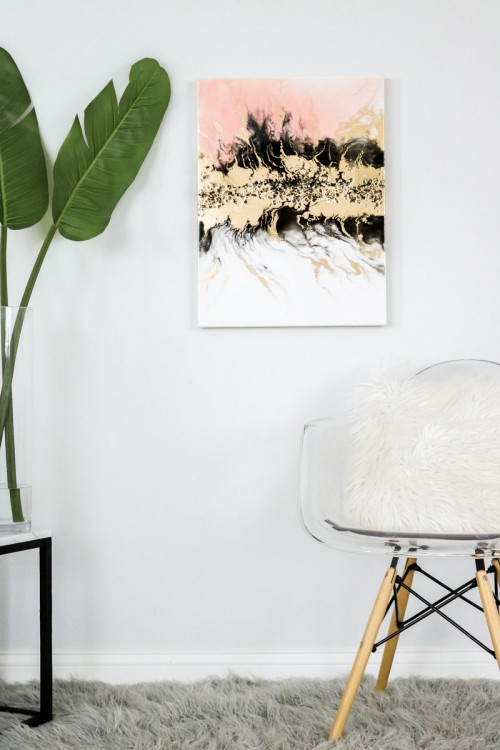
9. DIY resin art by lily ardor.
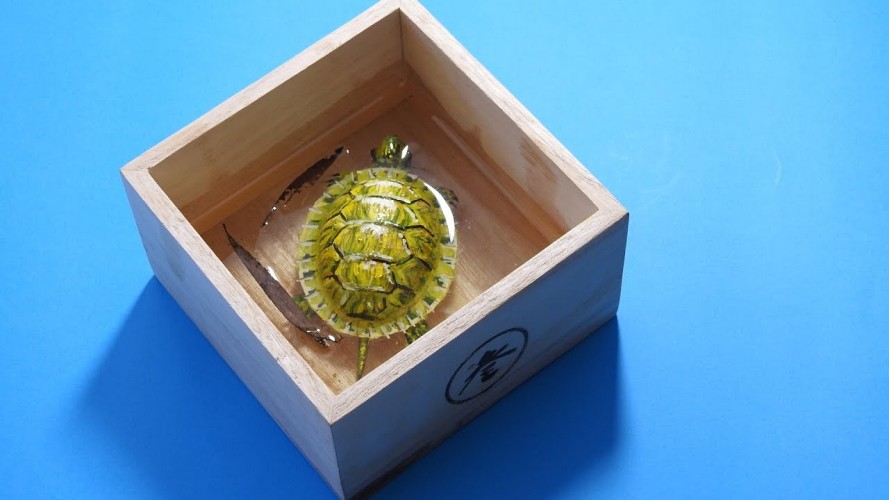
10. Painting 3D turtle in resins layers by gerardo chierchia.
11. Galaxy inspired epoxy resin paint pour art by brittany goldwyn.
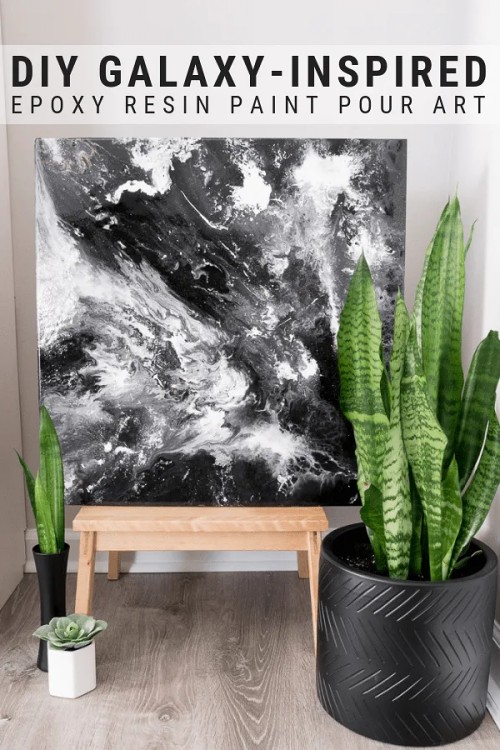
EPOXY RESIN WOOD PROJECTS
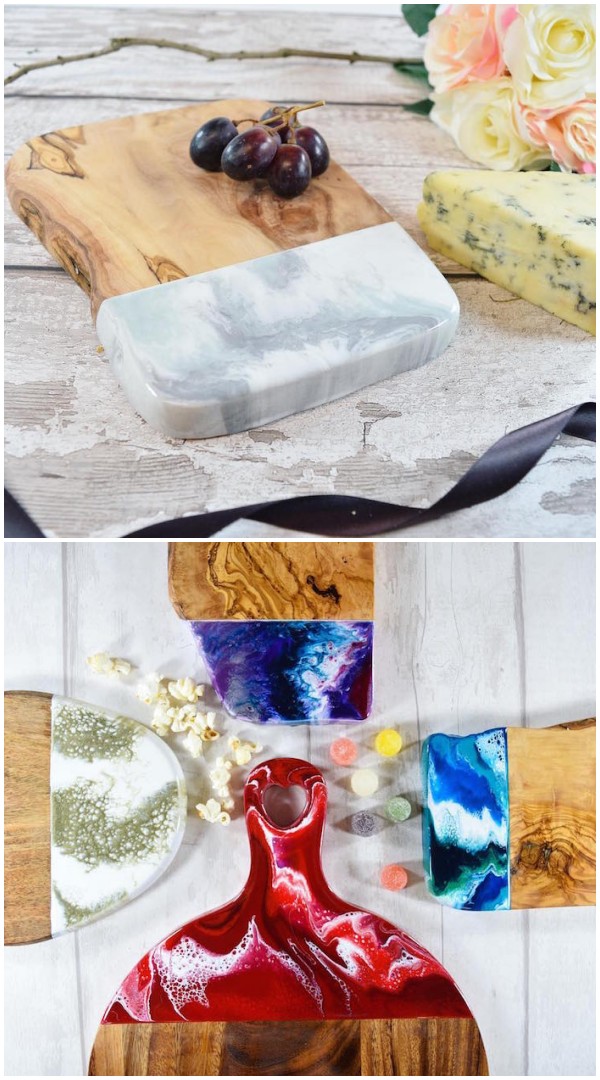
12. resin art wooden chopping boards by my modern met.
13. DIY lap desk epoxy resin via anikas diy life.

14. Epoxy resin wood coasters by DIY creators.
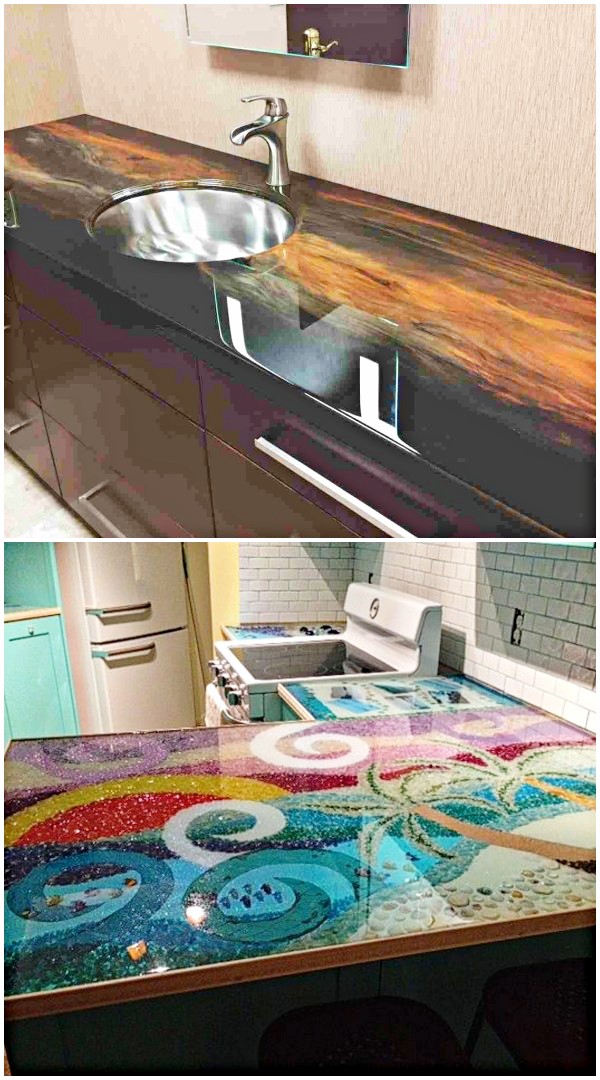
EPOXY RESIN COUNTERTOPS
15. How to pour an epoxy countertop by family handyman.
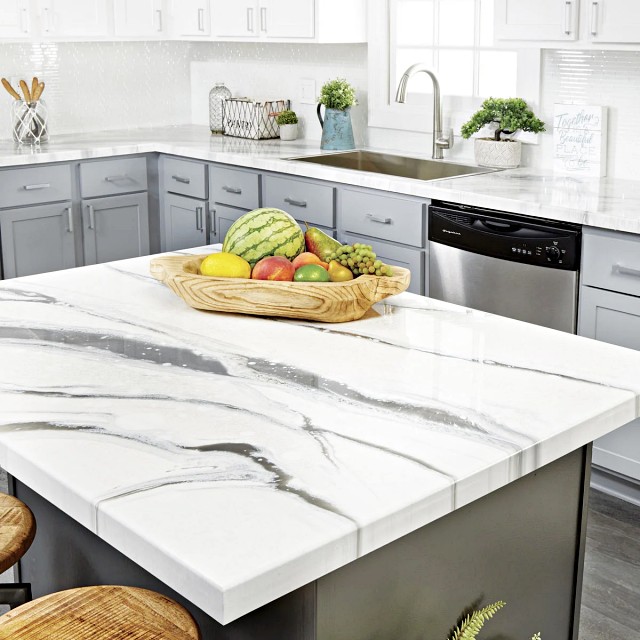
16. Effortless diy epoxy resin countertops by randolph sunoco.
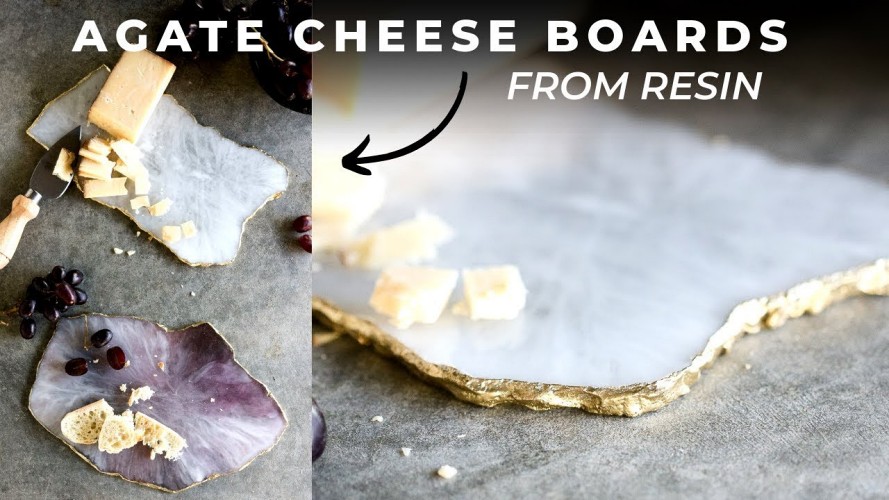
EPOXY RESIN AGATE GEODES
17. DIY faux agate cheeseboard with art resin by Lily Ardor.
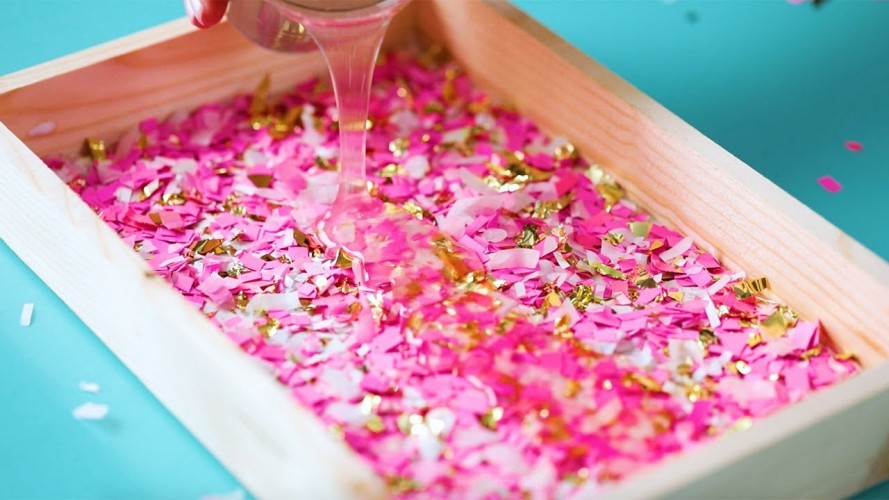
EPOXY RESIN TRAY
18. Confetti tray diy via tastemade.
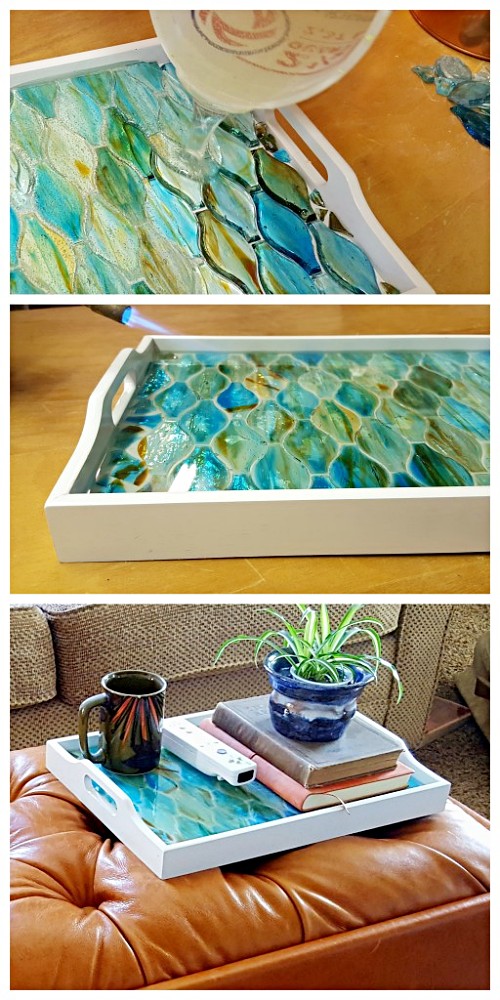
19. Green and gold leaf fluid landscape tray by kathryn beals.

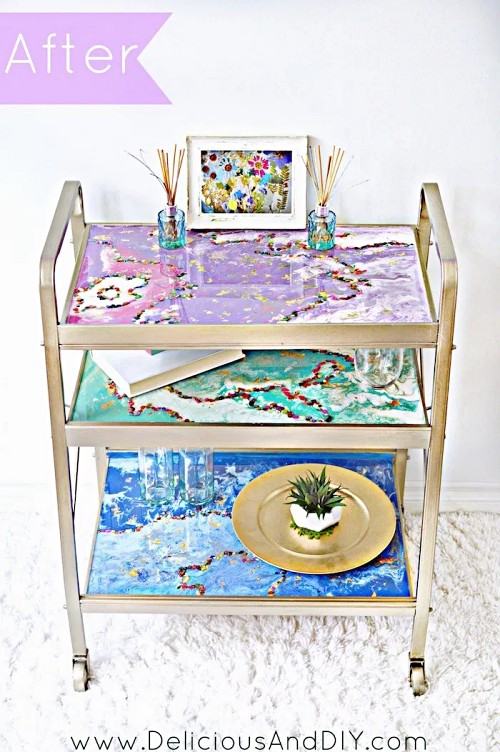
20. DIY bar cart makeover by delicious and diy.
21. Decorative mosaic tray by reality day dream.
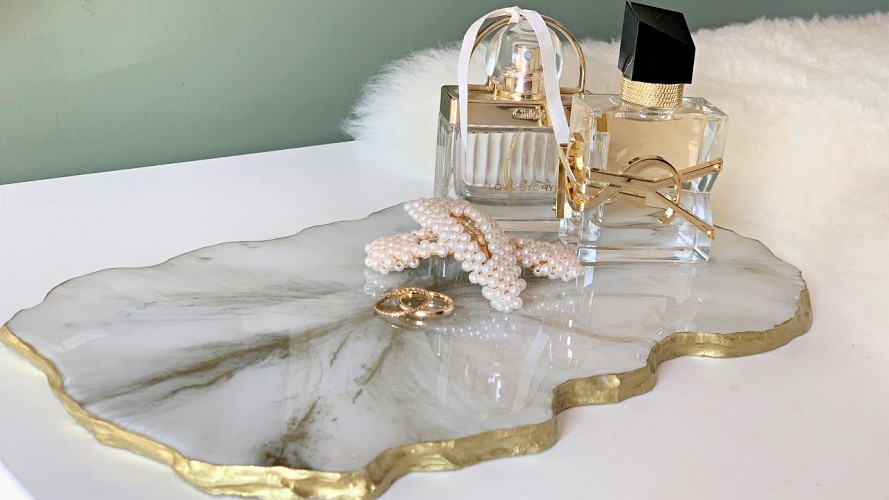
22. Free form epoxy resin tray by hobby trends.
EPOXY RESIN JEWELRY IDEAS
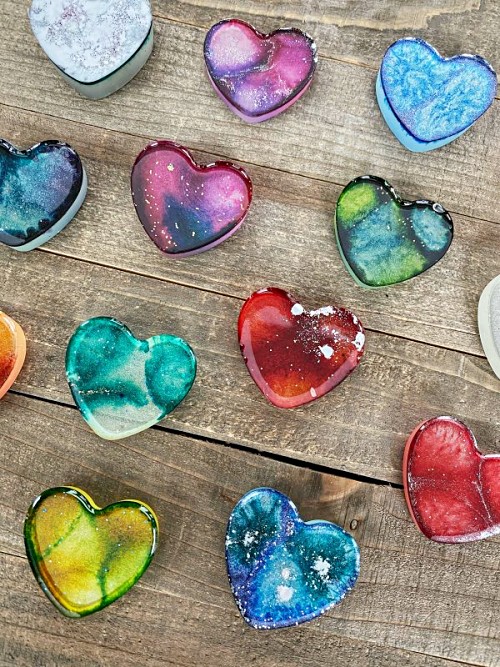
23. Alcohol ink in resin by mom always finds out.
24. Fairy pendant made from dried plants and epoxy resin by now ive seen everything.
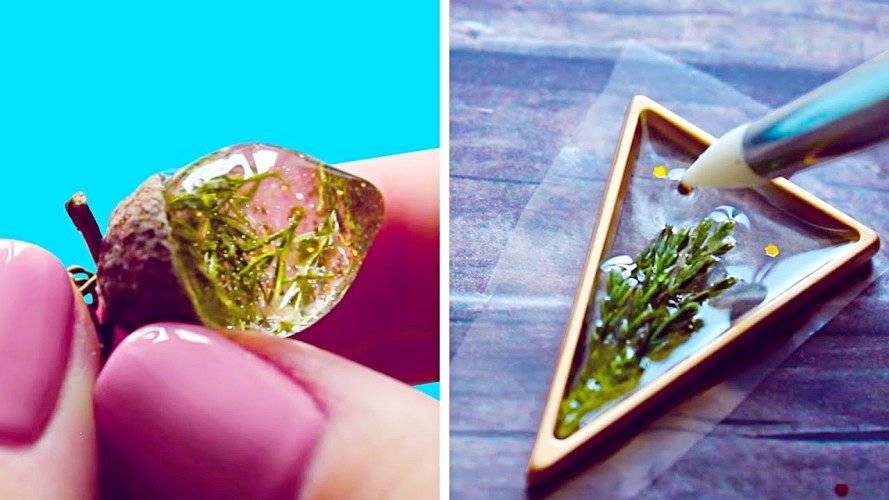
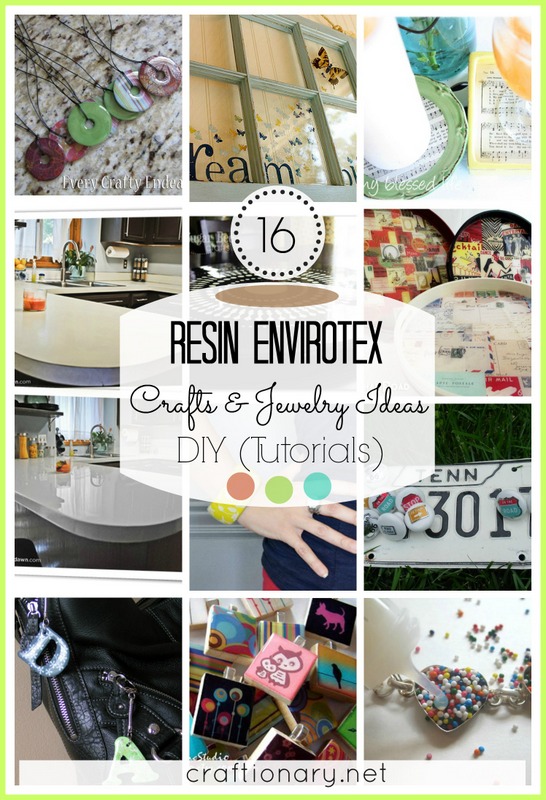
25. resin envirotex diy crafting at craftionary.
EPOXY RESIN FLOORING
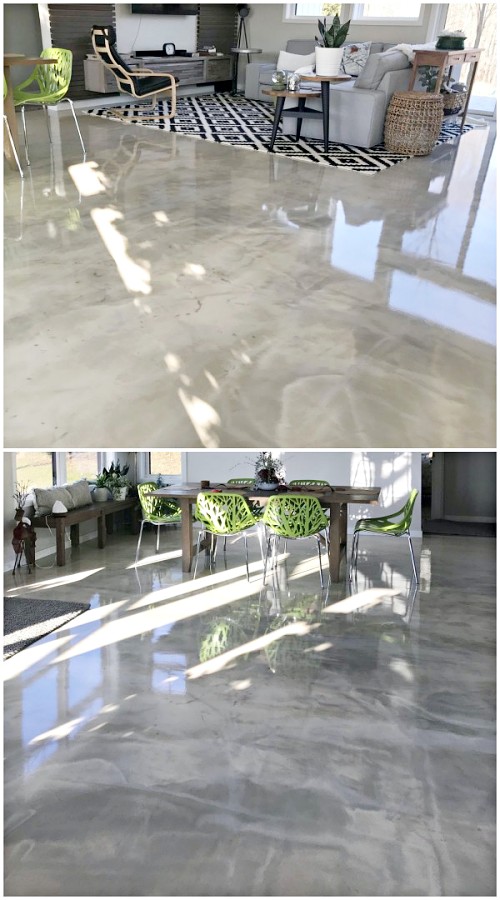
26. DIY homeowner installs designer metallic epoxy floor by duraamen.
EPOXY RESIN GARDEN PROJECTS
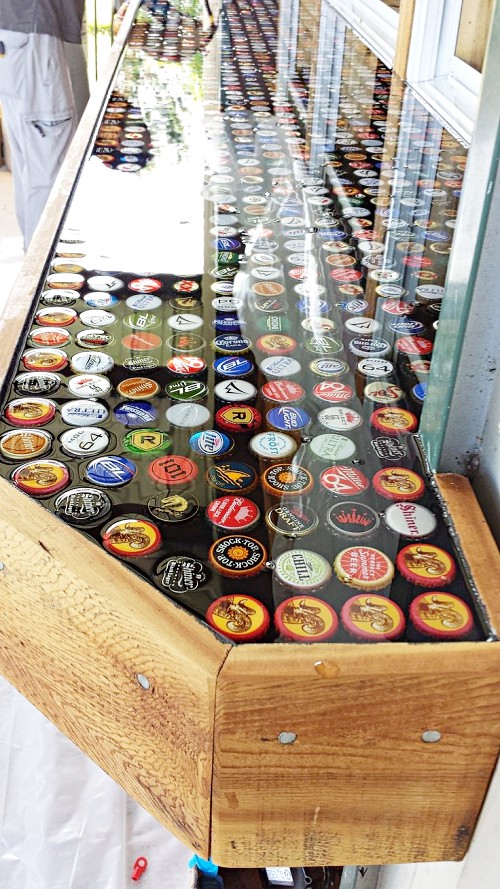
27. Epoxy bar coating epoxy resin coating outdoor table top using bottle caps. Photo by: best bar top epoxy.
EPOXY RESIN KEYCHAIN
28. DIY alcohol ink resin keychains by resin crafts blog.
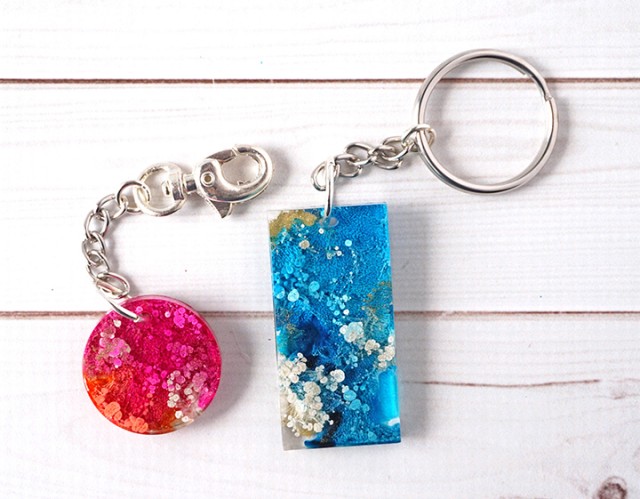
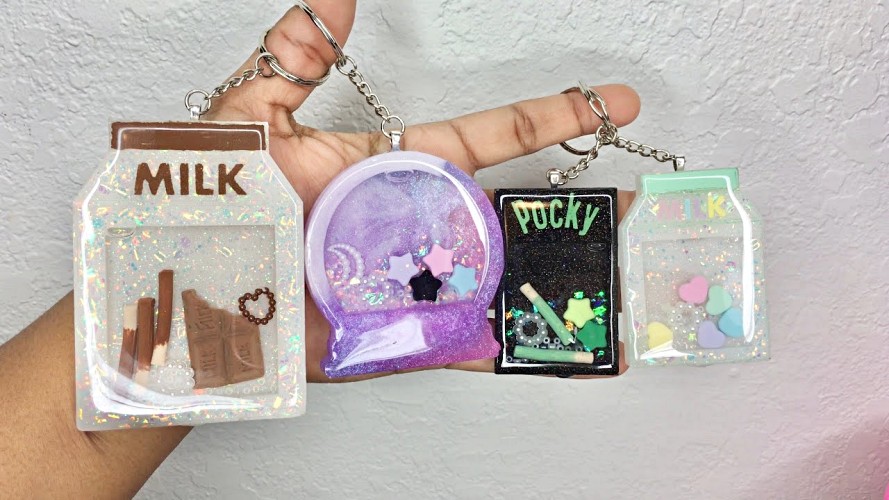
29. How to make shaker charms by sweet art crafts.
EPOXY RESIN CRAFTS
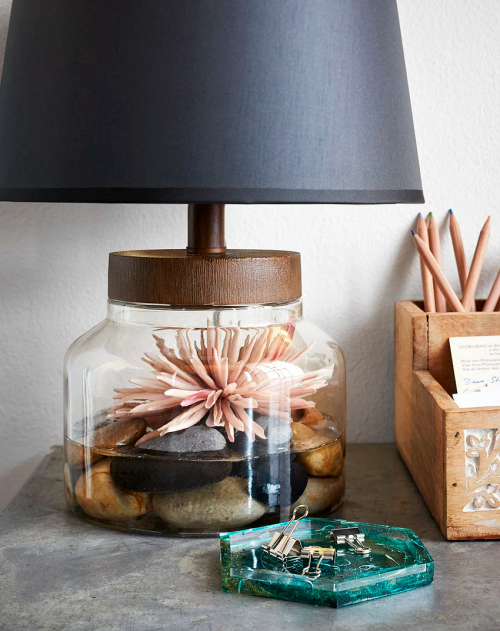
30. Easy resin crafts to make at home by bhg. Make an easy rock lamp with resins using rocks from the beach and place them in a glass base lamp with removable lid. Pour epoxy resin to finish of the project.
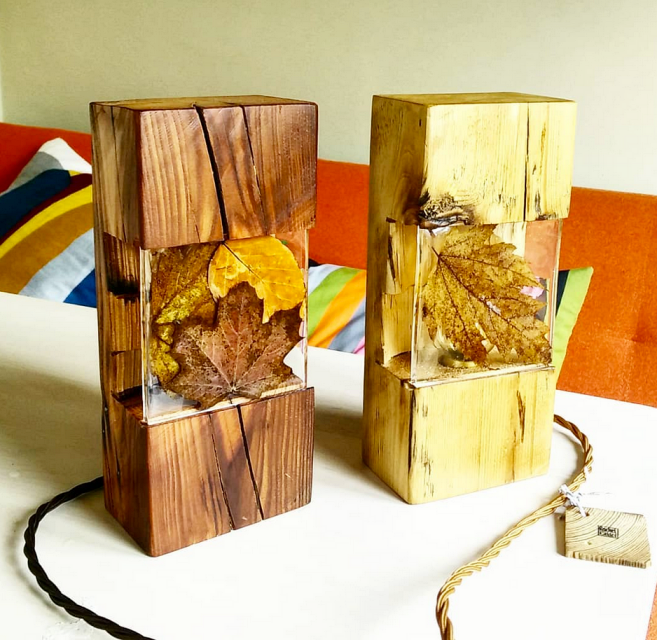
31. Resin leaf lamp made with wood logs and real leaves by rachel calder design. Original source unknown.
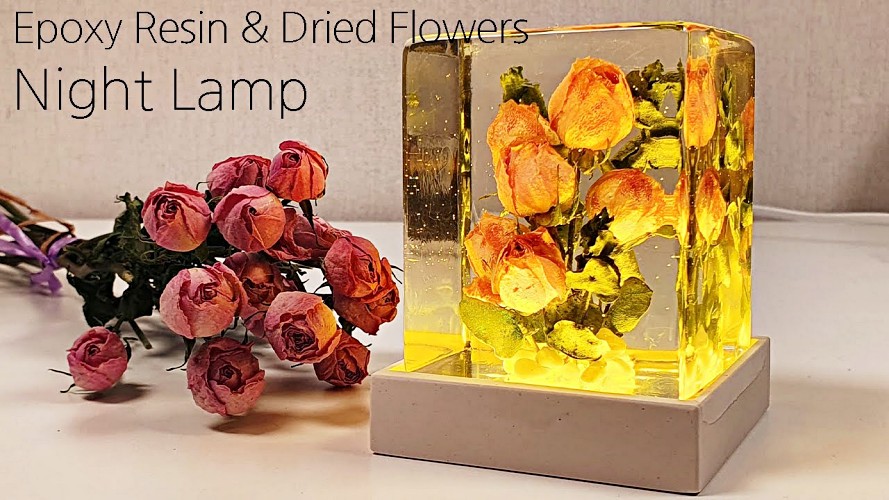
32. Pink roses and epoxy resin night lamp by mahaza art.
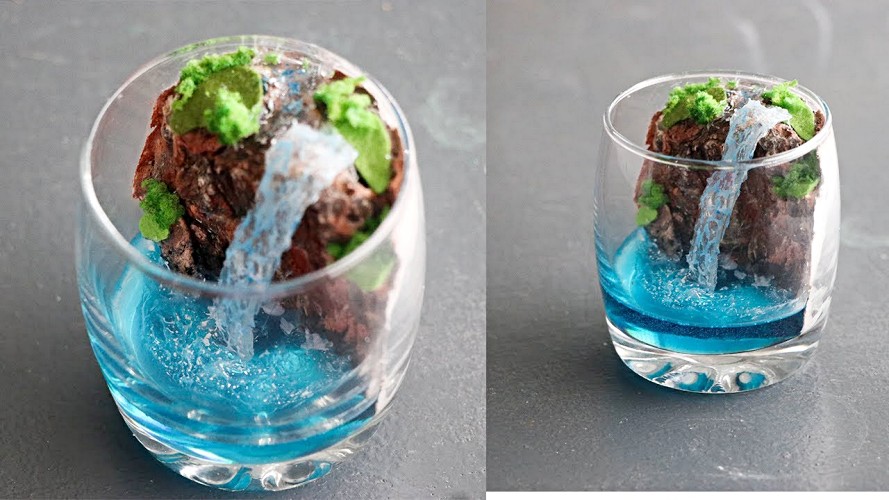
33. DIY terrarium waterfall resin crafts by crafty fingers.
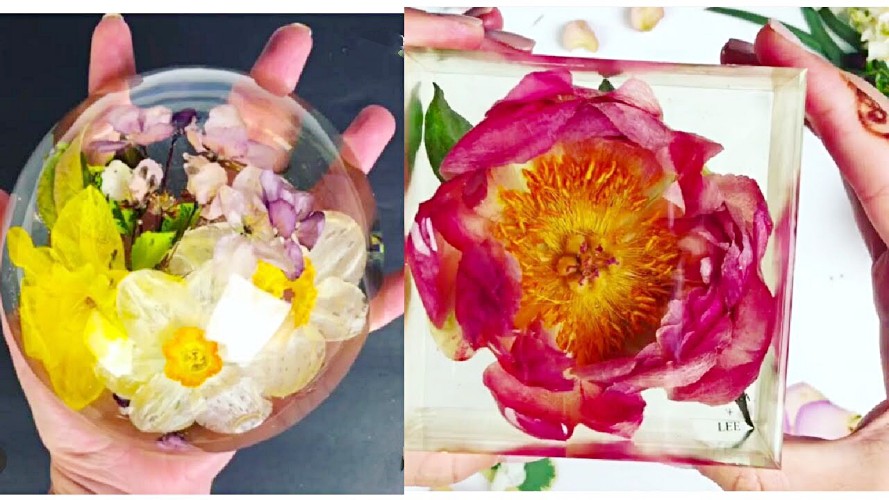
34. Flowers in resin epoxy resin project by epoxy and wood.
35. How to make a resin wooden bowl by the wooden joy.

EPOXY RESIN TABLES
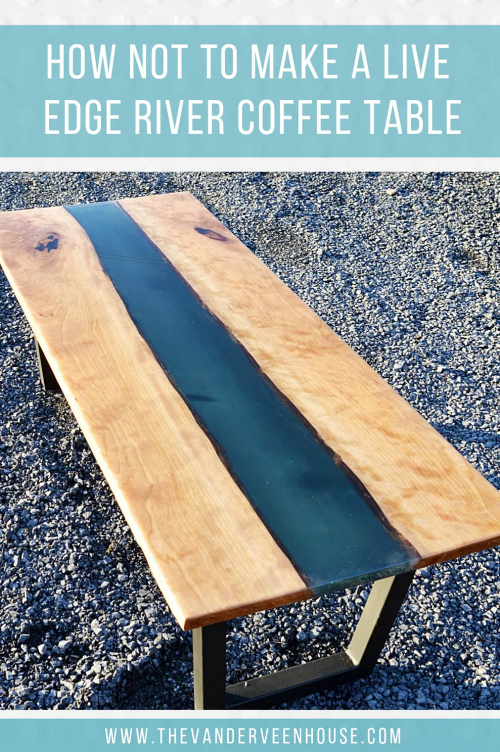
36. River coffee table by the vanderveen house.
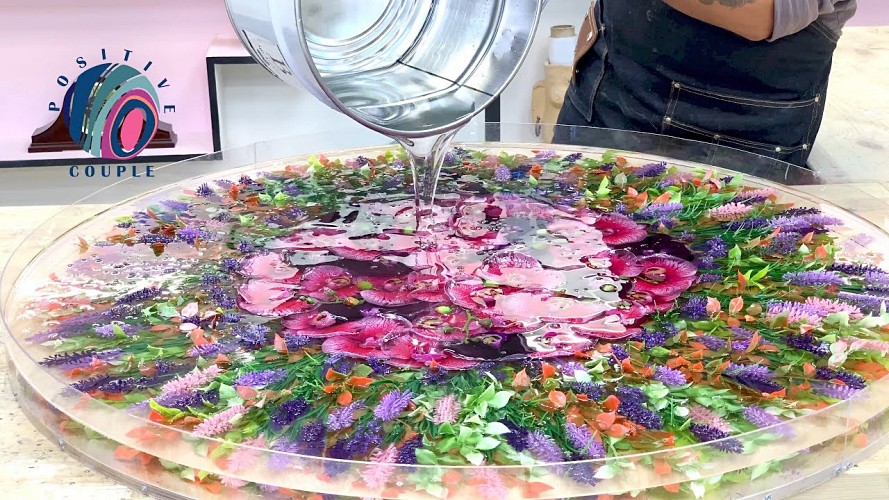
37. Amazing table of flowers and epoxy resins by positive couple.


Excellent ideas
wow. Epoxy does have amazing results.
Great ideas
I have been doing resin work for about a year now. The thing that is hindered me most is sometimes small bits of information are left out of articles and tutorials that are crucial and necessary for the beginner to know. One thing I noticed in your list of supplies is that you left out heat gun and torch. Those two items are musts! Resin is an expensive product and if people are going to blog, teach, or do tutorials they need to be very thorough to be fair to the art.
Thanks for pointing that out Jennifer. When I try something new I do my research and share it on my blog in the hopes that it saves time and effort for others. But it’s always great to learn more!
She LITERALLY listed
“Torch”
“Heat gun”
Not sure if you saw it listed under
“Supplies Needed For Your Resin Projects”
What kind of ornaments can be used in gel candles e.g. plastic, resin or wooden
You can use any ornaments you like except the paper ones.
Beautiful
Good morning,
I recently started working with resin making trays. I came across your blog while searching to purchase a book on resin making crafts. Is your book “36 DIY resin projects” available for purchase? I have tried
all the craft stores in my area and no one has any books on crafting with resin. Would love to hear from you regarding your book, the crafts are all so beautiful and would love to make them myself
Have a Great day !
Hi Peggy, I am sorry I am not writing a book on resins.
have you any resin art with crystals ideas?
I’ll update the post if these ideas come up! Thanks!
These are great projects. I am a beginner and not having luck with my epoxy projects. Both ended up tacky. Went through every step as stated and still tacky. Can you put anything on this final layer to reduce the tackiness??
Hope this article helps: artresin.com /blogs /artresin /oh-sh-t-series-episode-1-sticky (just type it without spaces to reach the page).
wow! I got a lot of ideas from this website! I love the little turtle in a box. It’s so cute!
You inspire me so much. I am a beginner in resin crafting and I pray one day I can do resin crafts like you can. I want to make them for my family and myself. I’d like to do anyone who would want one as well. For now I am just taking it slow as a beginner. Do you have any tips or advice?
My tip is to start from basics and learn the actually craft of resin before utilizing more materials with it to make unique items. Use some molds and resin mix as per instructions and see how it goes. Nothing better than learning from practical experience. Good Luck!
Thank you so much for the inspiration. I love the tray but that bowl. WOW
What is the best epoxy product to use for crafts, jewelry, home DIY that is cost effective, remains transparent, no cracking, keeps its shine the natural colour of items used shines through for ages, water and heat resistant? A mouth full I know, but this info will help me with the projects I’d like to tackle. Thank you in advance. Kind regards. Teresa
Hi Teresa, found this detailed video. Hope it helps: youtube.com /watch?v=27ULJwdBgbs (just type it without spaces to reach the page).
Thanks I was actually satisfies
HI I am new to epoxy crafting and was thinking about making some coasters. I was thinking about making some sayings using vinyl in the cricut and just laying the cutout in the middle of the coaster between the layers of epoxy. Like fill the mold half full of the epoxy then lay the vinyl and then full the mold with epoxy Can anyone tell me if this will work.
Hi, thanks for asking! According to my understanding, it should work. However, wait till the bottom layer is completely dry so when you place your saying it doesn’t sink it. Good luck! Share the final project and tag on instagram! 🙂
I’d really like to start making resin items I find the process extremely interesting. I’m hoping to get some info on all the things you will need to create some beautiful pieces could anyone provide me with a list? I think these resin pictures are beautiful and I’m so excited to start thanks x
Hi Steph, all resin projects require material specific to the project needs. Therefore, a list won’t be possible. Resin kit that has two solutions that you have to mix based on box instructions is the main item in all these projects that you pour over once your display is set. I hope this helps!
i started crafting with resin several months ago. Got sidetracked and forgot almost everything I had learned. Thank you so much because you refreshed my memory. At my age memory is everything. tyty
These epoxy resin projects are really beautiful & eye-catchy. I would like to make a wooden epoxy table for my room. Thank you so much for your blog. Keep Writing!
Resin is super cool to work with. These ideas are helpful. Thanks.
What is the durability betweene epoxy and epoxy resin since one of them dries quicker?is there any that is stronger than the other?
Hi Tebogo, the main difference between both adhesive types is the drying time. Both epoxy and resin adhesives require mixing before use, but epoxy hardens much faster than resin glue. Epoxy adhesive is far more expensive compared to resin glue since it has an excellent bonding capability that surpasses all type of adhesives.
You would also like to know that Epoxy is the family of basic components or cured end products of epoxy resins. Epoxy resins is also known as polyepoxides. Due to it’s strong bonding epoxy resin is commonly used in the construction of vehicles, snowboards, aircrafts and bicycles.
Therefore, based on your craft project you can choose how strong and durable you want the bond to be! I hope this helps!
Thank you Hani.it does help
Thank you for taking the time and sharing this beneficial blog. The good about epoxy resin is that it is a strong adhesive and has corrosion resistance.
Resin is not typically referred to as “glue” in the very vast and popular RESIN DIY world. I have created tons of projects. You can glue things together. It is way bigger than that. The term “resin” refers to a category of semi-solid natural and synthetic compounds that can be hardened into a highly durable plastic material. Besides coating projects, there are tons of resin projects that are full resin. The whole project is created with resin. You have examples above. But it is a major chemical reaction between two parts (A & B) that create a glass like appearance and can be very thick, such as a table top or many other things. So, glue, is not a great way to term it
Thanks for your insight on resin! It started as a glue and today it as numerous other uses.
Your article is very good. I have a question about drying. I did 2 resin pours yesterday and the first batched was perfectly hardened this morning. The second batch is sticky. Did I not stir long enough? Is there something that can be done to harden the second one?
Thanks – Karen
Hi Karen, there are a few reasons for this happening, #1 being mixing ratio. Make sure to measure the hardener and resin accurately while you mix it. Secondly, any scraps from previous batch if not cleaned properly may lead to improper mixing of the second batch. So, always clean the mixing cups properly. The space where you allow the batches to be cured must be warm and not cold. It is also quiet possible as a final note that the colorant mixed should not exceed a certain amount. For example, a 100ml mixture should require 6ml of colorant.
For your second question, you can completely remove the sticky resin and pour fresh resin into a completely dry area and allow it to cure again!
I hope this helps!