This post may contain affiliate links. Please see our full Disclosure Policy for details.
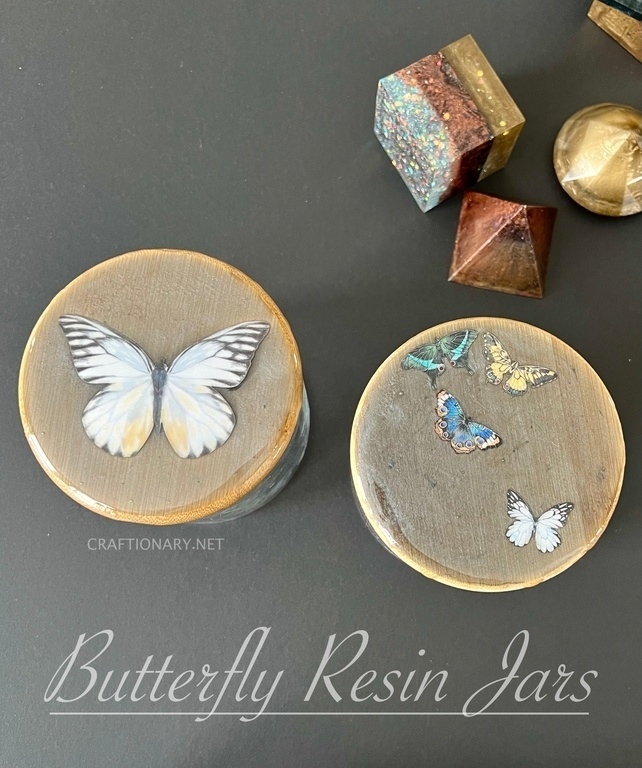
Make unique butterfly resin art on bamboo jar lids and turn ordinary dollar store jars into custom beautiful jars for storage. Use these epoxy resin art jars in your kitchen to store nuts and display on the kitchen counter or store office supplies, stationery and craft items in these storage jars.
If you are new to DIY epoxy resin, you will benefit from this detailed tutorial with video on epoxy resin mold DIY for beginners. I will also share an interesting way to make resin art without molds in future so stay tuned.
Butterfly resin art video
If you enjoy visual instructions more than reading continue to see this video after reading this article. There are things covered in writing that are helpful for you.
Material for epoxy resin jars
You will need:
- Dollar store bamboo jars
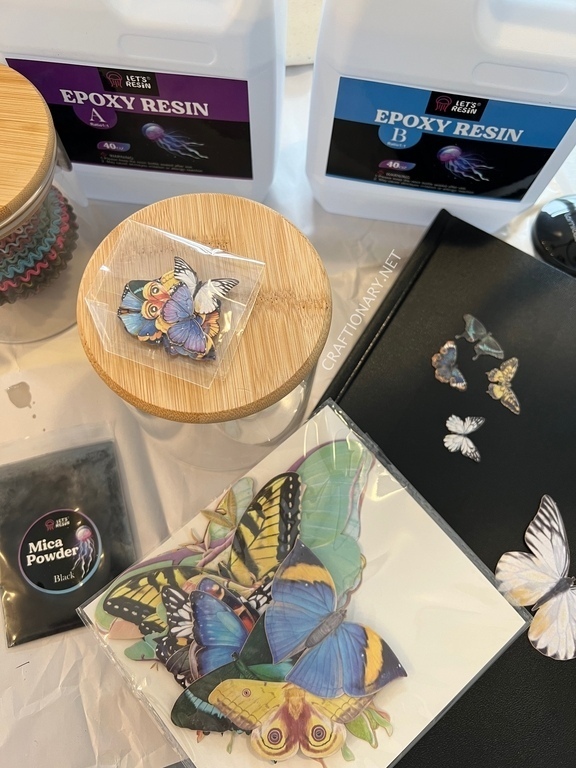
- Epoxy resin kit – Epoxy Resin Kit includes all the essentials for this project. Epoxy resin, and helpful tools like measuring cups, wooden stir sticks, plastic droppers, and gloves.
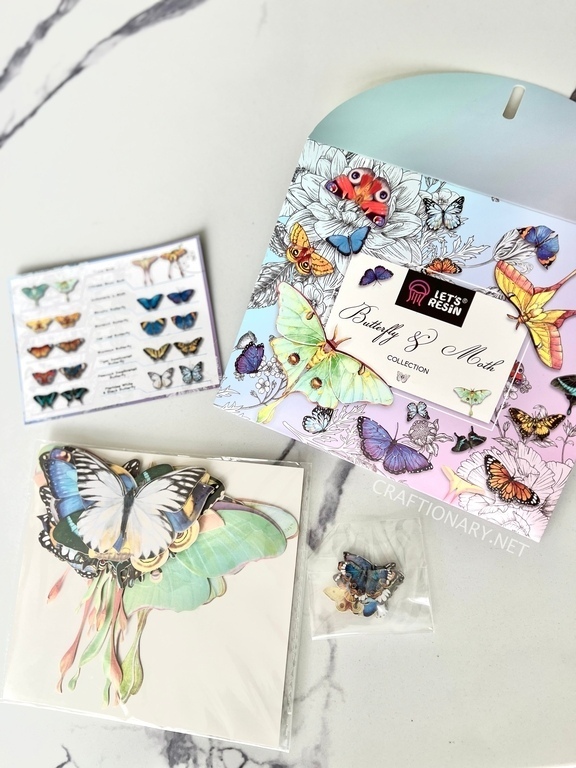
- Paper Butterfly Moth
- Mica powder
- Glitter
- OR Epoxy resin pigment kit – Epoxy Resin Kit includes all the essentials for this project. Epoxy resin, 12 color mica powder, 12 color fine glitter, 8 color opal glitter, 3 color foil flakes, dried flowers, butterfly sticker, metallic resin fillers, wood stir sticks, tweezer, mixing cups, and gloves.
- Plastic sheet or paper sheet
- Goggles
- Apron
- Tape (Sellotape or brown tape)
Related: DIY Resin Crafting: Everything You Need To Know To Get Started
Butterfly resin art bamboo jars step-by-step instructions
Initial prep:
1. Cover the work surface with sheet and wear gloves.
2. Remove the plastic from the airtight bamboo jars and wipe the surface with dry paper towel to remove any dust and residue.
3. Ready some heighten items like small jars to place the finished mason jars to cure.
4. Even though I skipped this part but it will be helpful to seal the lid sides with a tape to create a boundary so it doesn’t drip off the edge for neatness.
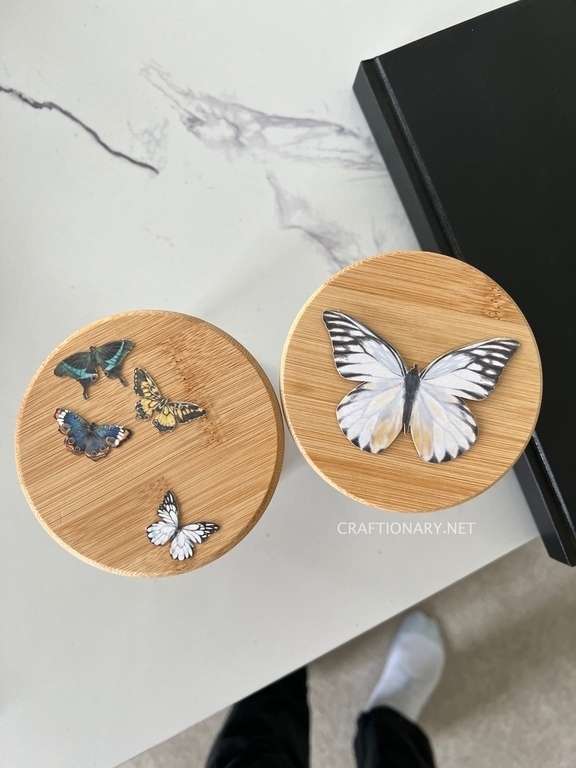
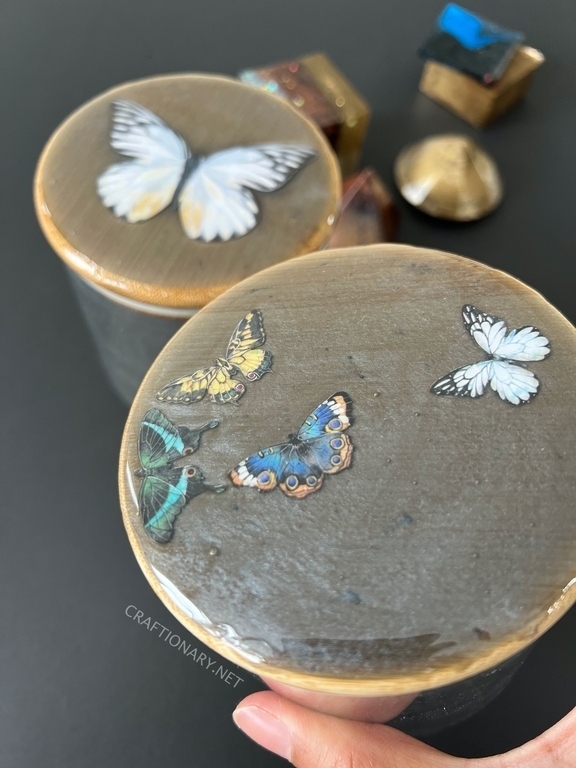
5. Arrange the butterflies on the bamboo lid till you are satisfied with the setting and take a picture to remember the arrangement.
Prepare epoxy resin solution
6. If you are new to DIY epoxy resin, you will benefit from this detailed tutorial with video on epoxy resin mold DIY for beginners. Read the Lets Resin instructions manual carefully. Follow the instructions on the package to mix the 1:1 ratio epoxy resin. It contains solution A (resin) and solution B (hardener).
7. Add 0.5g black mica powder to the mixture to give it a tint of black. Note that as a general rule in 1oz of resin mixture add 1g of mica powder and mix to see the vibrant color. If you want darker you can always add more but cannot do the reverse. Add just a little black chunky glitter to give it that it effect (optional).
8. Pour the epoxy resin mixture at the center of the lid and carefully with the help of your spatula spread it over and to the sides of the lid. Add enough to give it a good reasonable thick layer. Add the butterflies in position and let it cure for 24 hours.
Seal with resin after curing
9. After 24 hours. Dome your resin art to seal and give it a glossy effect. There is something called doming resin that is used for jewelry and projects without boundary and is relatively more thicker than epoxy resin. However, I used epoxy resin 1:1 ratio and mixed thoroughly and poured it on top and let it cure for another 24 hours.
10. The finished product is amazing! I love the look.
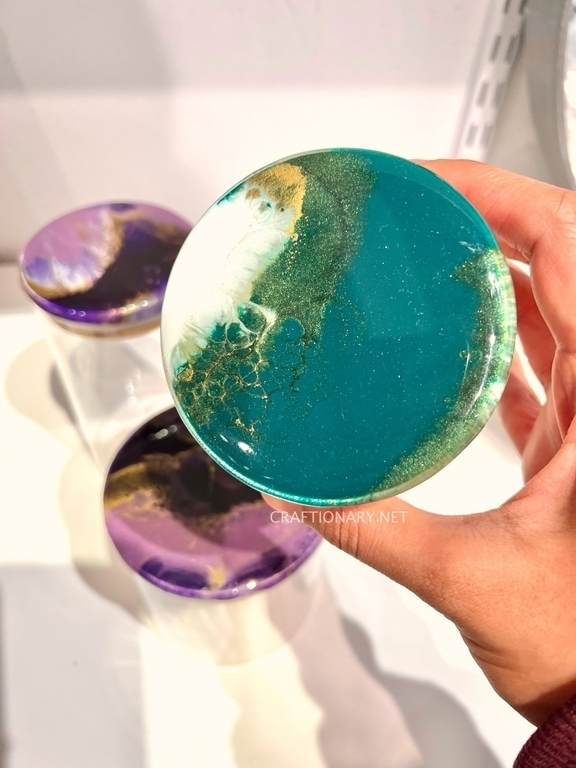
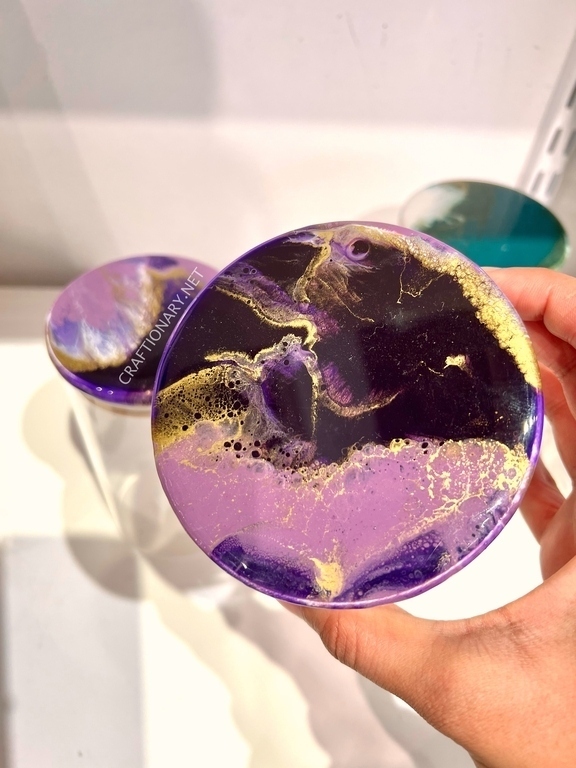
Epoxy resin art on wood
Some more fun ideas to try on jar lids using acrylic pour method to make resin pour art on wood with different colors and blowing method. You can use a mini blow dryer or straw for smaller projects like this one.
Three tones of turquoise emerald green, metallic gold and white to make art. Use a dropper to drop alcohol to form ripples and blow for swirls. You can also use toothpick to make certain swirls and patterns.
Three tones of purple and gold with drops of alcohol to make this resin pour art.
I hope you enjoyed this project. Any questions regarding the projects are welcome in the comments section below. You will also like:
36 Stunning epoxy resin projects diy that look expensive
Beautiful glass paperweights with epoxy resin molds
Disclaimer: This is a sponsored post by Lets Resin. I received products and compensation to review their products. However, the opinions and projects shared are 100% mine.