This post may contain affiliate links. Please see our full Disclosure Policy for details.
You can mold resin crafts in any desired shape and color. It also allows you to capture and save special moments by preserving sentimental objects and botanical components in beautiful ways forever. Initially, resin was only limited to industrial use. But in the last few years, it has become a popular craft to make epoxy resin art and DIY projects. Pouring resins is relaxing but requires patience.
In this article, you will find resin crafts safety, resin tools and materials information. It includes types of resins like polyester resin, epoxy resin and UV resin. Silicone molds and other essential tools like measuring cups, stir sticks, and gloves. Epoxy resin colors like alcohol inks, pigments and mica powder. And finally insertions and fillers like dried flowers, paper items, foils and glitter.
Table of contents:
- Guide to resin crafts
- Resin safety and precaution
- Epoxy resin crafts video instructions
- Resin tools and materials
- Types of resins
- Resin crafts casting molds
- Other tools for resin crafts
- How to add color to resin crafts?
- Resin insertions
Guide to resin crafts
Once you learn about resins, you will love to do resin art and DIY resin crafts. There are many ways to use resins in the form of jewelry, accessories, home decor, frame art, and many more. There are lots of suppliers available in the market to support this craft by selling silicone molds of different shapes, pigments, insertions and glitter in different colors and other essential material.
You will also get answers to:
- Mix and pour the resins
- Avoid bubbles on surface
- Demolding disasters
- Dry flowers
- Make jewelry professionally
- Make custom silicone molds (silicone moulds)
These techniques will also help you to use resin as a hobby or a business. Although; there is a lot of fun to make a resin art but you have to be extra careful with it because you are working with chemicals.
Related: DIY Resin Crafting: Everything You Need To Know To Get Started
Resin Safety and Precaution
Resin is a chemical, and it would be perfectly safe for you; as long as you follow the health and safety recommendations given by the manufacturers. Every type of resin has different PPE (personal protection equipment) because each has different chemical qualities.
Always take into account and should not avoid supplier’s manual and instructions. Most suppliers have similar chemical composition for epoxy resin which is used for making crafts and indoor projects. Therefore, the following safety measures will be helpful:
- Protect your hands by using a special resin barrier cream or wear nitrile gloves because the chemical in the resin is sticky, hard to wash and can damage your skin.
- Work in fully ventilated area.
- Always protect your eyes by wearing safety goggles when sanding or working with large amounts of resin.
- Wear proper respiratory gadget when sanding resin to avoid inhaling.
- Avoid eating and drinking while working with resin.
- Avoid smoking while working with resin.
- Wear a sleeved top to protect your arm and a full-length apron to protect your clothes and avoid skin contact.
- If you get anything in your eye accidentally, immediately wash it with plenty of water for 15 to 20 minutes and consult with the doctor.
Protect Your Working Area:
Protect your work surface or table from resin spills, use a silicone mat, or tape plastic sheet, bin bags or paper sheet to avoid resin spills. Keep alcohol wipes or baby wipes handy to clean up small spills or to wipe your sticky gloves. Paper towels are handy for wiping tools while making resin art.
What is an exothermic reaction?
You can avoid the exothermic reaction by reading and following the instructions in the guide by seller. A small amount of heat lets off while resin cures, and if the heat lets off too quickly then an exothermic reaction may occur. This may occur if you mix large quantities and don’t follow instructions. The instance your resin gives of smoke or catches fire, move your resin container somewhere safe outside your home, and wait for the reaction to finish. The resin is a waste once it cools down in this case. Simply throw it away and restarts.
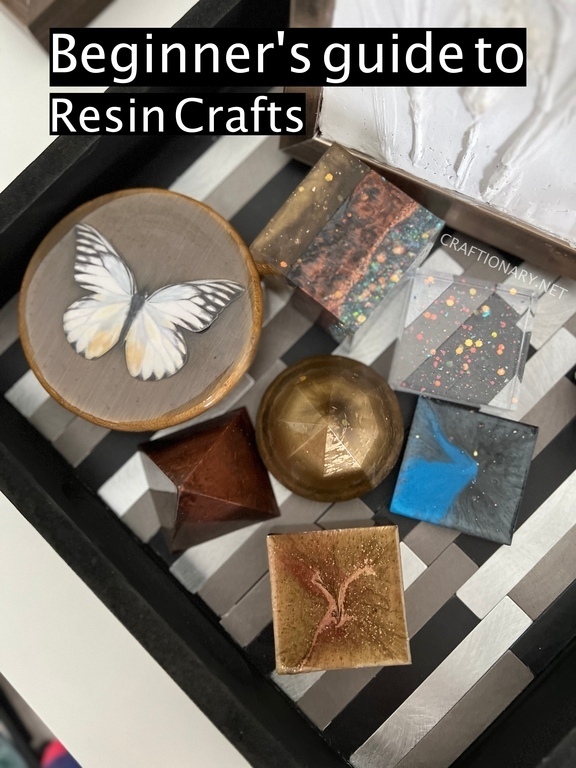
Epoxy resin crafts video instructions
Find a quick video that guides you through the process to make paperweights with epoxy resin molds. This project using starter kit for beginner resin crafts is ideal to try for first time.
Resin Tools and Materials
Types of Resin
There are three main types of resin you use for crafts:
- Polyester Resin
- Epoxy Resin
- UV Resin
Polyester Resin:
Polyester resin is used in industries and is not suitable for crafting because it cures very fast and leaves a strong smell for days after use. I mostly use epoxy and UV resin for making resin art and projects.
Epoxy Resin:
Make jewelry and other small epoxy resin projects with this resin. There are two types of epoxy resin: shallow pour resin and deep pour resin.
Epoxy resin has two parts, one part is the resin and the second is the hardener (commonly referred as part A and part B). When we mix these parts, a chemical reaction takes place that hardens the resin into a solid plastic overtime. This process is known as curing. Each product has different mixing ratios. The most commonly used ratios are 1:1 (one part resin and one part hardener) and 2:1 (two part resin and one part hardener). Other more specific mixing ratios are also available based on the project. It is important to mix the resin and hardener as per ratio mentioned on the brand’s manual. You should avoid mixing resin with different mixing ratios and never mix various brands together. Resin is expensive and wasting any solution will cost you time and money.
Related: 8 Fun and Creative Epoxy Resin Techniques To Try
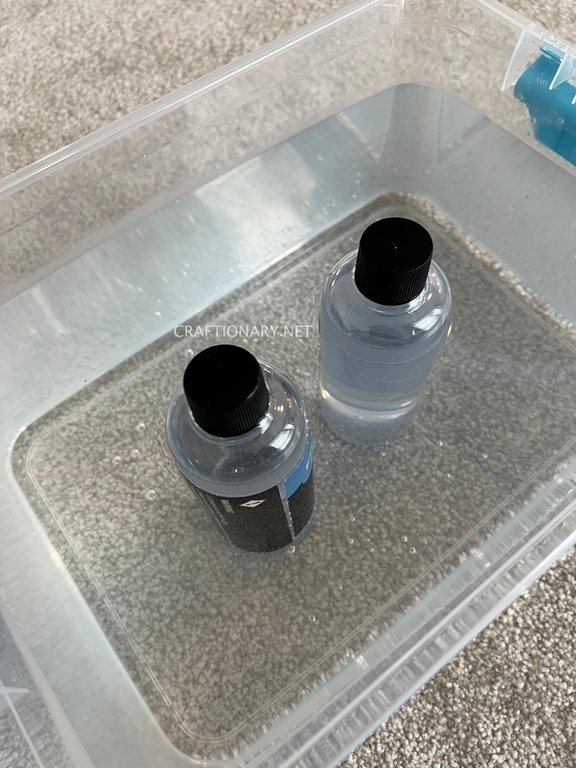
Put resin in warm water before mixing. Learn more tips about working with epoxy resin.
Shallow Pour Epoxy Resin:
Pour Shallow pour epoxy resin 1 cm (3/8 in) deep into a mold because pouring deeper than this can increase the risk of an exothermic reaction. Small amount releases little heat and large amount produces more heat. Work in batches if you need large quantities for shallow pour resin art.
The process of resin drying is called resin curing. Epoxy resin normally cures in 24 hours and is fully cure in about 2-20 days as mentioned in manufacturer’s manual.
Deep Pour Epoxy Resin:
As the name states, this is suitable for a deeper pour resin crafts. It takes more time to cure than the shallow pour resin and is best for table art, lamps, decor pieces, and deep molds. Commonly mixed in a 2:1 ratio (two part resin and one part hardener). The mixed resin is easy to work with, crystal clear, produces fewer bubbles.
Commonly you can pour it to a depth of 2 inches in one layer. It becomes touch dry within 3-4 days and fully cured after 21 days depending on room temperature.
Every resin brand has different drying and curing times, so always read the information given by manufacturers.
Heatproof Epoxy Resin:
This epoxy resin is ideal for making items like coasters that holds warm beverages. The mixing ratio of this also varies according to brand. But 1:1 or 2:1 are most common. Sometimes this resin can be more expensive. Therefore, it is economical to use for the outer layer. For example, when making a coaster use shallow pour resin, let it cure, demold and then use the heatproof resin for the outer surface on which the cup will sit. Never use heatproof resin open flame use like candles and ashtrays. LED tealights and candles are a great substitute.
The heat resist resin cures in 28 days but it can vary from brand to brand.
There are also epoxy resin brands available that provide a single product that can be used to produce small, large and heatproof resin projects as well.
UV Resin:
UV Resin is commonly used for jewelry but its fragile and breaks easily. It is premixed in bottles and is ideal when waiting for resin to cure is unsuitable. Simply squeeze resin into the mold and move it under UV light and it cures within 3 minutes.
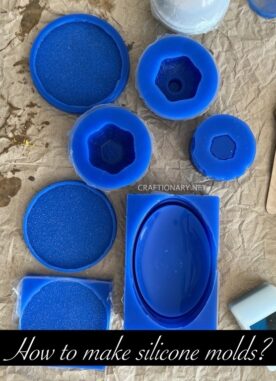
Resin Crafts Casting Molds
Pour mixed resin into any silicone mold to make different things. You can also make silicone molds.
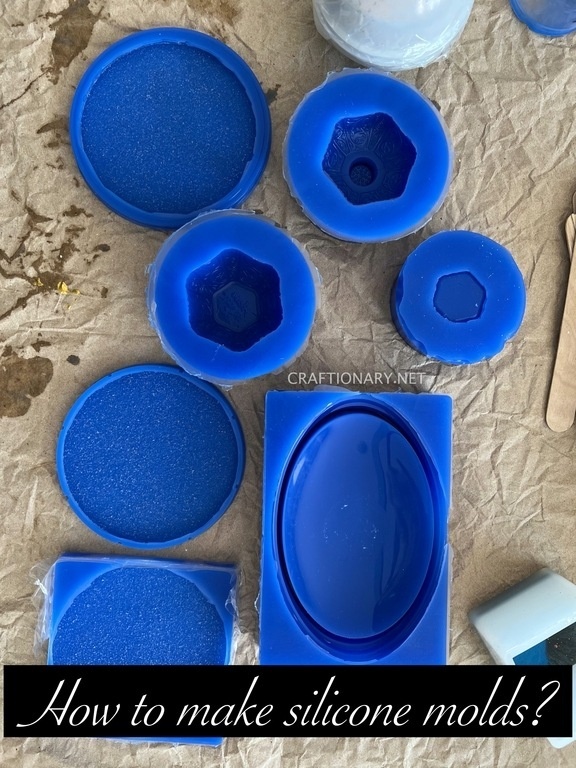
Buy Silicone Molds:
Silicone molds for resin casting are flexible and demold easily. This is ideal for making jewelry pieces with epoxy resin. There are a variety of silicone molds available out there. For shiny finish buy shiny molds, however, matt molds and frosted molds are also readily available.
You can also find themed molds in which you can make many different pieces at once. There are earring themes, geometric shapes, motifs, and flowers etc. For example, multiple jewelry molds and coaster set molds. This way you can make parts of a larger piece in one setting.
Some molds for keys, earrings, or pendants have the ready-made hole. So, there is no need to drill for a jump ring, keychain, or earring hoop.
Shaker molds come in all types of fun designs and have a free floating insertion space in which you can add baby oil and other insertions.
There are other special molds like 3D domed mold, insertion molds, and colorful silicone molds to add to your collection as well. Take note in order for your piece to cure properly UV light needs to penetrate through the mold, therefore, you can only use clear molds with UV resin.
Daily Objects as Molds:
You can experiment with other items to make molds for epoxy resin as well. Some items like plastic phone cases can be used as molds. You can also use parchment paper and hot glue gun to make custom one time use molds. Another fun way is to use your items to make silicone molds at home. Decorate daily objects like trays, jar lids with epoxy resin.
Insertions in Molds:
Before adding insertions in your resin, you have to decide on the upper side of the finished piece. For example, in a shiny mold the more smooth and shiny surface will be the top part so make sure to place dried flowers, paper butterflies or photographs in the right side.
How To Care For Molds:
With time, your molds will deteriorate because of chemical reaction that occurs during the resin curing. You can use them for 15-20 times if you care. There are some ways that you can extend your mold’s life:
- Remove bubbles from resin using the bubble fishing method rather than the heating method.
- Do not fold or bend the molds and keep them in separate containers.
- Use chemical free wipes like baby wipes to remove sticky residue.
- Dry resin and glitter sticks to tape.
- Do not rinse the molds to clean the chemicals can clogged your drain and in cures formed it is a form of plastic.
- When resin sticks to mold, it becomes dull and damaged buy new ones.
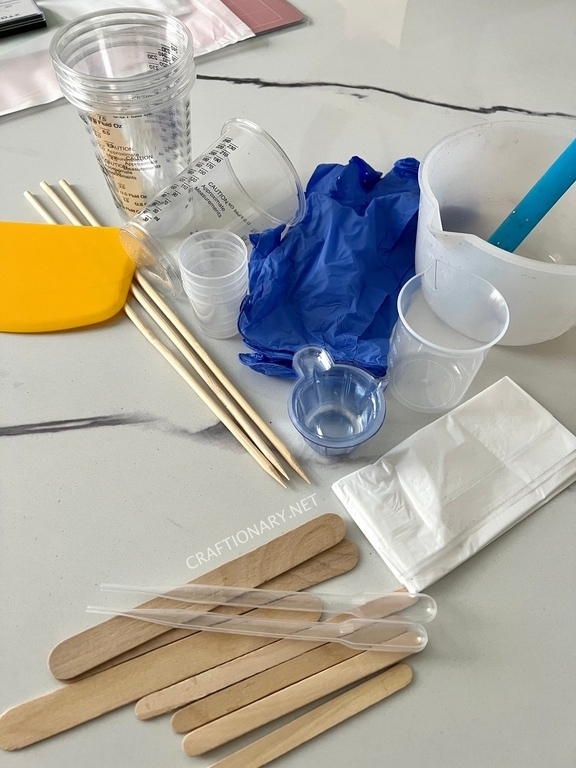
Other Tools for Resin Crafts
There are other essentials tools besides resin and molds that you must keep ready before working on your DIY crafts. Find our material recommendations for beginners.
1) Silicone Mat or Plastic Sheet
A silicone mat or plastic sheet to keep your work surface mess free and protected from any damage caused by resin drips.
2) Measuring Cups
Silicone cups are reusable and easy to clean making them the best choice for mixing resin. They are available in various sizes. You can peel off cured leftover resin and wipe them to clean. Plastic cups are good too but disposable, they are one time use only.
3) Stir Sticks:
Similar to mixing cups, silicone sticks are best for mixing, easy to wipe and reusable. The disposable option are wooden sticks (lolly sticks), which work just fine for mixing and coating.
4) Weighing Scales
You can mix resin and hardener by either volume or weight ratio with weight being more accurate. Use weighing scale or digital scale to measure and mix resin.
5) Gloves
Wear waterproof nitrile gloves to keep your hands safe from resin.
6) Sticky Tape
Use sticky tape to pull off small dried parts of resin from the molds.
7) Wet wipes
Keep alcohol wipes or baby wipes handy to clean molds, sticky gloves, work space, and resin spills.
8) Toothpicks
Use toothpicks to add small amount of pigment and push resin in narrow areas of a mold.
9) Wooden skewers
Use wooden skewer to make swirls and patterns when mixing different colors of resin.
10) Blower or Heat Gun
Use blow dryer or heat gun to make different surface effects like ocean waves on serving tray. Follow resin and heat gun manufacturer instructions for this purpose.
11) Torch
Use torch to remove bubbles from the surface of the resin pour. Take caution not to bring torch close to the mold as it can damage the mold.
12) Rubbing Alcohol
Fill a bottle with rubbing alcohol and spritz the surface of resin to remove tension and pop bubbles in molds.
13) Resin Polish Kit (optional)
For extra shiny finish use this kit that comes with sandpapers, abrasive paste, clothes and gloss spray. Use wet sandpaper to minimize the dust, and wear the mask with organic vapor filter when sanding resin.
14) Spreader
Use a plastic spreader to spread and move a layer of resin pour on the surface to reach corners and form a proper layer.
How to add Colors to Resin Crafts?
There are a variety of colors to add to resin. There are alcohol inks, opaque pigments and mica powder.
Alcohol Inks:
Alcohol based inks give vibrant and rich color to resin. You can add alcohol inks in two ways:
1. Use a dropper and add small amount to get dramatic results.
2. First pour clear resin into your mold and then drop alcohol ink to make patterns and give cool effects.
There are various possibilities to play with these techniques. There is petri-dish effect, marshmallow effect and many more. For example, make ripples by dropping different colors into each other to make abstract designs. Take caution not to use heat near alcohol inks.
Color Pigments:
Resin pigments are available either in transparent and opaque colors. They have a sticky texture. Small amount can give a nice color to resin. You can also mix different colors to make different shades before mixing in resin. Be careful when adding color to resin, too much color can result in improper curing of resin.
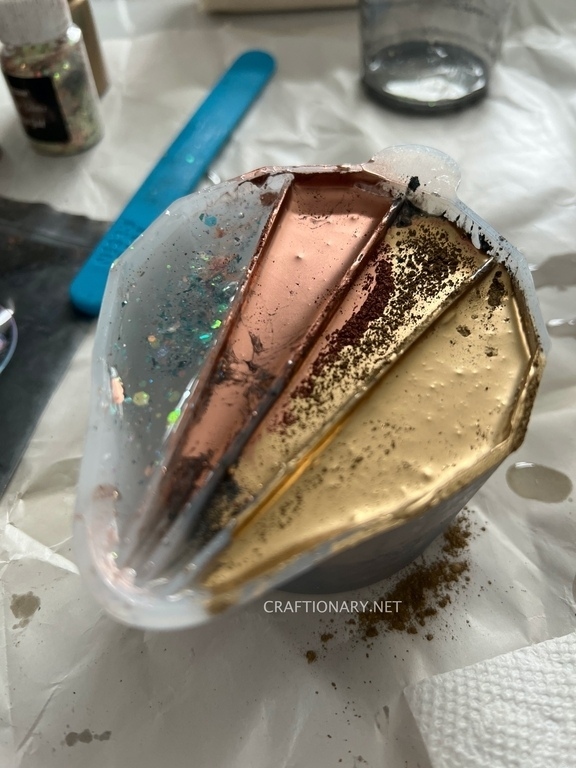
Mica powder:
Mica powder comes from natural minerals and gives shimmery look to the resin. You can explore many opportunities with the variety of mica colors that includes basic, metallic and chameleon mica powder to name a few. You can use mica powder as follows:
- Mica powder can give shimmer when added in small amount to opaque color.
- Pearl effect can be achieved with white mica powder in opaque white resin.
- A hint of mica powder in clear resin can give it a tint effect with clear surface.
- Mix different colors in a mold and swirl to make various patterns and effects from blending them together.
Never use acrylic paints or water based colors in resin. Water destroys resin and may result in an exothermic reaction.
Resin Insertions
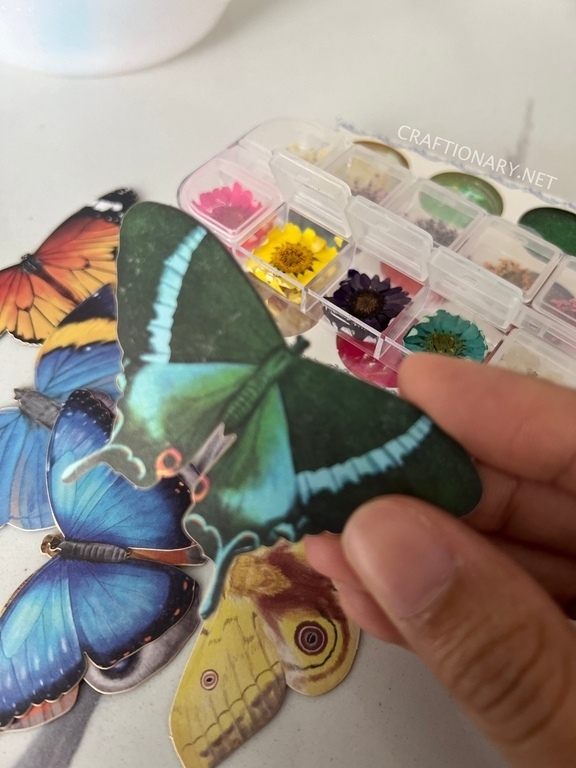
There are various things you can insert in resin like flowers, foils, and glitters to name a few common ones. Infact, you can use anything as filler in resin as long as it is dry.
Flowers:
Make sure to dry flowers completely before inserting in resin. Read how to dry flowers? Dried flowers are lightweight and float therefore work in layers to set them in place. Use resin as glue to fix them in place and be careful as dried flowers are delicate and break easily.
Small flowers like daisies, pansies, violas, and forget-me-not are good for shallow pour resin art in small molds and jewelry.
Big flowers such as large daisies, roses, peonies, and chrysanthemums are perfect for deep pour resin in large molds and table.
Foils:
Like flowers, foils are lightweight, delicate and float. They are available in a variety of metallic colors like gold, silver, bronze, and copper; and non metallic colors as well. There are a few tips to get the best result when adding foils to your resin:
- Work in layers.
- Take your time and work slowly.
- Foil can easily blow away so avoid spaces with air disturbance.
- You can also brush the foil into the mold before pouring the resin instead of adding it into the resin as filler.
- Use dry non sticky gloves to avoid more foil sticking to your gloves than in your mold.
Glitter:
Glitter is available in many colors and textured from ultrafine to chunky glitter. Glitters are also available in theme shapes, especially for Christmas and Halloween.
Unlike flowers and foils that are lightweight and float, glitter is heavy and sinks to the bottom of the layer in resin. In order to avoid this, you can either add glitter when resin becomes slightly thicker or combine glitter and resin in equal ratio such that it is saturated. Also, note that the fine glitter will suspend in resin better than the chunky glitter.
I hope you found this article beneficial. If you have any questions about resin crafts leave them in the comments section.
Author: Amber Saad
You will also like:
Unique butterfly resin art on bamboo jars