This post may contain affiliate links. Please see our full Disclosure Policy for details.
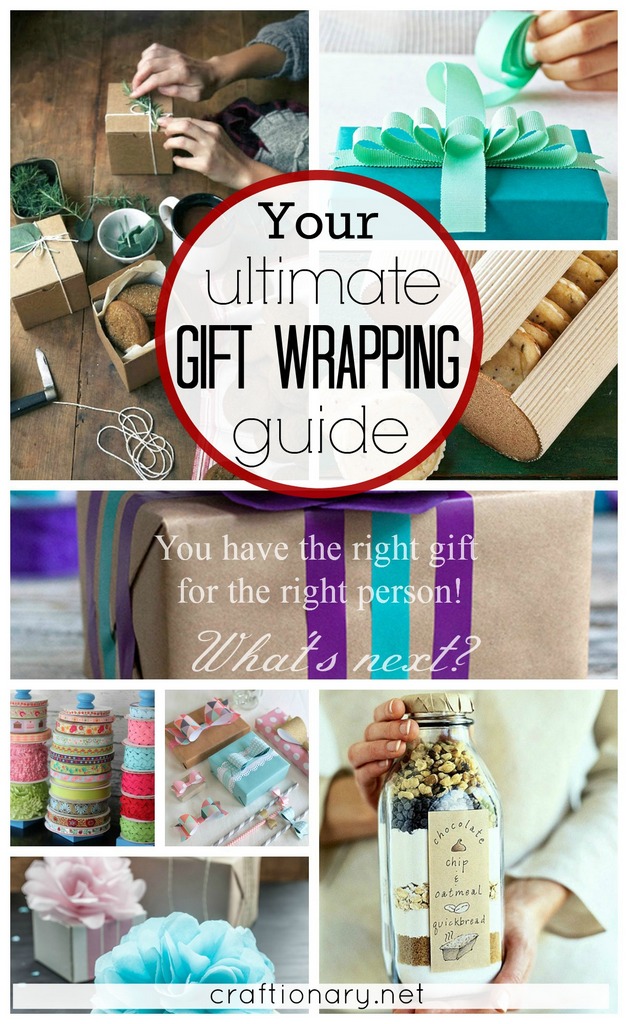
You’ve nailed the perfect present, chosen with care and consideration. But the journey of a thoughtful gift doesn’t end there! The way you present it can elevate the entire experience, transforming a simple exchange into a moment of true delight.
This ultimate gift wrapping guide goes beyond basic bows, offering expert tips, creative techniques, eco-friendly alternatives, and smart solutions to make every gift you give feel extraordinary.
Why Gift Wrapping Still Matters
Gift wrapping is more than just decoration:
- It expresses intent and personality. A beautiful wrap says “I took time for you”.
- It adds an element of surprise and delight. Opening a well-wrapped gift enhances the experience.
- From a psychological perspective, presentation influences how the receiver values the gift.
- Many professional wrap-style guides agree: clean folds, crisp lines, and thoughtful extras elevate the offering.
Gift wrapping or gift packing itself is an art. But with the right ideas and easy tips it shouldn’t be that stressful of a process.
Related: 30 DIY Gift Wrapping Ideas for Christmas Holidays
Gift Wrapping Guide
The gift wrapping guide covers gift wrapping tips, types of bows, ribbons, gift wraps and even ideas to wrap edible gifts.
The Essential Toolkit
Before you begin your wrapping adventure, gather your supplies. Having the right tools makes all the difference, ensuring a smooth process and a polished finish. We’ll also address common pitfalls and expert recommendations.
1. Paper Perfection
The Right Roll: Don’t underestimate the quality of your wrapping paper. Flimsy paper tears easily and looks cheap. Invest in rolls with a higher gsm (grams per square meter) for durability and a luxurious feel.
Expert Tip: Look for paper with grid lines on the back – a game-changer for straight cuts!
VARIETY IS THE KEY:
- Classic Kraft: Inexpensive, versatile, and perfect for a rustic look or as a blank canvas for personalization.
- Themed/Patterned: For holidays, birthdays, or specific recipients.
- Reversible: Get two designs in one!
- Fabric Wrap (Furoshiki): An eco-friendly and elegant alternative.
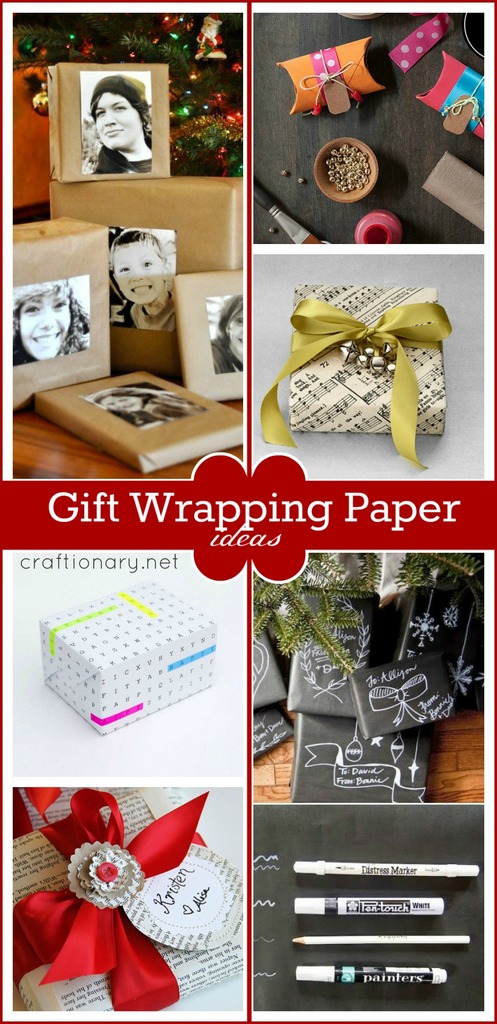
Gift wrapping paper ideas
- The recipient’s photo on the gift. It’s custom, special and easy to find!
- Recycle toilet paper into boxes for small gifts like jewelry.
- Musical wrapping paper.
- Word search interactive wrapping paper using canva.
- Black wrapping paper as faux chalkboard gift wrap.
- Newspaper or book pages for wrapping gifts. Cool idea for people who love to recycle.
2. Cutting and Securing Essentials
- Sharp Scissors: This is non-negotiable! Dull scissors lead to jagged edges and frustration. Keep a pair dedicated solely to paper.
- Double-Sided Tape: The secret to a seamless, professional finish. No visible tape marks!
- Invisible Tape (Matte Finish): For areas where double-sided isn’t practical or for a nearly undetectable hold.
- Glue Dots/Hot Glue Gun (Low Temp): Perfect for attaching embellishments like ribbons, tags, or small decorative items securely.
- Bone Folder or Ruler: For crisp, clean folds, especially on edges and corners.
3. Embellishments and Finishing Touches
- Ribbons and Twine:
- Satin/Grossgrain: Classic elegance.
- Velvet: Luxurious texture.
- Twine/Jute: Rustic and natural.
- Curling Ribbon: For traditional bows and curls.
- Wired Ribbon: Consider using wired ribbon for bows that hold their shape beautifully.
- Gift Tags: Essential for identifying gifts and adding a personal message.
- Natural Elements: Sprigs of rosemary, small pinecones, dried orange slices, or cinnamon sticks add a charming, fragrant touch.
- Ornaments/Charms: A small, inexpensive ornament can become part of the gift itself.
- Stamps and Markers: For personalizing plain paper or tags.
Related: 30 Creative Gift Card Holders That Elevate Any Gift
The Art of Wrapping: Step-by-Step Techniques
Let’s move from theory to practice! These techniques will cover most gift shapes and help you achieve a store-bought finish.
1. The Classic Box Wrap (Seamless and Crisp)
1. Measure and Cut:
Place your box upside down on the paper. Bring the paper up one side, over the top, and down the other. Cut the paper, leaving about 1-2 inches overlap. For the ends, the paper should be long enough to cover the sides with a slight overlap.
2. Secure the Seam:
Fold one long edge of the paper under by about half an inch for a clean finish. Bring both long edges together at the bottom (underside) of the box and secure with double-sided tape.
3. Perfecting the Ends (The Hospital Corner Method):
- Fold the top flap down against the box and crease firmly.
- Fold the side flaps in, creating neat triangles. Crease well.
- Fold the bottom flap up against the box. For an extra clean look, fold the edge under before securing with double-sided tape. Repeat on the other end.
Pro Tip: Use a bone folder or ruler to get those super sharp creases!
4. The Double-Sided Tape Secret:
Apply small pieces of double-sided tape strategically on the inside of folds and seams for an invisible hold. Add ribbon or bow, turning the gift into something iconic.
2. Tackling Awkward Shapes (The Bag and Tissue Method)
For items that aren’t box-shaped (think stuffed animals, clothing, or oddly shaped toys), a gift bag is your best friend.
1. Tissue Paper Volume:
Place your gift in the bag. Take 2-3 sheets of tissue paper. Hold them in the middle, then shake them gently to create volume.
2. The “Fan” or “Puff” Fold:
Insert the gathered center of the tissue paper into the bag, allowing the edges to fan out. Layer colors for extra flair.
Pro Tip: Add a small piece of tape to the underside of the tissue to prevent it from collapsing or falling out.
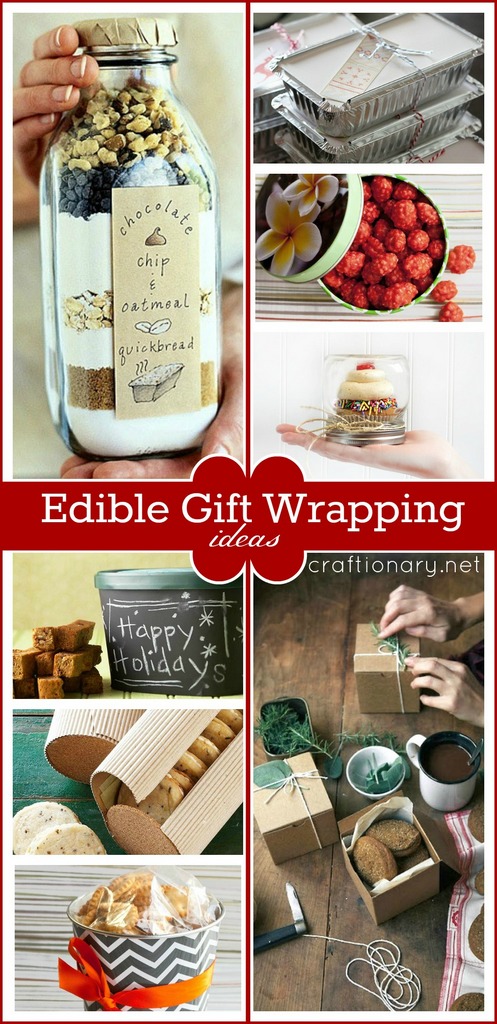
Edible gift wrapping ideas
- Glass jars (containing coffee, milk etc.) or mason jars make perfect containers for cookie mix, spice mix and semi-solid delights.
- Disposable foil containers, customize the lid with printable greeting or recipe.
- Tin boxes and containers for gifts like candies and popcorns.
- Cute little jars make perfect gift wrap for cupcakes, candies, trail mix and more.
- Chalkboard paint ice-cream container for homemade treats with greetings.
- Stack your homemade cookies in paper-lined roll of corrugated cardboard. Place a round of cork at each end and tie the tube tightly with ribbon. via bhg
- Buckets, that can come in handy for organizing stuff later on.
- Cardstock boxes.
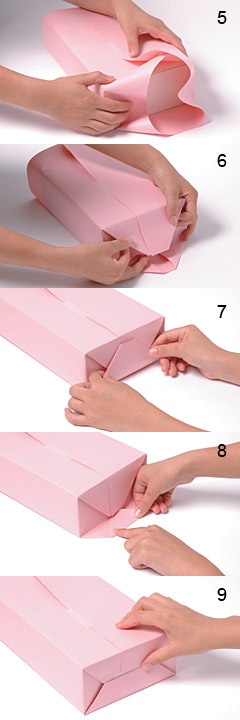
3. Wrapping Cylindrical/bottle wrap or soft items
Standard rectangular boxes are easiest—but what about mugs, clothes, or toys? Use gift bags or boxes when purely wrapping becomes challenging with off-shaped gifts.
1. Measure:
Cut paper long enough to wrap around the cylinder with overlap, and tall enough to extend beyond the top and bottom by 3-4 inches.
2. Wrap and Secure:
Wrap the paper around the cylinder, securing the seam with double-sided tape.
3. The Fanned End:
At one end, gently push the excess paper down towards the center, creating small, even pleats around the circle. Secure the center with a small piece of tape or a glue dot, or tie it with twine. Repeat for the other end.
Alternative: For bottles, you can also gather the paper at the neck and tie it with ribbon, leaving the top exposed.
Use crinkle paper, tissue or shredded paper to fill extra space for stability.
Pro tip: Use lightweight materials, and avoid overstuffing.
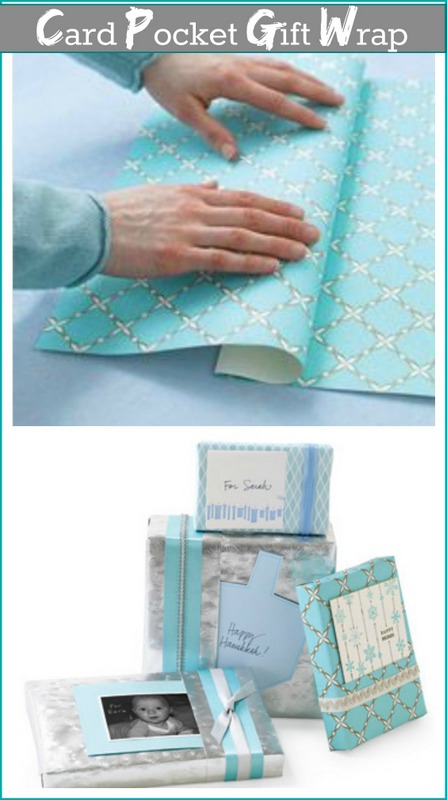
4. Smart Card Pock Gift Wrapping Technique
Fold the wrapping paper to make a card pocket when packing your gift.
Elevating Your Presentation: Ribbons, Tags and Personal Touches
Now for the fun part – turning your wrapped gift into a work of art!
Pro tip: Make your wrap signature: use the same elements so your gifts become recognizable.
1. Ribbon Mastery
- The Classic Criss-Cross: Wrap ribbon around the gift length-wise, then width-wise. Tie a knot on the top or bottom, then create a beautiful bow.
- The Simple Tie: A single ribbon tied around the center of the gift, finished with a neat knot or a simple bow, can be incredibly elegant.
- Multi-Ribbon Magic: Layer two or more different ribbons (e.g., a wide solid color with a narrower patterned one) for added dimension.
- The Pom-Pom Bow: A classic and impactful bow. Find tutorials for this online; it uses multiple loops of ribbon to create a full, fluffy effect.
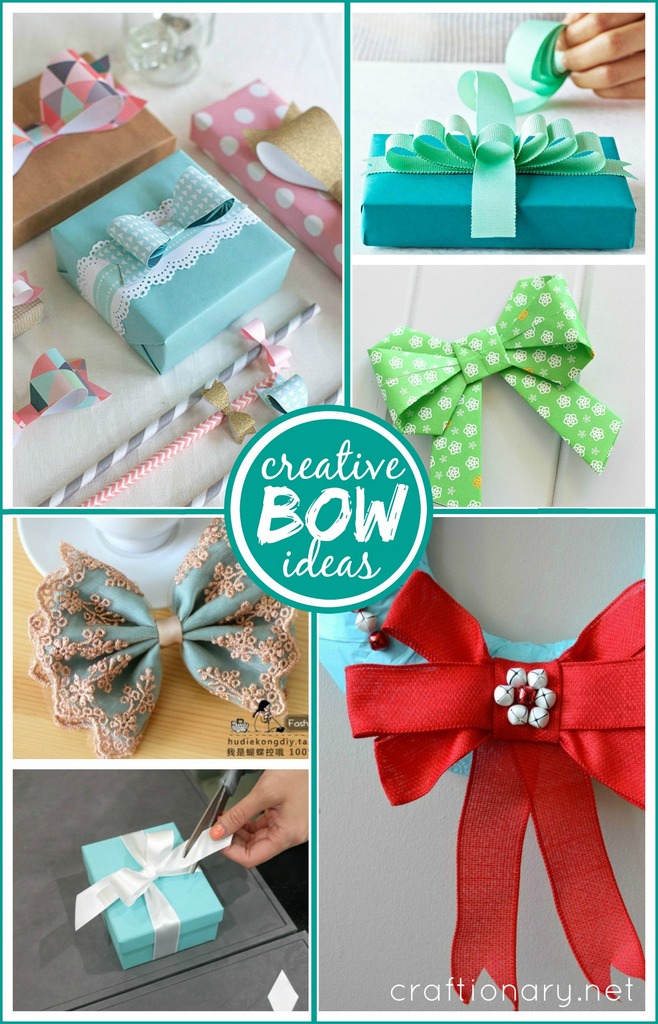
Creative gift wrapping bows
- Paper bow templates in 4 sizes via lia griffith.
- Make festive DIY bow
- Origami bow
- Lace bow
- Tiffany’s bow via urban e bloc.
- Easy 3 loop bow via craftionary.
DIY Bow maker
A board and two dowels make an easy bow making tool. This tool helps keep the ribbon in place while you make loops for the bow. It also makes tying easy.

2. The Power of the Gift Tag
- Handwritten Charm: Always handwrite your tags. It adds a personal touch that printed labels can’t replicate.
- Creative Attachments: Don’t just stick it on! Tie it with twine, thread it through a ribbon, or attach it with a mini clothespin.
- Embellished Tags: Add a small sprig of greenery, a mini pinecone, or a wax seal to your tag for an extra touch of sophistication.
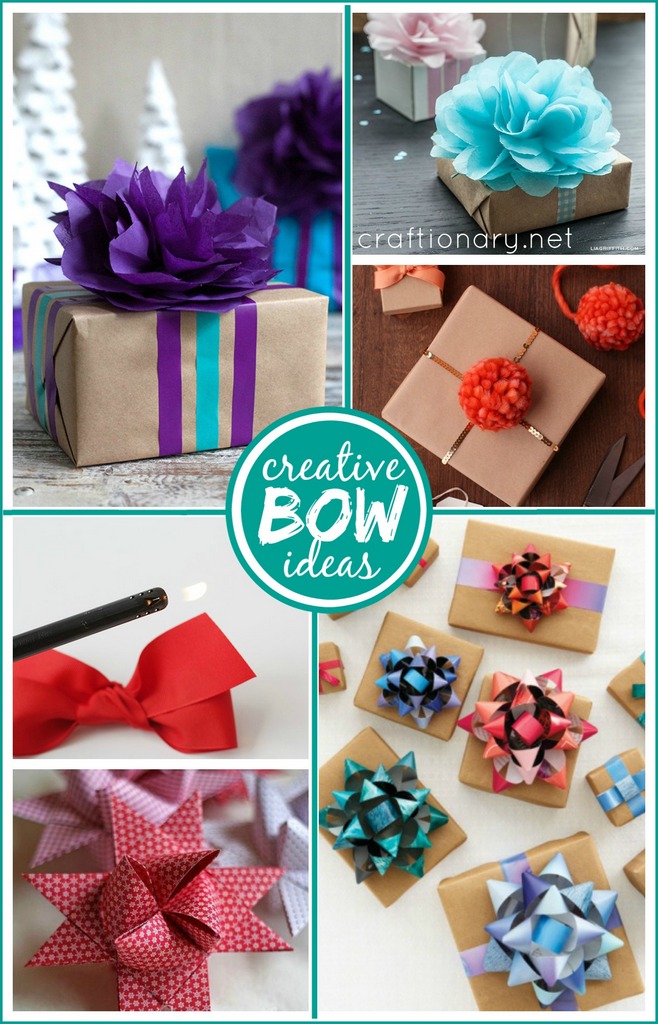
Creative Gift Toppers
- Tissue paper topper
- Tissue poms and flower gift toppers via lia griffith.
- Pom pom gift topper.
- No-fray ribbon trick, simply torch the ends.
- Jingle bell paper bow (German paper star)
- Read ~ Wrap ~ Recycle. Make bows from magazine.
3. Thoughtful Personalization
- Theme Integration: If the gift has a theme (e.g., a cooking gift), attach a small kitchen utensil or a dried herb sprig.
- Small Keepsakes: A small, inexpensive ornament, a charm, photos, or a handmade element can be tied onto the gift, becoming a little bonus present.
- Hand-Stamped Paper: Use plain kraft paper and festive stamps for a custom, rustic look.
- Adding Texture: Consider small bells, beads, or even a mini cookie cutter tied onto the ribbon.
Related: 40 Meaningful Memory Keepsake Ideas to Treasure Life
Eco-Friendly and Sustainable Wrapping Ideas
In an effort to reduce waste, consider these planet-friendly alternatives that are just as beautiful. Choose biodegradable materials and avoid excessive plastic accessories.
- Furoshiki (Fabric Wrapping): Reusable fabric squares can be tied in various ways to create stunning, waste-free gift wraps. The fabric itself can even be part of the gift!
- Reusable Gift Bags: Invest in high-quality, reusable fabric bags that recipients can use again.
- Newspaper/Magazines: For a quirky, vintage look, use old newspaper comics, sheet music, or pages from aesthetically pleasing magazines.
- Brown Paper Bags: Decorate plain paper bags with stamps, drawings, or ribbons for a personalized touch.
- Natural Embellishments: Stick to natural, compostable elements like dried flowers, leaves, pinecones, and twine.
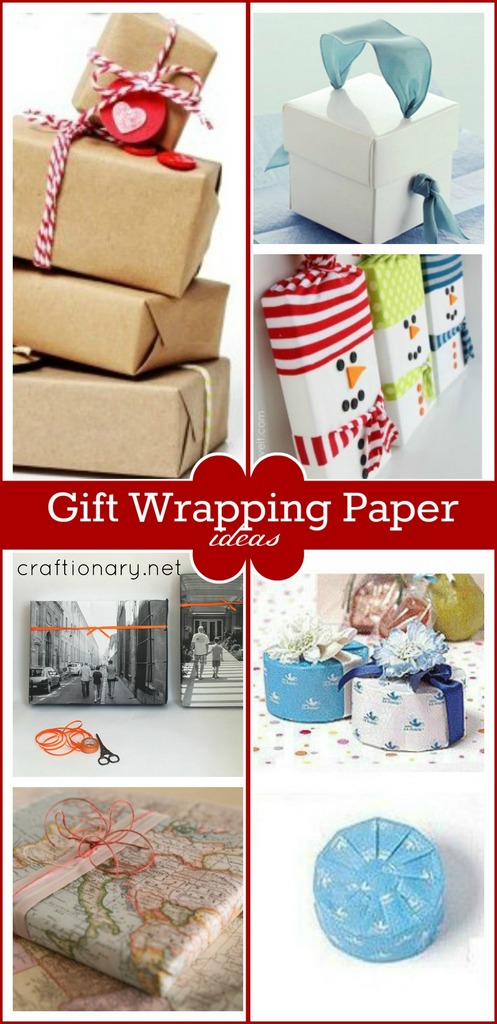
Recyclable Gift Wrapping Ideas
- Brown wrapping paper.
- A ribbon serves as a cute handle for your boxed gift.
- Recycle old t-shirts into making snowman gift wraps. Good for Holidays and Christmas gifts.
- Print a large engineering print photo from your local store to wrap a custom gift.
- Map gift wrapping paper.
- A nice and proper gift wrapping fold for circular gifts.
How to Organize Your Gift Wrapping Station
To save time and stress:
- Keep your supplies in one basket or drawer (paper, ribbons, tags).
- Pre-cut paper for different sizes of gifts.
- Store leftover ribbon in a small spool organizer.
- Have a dedicated space with good lighting and sharp scissors.?This organization makes wrap time faster and more enjoyable.
Gift wrapping Storage Solutions
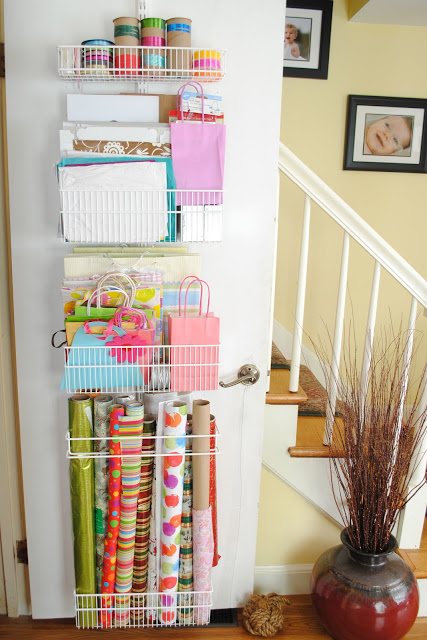
1. Over the door racks
Over the door organizer is perfect for small spaces and utilizes that unused closet door space. Organize wrapping paper, bags and ribbons on each wire rack.
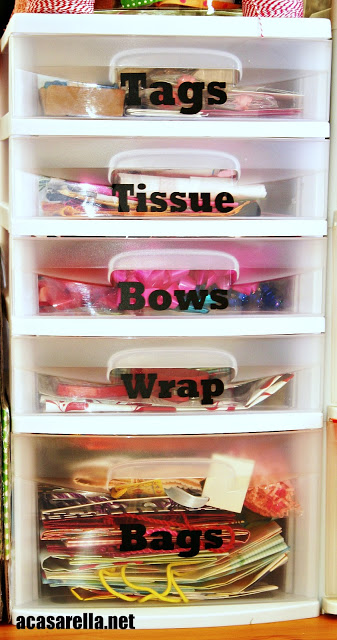
2. Rolling Drawer with Labels
Simple and easy drawer tower for gift tags, tissues, bows, wrap and bags with labels.
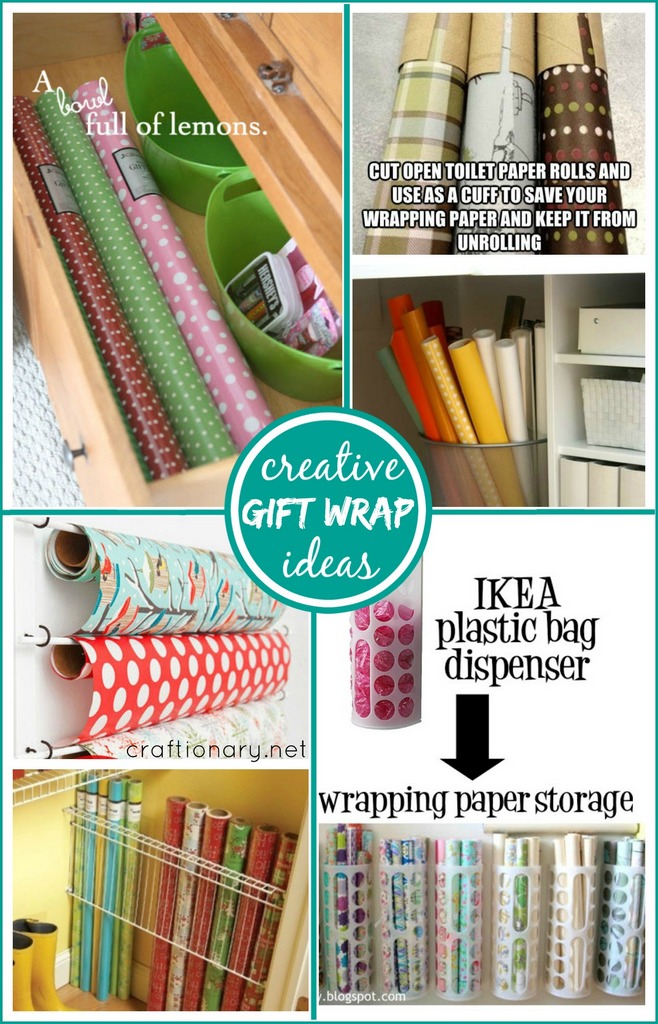
3. Gift Wrapping Paper Organization Ideas
- Using a drawer to organize gift wrapping rolls. And keeping all the other supplies in storage bins or baskets.
- Cut and use toilet paper rolls as gift wrap cuffs to prevent them from unrolling.
- Using a trash bin for holding wrapping paper.
- Dowels and hooks on a board make an easy DIY storage solution for wrapping paper.
- A wire divider serves good for using the side space for keeping wrapping paper.
- Ikea plastic bag dispenser can also be used as wrapping paper storage.
4. Ribbon tips and organization
- Ribbon organization on towers or stands.
- Using paper clips to keep the ribbon from unrolling.
- Printing on ribbon to customize for a special gift wrap. via sew mc cool
- Using shoe or scrapbook box for organizing ribbon.
- A list of places to buy cheap ribbon via craftaholic anonymous

Gift wrapping is more than just putting paper around a box—it’s a powerful way to show care, style, and personality. With the right materials, technique, finishing touches, and a little organization, you can turn your gift into an experience. Use this Ultimate Gift Wrapping Guide to wrap with confidence, style, and heart.

You will also like:
30 Unique Handmade Gift Ideas that show you CARE