This post may contain affiliate links. Please see our full Disclosure Policy for details.
Woven art is a captivating and creative technique that blends two separate artworks into a single masterpiece by cutting and weaving strips of paper. This visually striking method offers a hands-on way to explore contrast, harmony, and the surprise of hidden images—all while producing a unique, tactile piece of art. Whether you’re a craft enthusiast, teacher, or looking for an engaging project for kids or adults, paper weaving is a timeless technique that never loses its charm.
Learn how to create your own woven paper art, using two artworks, photos, or drawings—cut into strips and interlaced to form a mesmerizing and unified design. Find free printable grid template to assist you with cutting equally distanced paper strips for making paper weaving art.
What is Paper Weaving Art?
Paper weaving is the art of interlacing strips of paper—much like fabric weaving—to create patterns or merge images. The unique twist in woven art from two images is that you cut both artworks into strips and weave them together, one horizontally and one vertically, to form a combined, abstracted image. This creates a textural, layered effect that’s both geometric and expressive.
Why Woven Art is Trending
- Visually impactful: It turns simple drawings or photos into dimensional, optical illusion-style pieces.
- Beginner-friendly: No special tools required—just scissors, glue, and creativity.
- Educational value: Great for classrooms to teach patterning, contrast, symmetry, and fine motor skills.
- Popular on Pinterest and Instagram: It’s a scroll-stopper with major visual appeal.
- Eco-conscious: You can reuse old artworks, recycled paper, or failed prints.
Materials
- Two artworks or prints (same size)
- Craft knife or scissors
- Ruler
- Cutting mat (optional but helpful)
- Pencil
- Glue or tape
- Background paper (optional, for mounting)
Tip: Choose contrasting images—like a black-and-white sketch and a colorful painting—for maximum visual drama when woven together.
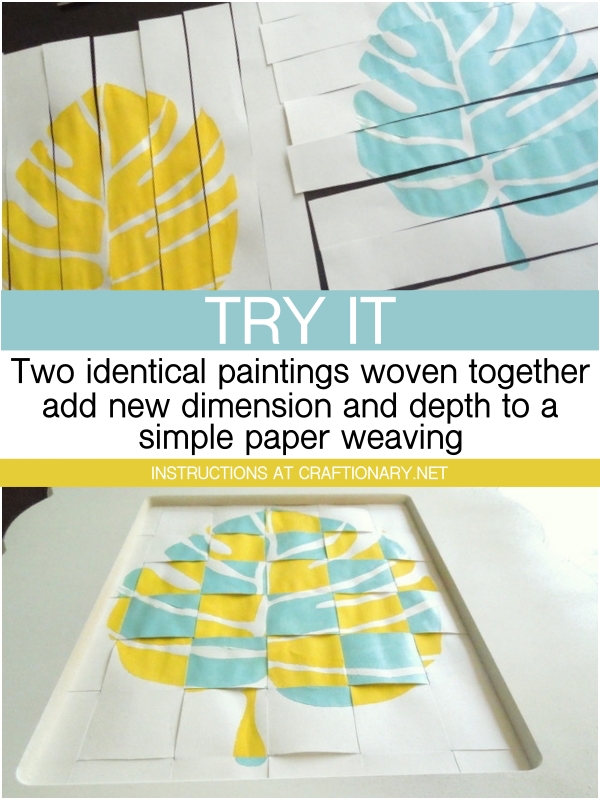
I had been wanting to give a 3D effect to a stenciled project for a while now. Previously, I had stenciled a magnetic board to display family pictures and a stencil wooden tray to use as a decorative accent.
Step-by-Step: How to Make Woven Paper Art
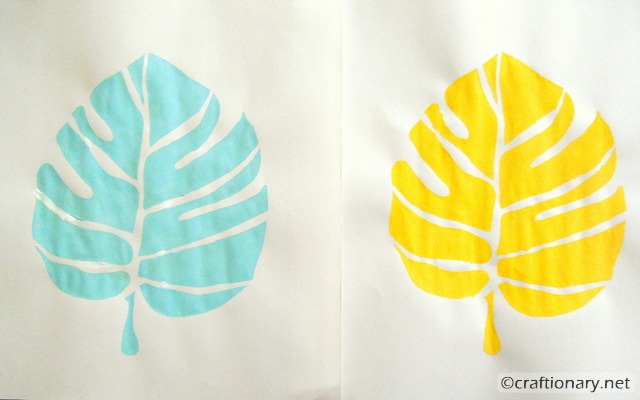
1. Prepare Your Artworks
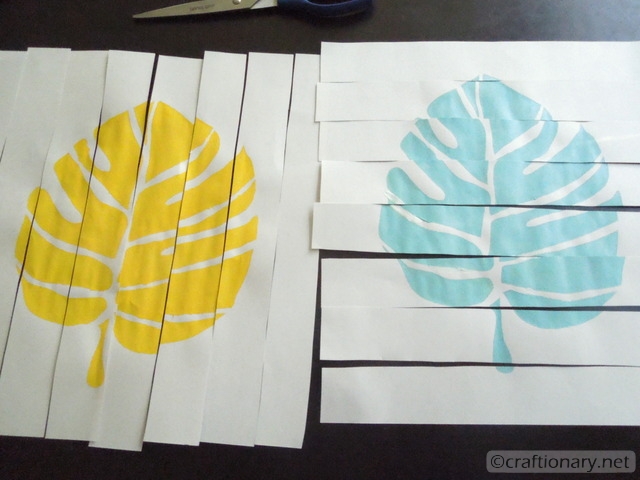
Print or draw two artworks of equal size on paper (ideally cardstock or heavyweight paper such as watercolor paper). Trim them to the same dimensions.
I used a foam brush to paint a leaf stencil on two drawing papers in contrasting colors.
Tip: If you plan to frame your finished artwork, make sure the artwork is according to the frame’e size.
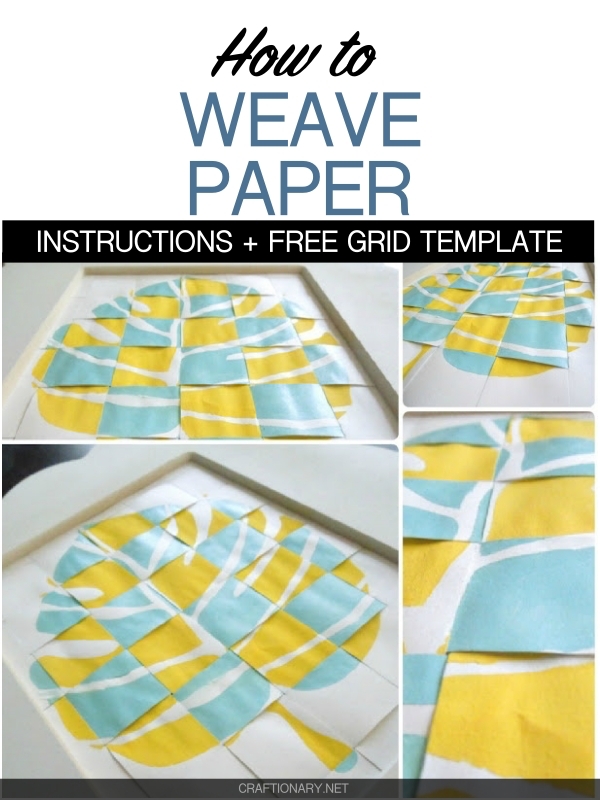
2. Cut One Artwork into Vertical Strips
Using a ruler and pencil, mark equal-width vertical lines (e.g., every 1 cm). Cut along the lines to create evenly sized strips. This will be your “warp.”
3. Cut the Second Artwork into Horizontal Strips
Repeat the process for the second artwork, marking and cutting horizontal strips. This will be your “weft.”
Related: Beginners Knitting: Learn to warp and weft using cardboard loom
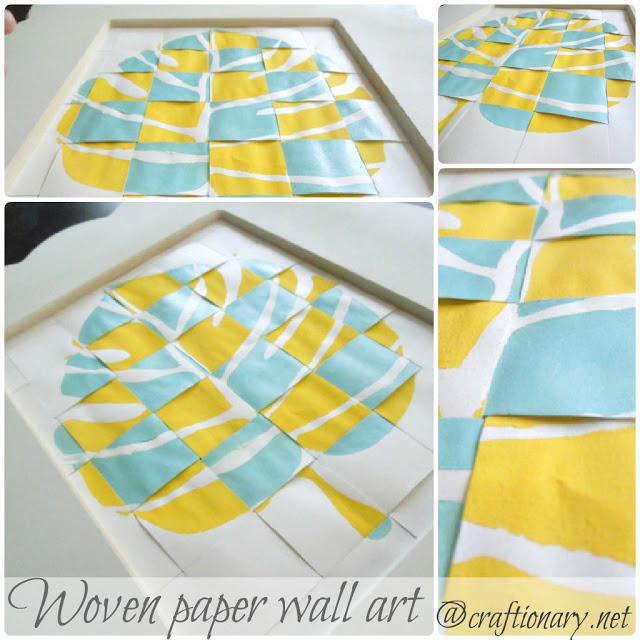
4. Weave the Strips
Take one horizontal strip and weave it over and under the vertical strips, alternating as you go. Repeat with the remaining strips, alternating the over-under pattern to form a tight weave.
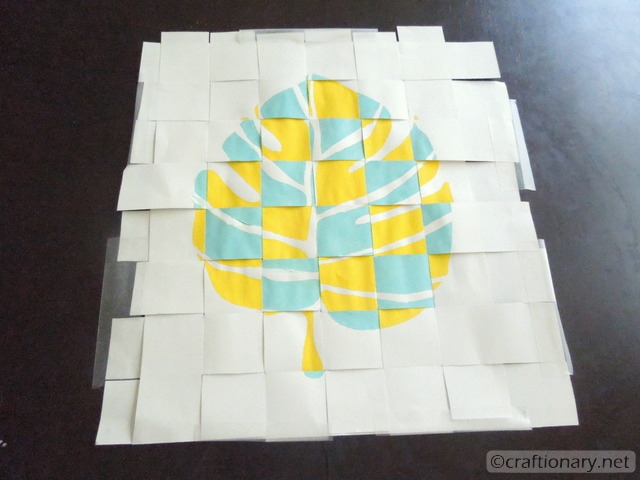
5. Secure the Weave
Once you’re satisfied with the alignment, glue or tape the ends on the back side of the artwork to hold everything in place. Mount it onto a piece of background paper if desired.
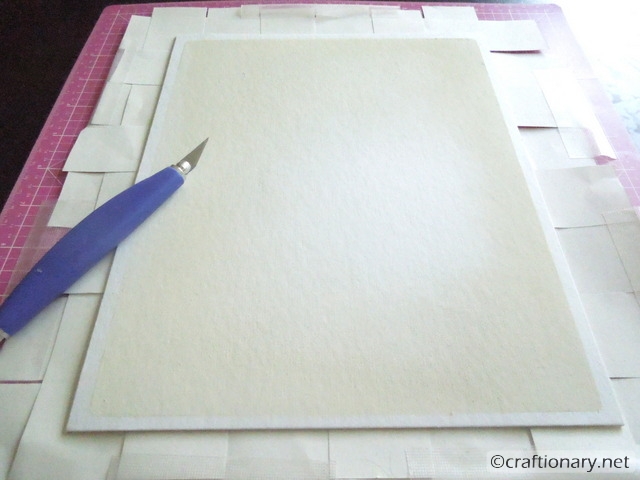
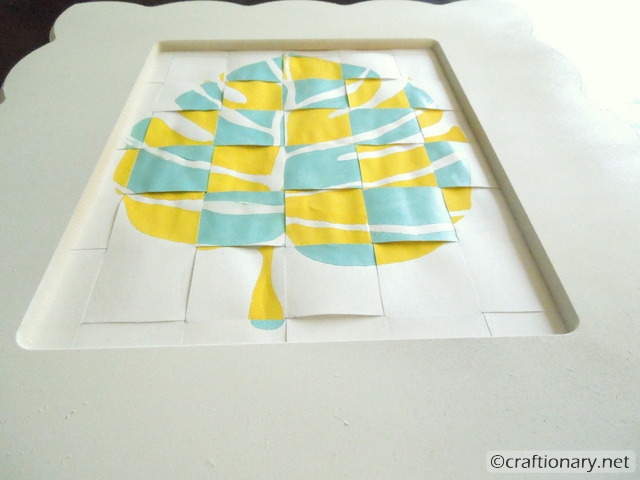
Or simply put the frame’s backing board on your woven art and cut the sides to fit the frame.
You can also tape it to keep it from moving.
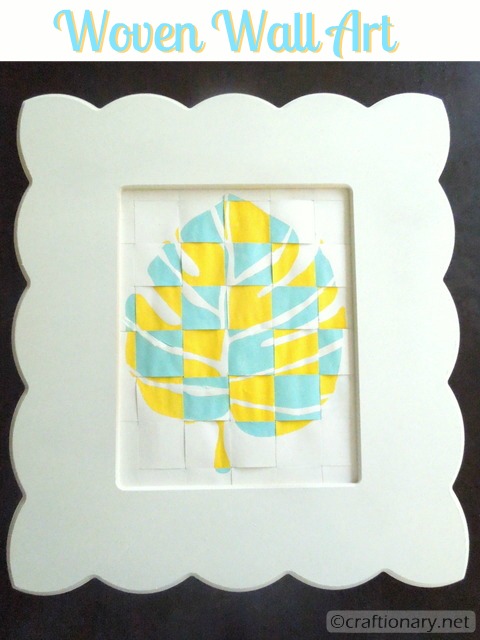
The frame I am using is 8×10 and the paper size is A4.
And there you have it! You can give a modern look to any simple art like this. Or like some say turn a painting that went bad into a creative work of art.
Variations and Ideas
- Split-portrait weaving: Use two halves of a self-portrait and an abstract design.
- Photo vs. sketch: Combine a printed photo and a pencil sketch for visual tension.
- Color blending: Use two watercolor pieces with similar palettes for a dreamy effect.
- Word art: Weave a quote into an abstract background to hide/reveal words.
- Seasonal twist: Try winter and summer scenes woven together as a seasonal contrast.
Educational Benefits of Paper Weaving
Teachers love this project because it:
- Teaches patience and precision
- Develops spatial awareness and symmetry
- Encourages art appreciation and contrast analysis
- Provides opportunities for STEAM integration (Math + Art)

Printable Grid Template Guide
To make it easier, we’ve created a free printable guide with grid templates and weaving layout lines you can use to align your cuts perfectly. Ideal for classroom or homeschool use.
Inspirations for paper weaving art:
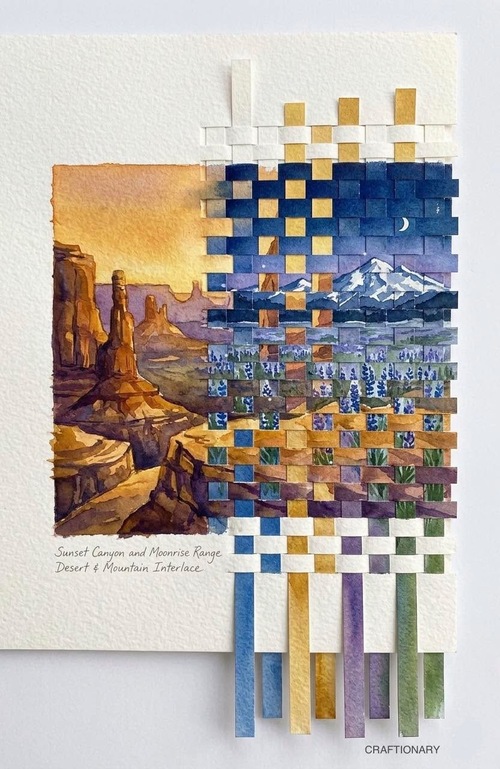
You may try paper weaving interlace of contrasting art using the slit and insert method once you are familiar with the basic technique here. Learn more about paper weaving art like the sunset and moon art with instructions.

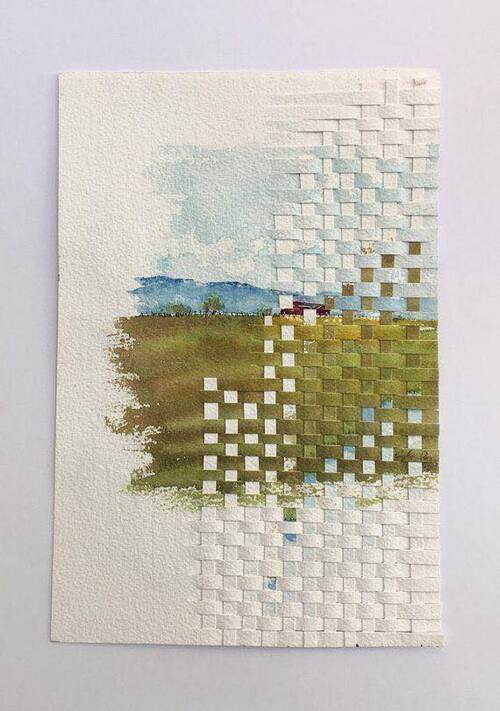
Watercolor paper weaving art is so cool shared by Cindy Latoski-Longstaff.
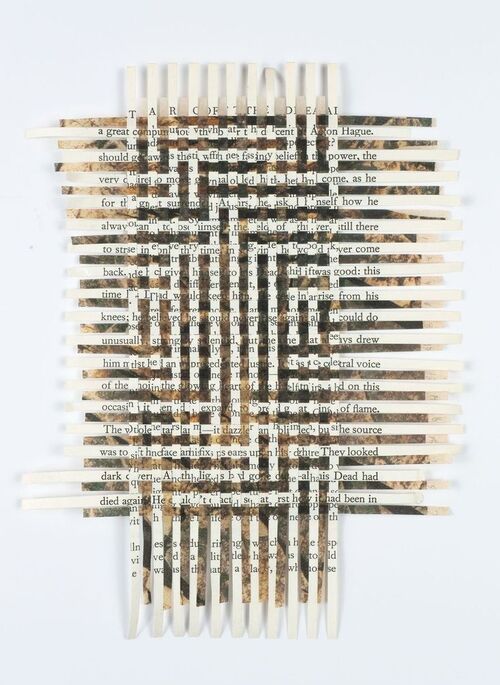
Another paper weaving art that is so cool from The Artist
Geometric paper weaving artwork by Pauline Kerleroux
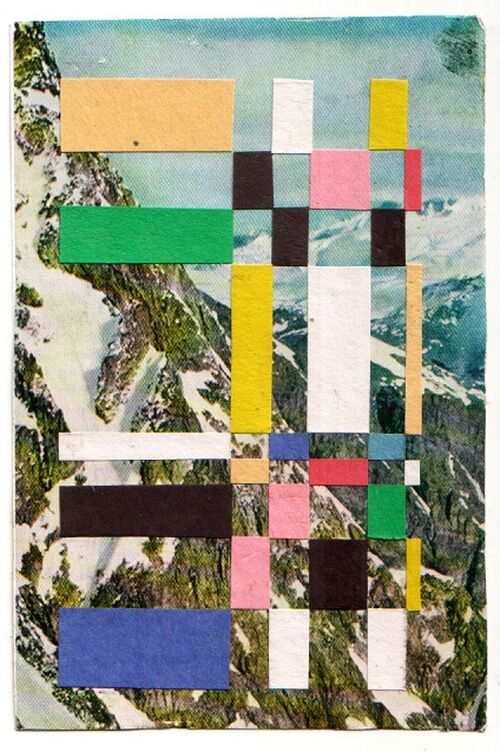
Photo and colorful paper strips by Arlene solum
Woven paper art is more than a craft—it’s a bold, creative statement that merges two visions into one. It’s also a brilliant way to upcycle artwork, explore visual storytelling, or simply lose yourself in a calming, meditative creative process.
So grab some scissors and start weaving a new perspective today!
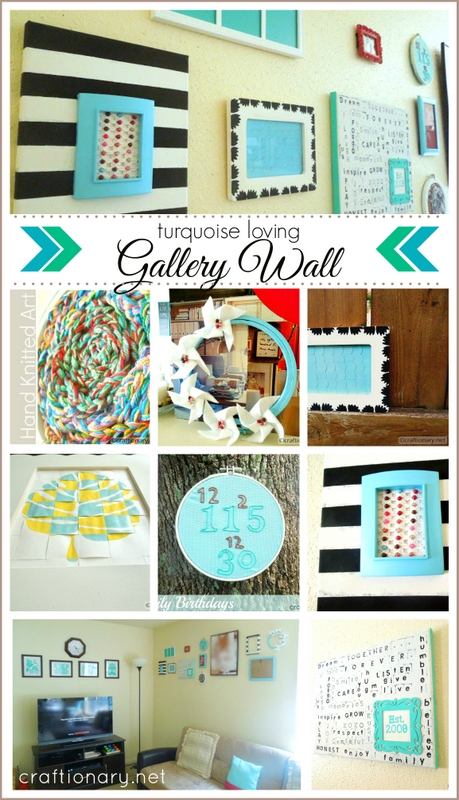
I would love for you to check out my Gallery Wall reveal.
You will also like:
DIY Shadow Silhouette Art Project on Painted Canvas
Blooming Walls: Creating A Home Art Gallery with Acrylic Paints


What an original idea!
Very nice!
How creative! I love it Hani!
How fun! What a great idea. I love it! Thanks for sharing at our Handmade Tuesdays party. I'm sharing this on my FB page.
I love the way this 3D leaf looks!!! So gorgeous. Thanks so much for linking up at Romance on a dime! Pinning this.
This is absolutely beautiful Hani! xoxo
That is so cool! I love it! Thanks for sharing at Terrific Tuesdays. Rachel
Love this, I'm pinning!
This is so neat! Gonna try it! Thanks for sharing =)
Fantastic idea, thank you.
I found this via the Create & Inspire party. I have linked in a pork and apple curry.
Have a great week.
What a great,simple idea! I love your color choices too! Thanks so much for coming out to the party at Clean and Scentsible. I'll be featuring this tomorrow. Enjoy the rest of your weekend!
Jenn 🙂
Hani,
Love this! I can see all the wonderful holiday art I'm going to be making in the future. I love the color scheme you chose too.
Thanks so much for linking up to Creative Thursday last week. I can't wait to see what you link up next. Have a great week.
Michelle
Love the woven effect !
This is such a great idea! I love how it looks 🙂
This is so cute, the colours are perfect! and I love it! thank you for posting this GREAT idea!
hugs
-gina
What a great idea your picture are.
Beautiful!! Thank you for sharing on Sharing Saturday!
That turned out GREAT!
I am so in love with this. It is beautiful!
Thanks so much for linking up to the Pinworthy Projects party!
Wow, that is so cool! What a fun idea! Thanks so much for linking up to The Fun In Functional 🙂
Hello
And you for linking this project up at last weeks craft, create and inspire linky party …
This project is featured this week !!
Hope you will stop by and link up your projects from this week, don't forget to grab an I have been featured button!
Claire x
Great adia! i will try very soon.
I would love to know where you find this frame! So pretty together 🙂