This post may contain affiliate links. Please see our full Disclosure Policy for details.
The Living room Wall Gallery has been almost completed. Today I am sharing a tutorial to make easy and custom DIY wall decor using embroidery hoop. Make a Family Birthdays wall art with embroidery hoop and simple chain stitch or stem stitch that is easy for beginners. Hang the frame in your home.
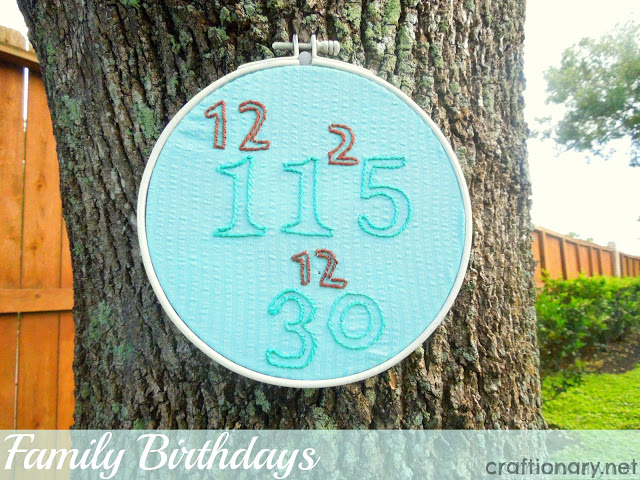
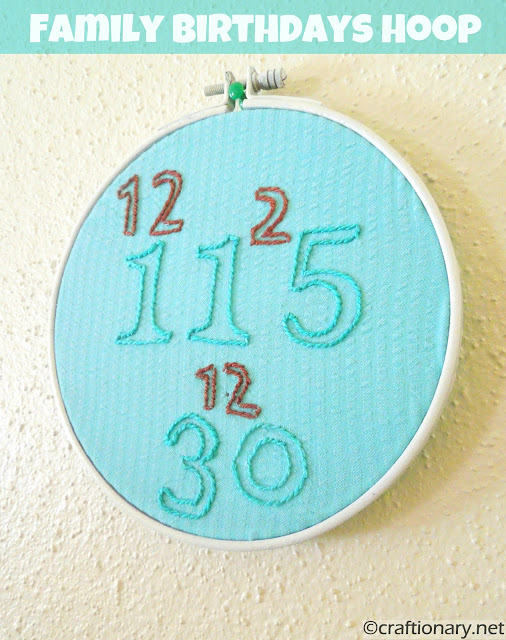
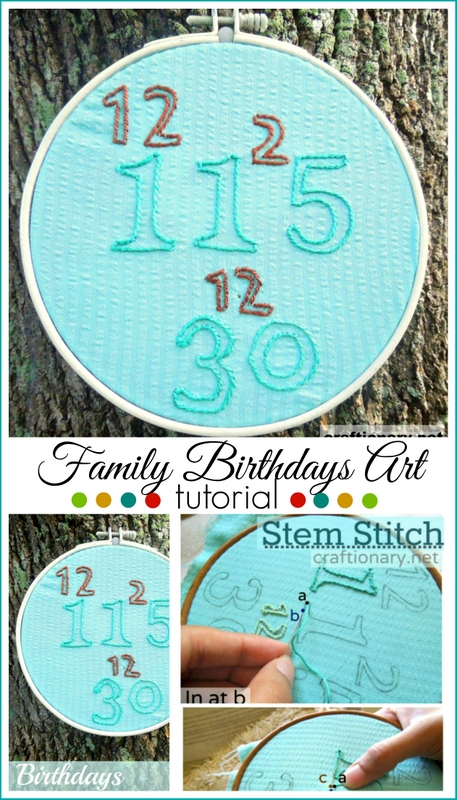
Family Birthdays Embroidery Hoop
The inspiration for this project comes from the birthdays. You can use this idea to craft a birthday art in your own style. There are a tons of different ways birthday art can be made like a printable or painted canvas.
However, I love the way embroidered birthdays look on the embroidery hoop. Cute and sweet!
All you have to do is place the fabric of your choice in the embroidery hoop. And pick the colors you like for embroidery.
Trace the numbers and start embroidery.
Family Birthdays Embroidery Hoop (Tutorial)
I really liked this birthday dates Printable frame idea. Which inspired me to create this embroidery hoop.
The idea to embroidery my Family’s Birthdays on a hoop.
That was it, a custom special handmade project!
Make It:
I simply made an image on Picmonkey with the birth dates and printed it out.
Then with the help of a carbon paper, I traced it onto my fabric.
Fit it into the embroidery hoop. And started embroidery the Stem Stitch.
Tip: I place a piece of paper towel on the back to support my stitch and get neat results.

What I love about this stitch is, it gives a very neat outline and is very easy to do.
Stem Stitch Tutorial:
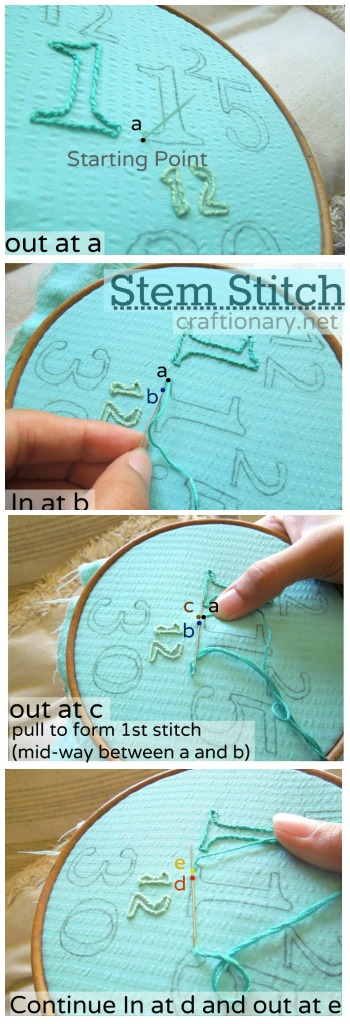
- Bring the thread out at a and hold it down with your thumb. Insert the thread at b and bring it out at c, midway between a and b.
- Pull the thread through to see the first stitch. Hold the working thread down with your thumb and insert the needle at d and bring it out at e, midway between d and b.
- Continue in this way, making each stitch exactly the same length.
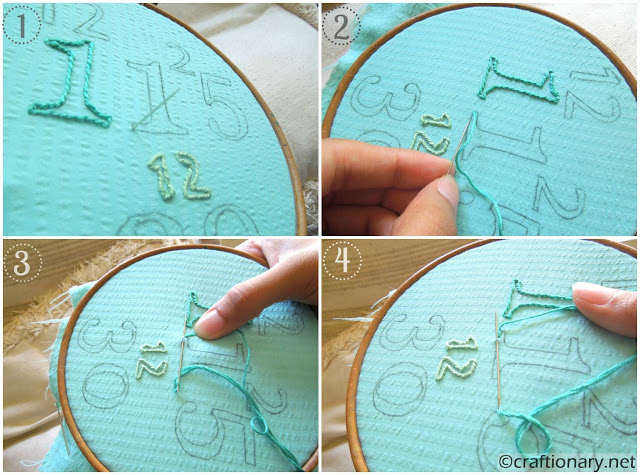
View each image individually for better understanding.
Images One, Two, Three and Four.
I chose to go with turquoise for the date and brown for the month of our birth dates.

Here’s what you get.
A custom and handmade this embroidery hoop looks!
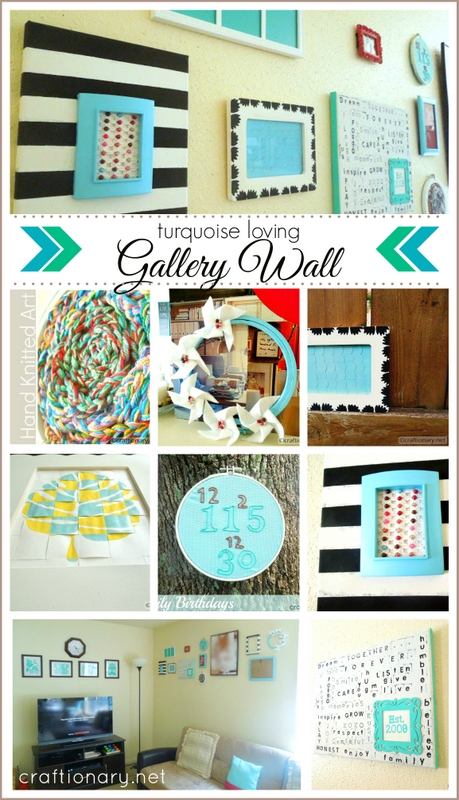
To see all the projects of this series, go to DIY Easy Wall Decor Complete Series.
Which one you think is the best?
Looking for Wall Decorating ideas?
Check out tutorials in the category Wall Art.


Hi,
Thanks for stopping by our blog and for those lovely words of encouragement.. This is a very very creative idea, even though I am horrendous at needle work , and never stitch or sew, you have really pumped up my needle energy and I am DEFINETLY going to try this. Absolutely love this idea.
Happy Ramadan .
Hadiyah
WOW, great idea! Love this embroidery hoop, so artistic & creative! Thanks Hani for visiting me and for your sweet words. Happy to follow you 🙂
What a fun idea! Helps with remembering those days I bet too! 🙂
Super cute idea! And you're totally right about the stem stitch; I used it in my first ever embroidery project last year and it is definitely super easy! Thanks for sharing this at The Fun In Functional!
I love how you made this your own! What a great idea! I've been wanting to do something with our family's birthday's too.
Great hoop! (and I'm a big fan of stem stitch too, it's so great for gentle curves)
How cute AND meaningful! Thanks!
So cute! Thanks for linking this up to Fantabulous Friday at Little Becky Homecky!!
Dear Hani, I've shared an award with you. Please come by and pick it up
Great post. I found this through the Create and Inspire linky party. I linked in a rhubarb and banana jam I did to use up old bananas.
Cheers
So cute! I love the way this looks. Thanks for linking up at Romance on a dime!
Love this Hani!!! People rarely include birthdays in art! Great idea!
Thanks so much for sharing this at The DIY Dreamer.. From Dream To Reality!!
such a great idea to remmember birthdays…
What a wonderful idea. Such a great thing to pass on as well. Thanks for sharing at Sharing Saturday!
I really loved this idea and will be totally pinning and featuring it! thanks for sharing this, Hanni!
Hugs,
Lelanie
This such a wonderful idea, Hani! And I'm so happy you shared this at my Throwback Thursday party! Thank you so much! You have such great ideas and I hope to see you again this week! 🙂
Oh how lovely! This stitchery is perfection!
I have seen this & really been wanting to make one for my mom as well. Thanks for the tutorial. Yours is adorable!!