This post may contain affiliate links. Please see our full Disclosure Policy for details.
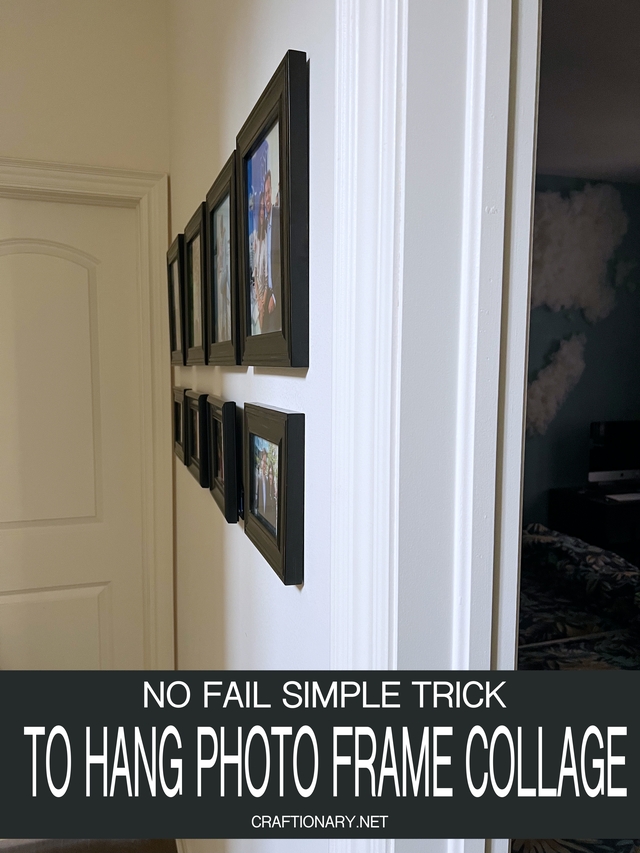
This simple no fail trick will show you how to hang small photo frames collage on the wall in alignment the first time without damaging the drywall for a professional-looking display at home.
Material for hanging leveled photo frames
You will need:
– Choice of picture frames
– Variety of Nails, hooks, and wall anchors
– Magnetic level and ruler or Laser level
– Pencil, measuring tape and tools for screws
Instructions to hang small photo frames collage
Choose a Collage Design
There are so many variety of ways to create a collage but my favorite is the traditional symmetrical design. To make sure your picture frames will be in alignment when you hang them all you need to do is use painter’s tape assistance and mark the hooks.
Layout and Tape Frames
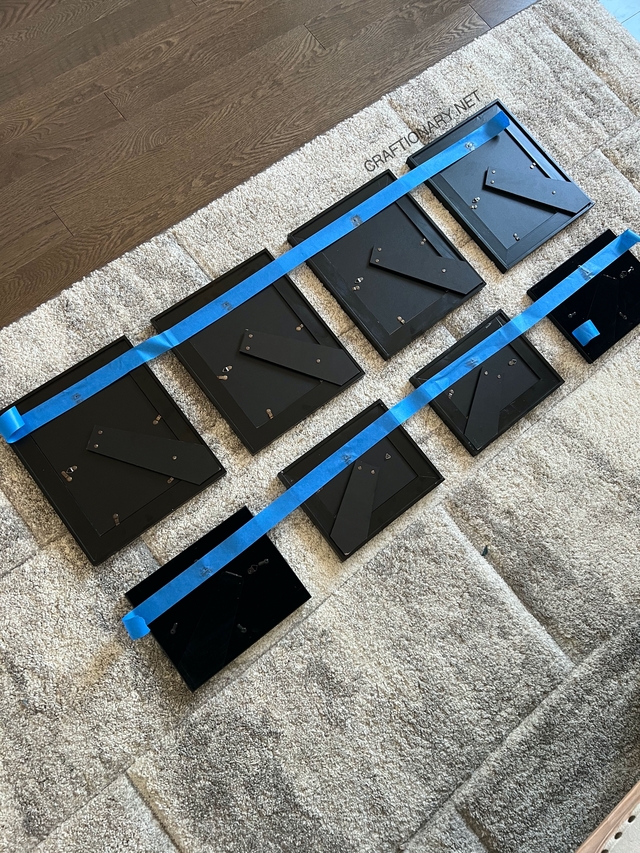
Place the photo frames upside down on the floor and set them as you want on the wall. Make sure the distance between the two photo frames is the same throughout the collage. Use a measuring tape to ensure the distance is correct.
I have a 3 inches distance (a typical gap is around 2-3 inches) between my picture frames. You can use old picture frames from thrift store too.
Use an arm’s length method to stick the painter’s tape horizontally covering all frames. Make sure the tape is on the frame’s hook.
Tip: The hook should be up like it is suppose to be when hanging, make sure it is not facing down.
Do the same for the second line or for your design ensuring all rows are covered. Now place a tape vertically to cover the column distance between the rows of frames. This vertical tape will help you locate where to start the next row of frames.
Now mark the hook positions with a pencil. It is also a good idea to take a picture of your arrangement for reference later when you transfer them to the wall.
Measure and Mark the Frame Location on the Wall
Measure the wall’s width and mark the center.
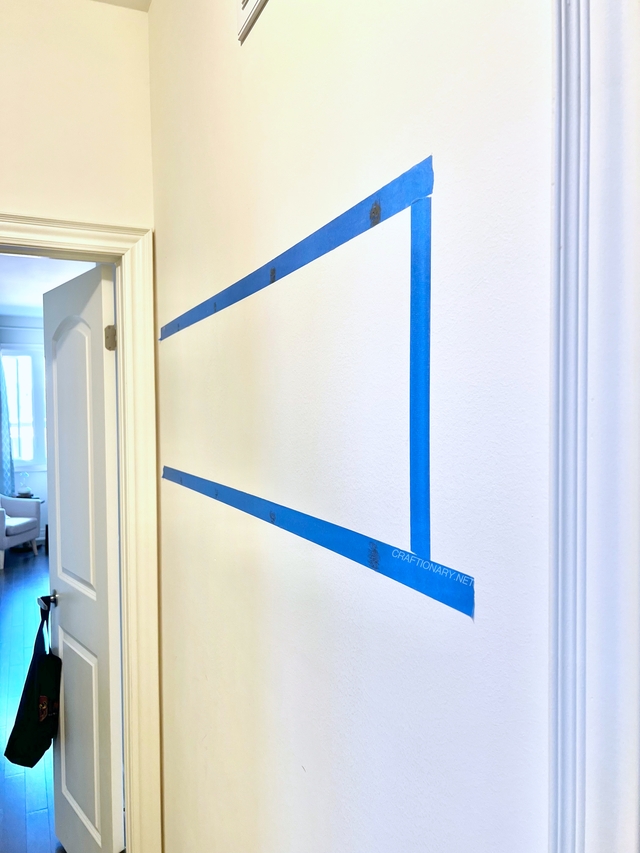
Remove the painter’s tape from the first row of frames and stick it on your wall making sure the tape’s center is in alignment with the wall’s center.
Use a level to check the alignment of the tape at different spots on the wall. You can also measure the distance from the floor to the tape at three different instances throughout the length for personal satisfaction.
Now do the same for the other row of frames and the column. Make sure to check it.
Screw and hang photo frame collage
Use a screwdriver or drill machine to insert screws in the drywall or brick wall where you mark on the tape.
Hang your photo frames and you are done.
You will also like: How to frame a puzzle in 3 easy steps?
Some side notes for printing photos:
Use Shutterfly to save your collection of photos in high resolution through the app for no additional cost.
The app saves your photos by year, making the collection easy to access and choose photos when required.
Add the photos you like to the favorites or create an album and share or save it on your phone or laptop.
I find printing photos the easiest with online photo services from Walmart and Staples. Prefer Walmart for its price, quality, and timely options.
Pro Tips for hanging frames:
Start hanging frames from the center or focal point and work your way outward.
Use painter’s tape and not any other paper tape as it is easy to remove without damaging or stripping the paint from the wall.
Use wall anchors for heavy frames and make sure to use the right anchors according to the weight of your photo frames to prevent drywall from cracking or collapsing due to overload.
Hope you liked this simple trick which has made me confident in placing large photo frame collage on the walls hassle-free.
