This post may contain affiliate links. Please see our full Disclosure Policy for details.
Learn how to use alcohol inks with this complete guide on types of alcohol inks, materials and instructions to make alcohol ink art along with painting tips. You will also find different techniques, mixes, and beginner kit recommendations to start using for crafts.
Ever seen paintings explode with wild colors and dreamy swirls? Looks like magic, right? Nope! It’s alcohol inks, and this guide is your ticket to making those mind-blowing masterpieces yourself, even if you’ve never touched a brush. Ditch the fancy stuff and forget frustration – alcohol inks are all about vibrant colors and easy fun. Get ready to unleash your inner artist, one dazzling drop at a time. No complicated rules, just endless possibilities – let’s create something awe-inspiring, together!
Table of contents:
- What is alcohol ink?
- Types of alcohol inks
- What material is needed to work with alcohol inks?
- How to use alcohol inks?
- What can you do with alcohol inks?
- Best alcohol ink kits
- Different alcohol ink techniques

What is Alcohol Ink?
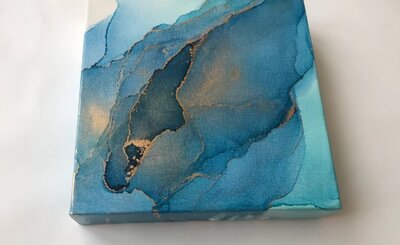
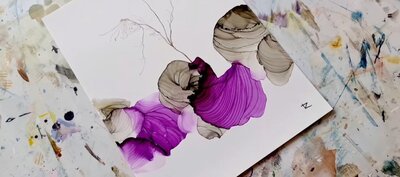
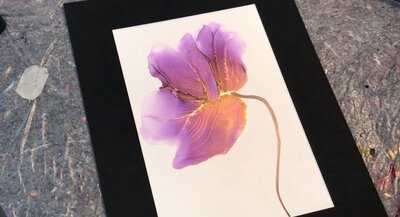
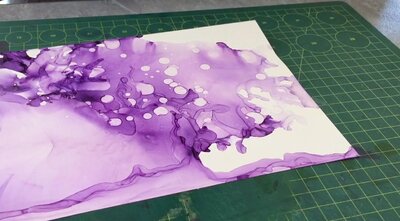
Alcohol ink is an exciting art medium known for its vibrant colors and fast-drying properties. Made from alcohol and dye-based colorants, this ink creates translucent designs on various surfaces like canvas, Yupo paper, and ceramic tiles. Artists love its fluidity, making it perfect for intricate patterns. Particularly popular in abstract art, the unpredictable nature of alcohol ink adds charm to creations, forming captivating patterns and rich color blends. Its versatility makes it a top choice for artists exploring innovative and expressive techniques in their work.
You will also like: 40 Best Alcohol Ink Art Projects You’ve Ever Seen
Types of alcohol Inks:
Alcohol inks come in different types, each with its distinct qualities:
-
Dye-Based Alcohol Inks:
These are common and versatile, known for their vibrant and translucent colors.
-
Pigment-Based Alcohol Inks:
These inks use pigment particles, resulting in more opaque and intense colors, especially great for certain artistic effects and resin crafts.
Shop pigment-based Alcohol inks here
-
Blending Solution:
This is a clear solution used to lighten or blend alcohol ink colors, making it easier to create smooth transitions in your artwork.
-
Metallic Alcohol Inks:
These inks have metallic pigments in them, giving your creations a shimmering or metallic effect.
-
Pearlescent Alcohol Inks:
Like metallic inks but with pearlescent pigments, these give your artwork a pearly, iridescent sheen.
-
Opaque Alcohol Inks:
If you’re looking for solid and opaque coverage, these inks are the way to go, helping you achieve more opacity in your artwork.
-
Custom Alcohol Inks:
Some artists like to create their alcohol inks by mixing dyes or pigments with alcohol. This allows for personalized color palettes, and different brands also have their formulations, opening diverse artistic possibilities.
This tutorial by Created and Made Studios can help you learn a few methods to make your alcohol ink.
What Material is Needed for Alcohol Ink Art:
Speculating what other supplies are to be used for Alcohol ink art? Don’t worry!
Unveil the essential supplies needed to start alcohol ink painting in this article, providing a list of the basics. Further, gain insights into how these supplies are used and where to track them down.
1) Alcohol Inks
Let’s talk about alcohol inks.
They are of course a basic supply for alcohol Ink art. They are easy yet tricky to use because of their fluidity and fast-drying nature. There are many different brands available, but I’ve got some top picks:
-Ranger by Tim Holtz Alcohol Inks:
Tons of colors to choose from, and these inks reveal new shades when mixed with isopropyl alcohol. Often sold in neat 3-color packs, making it easy for beginners. The colors usually complement each other well.
-Piñata Alcohol Inks by Jacquard:
Bright and concentrated inks that keep their true color even when diluted. A little bit of these inks goes a long way, and it’s a blast to mix them for your custom shades. Their metallic shades are to die for and are basically what they are most famous for!
Tip: Give metallic inks a good shake before use to ensure proper mixing; a ball bearing inside assists with this. Standard inks, on the other hand, require no mixing.
-Vibrant Alcohol Ink Colors:
A massive range of colors, although it might be tricky to decide which ones to go for. They aren’t as concentrated and famous as some other brands, but the color variety is mind-blowing!
Tip: Never buy a complete set unless you want to try with variety of colors in the beginning. Start with just 2 or 3. Use metallic colors as a game-changer!
-Alcohol Ink Markers
For those who enjoy a drawing approach, alcohol ink markers provide the precision needed to add intricate details to your artwork.
Art Piece where Alcohol Ink Markers are used by Kimberly Cole
Popular choices like Sharpies become valuable for incorporating details and outlines after manipulating the inks. While labelled as “permanent,” Sharpies’ resilience can be influenced by paper and rubbing alcohol, necessitating sealing with Krylon Kamar and UV Protectant for enduring results. White gel pens become excellent companions for applying those final, luminous highlights.
-Copic Markers
Copic Markers, a go-to in the domain of alcohol-based markers, offer remarkable pigmentation and user-friendly features. Available in packs with various nib options, including chisel and brush, Copic provides a broad spectrum of 368 colors. The versatility extends with refill options for both markers and ink.
-Sharpies
Classic Sharpies, recognized alcohol-based markers, encompass a diverse palette, from neon to metallic and pastel to traditional collections. Ideal for beginners, Sharpies facilitate coloring, and the application of rubbing alcohol introduces captivating marbling effects, contributing to a visually striking finish.
Do you mix Alcohol Ink with anything?
Absolutely! Alcohol inks can either shine on their own or team up with a blending solution for added creativity. This solution, also alcohol-based, brings its magic – lightening colors, creating textures, and unveiling unique patterns. Some artists prefer the pure charm of alcohol inks, while others enjoy experimenting by incorporating friends like acrylics, watercolors, or resin. Just remember, for these creative blends, stick with alcohol-based solutions tailor-made for the lively journey of alcohol inks.
2) Surfaces to Work On
Painting with alcohol ink is most effective on non-porous surfaces. This will allow the inks to mix and flow, providing a variety of fascinating designs. Though there are numerous options available, these are some of the simplest for newbies to use
-Yupo Paper
Yupo is a special kind of polypropylene paper that is resistant to water and works well for this kind of painting. It comes in a variety of sorts and sizes and won’t tear when blended. Yupo comes in a variety of types like white, translucent, standard weight, heavy weight etc.
Are you aware that Yupo paper is both tear and water-resistant? No need to concern yourself with unintentionally tearing the paper if you’ve secured it down!
–Clay Boards
Claybord serves as a versatile surface for various art media, particularly complementing ink. These high-quality panels come in flat or cradled options, featuring sturdy wooden edges. After completing and allowing a painting to dry, artists can utilize a specific scratching tool to create designs or textures on the surface.
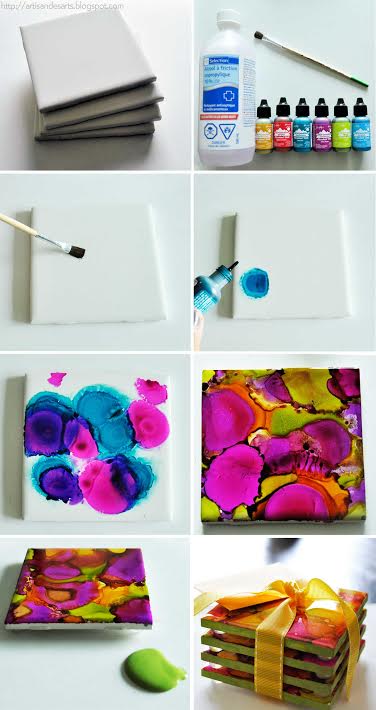
-Ceramic Tiles
Ceramic tiles offer a budget-friendly option for creative surfaces, readily available at most hardware stores. Alcohol InkArtwork on ceramic tiles presents a smooth, glossy finish, seamlessly integrating with the tile once the ink is applied.
Tip: You can use alcohol inks on a variety of surfaces, including glass (such as wine glasses and tumblers), wood, metals, ceramics (like tiles), glossy cardstock, plastic, canvas prepared for non-porous surfaces, and even whiteboards.
What types of paper can I use for alcohol ink art?
Alcohol inks work best on non-absorbent and non-porous papers. Some recommended options include synthetic Yupo paper, specially designed synthetic paper for alcohol inks, coated papers like photo or glossy papers, clear acetate or transparency sheets, and certain smooth plastics. Additionally, durable surfaces such as tiles, ceramics, and smooth glass are excellent choices for alcohol ink creations on paper. Always ensure the selected paper is clean to achieve optimal results.
3) Alcohol Blending Solution
The Alcohol Blending Solution serves as a substitute for 91% alcohol in blending, lightening, and erasing ink from artwork. It introduces a slight variation in the flow of inks compared to plain alcohol, adding an enjoyable element to your projects.
Shop Alcohol Blending Solution here
Pro Tip: You can also utilize this solution for cleaning to remove ink.
4) Isopropyl Alcohol
Isopropyl Alcohol, ranging from 91% to 100%, is a versatile tool for blending, lightening, erasing, and crafting intricate designs with ink, making it a staple for various artistic applications.
5) Claro Extender
Claro Extender facilitates smooth ink blending, prolonging drying time for extended painting and color blending. It enhances ink transparency, maintaining a glossy finish, while isopropyl alcohol yields a more matte appearance.
6) Plastic Painting Palette
For blending colors and creating diverse shades, a small plastic paint palette is quite useful. Additionally, it serves well in mixing ink with blending solution for lighter tones. If a palette is unavailable or you require more ink for larger artwork, consider using small plastic cups in 2- or 3-ounce sizes as an alternative.
7) Blending Tools
Explore a range of tools to enhance your alcohol ink creations. While inks naturally blend with alcohol or solution, these tools add unique effects, patterns, and designs. Whether using everyday items or purpose-designed tools, you don’t need to get everything at once. Start with what you have and gradually expand your collection to experiment with new techniques.
Tool Suggestions:
– Paper towel bits
– Cotton swabs
– Drinking straws
– Art sponges
– Small felt pieces
– Ranger Mini Ink Blending Tool
– Art paint brushes
Craft your artistic journey by blending and experimenting with various tools to discover your preferred techniques and styles.
8) Drying Tools
Drying tools are equally important for managing the fast-paced world of alcohol ink art. They are used for creating effects like sea waves, mountainous effects and many more. Here are some popular options and their uses:
-Heat Gun
A heat gun blasts hot air, rapidly increasing the drying procedure. This is perfect for creating colors, preventing color bleeding, and marking perfect effects. The technique of using it takes practice but maintaining a safe distance and short shots might prevent your art from spoiling or smudging!
-Hair Dryer
Unlike the heat gun’s focused blast, a hair dryer offers a softer, wider stream of air. This is gentler on the surface and inks, making it easier for beginners to control. Drying takes longer with a hair dryer compared to a heat gun, so adjust your pace accordingly. The best part is that Hair dryers are usually available at home so beginners will not need to buy many tools and it’s perfect for giving effects which they can easily create. So, it’s a win-win!
-Air Blower
For a delicate touch, an air blower provides a gentle, sustained flow of air. This is perfect for nudging inks around, creating subtle movements, and lifting excess ink after blending.
Like a hair dryer, drying takes time with an air blower. Embrace the flow and enjoy the process!
-Straws
This budget-friendly tool offers surprising versatility. Blow through a straw to direct air on specific areas, create bubbles and textures, or achieve delicate lines.
Mastering the airflow through a straw takes practice, but it can be a rewarding way to add unique details to your artwork.
-Some more options
-Cotton Swabs:
Can be used to absorb excess ink, blend colors in small areas, or create fine lines by dabbing gently.
-Paper Towels:
Useful for wiping up spills, cleaning tools, or gently removing unwanted ink splatters.
Experiment and have fun! There’s no single “right” way to use drying tools. Explore different techniques and find what works best for you.
Your creativity is the limit! Combine different tools and techniques to achieve unique effects and bring your artistic vision to life.
Precautionary Measures
-Use heat tools with caution and proper ventilation.
-For a secure workspace in alcohol ink art, use a respirator to guard against inhaling fumes with volatile compounds. Follow the manufacturer’s guidelines for safe usage, especially in enclosed spaces or with regular alcohol ink use.
-Proper Hygiene conditions like cleaning the space before and after your artwork is a must. -Gloves should never be forgotten as it may take a few washes for alcohol ink to go away.
9) Droppers or Applicators
Items for applying ink, alcohol, or blending solution include basic plastic droppers and disposable droppers. Additionally, plastic precision tip applicator bottles, also known as needle-tip squeeze bottles, can be filled with alcohol, or blending solution for precise application in paintings or on palettes.
Cotton swabs, Paper towels, Small Pieces of felt sheets and Paint Brushes are also widely used by alcohol ink artists as applicators and for moving inks around the substrates.
10) Miscellaneous Stuff
- Absorbent liner: Guard your workspace with a protective layer.
- Paper towels: Keep things clean by wiping spills and tidying up during the painting process.
- Apron/old clothes: Shield your attire from potential stains and spills.
- Masking fluid: Protect chosen areas from ink; apply, let dry, paint over, and reveal negative space by removing the dried fluid. Beginners can skip this step.
- Nitrile Gloves: Ensure skin protection and maintain dexterity when handling inks.
How to Use Alcohol Ink?
Step-by-Step Guide for Beginners
1) Selecting Your Canvas:
– Opt for a sleek canvas – paper, glass, or contemporary synthetics.
– Ensure a pristine surface, providing the ideal foundation for vibrant colours.
2) Prioritizing Safety Measures:
– Choose a well-ventilated workspace or embrace the outdoors for a breath of fresh creativity.
– Utilize protective gloves, maintaining a clean and professional aesthetic.
3) Curate Your Color Palette:
– Thoughtfully assemble a color palette that resonates with your artistic vision.
– Blend and layer, creating a harmonious visual composition on your chosen canvas.
4) Precision in Application:
– Delicately apply drops of alcohol ink, orchestrating a symphony of colors.
(Grey ink dropped on a ceramic tray)
– Employ brushes or controlled air currents for subtle patterns and textures.
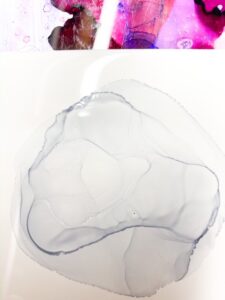
(Ink is pushed around using an air blower)
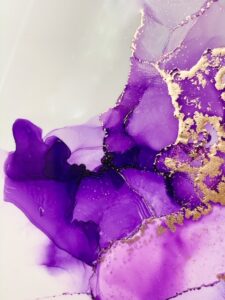
5) Mastering Tools of Expression:
– Explore the use of brushes, palette knives, and strategic air techniques for sophisticated artistic expression.
– Introduce a dew of rubbing alcohol to achieve captivating and refined effects.
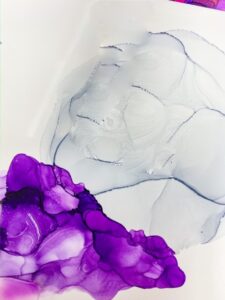
(Same process with Violet using straws or blowers)
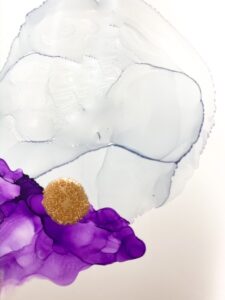
(The addition of metallic in the center enhances the beauty)
(Metallic gold pushed using a blower again)
image source: thirteen chairs
6) Exercising Patience During Drying:
– Allow your masterpiece the necessary time to dry, recognizing the influence of factors like surface composition and ink quantity.
7) Preserving Artistic Integrity:
– Safeguard your creation by applying a clear coat, such as Krylon UV-Resistant Clear Acrylic.
– Administer the sealant with precision, ensuring comprehensive coverage and protection.
Tips: Seal your alcohol ink art with a clear sealer or resin. Apply 2-3 thin coats, like Krylon Kamar and a UV sealer.
Minimize surface contact to maintain ink integrity. Wear rubber gloves to prevent stains and oil transfer. Follow these tips to protect and showcase your vibrant creations.
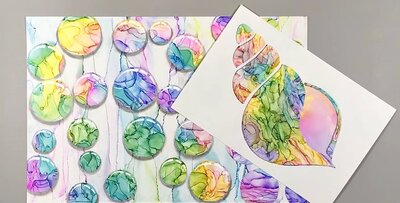
What can you do with Alcohol Ink?
Alcohol Inks works as one of the best mediums for painting and crafting among artists. It works well with many other mediums like acrylic painting, resin crafting, glass, mirrors etc. A few of them are listed here.
-
Painting:
Craft abstract art on various surfaces mixed with many other mediums of painting like acrylic painting, oil painting, glass painting and many more. We can use brushes for precise applications of these paints between the waves of alcohol inks.
-
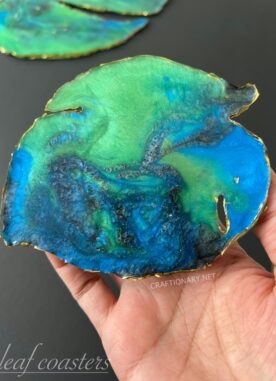
Resin Art:
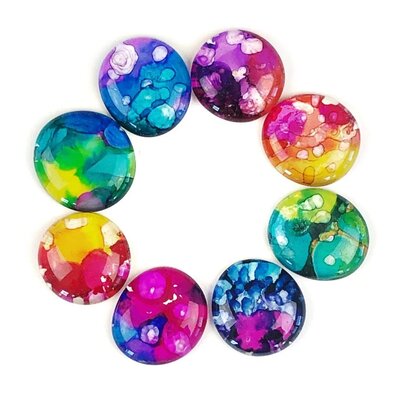
Alcohol ink mixes well and creates beautiful and subtle patterns with Epoxy resin and hardener. Design translucent pieces like coasters, paperweights, jewelry holders or jewellery.
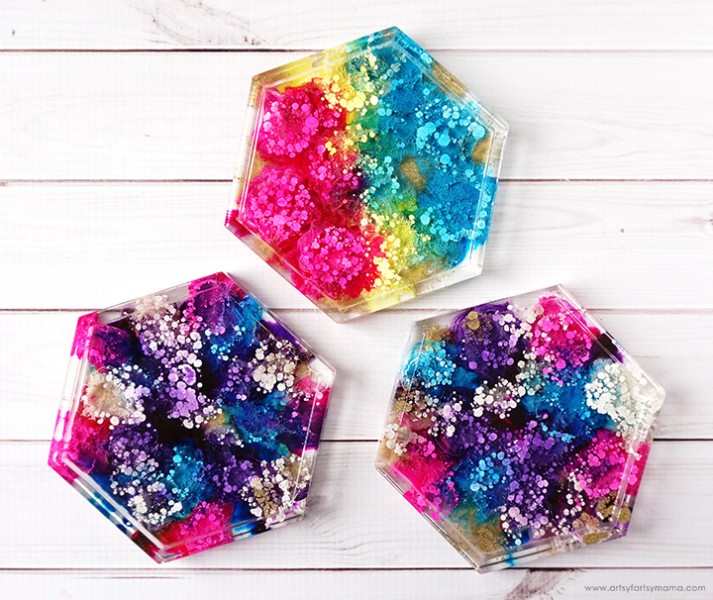
Picture by Craftionary
-
Home Decor:
Personalise items such as vases, ornaments, and other home decor stuff. Create soft swirls with vibrant patterns and embellish your space uniquely.
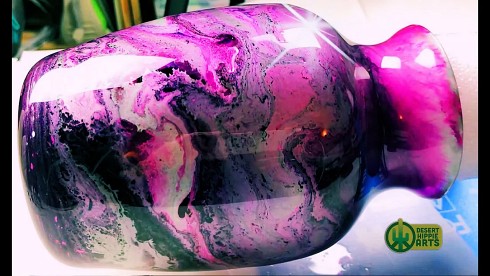
Picture by craftionary, pattern glazed with resin.
Shop Simple Decoration Pieces to Paint on here
-
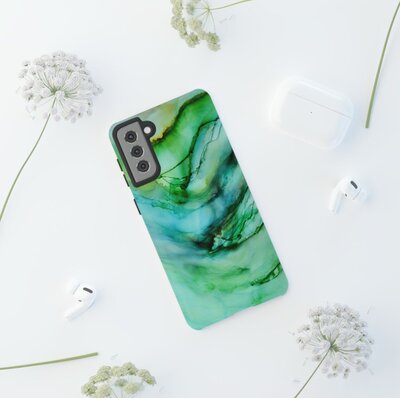
Accessories:
Transform phone cases, keychains, or footwear with alcohol inks instantly!
Customized Accessories have become a fashion trend. From hand-painted bridal joggers to hand-painted stoles, you can create them all by yourself just by practicing the art of alcohol ink!
Shop plain mobile cases to paint on here
-
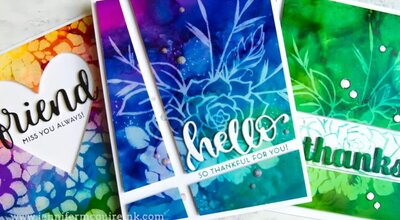
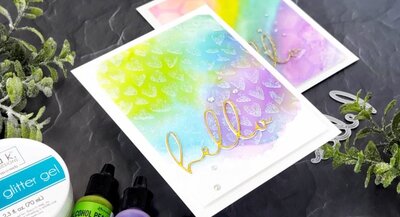
Card Making:
Create vibrant and distinctive greeting cards, bookmarks, or lettering backgrounds. Alcohol inks can escalate the level of card making through its working technique especially reviving its pigments using Isopropyl Alcohol!
Use this art to make customized cards for your loved ones and spread joy around.
-
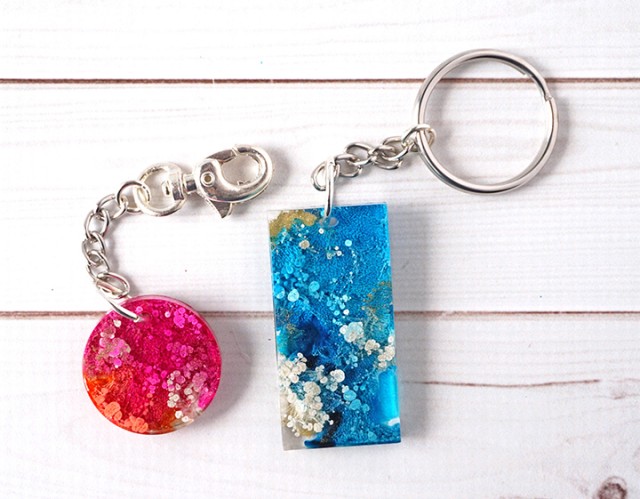
DIY Jewelry:
Fashion personalized pieces using metal or glass and turn old hardware store items like washers, aluminum pieces, wooden pieces etc. into adorable jewelry and carry them with grace and style!
-
Mixed Media Art:
Combine Alcohol ink with acrylics, gypsum paste etc for layered textures or sprinkle gold dust over shimmering landscapes. Let your imaginations soar with techniques like the ones explored by mixed media artists!
-
Abstract Backgrounds:
Enhance scrapbooking or journaling projects. Create fluid backdrops for projects or inject vibrant energy into your journaling pages. Be mesmerized by the abstract compositions of alcohol ink.
-
Fabric Design:
Customize textiles with a splash of colour! Transfer your artistic vision onto silk scarves, shoes, add vibrant accents to canvas bags, or even create hand-painted tea towels.
Shop this Hand Painted Purse here

-
Ceramic/Glass Painting:
Decorate items like bowls or mugs. Transform plates into mini masterpieces! Unleash a vibrant dance of colors across your dinnerware, creating abstract landscapes or playful patterns that bring joy to every meal.
30 ways to make Abstract Art projects
-
Alcohol Ink Art on Mirrors:
Add a touch of enchantment to your mirrors by swirling your brushes around the mirrors. Curate minimum style borders or floral bunches and enjoy your mirror selfies every time!

Alcohol Ink Painting Kits for Beginners and Professionals
A variety of Alcohol Ink Art kits are available online and on-site, including the ones that are only to be used by beginners while some are tailor-made exclusively for professionals. There’s a difference in the variety of colors and levels of tools provided to avoid waste of the products.
Different Alcohol Ink Techniques
There are a variety of techniques for using alcohol ink and each one gives a prettier effect than the other. Here, I am mentioning a few of the many techniques which are popular among the artists
1) Drop and Pour Technique
- Begin by smoothly coating your canvas with Isopropyl Alcohol or blending solution.
- Choose three colors that resonate with you and casually drop them onto the canvas.
- Observe the colors in action as you apply the first one, like a laid-back dance.
- Add the second color, enjoying the effortless blend reminiscent of calming sea waves.
- Repeat until your creation hits the sweet spot.
- Sit back and let your artwork air-dry naturally, allowing it to unfold at its own pace.
Tip: This method is perfect for creating backgrounds for lettering and calligraphy. It also creates subtle abstract artwork and is perfect for beginners.
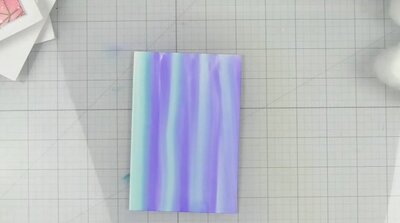
2) Cotton Round/Bud Technique
For a polished touch, grab a cotton round—it’s your ticket to a smooth base, especially handy for broad strokes like creating a serene sky. Here’s the lowdown:
- Set up your palette with the ink hues you’ve got in mind.
- Dip that cotton round into the ink, and get it nicely coated.
- Now, let it dance across the page with a steady hand and consistent pressure.
- To jazz it up with a gradient, cue the blending solution.
- Introduce it gradually as you move from the shadowy bits to the lighter areas.
- Voila! Watch the ink tones waltz into a seamless gradient swipe on your canvas.
Trying cotton balls with alcohol inks
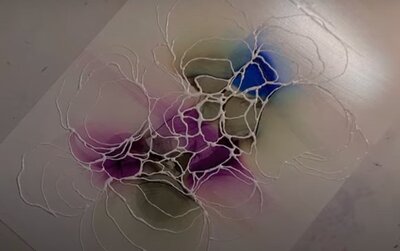
3) Ink-Lift Technique
This technique is an absolute delight.
Here’s how to jump in:
- Select your preferred inks and a canvas for your alcohol ink escapade.
- Pour those inks onto the canvas, letting them dance as you tilt the artwork or use blowers/straws for a seamless spread.
- Elevate the experience with a stencil—think of something intriguing like flowers or majestic creatures.
- Dab a bit of alcohol on the stencil/cutout and press it firmly onto the wet ink.
- Take that stencil, press it onto a fresh sheet of paper, and witness a stunning outline take shape.
- Before the ink sets, gently dab your artwork with a paper napkin or cotton buds, revealing a beautiful design inspired by the stencil or cutout.
4) Ripple Technique Using Hair Dryer:
Select a surface and inks that resonate with your imaginative mood, mix them with Isopropyl Alcohol and explore the magic of creating mesmerizing ripple effects with a hairdryer using the following method
- Choose your canvas and the inks that ignite your creativity.
- Mix your selected ink with Isopropyl Alcohol in a small cup, creating an alluring blend.
- Pour the mixture onto the surface, setting the stage for your artistic experiment.
- Utilize a hairdryer to apply heat from one angle, gently tilting the surface for a captivating ripple effect.
- Elevate your results by experimenting with a mix of two or more colours, approaching the heating process with precision.
- Watch in awe as your artwork unfolds with mesmerizing finesse, becoming a truly unique masterpiece.
5) Drop-Pour-Tilt / Flood Technique
Dive into the cool flood technique for a fun art experiment.
- Grab Isopropyl Alcohol, blending solution, vibrant alcohol inks, and cool surfaces like synthetic paper, boards, Nara Shapes, or even things like ceramic tiles or concrete.
- Pour your chosen inks onto the surface using small cups.
- Cover your art space generously with a mix of alcohol inks and blending solution.
- Tilt the surface to spread the inks smoothly, creating a rad blend.
- Amp up the vibe with glitter and metallic inks for an extra cool touch.
- Experience the magic of the flood coat as alcohol helps colors merge in cool ways, making awesome gradations across the surface.
6) Air Manipulation Technique
To pull off this cool effect, gather Isopropyl Alcohol, blending solution, alcohol inks, synthetic paper, or any non-porous surfaces, and a trusty puffer tool or straw.
- Set up a neat workspace – no dust, please!
- Grab an ice tray or some tiny cups for your alcohol. Add drops of your favourite ink colors.
- Test the colors on a surface first.
- Dilute the inks and drop them onto your chosen surface using a dropper.
- If you’re just starting, stick to one color. Use the puffer tool to blow the ink outward.
- Introduce a wispy effect by adding blending solution drops along the blown-out color.
- Layer colors until you’re happy with the outcome.
- Mastering wisps might take some practice, even for seasoned artists! This technique is perfect for giving a 3D vibe to items like bowls and glasses.
7) Smooshing Ink Technique
This is by far the easiest and fun technique which requires no special steps other than pouring the ink onto the non-porous substrate and then gently smooshing the paints with fingers (covered with gloves). This one is perfect for beginners and effortless too!
Tip: You can use stencils over the already painted surfaces and can create different patterns and even texts too!
8) Brush technique
Fluid art, such as alcohol ink pieces, is known for its easygoing style. Grab a brush, pick your colors, and let your imagination run wild on the canvas. Play around with various strokes and enjoy splattering ink for a trendy droplet effect.
9) Fire Technique
For this captivating technique, collect Isopropyl Alcohol, blending solution, alcohol inks, synthetic paper, boards, or Nara Slim and Shapes. Opt for non-porous surfaces like ceramic tiles or concrete. Keep small cups ready for pouring inks.
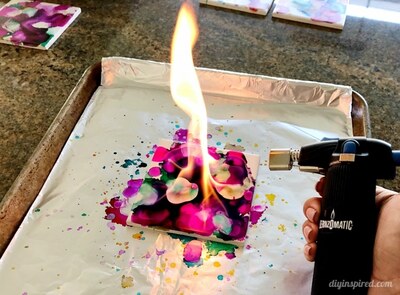
Precaution: Exercise utmost caution, especially as this technique is not suitable for individuals below the age of 18. Limit the application to ceramic or concrete surfaces to avoid potential fire hazards. It’s crucial to conduct this artistic process outdoors in an open environment.
- Apply the flooding technique by placing vibrant colors on the first tile.
- Safely move inks and isopropyl alcohol away from the work area to mitigate fire risks.
- Lightly use a camp lighter on the corner of the nearest tile, ensuring a safe distance.
- Allow the alcohol to ignite and burn until dissipated.
- Retreat and wait approximately 5 minutes to ensure complete burning.
- Repeat this process on other tiles.
- Allow the tiles to cure for at least 30 minutes (preferably an hour) before handling with an oven mitt.
Tips:
For an extra burst of color, consider repeating the process on the same tile. However, exercise caution and avoid repeating more than 2-3 times in a short period to prevent the possibility of ceramic tile breakage. Approach this technique with a blend of creativity and get ready for stunning, fiery results!
Watch this tutorial by Madeliene Arts to learn different techniques of Alcohol inks Art.
In the enchanting world of alcohol ink art, mistakes evolve into masterpieces. Every unexpected droplet and whimsical swirl convey a hidden tale, desiring to be discovered. So, hold your palette, delve into the fluid dance, and let your soul display its unique story through the mesmerizing exhibition of hues.
Written by: Sabah Aftab