This post may contain affiliate links. Please see our full Disclosure Policy for details.
Learn how to make a simple handkerchief wreath using your vintage colorful ladies hankies and an embroidery hoop in less than a minute.
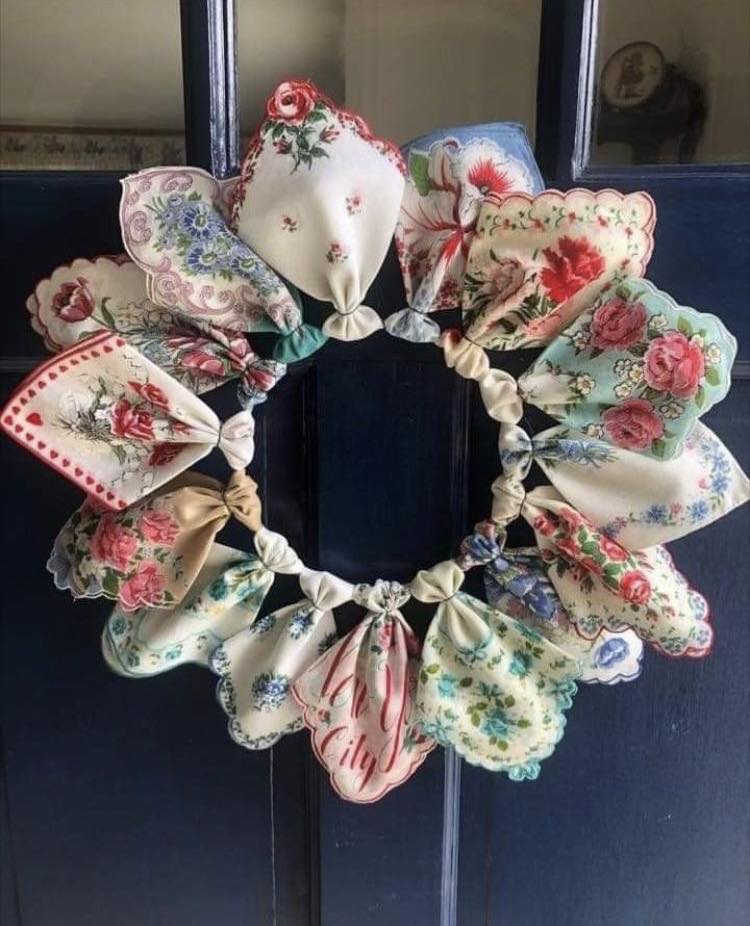
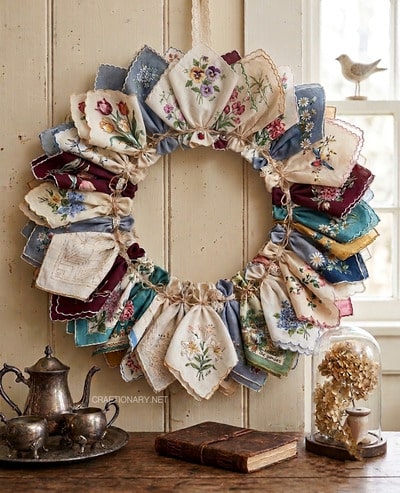
Crafts that repurpose vintage and old collections are so satisfying. One such idea that is easy to follow with simple instructions and requires no stitches or embroidery machine is a handkerchief wreath. Use those vintage hankies and make an embroidery hoop wreath in less than a minute. This is a fun idea for Spring and Summer DIY wreath crafts.
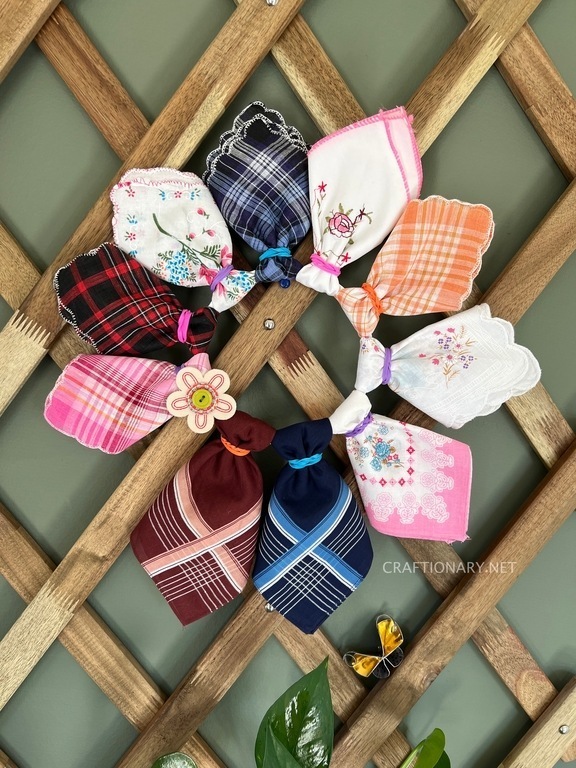
I saw this idea and fell in love with it instantly. You can use this idea to make any size wreath depending on your collection of vintage handkerchiefs. Since I only own a few, I decided to use a 5 inches embroidery hoop with 10 vintage ladies hankies.
unknown source
How many handkerchiefs for your embroidery hoop?
You can do your math depending on the size of the embroidery hoop. For example, an 8 inches hoop will require 17 handkerchiefs and a 3 inches hoop will need 7 hankies. Therefore, you will need 2 handkerchiefs approximately to cover an inch.
Supplies for handkerchief wreath
You will likely have all the material at home for this tutorial:
- Embroidery hoop
- Ladies or gents vintage fabric hankies or embroidered handkerchiefs
- Small rubber bands (loom elastic bands are perfect)
- Safety pins
- Starch spray
- A ribbon (optional)
Here’s a quick video tutorial:
Step-by-step instructions on how to make a hankie wreath
First, separate the embroidery hoop into two pieces. We will only use the inner hoop without the bracket for this wreath craft.
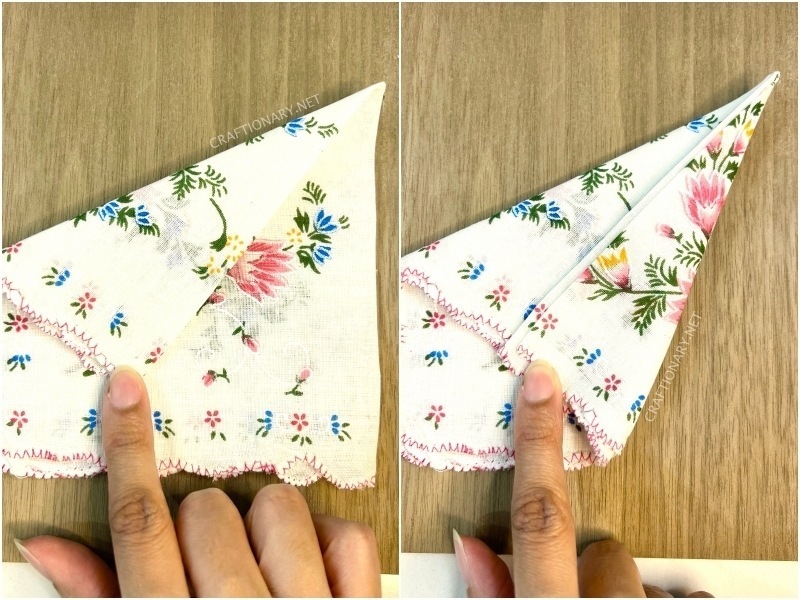
Next iron and fold all your handkerchiefs into fourths so that they form squares. Now place the hankie on the table with folded center facing top-right.
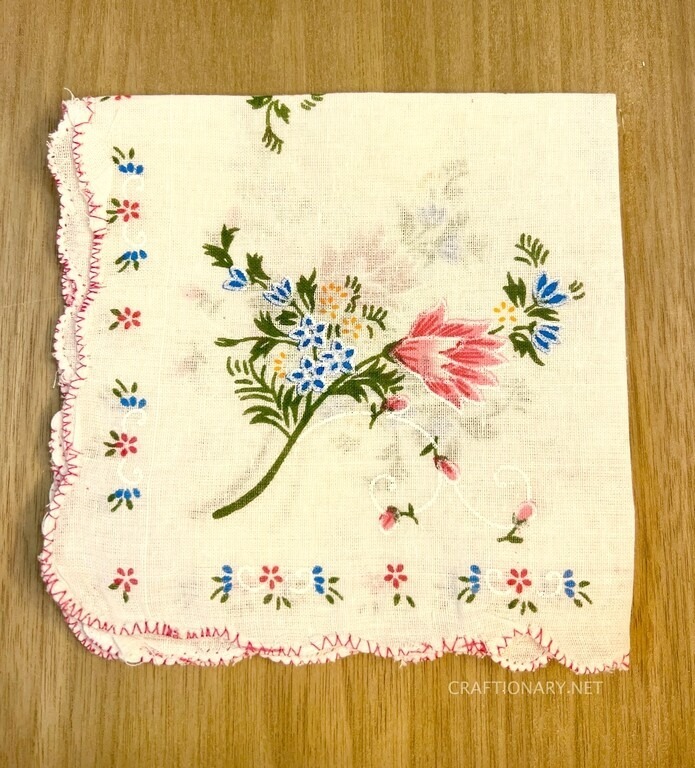
You can choose to use starch while you iron to make the handkerchief stiffer. The choice of material makes a difference here. I am using pure cotton fabric hankie. Cotton, linen, satin, or silk all have different ironing requirements and textures.
How to fold a handkerchief?
Fold the bottom right corner of the hanky to the approximate center diagonally. Now repeat the fold on the left corner. The two sides may overlap a little at the center.
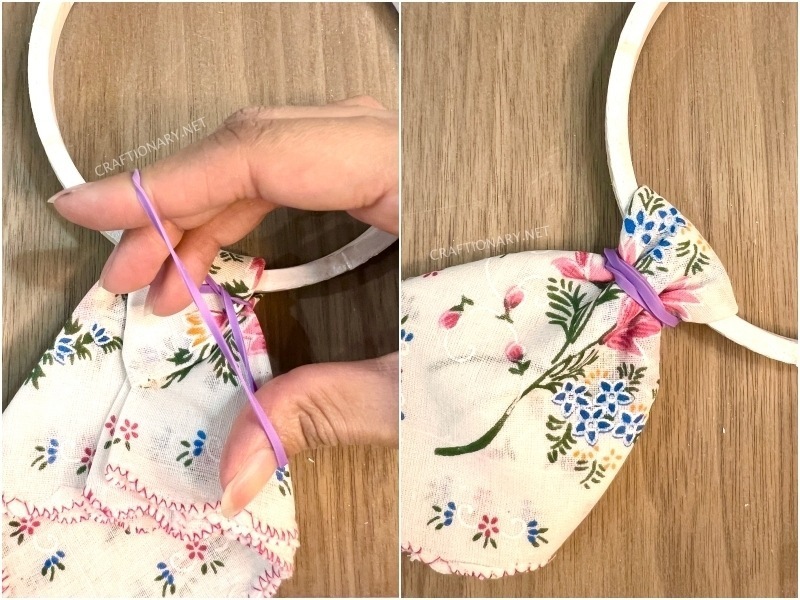
Now place the hoop over and about 1/3 of the way from the tip of the handkerchief. Take the point of the hanky and fold it over the hoop making a loop as shown in the picture.

With the help of a small rubber band tie the two sides around the hoop by looping it through twice or thrice depending on the elasticity of the band. Note that I used the rubber bands I had handy, but the small ones with give you neat results.
This is how it looks from the front. Now repeat the steps for all the ladies vintage hankies till the entire embroidery hoop is covered.
You can choose alternative colors or different patterns. Play around with your collection and have fun creating your handkerchief wreath.
You can add a ribbon as a finishing touch by looping it through the gaps between the hankies. I used a ribbon I had at home and added a fabric flower sticker on the side.
Start by securing the ribbon at the back inside the elastic of one hankie. Now loop it over one hankie and then under another. Continue this pattern to cover each alternative hankie in first round. Cover the remaining in the second round and tie at the back. You can add a bow or embellishment on the top.
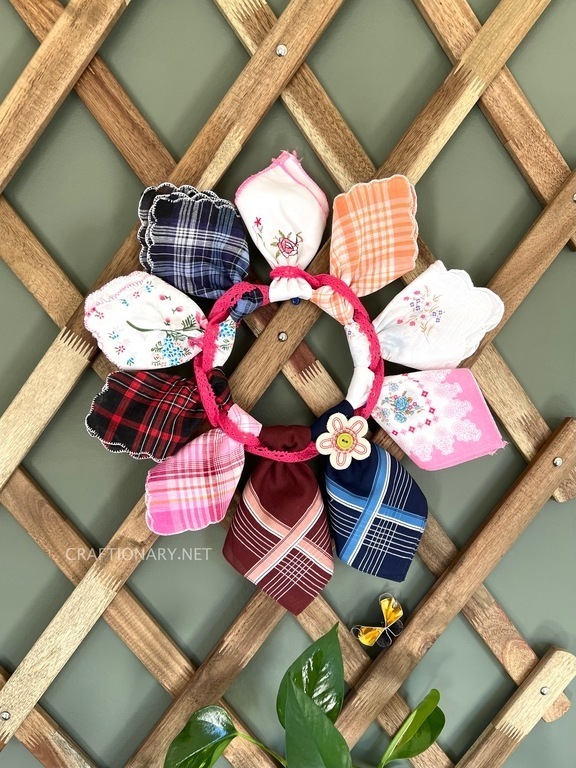
Flip over the hanky wreath and enjoy hanging it.
For added support, you can use safety pins to secure the tip on the back. You can pin it under the vintage hankie to hide the head of safety pin or have it shown. Both choices are shown in the second picture.
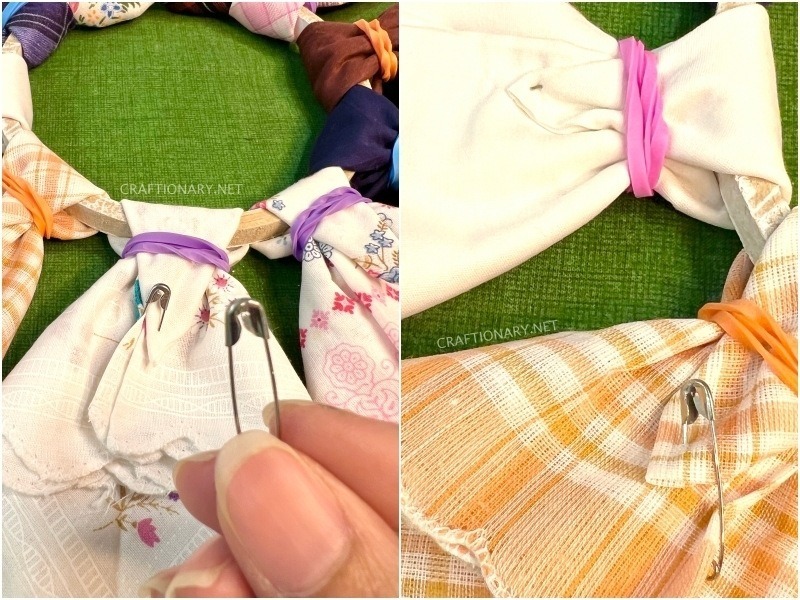
You can also skip elastic bands and use pipe cleaners or zip ties to secure the hankies.
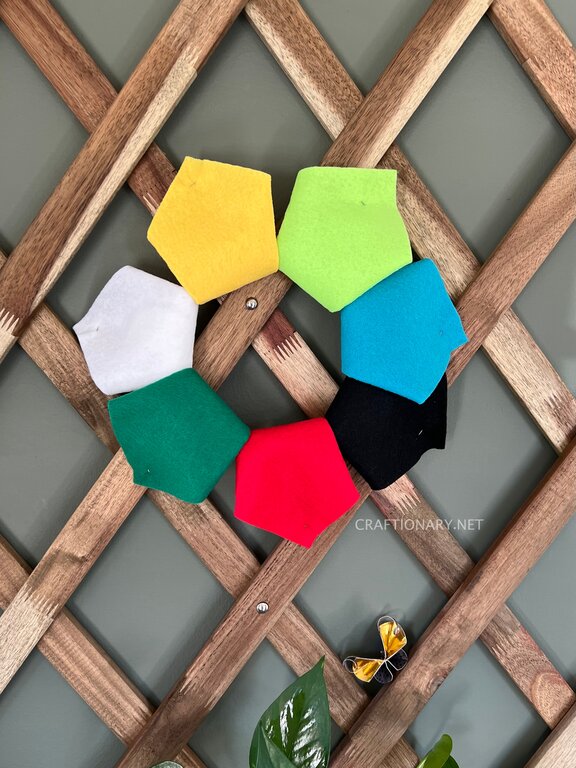
How to make a Felt wreath?
You can use this technique to make fun fabric wreaths using different materials if you don’t own vintage linen. Like this wreath, I made with felt squares and an embroidery hoop. I also opted to tie it with a safety pin on the back and skip the elastic band. Loop it around the hoop and pin the top and bottom end of the folded felt piece and secure it with a pin. This looks like a flower. A perfect spring flower wreath.
This is also fun to give as a graduation gift as it looks like ties. You can also repurpose vintage ties for this one as well. I also made a felt pinwheel wreath earlier.
Here are a few more variations of the above idea that are fun to work on:
This one has yoyo flowers incorporated into it for embellishment.
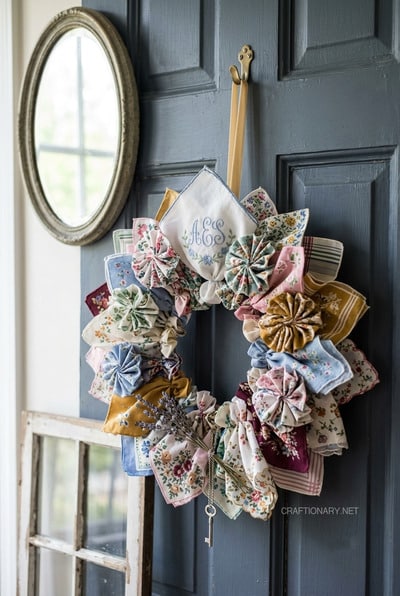
You may use twine to make mini bows to tie your collection on a hoop instead of elastic to avoid tension.
Note: This article was whipped up overnight based on high demand on our Facebook page. If you like this tutorial I will appreciate you sharing it. If you have such requests let me know and I would be happy to put up tutorials like this one. Nothing is more satisfying than helping you out.
You will also like:
Scrap Fabric Projects – Upcycling, Crafting, and Scrap Busting
Upcycle Old Treasures into Useful DIY Crafts and Projects
What to do with Old Teacups? 40 Creative and Practical Ideas


I wonder – – could this be done with men’s neckties ?
Yes you can but there will be no folding required as it is already shaped at the end. However, you will need to roll a lot of necktie to secure at the back!
I used starch, but the hankies wilt. They just flop over. Thoughts?
Cornstarch, fabric stiffener and modpodge (or PVA glue) work great. Try Mixing 1 tablespoon of cornstarch with 2 cups of water. Boil until it thickens slightly and let it cool. Dip the hanky, wring out the excess, and lay flat to dry. Iron for a crisp finish.
Alternatively, you can mist the hanky with a starch spray. You can also use glue stiffener (1:1 ratio mod podge and water) or gelatin stiffener (dissolve 1 tsp of gelatin in 2 cups of hot water). Method is the same as for cornstarch stiffener.