This post may contain affiliate links. Please see our full Disclosure Policy for details.
Flowers, seeds, leaves, moss, and tiny mushrooms are the best insertions for crafts like resin crafts and decorative rocks for instance. They are available in ready-to-use shapes but often expensive. You can dry and press flowers at your home using a variety of methods like dry them in the air, use silica gel or waxed paper, or simply press them using traditional ways. There are also ways to dry flowers faster that can speed up the natural slow process like microwavable press or other unnatural heat source to remove moisture quicker but results may vary. Let’s look at these variety of methods to preserve flowers for your projects:
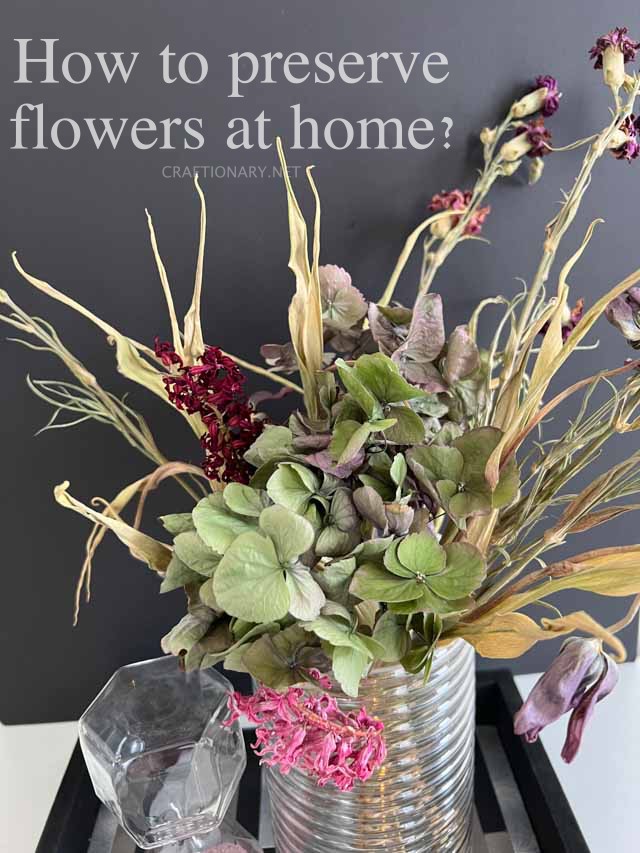
How to preserve flowers at home?
Methods to Dry Flowers for Crafts and Art?
There are several methods to dry flowers:
1. Air Drying Method:
Hang bunches of flowers upside down in a dry, ventilated space, away from direct sunlight and moisture to allow them to completely dry for 3-4 weeks. A store room or garage will work for this simplest and natural way. Here’s a beautiful event bouquet that was turned into a dried flower arrangement for free.

dried flowers bouquet uplifts table decor
2. Silica gel:
Submerge the flowers in silica gel or cornmeal inside an airtight container or sealed bag. Allow it to absorb all the moisture out for 2-3 days. It is a fast and effective method but can be expensive and messy as well.
Instructions:
Many prefer the silica sand drying method because it preserves the color and shape of the whole flower. For this, you need an airtight container and silica sand for drying the flowers.
- First, you pour a thin layer of sand into the bottom of the container and place the flowers on this layer. Then pour more sand over the top of the flower until all the petals are covered; moisture is absorbent.
- The period of drying the flowers in the sand depends on the different-sized flowers. For example, small flowers can dry on some days, and large flowers like roses can take several weeks. Check your small flowers daily and large flowers every three days to check how things are going.
- Handle the dried flowers carefully; they are lightweight as tissue paper. Use the sieve or mesh to remove the dried flowers from the sand. You can also use a soft brush to remove the extra sand from the petals because dried flowers are delicate and can easily break.
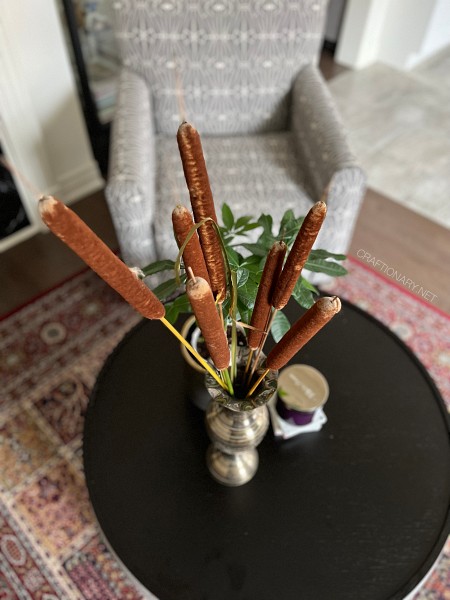
3. Hairspray Dried Flowers:
Use matte clear spray, aerosol hairspray or adhesive spray to seal dried flowers for extra protection. Here’s is an example of dried cattail flower arrangement using hairspray method.
4. Microwave:
Method 1:
Microwaveable flower press speeds up the drying process; compared to traditional flower presses. Use of microwaveable press is easy; place the flowers in fabric sheets and heat them in the microwave for just 15 seconds. So, the flowers get pressed and dried in just minutes. Always try to ensure that your flowers should be completely dry or that they will not turn brown or rot over time.
Wondering What to do with dried flowers?
Method 2:
Dry flowers in seconds with this simple microwave press. Arrange fresh, undamaged flowers on a paper towel and put another paper towel on top for absorption. Top with a microwave-safe plate, corrugated cardboard or ceramic tile for weight. Microwave for 30 seconds and check. Spin for another 30-60 seconds. Depending on the flower the timings may vary. Gently remove flowers from the paper and use them in your projects.
Microwave drying flowers is the quickest technique but it is not suitable for all flowers. It may also not preserve the color and shape of the flowers as well as natural drying methods. Make sure to test your flowers first.
5. Oven Drying:
Place the flowers on a baking sheet and dry them in a low-heat oven for several hours, or until they are completely dry. This method is quick but may not preserve the color and shape of the flowers as well as other methods.
Instructions:
- Preheat your oven to the lowest heat setting (150-200°F).
- Line a baking sheet with parchment or wax paper.
- Trim the stems of your flowers and remove excess foliage.
- Arrange the flowers on the baking sheet, leaving space between them.
- Place the baking sheet in the oven and leave the door slightly ajar to allow moisture to escape.
- Check the flowers every 15-20 minutes. Smaller flowers may dry in 1-2 hours, while larger ones may take longer.
- Once the petals feel crisp and brittle, remove the flowers from the oven and let them cool.
6. Traditional Method:
Layer the flowers between paper towel and iron on lowest setting. Increase the heat if required. This old flower drying method may result in fading of colors resulting in discolored flowers.
Traditional Flower Press:
This way is a popular choice for many, although it takes several weeks for small flowers. The flower press is made of wood and has layers of cardboard and absorbent paper sandwiched between two cove boards, fixed to each other with; wingnut bolts at each corner of the press. To get access to the cardboard or paper layers, unscrew the bolts.
Place your flowers between sheets of absorbent paper sandwiched between the layers. Arrange the flowers in such a way that they do not overlap each other. After placing the flowers, restack the cardboard layers and replace the bolt at each corner. Screw the bolts as tight as you can to dry the flowers. And keep checking them every few days.
7. Waxed Paper:
Place your flowers between two sheets of waxed paper and cover the waxed paper with a thin cloth. Use low to medium setting to press with a warm iron. The cloth prevents the iron from waxy residue.
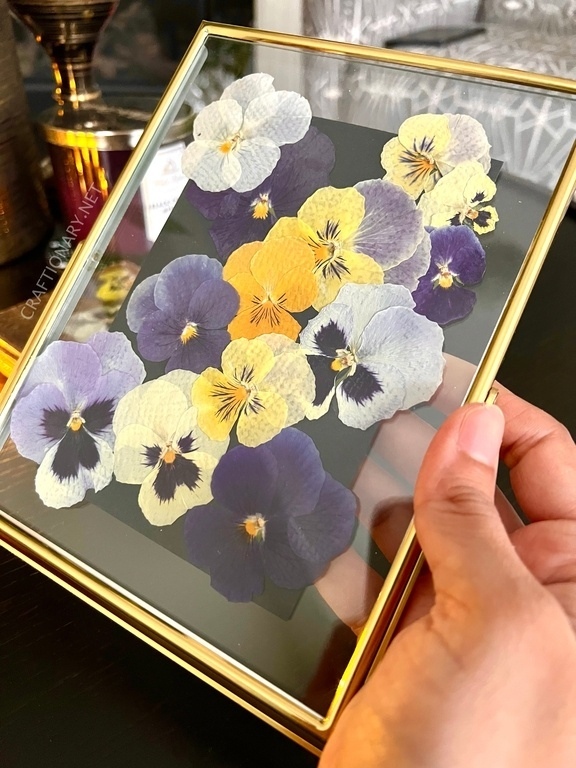
8. Pressed Flowers:
Press flowers between layers of paper towel to flat dry under heavy books or homemade press. You can also stack layers of flowers over each using paper towel as layer between them. Make sure to place lots of weight on top and let them dry for 2-3 weeks. Here’s a vintage pressed flowers in a frame art using this method.
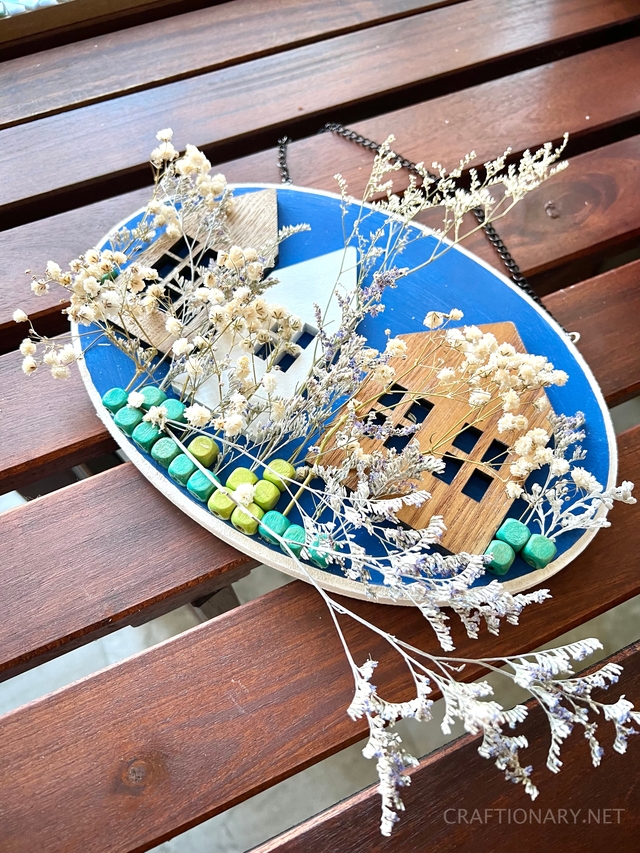
9. Using Diary or Books:
Old books, telephone books, and diaries work well for small flowers like pansies as standard press. Put the flowers either directly between the pages or between layers of paper towel. The thicker the books the better. Stack more books or bricks on top of it and let the flowers dry for 2-3 weeks. A beautiful dried flower wall hanging made with bead vases that can enjoy different dried flower arrangement every season.
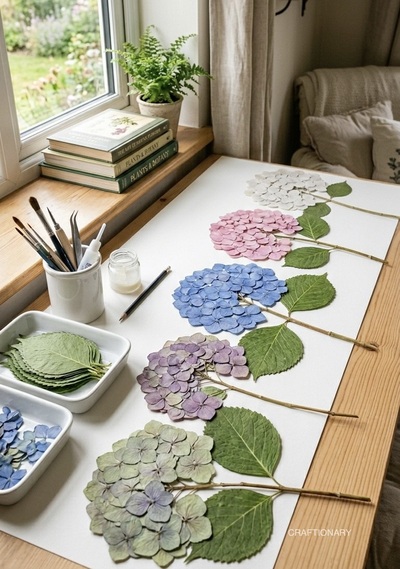
10. How to dry Hydrangeas?
To achieve that specific flat-lay look where the hydrangeas maintain their vibrant colors and architectural stems, you’ll need to move beyond traditional air-drying (which makes flowers brittle and curly) and use a pressing technique:
1. The Deconstruction Method
- To get that perfectly flat, circular bloom, you must press the components separately:
- The Florets: Snip individual small flowers (florets) from the main mophead.
- The Leaves: Select healthy, flat leaves.
- The Stems: Choose straight, thin stems. If the stem is too thick, carefully slice it in half lengthwise with a craft knife so it lies flat.
2. Preparing the Press
- Place a sheet of absorbent paper inside your press or book.
- Arrange the florets face down, ensuring they do not overlap. If they overlap while drying, they will stick together and tear.
- Place the leaves and stems on a separate page, as they contain more moisture and take longer to dry than the delicate petals.
3. The Pressing Process
- Close the book/press carefully to avoid shifting the petals.
- Place several heavy books on top.
- Leave them undisturbed for 2 to 3 weeks.
Tip: Change the paper after the first 48 hours if the flowers are very juicy—this prevents browning and mold.
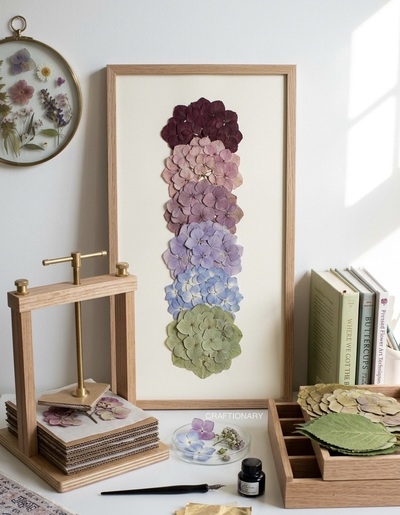
4. Reconstructing the Flower
Once the pieces are paper-thin and dry to the touch:
- Layout: Position your pressed stem on a heavy piece of cardstock or watercolor paper.
- The Bloom: Start at the top of the stem and begin gluing the individual florets in a circular pattern to recreate the mophead look.
- The Leaves: Tuck the base of the leaves slightly under the stem and glue down.
- Tools: Use the tweezers seen in the image to handle the petals, as they are extremely fragile and oils from your fingers can damage them.
Tips:
- Color Retention: Blue and purple hydrangeas hold their color best. White hydrangeas often turn a vintage tea-stained brown.
- Harvesting: Pick your flowers on a dry afternoon. If you pick them in the morning while they have dew on them, they are much more likely to mold during the pressing process.
- Adhesive: Use a tiny dot of clear-drying acid-free glue applied with a toothpick.
Get the flower press:
Make Crafts with Dried Flowers
Wondering once you have dried and pressed your flowers, what you can do with it? Here are some inspiration boards to get you started: