This post may contain affiliate links. Please see our full Disclosure Policy for details.
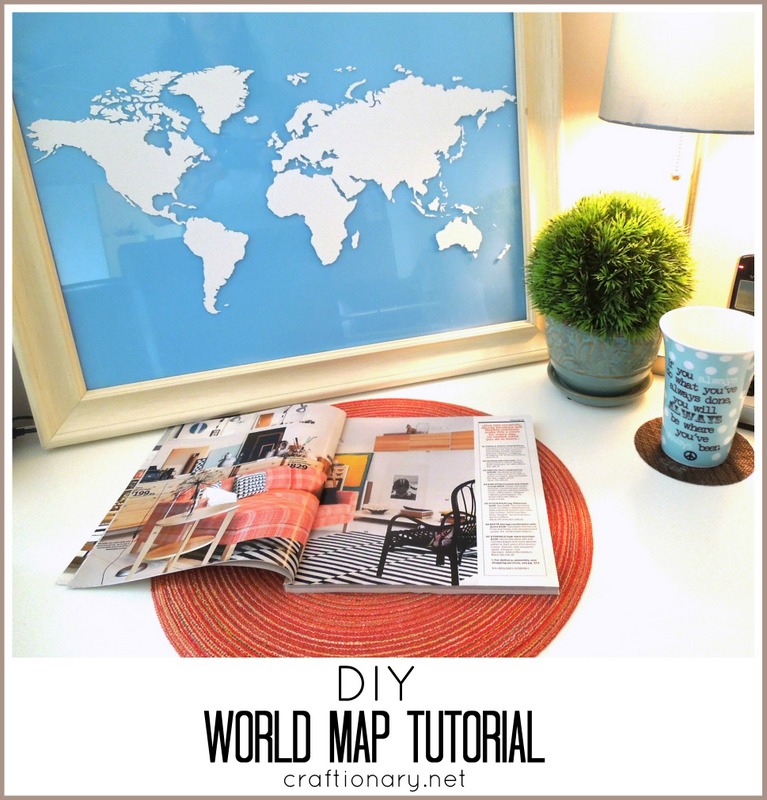
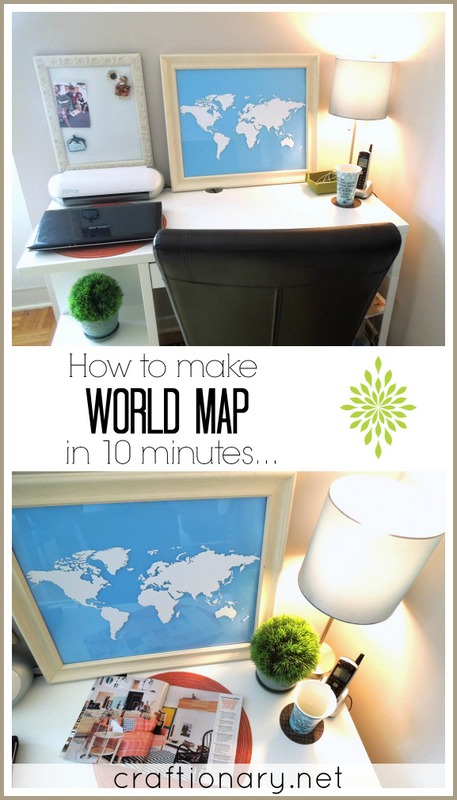
How to make easy world map in 10 minutes for less than $10. You will need a vinyl sheet, paper and frame to finish this project. I am so happy to share my first ever vinyl project. I have been so scared of trying one forever. But today I can say it’s super easy.
It was such a neat project which I made in only 10 minutes. Making a world map wall art with vinyl stickers. You can put these wall art decals on any smooth surface. And these are a cost effective way of decorating and modernizing our homes.
Icon wall stickers have tons of decorative vinyl wall stickers at a great price. They are very cooperative and work with you to make it easier to choose one you are sure to love. They have all the information you need about applying vinyl stickers on any surface. And there is also an instruction video that makes it a piece of cake for beginners to use vinyl stickers.
Find more ways to use world map at home with 17 Creative DIY Map tutorials.
Make easy world map
I am going to share my tutorial on how I made my world map for just $6.
But before I get to the step by step tutorial. Let me share two cute possibilities with this world map.
1. You can use it as a kid’s educational project:
Just by sticking the vinyl inside of the glass and framing it. You can create a world map on which you can write with sharpie and just wipe off. Here’s a dry erase frame tutorial.
2. Use it to tag places you have visited:
By using small rhinestones or colorful sharpies you can tag and cherish the places you have traveled to.
Easy World Map tutorial
Here’s what I did:
World Map for only $6
You will need:
- A wooden frame (I bought mine from a thrift store for $5)
- Drawing paper ($1 Dollar store)
- Vinyl sticker (from Icon wall stickers)
- Library card or squeegee
- Ruler, pencil, scissors and tape.
Vinyl Image Transfer on Glass:
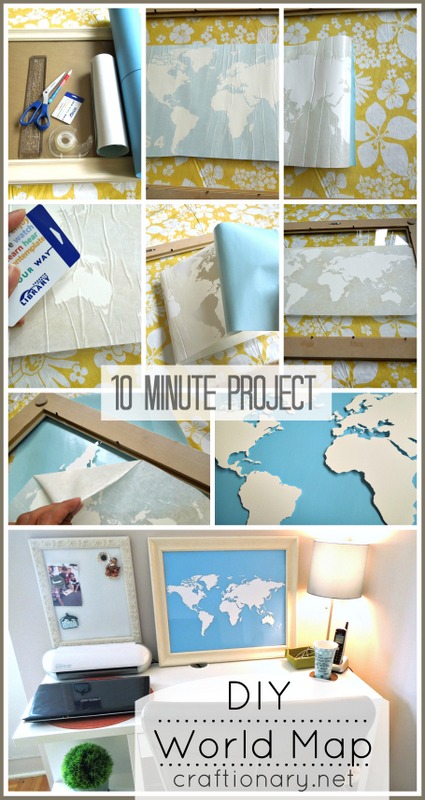
1. Place the sticker on the glass with transparent application layer facing you.
2. Use masking tape to stick and unroll the vinyl in place.
3. Apply a strip of tape across the decal to create an anchor point. Horizontally or vertically depending on the decal.
You can also use a spirit level to make sure your decal is aligned properly.
4. Now remove the tape from the corners.
5. Begin to carefully peel the application layer from the backing layer, ensuring the decal is stuck to the application layer. Keep peeling until you reach the anchor point. Cut the backing at the anchor point.
6. Carefully using your library card (which is very important for this project) flatten the decal on the surface. Make sure you remove all the bubbles. Work in a particular pattern. Working from the anchor point’s center going outwards and moving slightly as you go along.
7. Once your one side is done. Now remove the rest of the backing paper and continue flattening the vinyl sticker till you are done.
8. Once you have perfectly squeezed all the air bubbles out and you are satisfied. Carefully peel the application layer to reveal your decal. Make sure the decal adheres properly as you go.
There you have your wall art ready to be framed and nailed.
I love how I can change the background of the world map to match my decor anytime.
I hope you enjoyed reading about this project.
Find more ways to use world map at home with 17 Creative DIY Map tutorials.
Check out our category WALL ART.
Are you on pinterest?
You may also enjoy the Craftionary themed and DIY Techniques Boards.
Updated regularly whenever I find unique ideas.



Great project! I’m with you on the ease vinyl… it looks scary, but is so easy! I love that you applied it to grass. Thanks for sharing with us.
This is awesome! I love the way the world map turned out. Would be so fun for our son’s room to track his travels …
I LOVE this! I want one in my house!! You did a fantastic job Hani!
I especially like the idea of using this as a dry erase board. I am pinning this idea.
Icon Wall Stickers is a great company! I love what you did with the map and frame, a very creative idea indeed! Thanks for sharing 🙂
Very nice! Vinyl is great because it’s so versatile and not destructive. It looks great floating on the glass! :o)
This is so cute!! Love it.
What a beautiful job you did! This project makes me think I need to start at least dabbling in vinyl. :o) Thanks for the great tutorial!
Can’t wait to try this when I can get my crafty stash from store – waiting to move into a new house!
Great project! Your tutorial is really very good: as you I’ve never used vinyl, but after your advices I think I’ll try!
Thanks!
Great project! I love the idea of using it to mark places you’ve visited =) x
Like you said Hani, this would be a very fun idea to mark all of our travels! I want one now! 🙂
That is very cool. I homeschool my oldest son and that map would make a great geography test.
I love the map idea. So many uses for this that you wouldn’t normally think about like keeping up with travels, special places, school projects, etc. Thanks for sharing.!!!
Awesome idea!! I love it!!
I think it turned out great. The price was great, too! I will check out their site.
THIS IS AMAZING. I love that blue color and the frame you chose! *pinning*
The maps turned out beautiful. I love how easy they look to make.
I love Icon Wall Stickers. I recently did a review for their products using a huge wall icon. But I never would have thought to do something as cool as your world map. I love it! Thanks for sharing it at Throwback Thursday!!
I love wall stickers,Thanks For Share This Beautiful Article.
Very nice work! Great choices.