This post may contain affiliate links. Please see our full Disclosure Policy for details.
Let’s make a dry erase frame at home with tips to customize it for your space and needs.
A DIY dry erase frame is a functional and affordable alternative to traditional whiteboards and it’s super easy to make and decorate! Whether you need a family message board, a meal planner, or a homework reminder, this quick project is perfect for home, school, or office use.
What is a DIY Dry Erase Frame?
A DIY dry erase frame is a reusable whiteboard made from a picture frame and decorative paper or fabric. You simply write on the glass using dry erase markers and wipe clean with a damp cloth. It’s a cost-effective and stylish way to stay organized without sacrificing your home decor.

DIY Dry Erase Frame
Why Make a DIY Dry Erase Frame?
- Budget-friendly: Costs less than buying a whiteboard
- Customizable: Choose your background, frame size, and style
- Eco-friendly: Reduce paper waste with a reusable planner
- Multipurpose: Great for to-do lists, menus, affirmations, and more
Simple DIY List Frame
Materials
To make your own DIY dry erase frame, gather the following materials:
- A picture frame (any size – 8×10 is a popular choice)
- Decorative scrapbook paper, printed template, or fabric
- Dry erase markers
- Scissors or a paper trimmer
- Optional: ruler, washi tape, stickers, or labels for personalization
How to Make a Dry Erase Frame
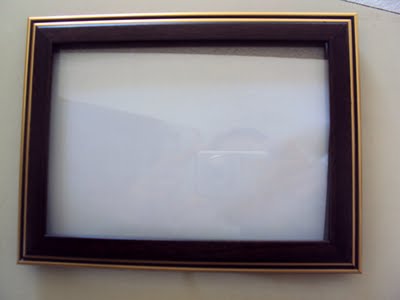
Choose and Prepare Your Frame
Pick a frame that fits the space you’ll use it in, like a kitchen counter, desk, or entryway. Remove the glass and backing before moving to the next step.
Remove glass and backing
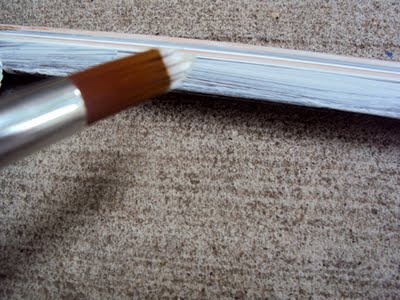
Paint the frame (optional)
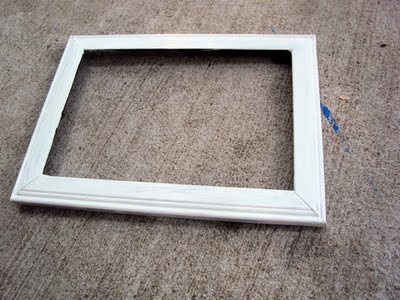
Or Spray Paint the frame (optional)
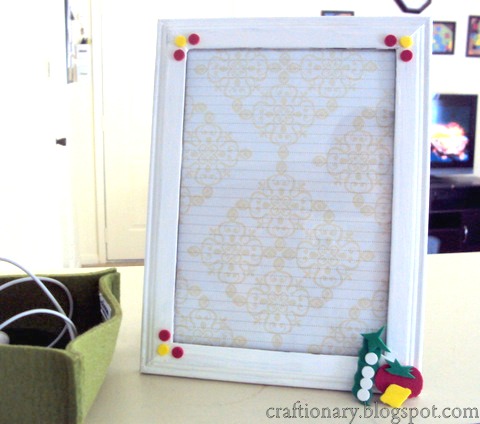
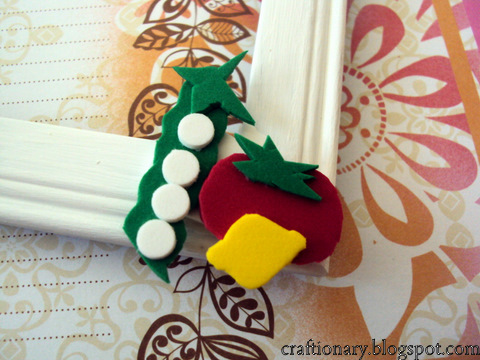
Decorate with felt or foam cutouts like vegetables and produce for keeping a grocery list with glue.
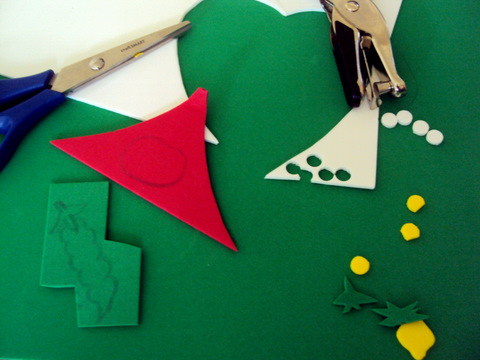
Decorate with felt or foam cutouts
Related: Decoupage file organizer
Decorate Grocery List Frame
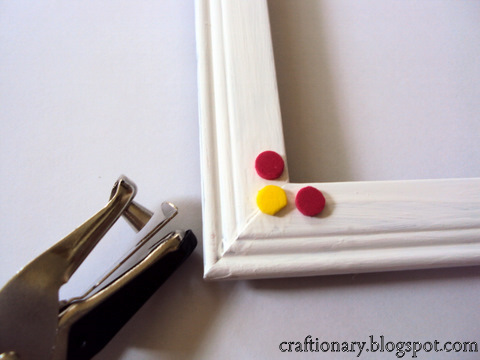
Paper punch foam dots
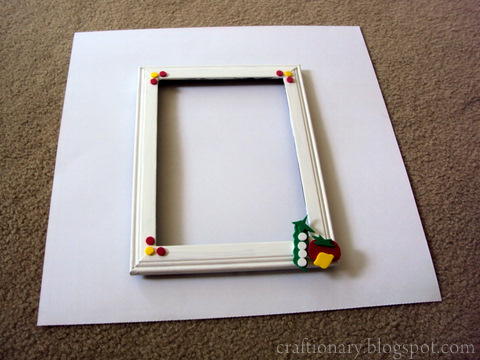
Decorated dry erase frame
Add A Background
Cut your paper or fabric to fit the size of the frame backing. This is where you can get creative! Try Weekly meal planner printables or scrapbook art.
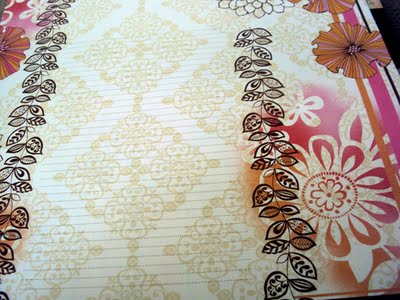
Paper for backing
Calendar templates
- To-do list layouts
- Minimalist or floral patterns
Pro Tip: Laminate your design if you want to swap backgrounds often without wear and tear.
Assemble Your Frame
Place the cut background inside the frame, then replace the glass and backing. Make sure everything fits snugly and looks clean through the front.
Start Writing!
Use dry erase markers to write directly on the glass. When you’re ready for a change, just wipe it clean with a dry or damp cloth.
Popular Uses for DIY Dry Erase Frames
- Meal Planning Board
- Chore Charts for Kids
- Weekly Schedule or Calendar
- Motivational Quotes Display
- Family Command Center
Tips to Optimize Your Dry Erase Frame
- Use fine tip dry erase markers for clean lines.
- Avoid glass cleaners with ammonia to prevent streaks.
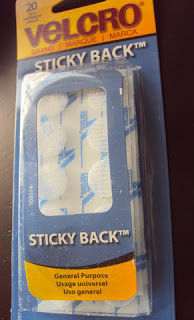
- Add a pen holder or velcro marker clip to keep everything handy.
- Mount with command strips or stand upright with an easel.
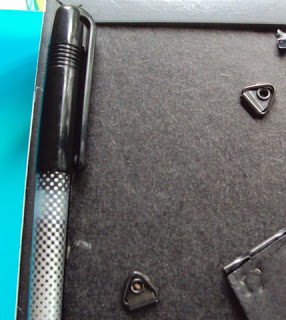
Pen holder for frame
FAQs
Can you use a plastic frame instead of glass?
Yes, but glass works best for smooth writing and easy cleaning. Acrylic or plastic may stain over time.
What size frame is best?
A 8×10 or 11×14 frame is perfect for everyday use, but larger frames work well for full schedules or family plans.
Can you use wet erase markers?
Yes, but wet erase markers require a damp cloth to clean, while dry erase markers wipe off more easily.


I love reading your blog..& this post is amazing..love it..
You like many comments..okkkk..wait a moment..i will comment some more on your previous posts..i hope you will enjoy & your day will be great with these 🙂
Lots of Love
Khadija
love your ideas and ideas…and tutorials…:).. stay blessed..:)
i'v often enjoyed reading yr blogs Hani. Thanks for sharing yr ideas with us. Can u plz share what type of paper should be used , and what type of pen/pencil we should use,that can be erased with a damp cloth?
This is such a useful project, which i think EVERY housewife needs!
These shopping list frames are really so beautiful their color combination is also really attractive.
This is so adorable! I have an ugly dry erase board, so what your project has inspired me to do was to put it in a frame, without the glass 🙂 Thanks for sharing!
This is such a GREAT idea!!! Love the little veggies you added to the corners! 🙂
Love it! You are very talented. That would make awesome gifts. I love that you share these ideas with us. Keep them coming.
What a cute project and your explanations on how to do it make it seem so easy, I think this is one that I'll actually have to try. I do waste a lot of paper with grocery lists, to do lists, etc.
Nice project i love the veggies n card stock u used
This is such a great idea! I think I'm going to have to try this!
Love this dry erase board! Great idea to just take it shopping with you instead of a paper list!Thanks for linking to a Round Tuit!Hope you have a great week!Jill @ Creating my way to Success
Your newest follower from Friday blog hop
Are you kidding me? Great idea! I'm going to do this. I'm putting your blog in my favorites, because I saw a few other things I need to look at. Thanks for linking up at Fancy Friday!
New follower of your blog thru GFC and while I was here I followed on Facebook and Twitter. I would love a follow back on all three of those also if you don't mind. No hurry, just when you can get to it. Thanks for the help, I really appreciate it.
I love this project. It is a must try! Thanks for sharing. Your newest follower.
Just a great idea!
Awesome!!! im loving it!!!
This is an incredible idea !!
I made one of these a while back too and I love it! The paper you put in yours is great! If you always use it as a shopping list you could put different categories on the paper, or staples you buy every week.
just came over from crazy wonderful and love your blog, this is so fun learning from other crafters and sharing our lives, the new penpals! thanks for sharing this craft, i have a few frames from a garage sale i plan on making one of these for the kitchen for notes, with 2 teenagers….it will help with the comings and goings!lol