This post may contain affiliate links. Please see our full Disclosure Policy for details.
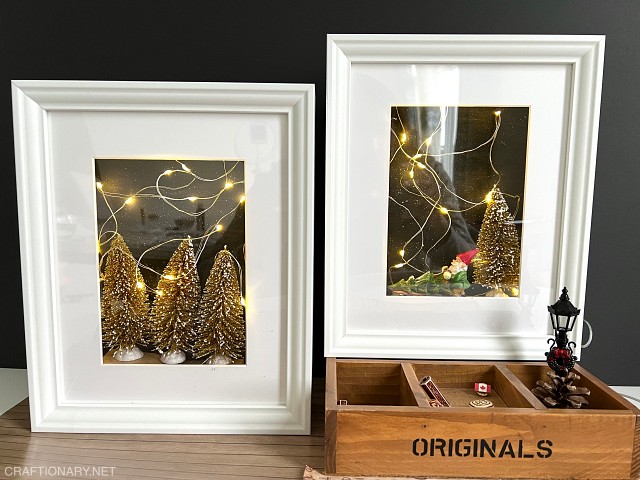
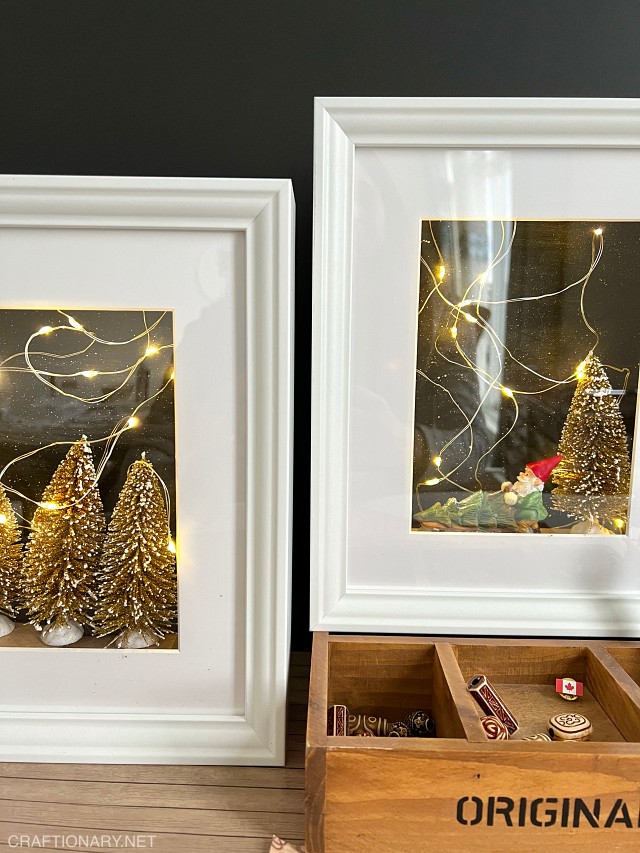
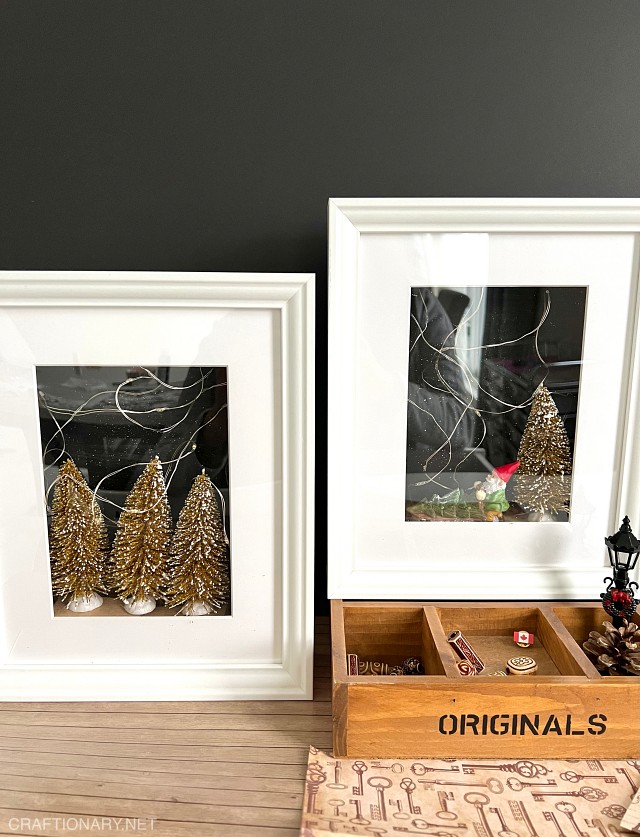
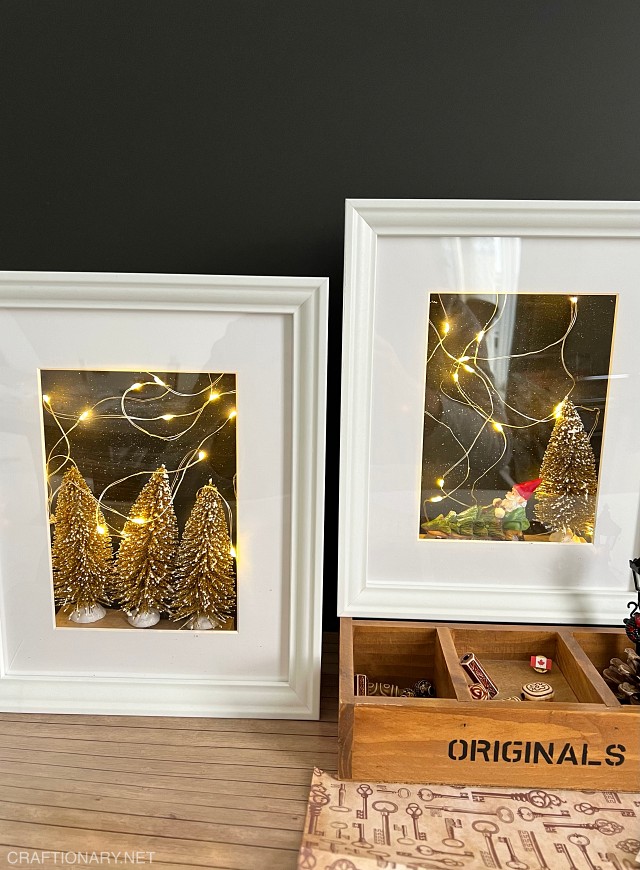
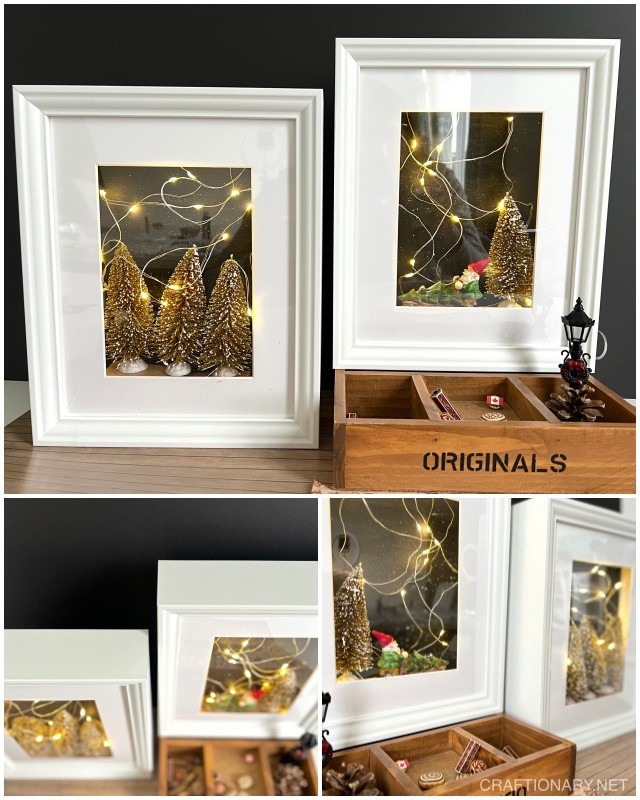
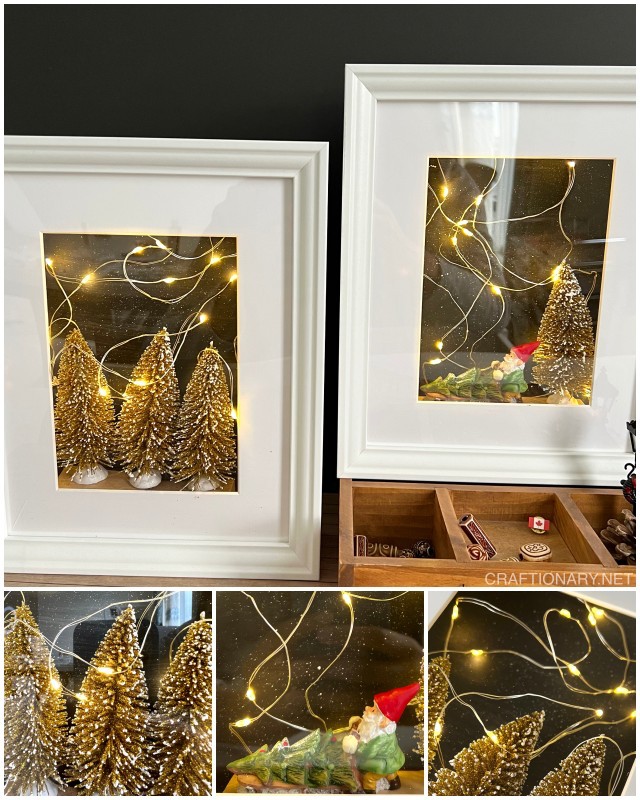
DIY Black and gold wall decor in shadow box with starry night sky and string lights where the gnome rides the sleigh through the forest of golden Christmas trees for inspiration.
Sometimes a quick project is all you can whip up for celebrating Holiday cheers! I like to decorate the front porch so that it brings the magical lighted Christmas cheers for our neighborhood! It is always windy and cold outside and we set a beautiful doormat and wreath at the doorstep for decorating. This year we thought of placing a LED string lights twinkling Christmas village scene at the window for extra magic. We also made Winter snowglobes lighted village for our mantel decor.
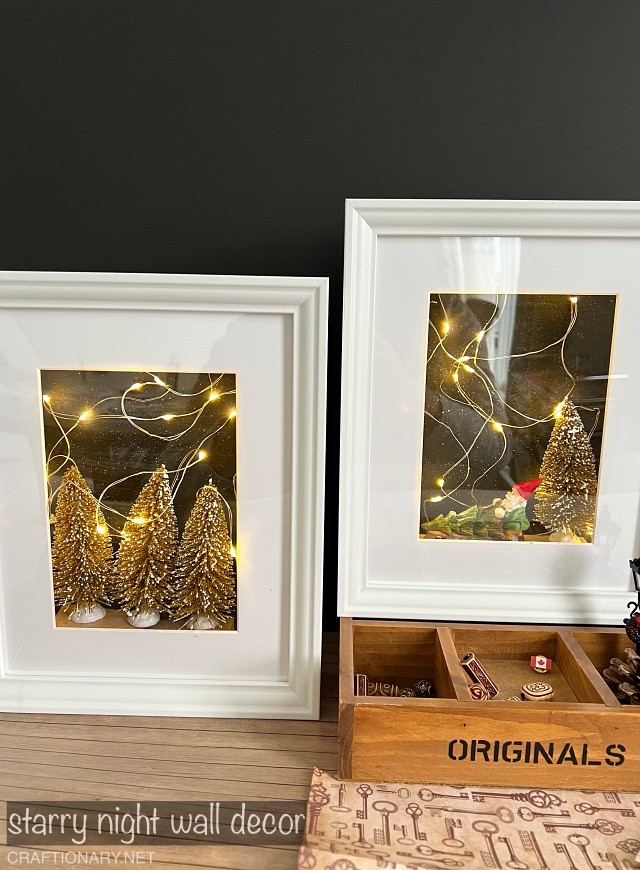
DIY Black and gold wall decor in shadow box
I got this idea from the feeling I get when I pass by and see a festive well decorated house! It gives me butterflies and I feel so filled up with happiness and smile!
Even though I don’t celebrate Christmas, but I love the feeling it brings! So much joy and happiness! I decided to make a winter scene in gold and black theme and pop these wood frames in the windows at my entryway facing outside!
Consider making DIY sunburst mirror and add black and gold framed mirror or DIY painted wall art for interior decoration. Use these ideas to create black and gold framed wall art or canvas wall art that looks expensive and is made cheap with simple things. Other easy options include using art prints you can download and print from the internet and frame them.
At night we turn the lights on, and it looks so cheerful and festive! This project is so easy to whip up and can be used to decorate any part of your home! Whether it’s your kitchen, Christmas mantel or dining table! The best part is that it’s so easy to make with things you might already have at home!
Once, the season is over you can either store it, redecorate it next season or even bring it apart and use the frames for any other seasonal or Holiday project! It’s that easy and handmade to your custom needs! So let’s get started with the tutorial:
How to make black and gold wall decor
VIDEO TUTORIAL TO MAKE WALL DECOR:
If you like visual directions better I have a complete video tutorial with starry night sky painting on the channel.
MATERIAL AND SUPPLIES YOU WILL NEED:
- Shadow box (I bought mine from IKEA)
- Gold Christmas trees (dollarama)
- Gnome with sleigh (dollarama)
- Wooden blocks (kids toys)
- String lights (dollarama)
- Hot glue gun
- Transparent glue sticks
- Double sided tape
- Acrylic paints (DecoArt in black and white)
- Paint brush or foam brush

TIPS FOR CRAFT:
– You can use anything even floral foam to replace wooden blocks.
– Decorative items can be anything depending on your collection of accent pieces and accessories.
– You can use large shadow box to create a winter snow village. Ideas are endless given your novelty items collection!
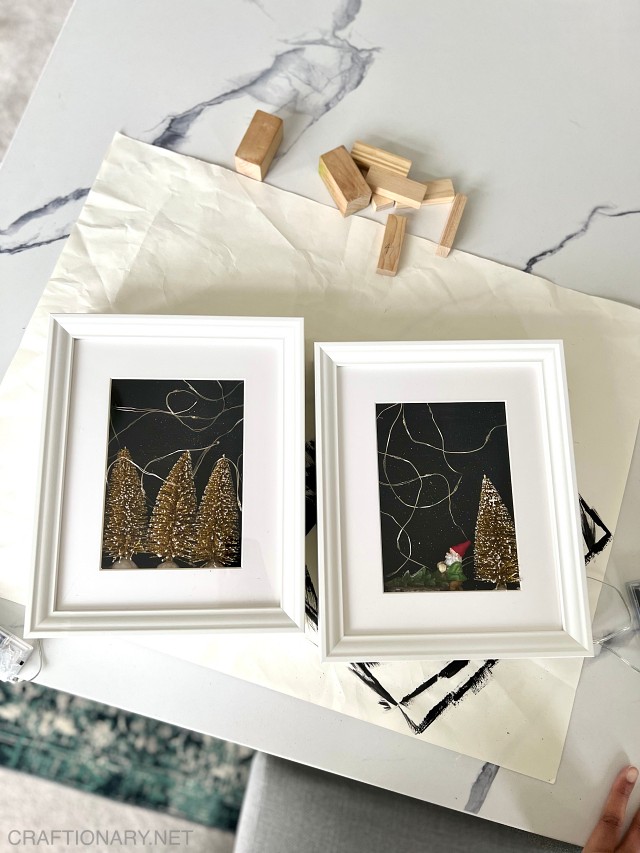
STEP BY STEP TUTORIAL AND INSTRUCTIONS:
1. Use the frame backing to trace and mark the size of sketch paper that will make the background of the shadow box frames.
2. Then cut the paper to the size.
3. Use acrylic paints or water-based colors in black and white to make a simple painted winter night sky for DIY black and gold wall art.
Night Sky Painting
HOW TO SPLATTER STARS WITH ACRYLIC PAINTS
You can simply use black construction paper if you like! I wanted the sky to look painted with brush strokes, so I went with this additional step.
- Started by painting the paper black. Stroke in one direction only i.e., left to right! This way the sky looks wide and on horizon.
- Let the paper dry for 5-10 minutes. It dries very quickly!
- Now it’s time to make the sky filled with stars.
- I used a size 1 round paint brush and dip it in white acrylic paint slightly. Dab it twice on the paint palette to remove any excess paint.
- Now hold the paint brush to the paint surface at an angle of 45 degrees and pull on the bristles of the paint brush to splatter the paint on the paper.
- Continue to splatter the paint on the entire surface of the sketch paper.
- Given the little amount of paint on the bristles, it really brings out a beautiful galaxy of stars on the black painted paper.
- You can also splatter some gold paint for glittery night sky showing yellow stars and blue paint for blue stars for an even more realistic galaxy.
TIP FOR BEST RESULTS WITH SPLATTER PAINT TECHNIQUE:
If your paint brush has lots of paint the drip painting or action painting technique will result in big dabs of white paint rather than a splattered galaxy. Therefore, use little amounts of paint and repeat as per your project’s area need.
Shadow box wall decor in black and gold
4. While the painted paper dries. Continue to decorate the inside of wooden shadow boxes from IKEA.
5. Simply open the shadow box and follow the instructions to decide how you want to display your winter scene. I chose to line the glass close to the frame and leave space in between for setting the accent pieces.
6. Next put the box upside down and arrange the wooden blocks and decorative accessories facing the glass i.e. gold Christmas trees and gnome with the sleigh! You will be seeing the backside while arranging the pieces.
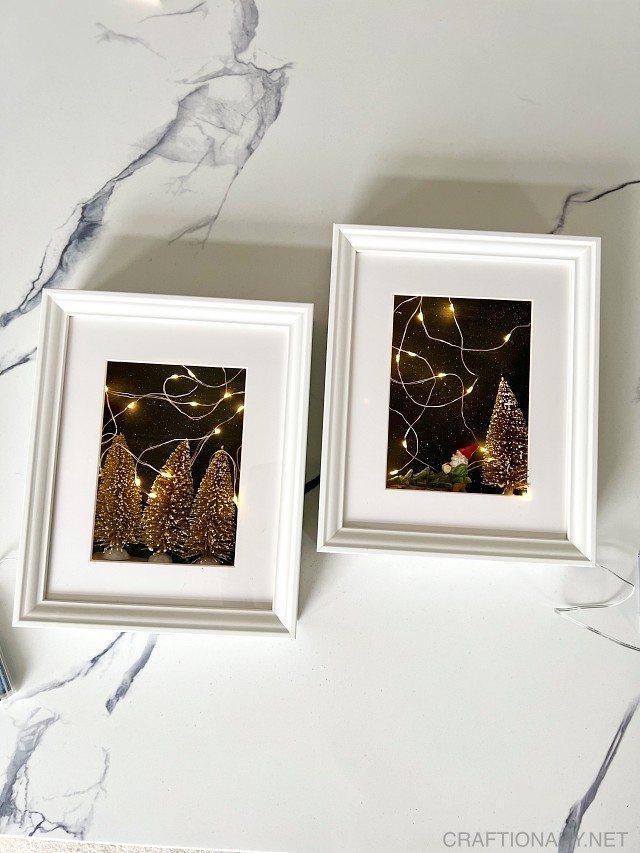
7. Tilt the frames from one side to check alignment from the front and use hot glue to secure them in place!
8. Finally take the led string lights (battery operated or button operated, whichever you prefer) and fill them in the box unevenly focusing on covering the sky with light more.
9. Make sure to keep the battery box outside the frame. You can even dab some hot glue and secure it behind the frame for ease of use.
10. Now use double sided tape to stick the painted night sky on the frame board and close the shadow box from behind!
11. Hang it on the wall with command hooks, or display in your desired location and voila!
Happy Holidays with festive and cheerful lights for a magical scene! If you like larger than life projects, checkout these Christmas outdoor lights projects!
Hope you enjoyed this project! Till next time take care and please consider following me along at instagram where I started posting this year but I keep it very simple.