This post may contain affiliate links. Please see our full Disclosure Policy for details.
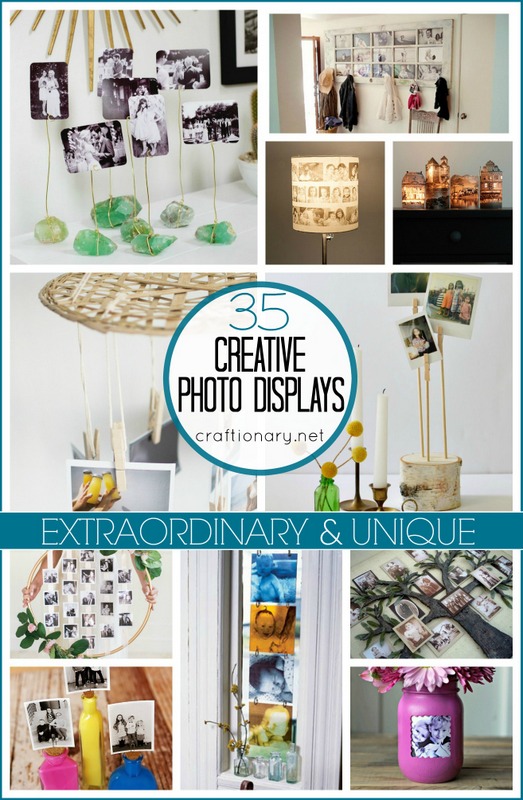
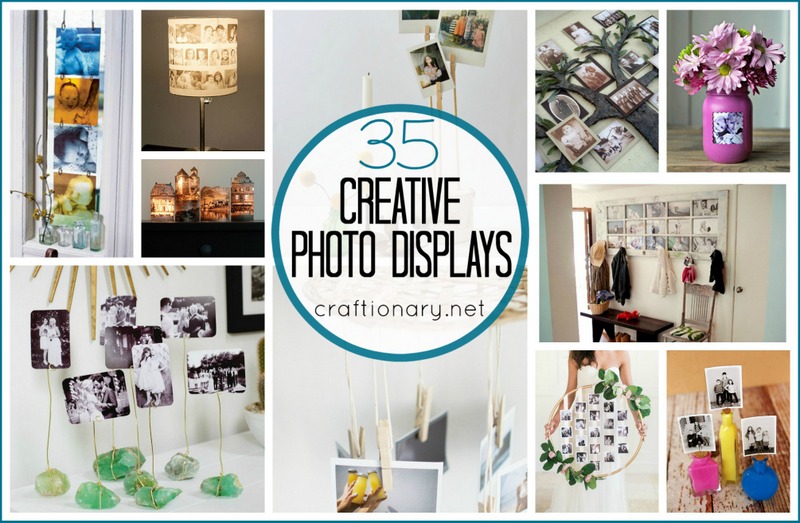
Find DIY photo display tutorials to brighten up plain and dull looking walls, table tops and ceilings with memories of family and friends. Substitute fancy or antique frames with simple, easy, and clever home decor ideas like gallery walls, picture ledges, wire photo holders, clipboard displays, string lights, mason jar frames and more. Step-by-step how-tos, layout planning, print and preservation tips, and pro tricks to make your photos look gallery-ready.
1. Choose the right display for your space and photos
Not every idea fits every room. Match your method to the room function, wall size, and how often you want to change the photos:
- High-traffic living rooms/ permanent displays: framed gallery wall or large statement print. These read as art and hold up well.
- Renters and changers: picture ledges, clipboards, wire/photo string systems—easy to swap without many holes in the wall.
- Small spaces and shelves: stack small framed prints or use mini-clip displays on bookcases.
Related: How to hang small photo frames collage in alignment?
2. Materials and tools you’ll likely need
- Materials: prints (various sizes), frames (or mat board), picture ledges, wire/twine, binder clips, clothespins, corkboard, magnets, Mod Podge (for craft displays), adhesive picture hanging strips (for renters).
- Tools: tape measure, level, pencil, hammer, nails or anchors, drill (for heavy frames), stud finder, reusable template paper or kraft paper.
- Safety note: use anchors for frames heavier than 5–10 lbs; always wear eye protection when drilling.
3. Planning a gallery wall (step-by-step)
Creating a balanced gallery wall is as much about prep as composition. Follow this plan used by interior designers:
- Collect and choose photos — edit to a color story (BandW, muted tones, or bright).
- Select frames and mats — keep consistent finishes for cohesion or mix for eclectic style.
- Lay out on the floor — arrange pieces on the floor to test balance before committing to the wall.
- Create paper templates — trace each frame onto kraft paper, label, and tape to the wall to preview spacing (Pro tip from retailers.)
- Start from the center or anchor piece — place the largest or most important piece first; work outward.
- Use consistent spacing — 2–3” between frames for a tidy look; closer spacing to create a tight, cohesive cluster.
- Hang and tweak — step back frequently and adjust.
Why designers recommend this: previewing on the floor and with paper templates prevents rushed mistakes and unnecessary holes.
4. Low-damage and renter-friendly displays
If you can’t—or don’t want to—put lots of holes in the wall, try these options:
- Picture ledges/ floating shelves: let you layer frames and decor; swap art seasonally with no new holes. IKEA sells affordable ledges that are easy to install.
- Wire + clips: staple or anchor two hooks and string tensile wire or twine; attach photos with binder clips or mini clothespins. Great for rotating prints.
- Clipboard wall: hang clipboards in a grid—change photos in seconds.
- Adhesive strips and removable hooks: ideal for lightweight frames and prints; follow weight limits on packaging.
5. Creative Photo Display Ideas
BEST PHOTO DISPLAY STANDS
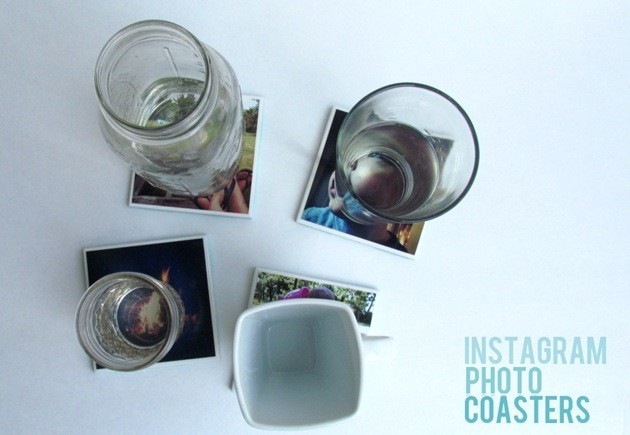
1. PHOTO COASTERS
This DIY photo coaster will change your mood for good with that hot cup of coffee. The photo coaster uses mod podge gloss and sealant to transfer the picture onto the ceramic tiles.Replacing the ceramic tiles with a canvas or wood will also have the same effect.
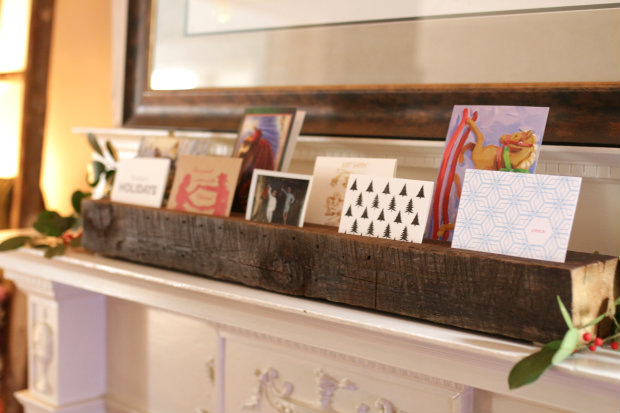
2. PHOTO DISPLAY FOR THE FIRE PLACE
This wooden stand is just the right way to recycle a broken wooden beam or a window rim. The display pictures or cards can easily be replaced by family photographs and the surface or your furniture is protected by the felted corners on the beam.
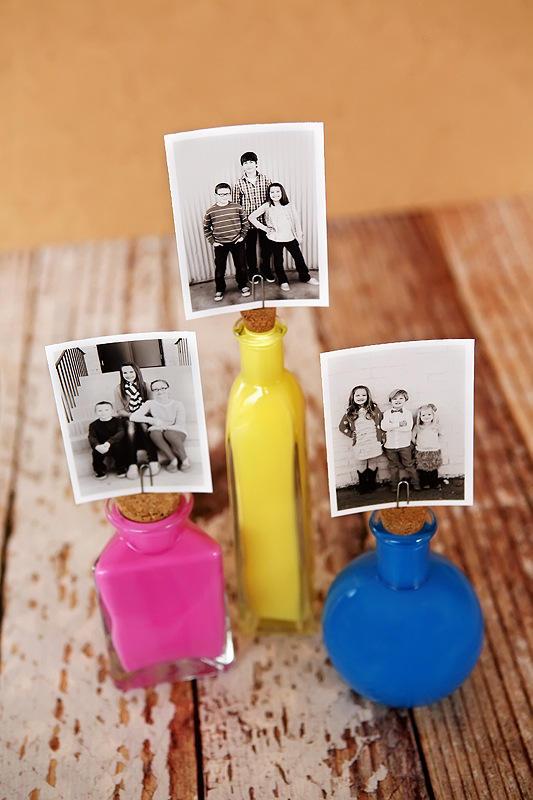
3. PHOTO BOTTLE STAND
Recycle empty bottles with this easy to make Painted bottle photo stand for your coffee table. All you need are bottles, acrylic paint (swirled around, dripped, and dried inside the bottle), corks and your photographs to display pictures.
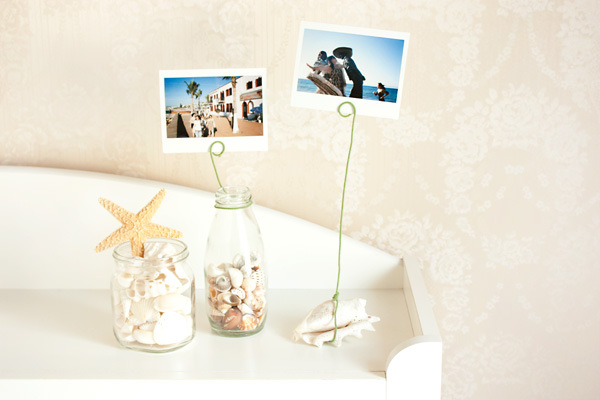
4. STONE PHOTO STAND
Make this simple and elegant Photo stand with stones or seashells collection.
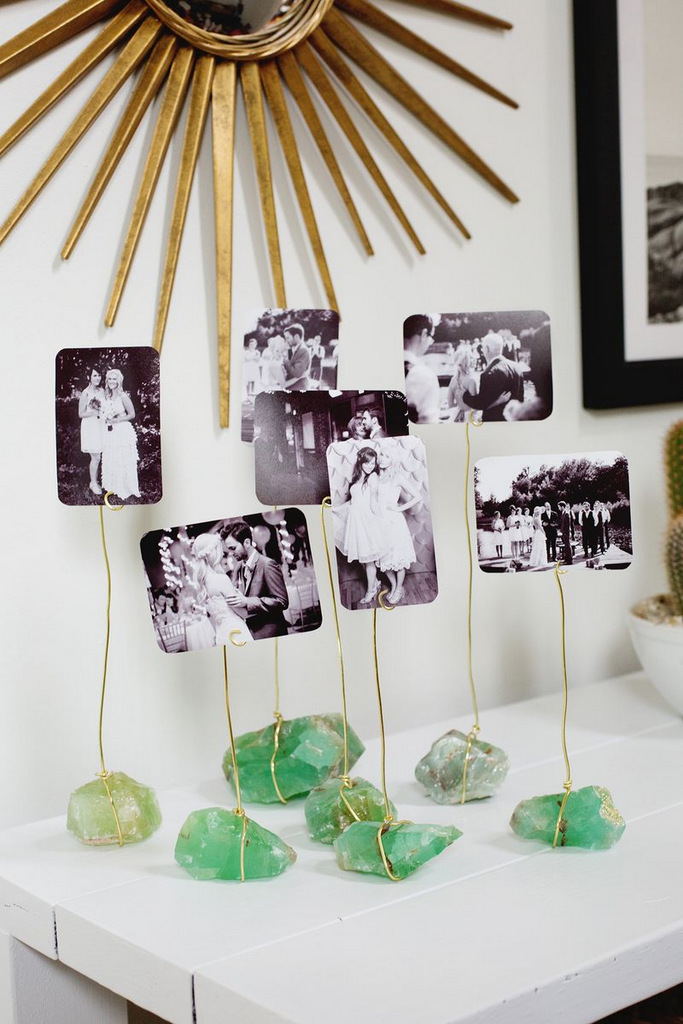
5. ROCK PHOTO DISPLAY STAND
Mineral rocks are not just any ordinary rocks. These mineral rocks emit positive energy and make a pretty awesome looking photo stand. DIY mineral rock stand with wire photo holder.
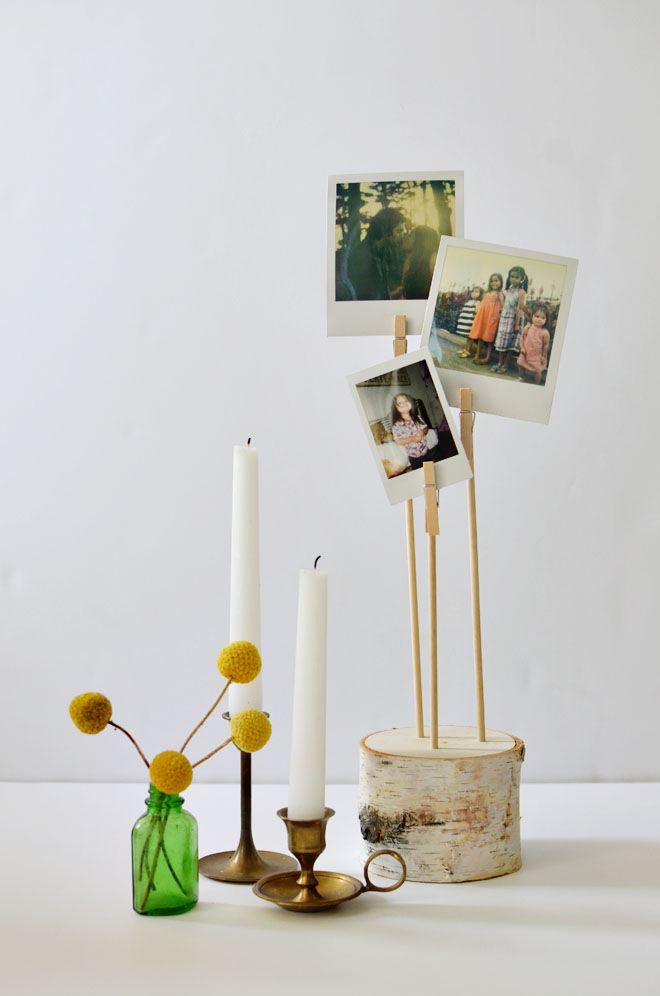
6. BIRCH PICTURE HOLDER FOR TABLE
Birch tree trunks are found in many different colors but in this Birch picture display pillar we have used white Birch pillar with dowel and clothespin. If you don’t want it to be white you can use oil paint to paint it in your desired color.
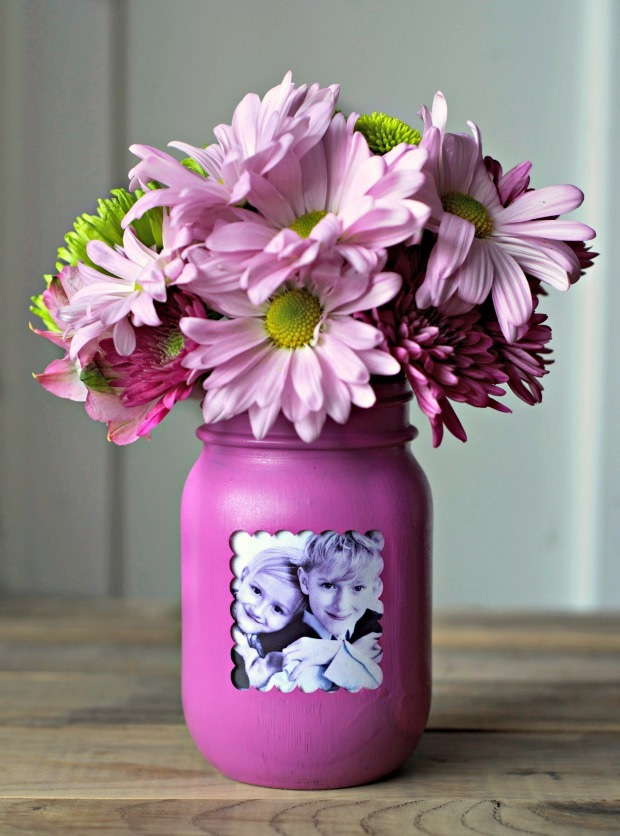
7. MASON JAR PHOTO VASE
Mason Jars can be recycled and reused in many different ways to display pictures. DIY flower vase shows the use of Radiant Orchid satin paint on a mason jar with a photo frame left unpainted. Use cutout vinyl or painter’s tape.
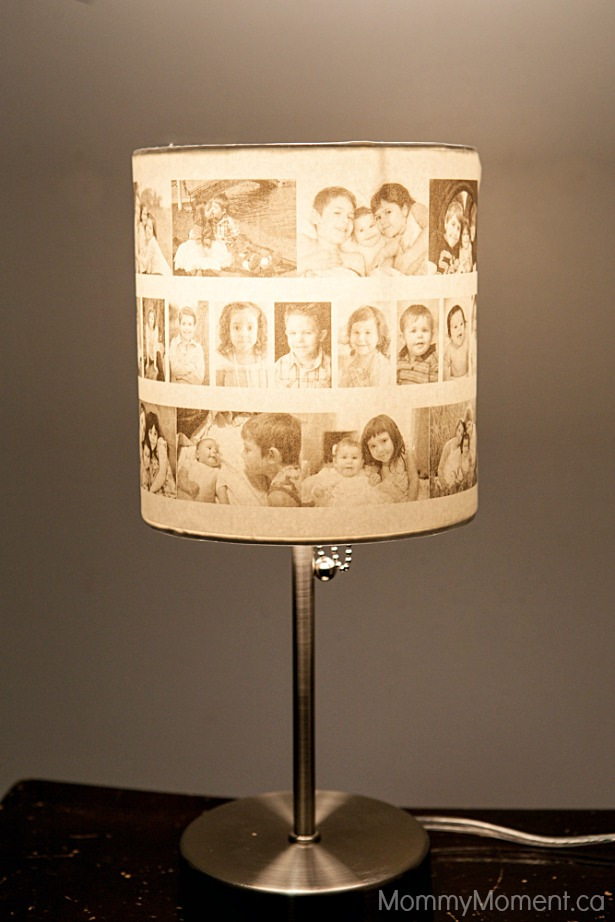
8. PICTURE STAND LAMP COLLAGE HOLDER
This DIY Photo lamp shows a unique way to display photos and pictures in your house other than those typical photo stands and wall collages. The tutorial is simple and requires only a Lamp with shade, a trace paper and a scotch tape.
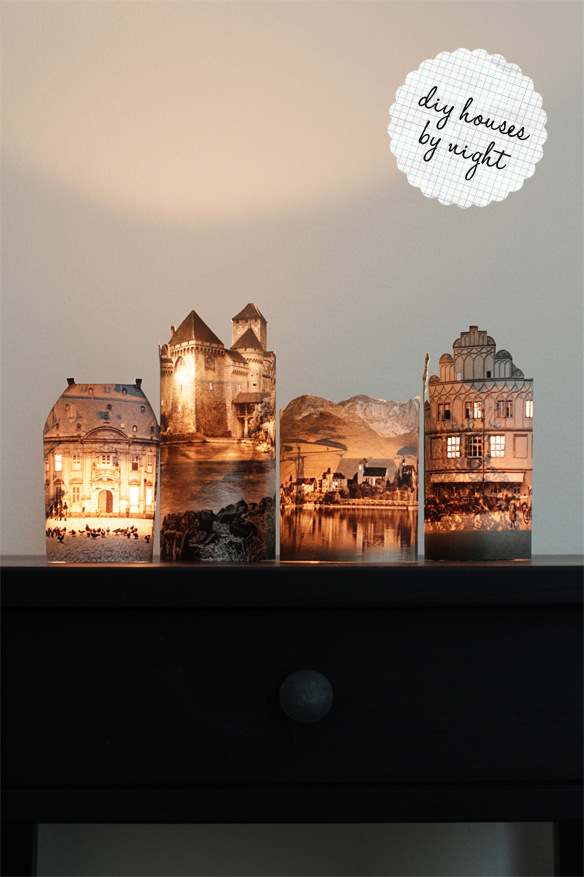
9. HANGING PICTURE NIGHT SHADE DISPLAY
Make a customized night lamp and modify the outlook of your night lamp by using your family photographs or your kids favorite characters. Use Landscape pictures and battery operated tea lights. You can also use LED lights.
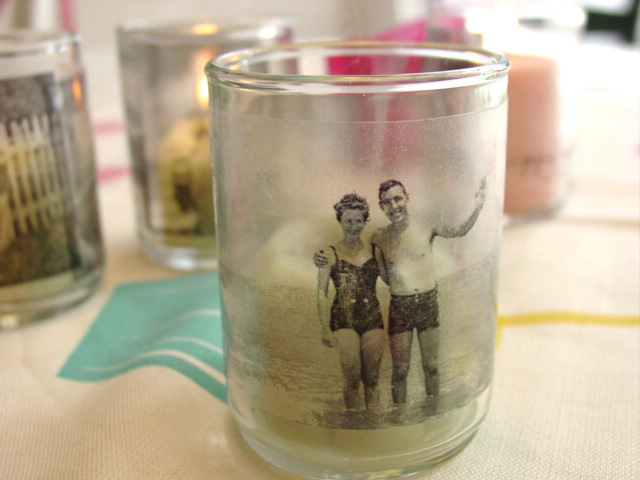
10. CUSTOMIZED CANDLE HOLDER PHOTO STAND
Transfer a black and white photo memory on a glass holder from a contact paper by using a scrubber and warm water. Place the picture with backside facing towards you, wet the paper and keep scrubbing the peel until the backside is fully removed.
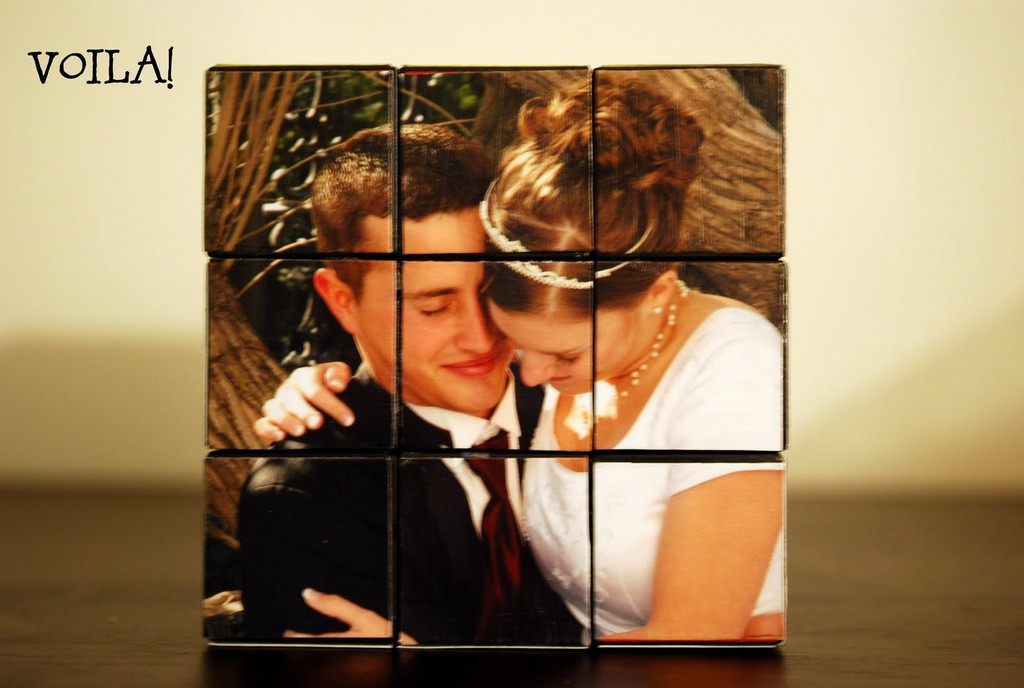
11. BLOCK PICTURE PUZZLE PICTURE DISPLAY
Kids love building blocks and adults love solving puzzles. With this DIY Picture puzzle blocks tutorial, kids and adults both can have fun solving puzzles and building blocks. It is a fun way to use blocks to create a puzzle and at the same time create a show piece for the table to display pictures.
3 in 1 Photo display for travelers:
- 3D Photo shapes: A fun and interesting way to show case your traveling pictures by creating 3D shapes using chip board and your photographs. However, be careful measurements matter a lot in this tutorial.
- Wire Rack Display: DIY wire rack display tutorial teaches you how to make the entire rack from scratch with the help of wired cloth hanger, jute twine and floral twine. You can use this rack to make your party entrance a little more extravagant.
- Photo easel: Wanting to relive those traveling moments in the comfort of your home is easy. All you need are the photographs of places you visited, a cutter, glue and a foam board/poster board and you can make 3D images of these memories with this DIY photo easel tutorial.

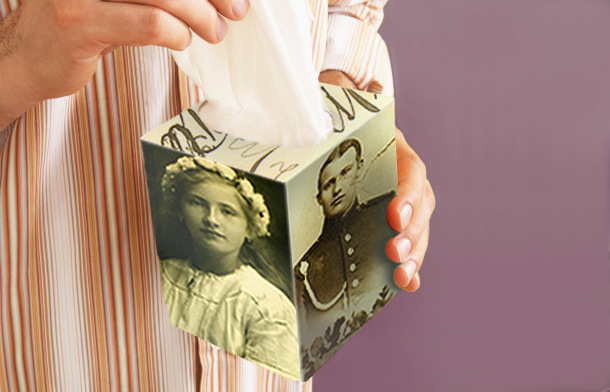
12. PHOTO TISSUE BOX PICTURE STAND
Wiping off your tears with a tissue will work best with some good memories to help out, with this DIY photo tissue box photo stand. Using a wooden tissue box base recreate your moments of happiness.
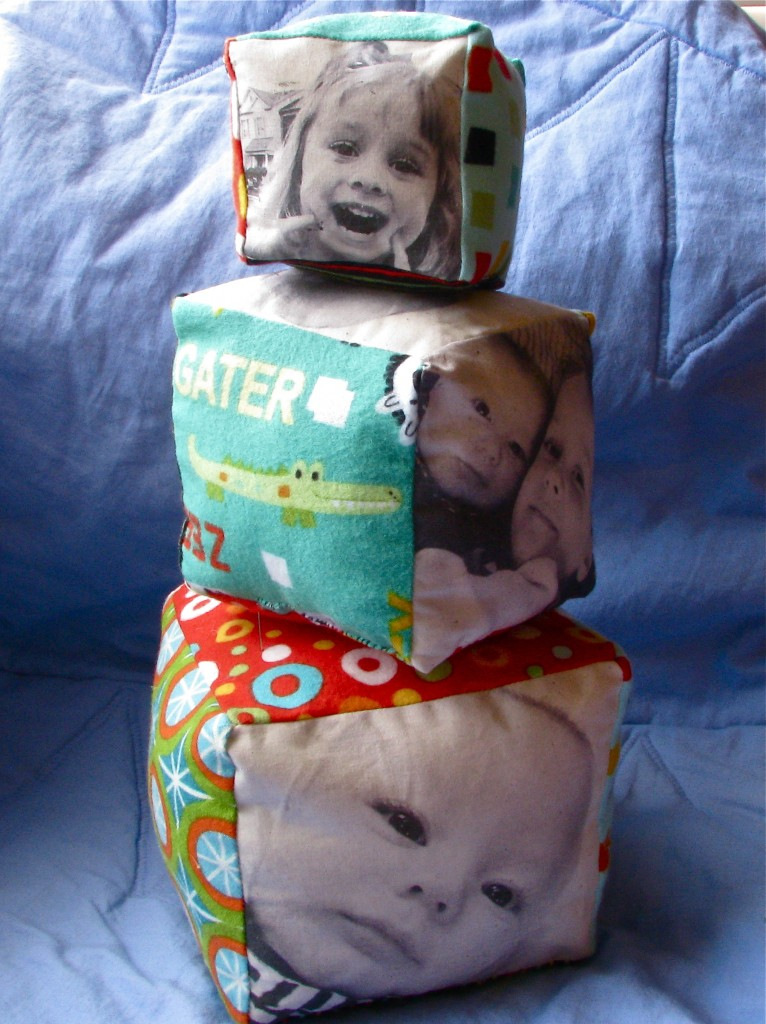
13. FABRIC PHOTO BLOCKS
DIY fabric photo blocks shows you how to print on fabrics and how to make soft stuffed blocks?
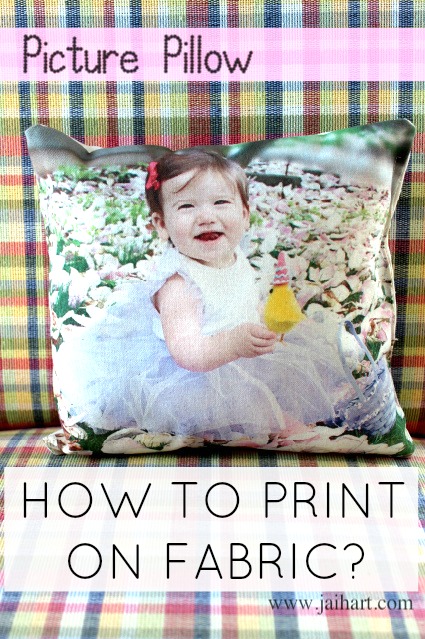
14. DISPLAY PHOTO PILLOW PICTURE STAND
Make a personalized photo pillow using freezer paper and printer to print on fabric. Tutorial to print on fabric is simple and easy to follow.
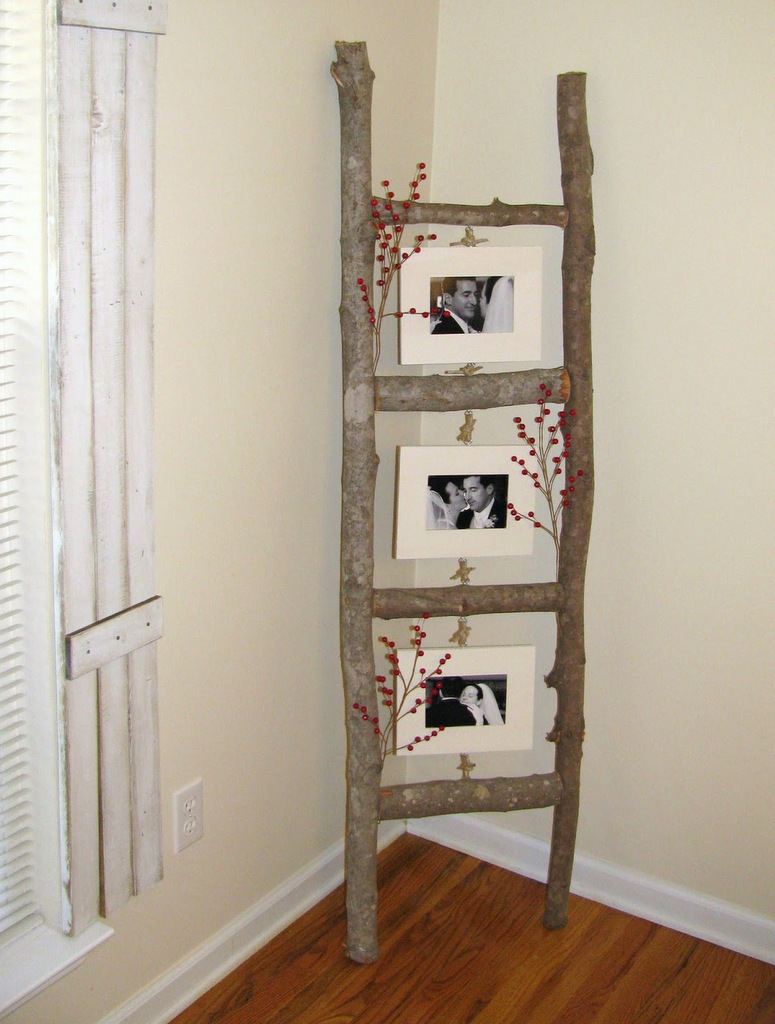
15. LADDER PHOTO DISPLAY EASEL
A ladder is not just used to climb high places. This DIY ladder photo display can be used to climb into the hearts of your loved ones as well with pictures display.
16. SHADOW BOX FAMILY TREE
Preserve your family lineage in a shadow box for generations to come with this DIY shadow box family tree. In this hanging photo display the shadow box is made from scratch with an old frame and wooden rims and board.

BEST WALL PICTURE DISPLAYS
17. HANGING DIY PHOTO WALL
Don’t have tools and DIY materials on you. Big Deal! This DIY Photo Wall display requires nothing more than lots of photographs, glue and an empty wall. So get started making hanging photo display.
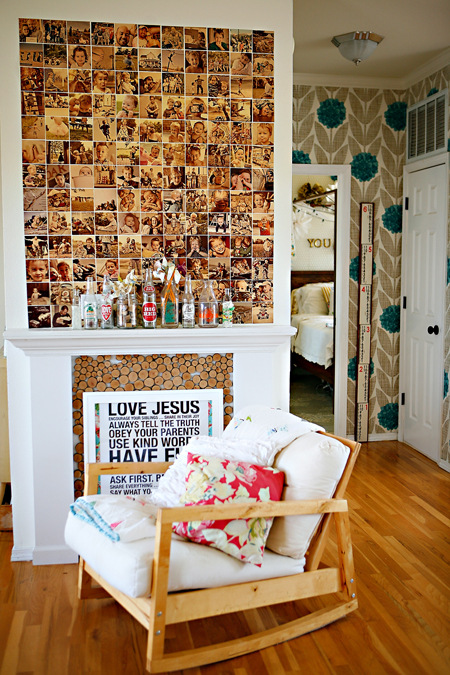
18. PAINTED PICTURE WALL COLLAGE
Do you want to send a message to that one person you care for. Turn a large frame into a board with chalkboard paint or simply paint a wall and enjoy creating fun picture displays and collages. You can also use software and print large architecture size pictures and frame them in black and white as portraits for the wall. Another fun idea is to display large canvas prints.
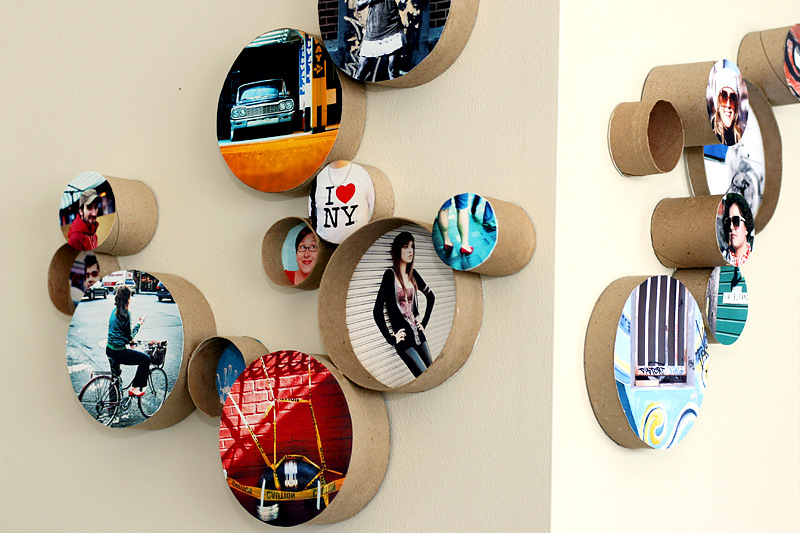
19. RECYCLED HANGING PHOTO DISPLAY
Recycling those toilet paper cardboard rolls or those foil paper base can be as easy as ABC with this DIY photo display. The tutorial has shaped the pictures in a circle which is different from a usual square or rectangle.
20. CHALK BOARD HANGING PHOTO DISPLAY
Teaching Kids about family and their value in their lives can be made so much more fun with this DIY photo display. All that the kids need is paints, a chalkboard, washi tape and some photographs. This DIY shows how to create a chalkboard on a wall. This will make a fun school project.

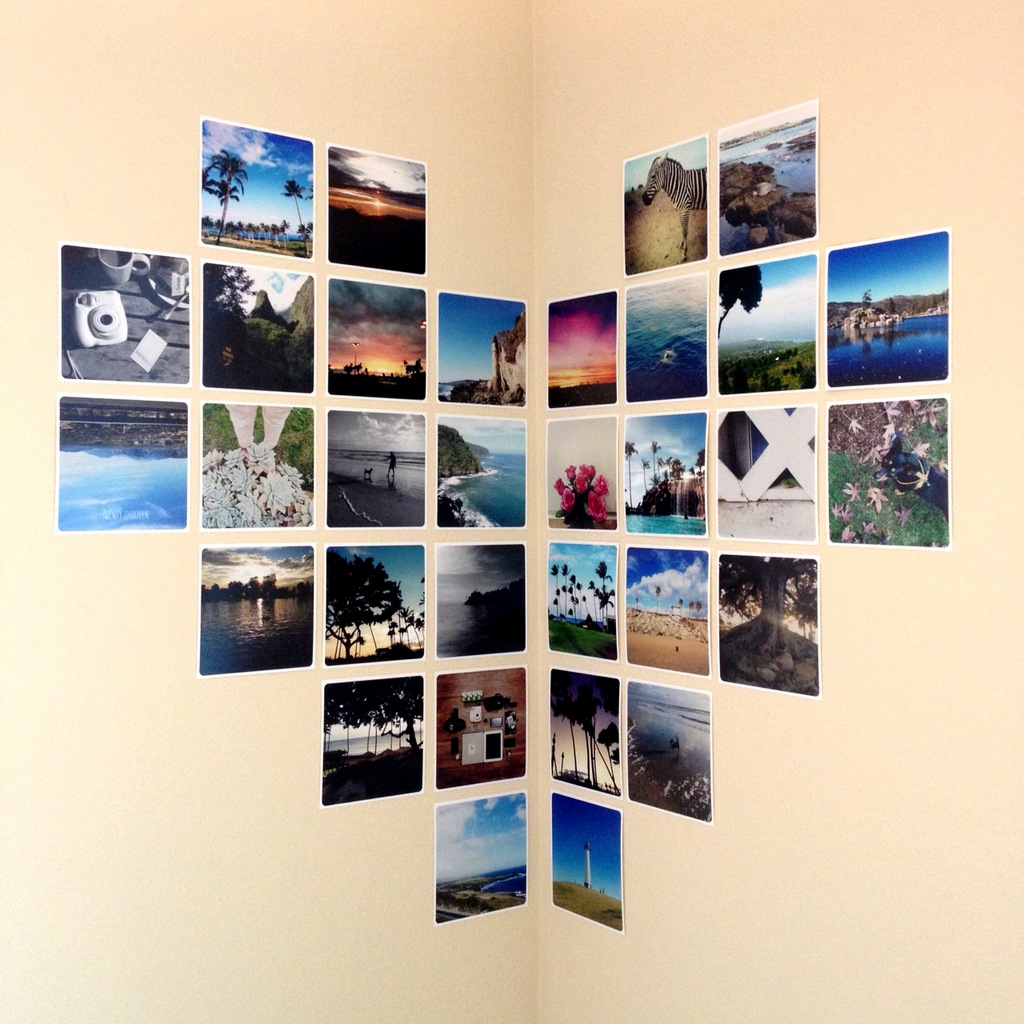
21. HANGING PICTURE DISPLAY GRID OR TILES
The all time favorite heart shape on the corner of your wall with all your wonderful memories in one place. This DIY Heart photo display opens the possibilities. Make a grid or use mix tiles to make a shape on the wall to display pictures.
22. FLORAL ACRYLIC PRINTS BACKDROP
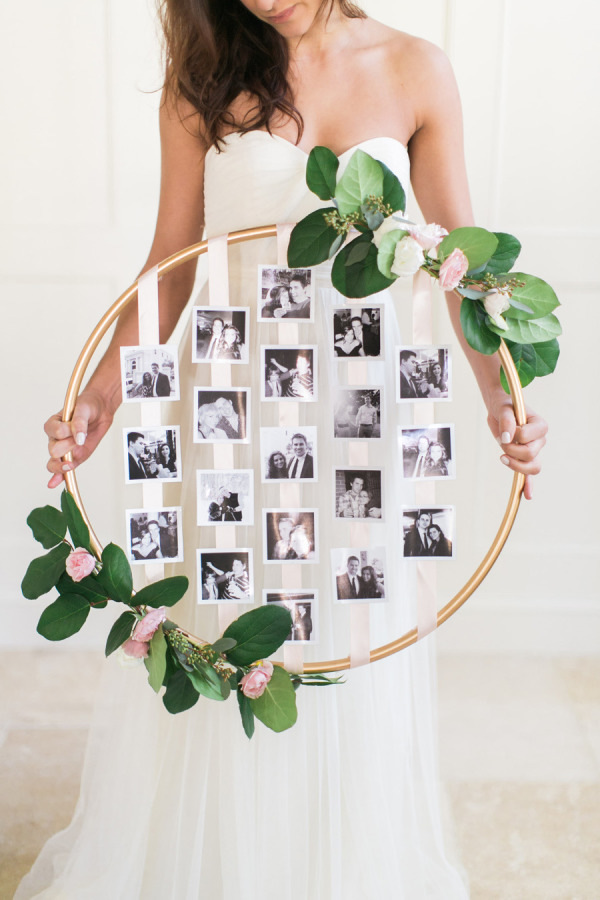
Hula hoop and black and white pictures makes perfect backdrop or wall photo frame for wedding. This DIY Floral photo hoop uses ribbon to hang pictures and faux flowers to transform that toy into an elegant wall decor using spray paint on hoop.
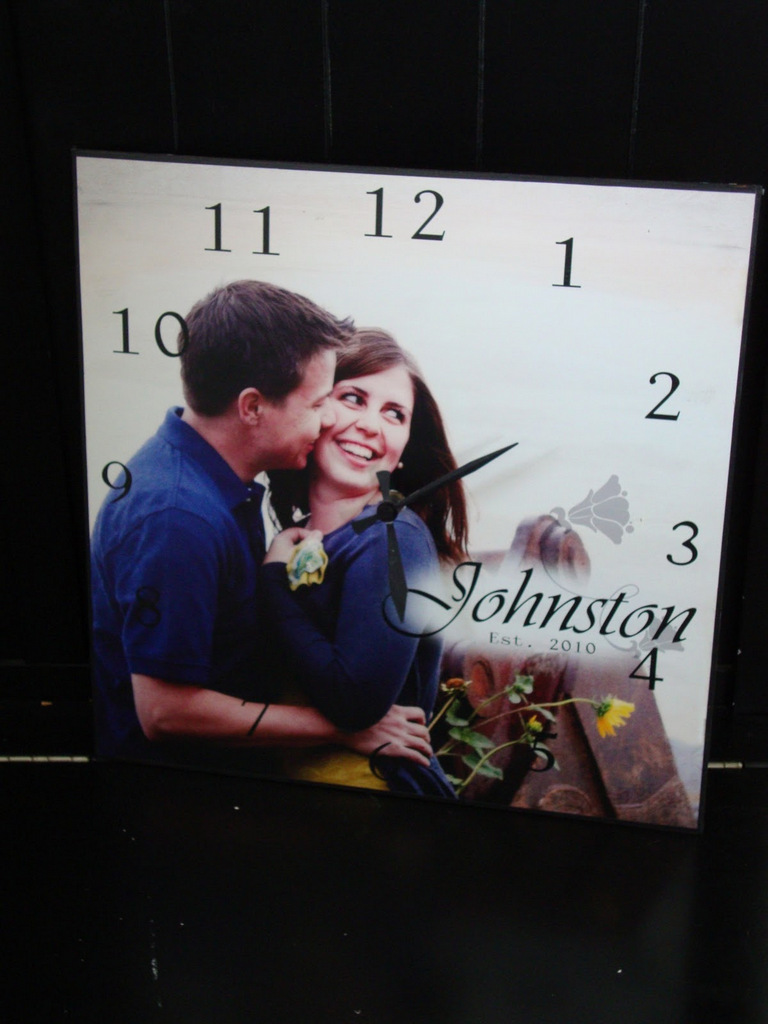
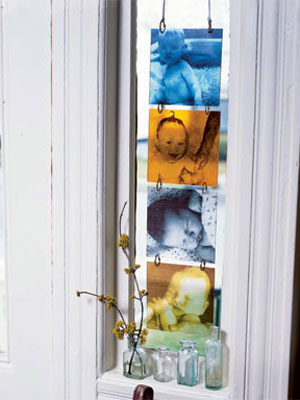
23. HANGING PHOTO WALL CLOCK DISPLAY
This DIY Photo Wall clock shows you just how to capture those moments in time. Transfer a picture on an MDF board and attach clock parts to it.
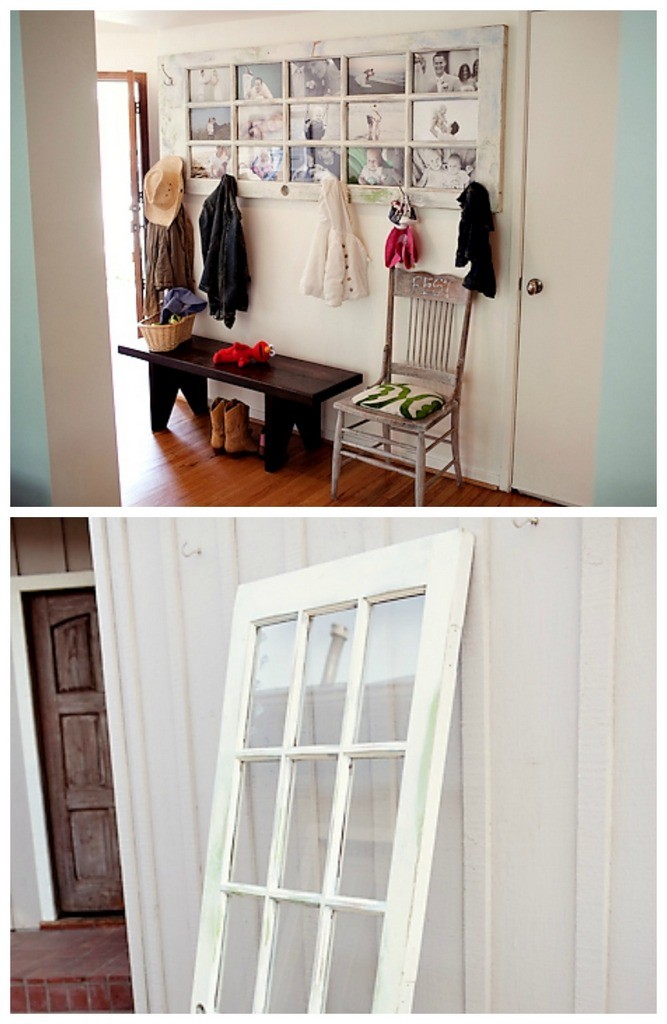
24. OLD DOOR HANGING PHOTO DISPLAY
Enhance the interior of the wall at your entrance by using an old door as picture display and frame coat rack. Use a tape to hang the pictures on the back of the door before hanging it on the wall.
25. ACRYLIC PICTURE HOLDER FRAME
Get acrylic frames from the shop or challenge yourself into making DIY Acrylic photo frame for cheaper using Faux Acrylic. This requires caution while using the tools.
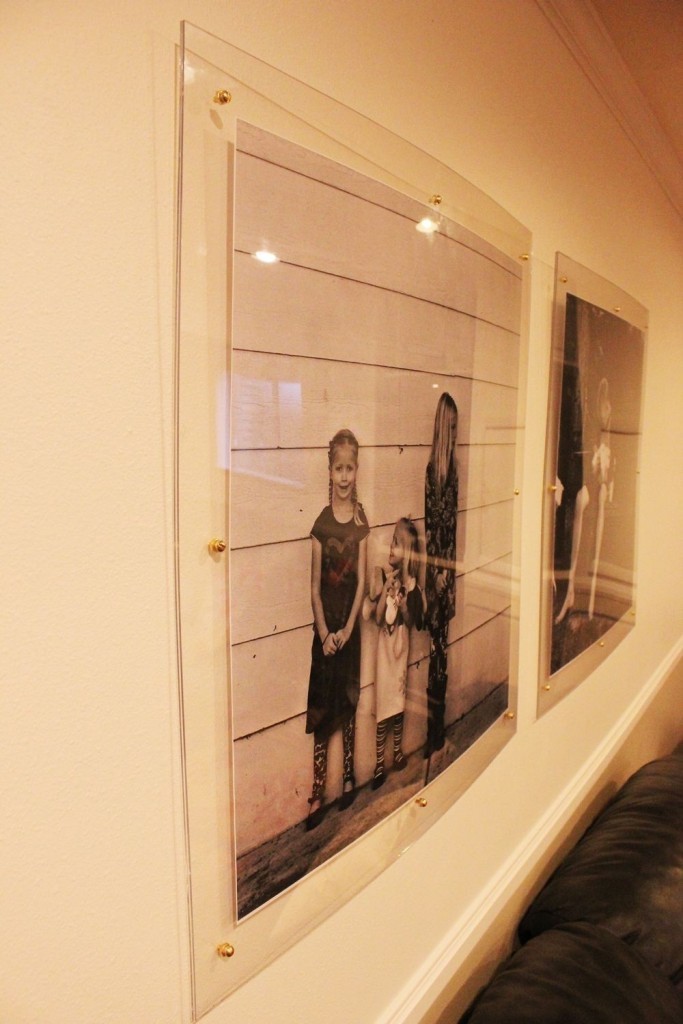
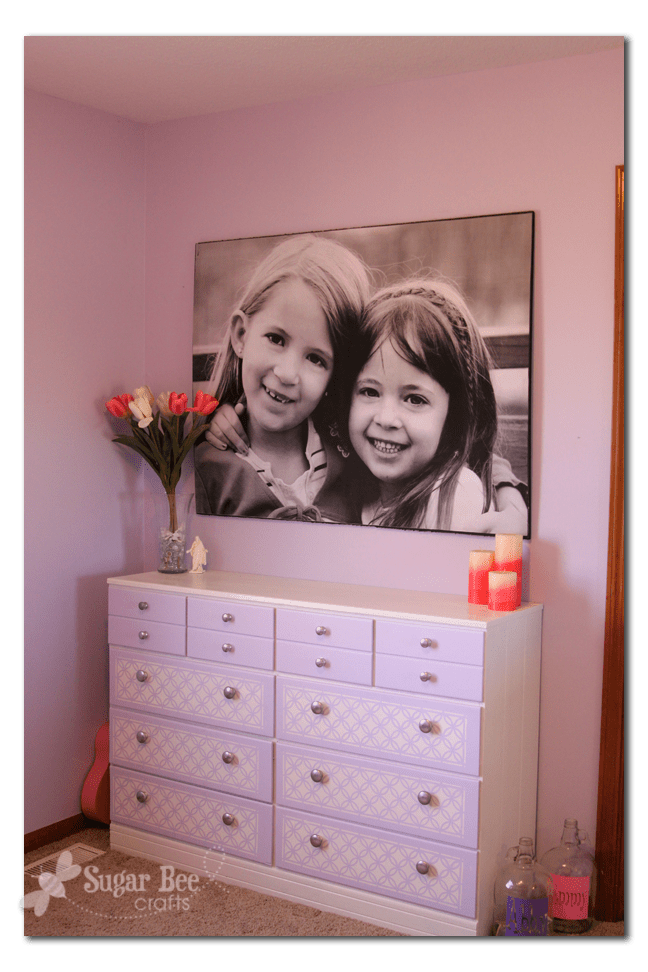
26. BIG PORTRAIT PHOTO DISPLAY
That one huge portrait that makes those jaws drop in aww is just a few steps away in this DIY Giant picture portrait. Use engineer print from an office store like staples and foam board to print hanging photo display.
DISPLAY PICTURES IN ORNAMENTS
27. CUBE PICTURE DISPLAY
Enjoy solving Rubik’s cube with more enthusiasm by sticking portraits or fun character pictures with the help of mod podge.
28. CHRISTMAS ORNAMENTS PHOTO DISPLAY
Christmas is almost around the corner and it’s time to decorate the trees with ornaments. These ornaments are created by using chandelier crystals, mini photos and mod podge magic. You can also make pendants. These make beautiful Christmas gifts too.
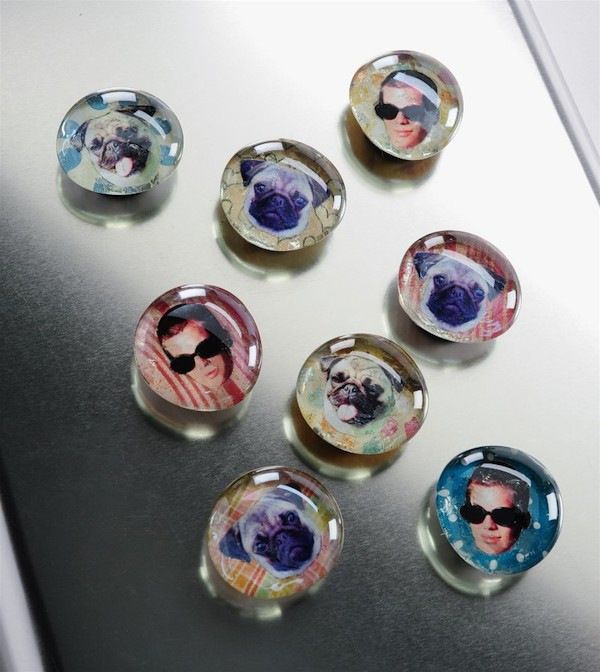
29. PICTURE GLASS MAGNET DISPLAYS
Make these picture displays with glass magnets. It is easy for kids to make these themselves with just a little adult supervision.
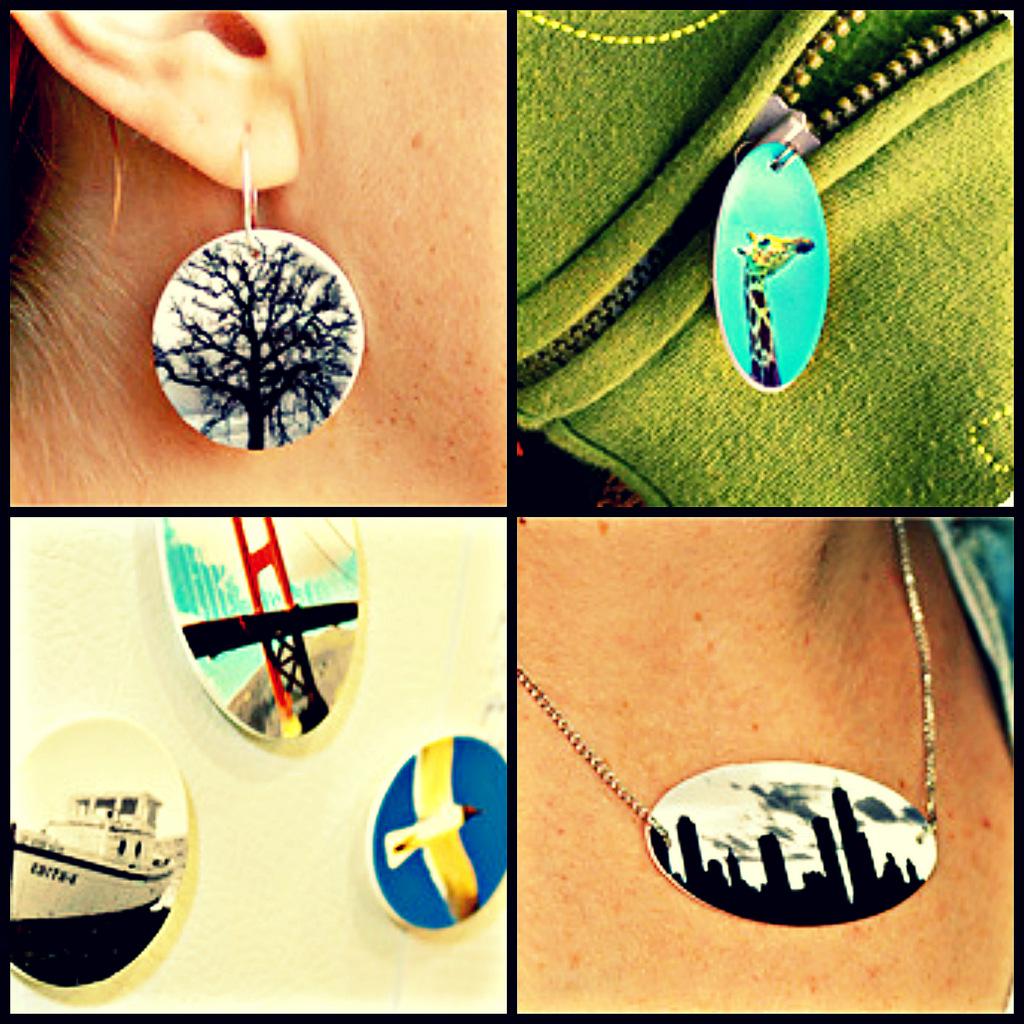
30. RESIN PHOTO CHARMS
When you are done eating those Popsicle ice cream, save the jumbo Popsicle stick. You can reuse those sticks to create DIY personalized charms for yourself or your friends. This tutorial uses mod podge technique of transferring your mini pictures onto the Popsicle sticks and resin.
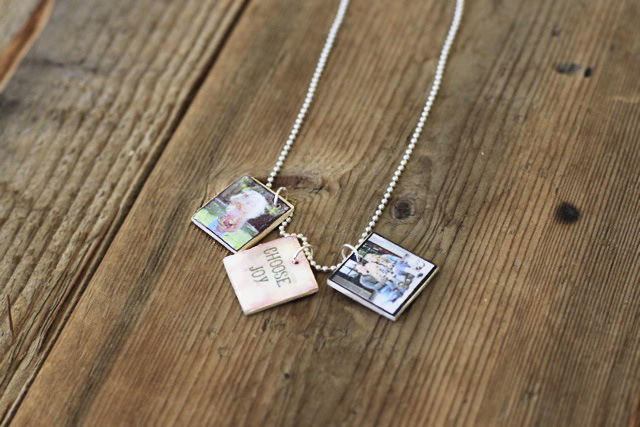
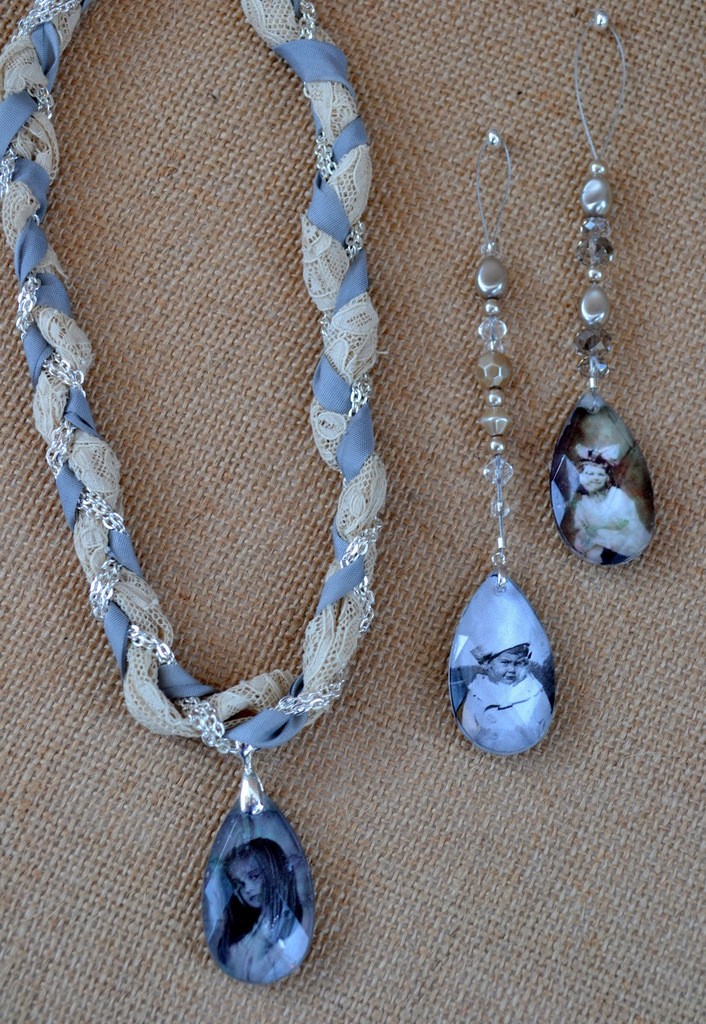
31. BAKED PICTURE DISPLAY JEWELRY
Baking is fun when it comes to cakes and cup cakes. With this DIY Photo jewelry tutorial let’s enjoy baking our pictures on parchment paper and turning then into small jewelry pieces for our luxury.
BEST HANGING PHOTO DISPLAY
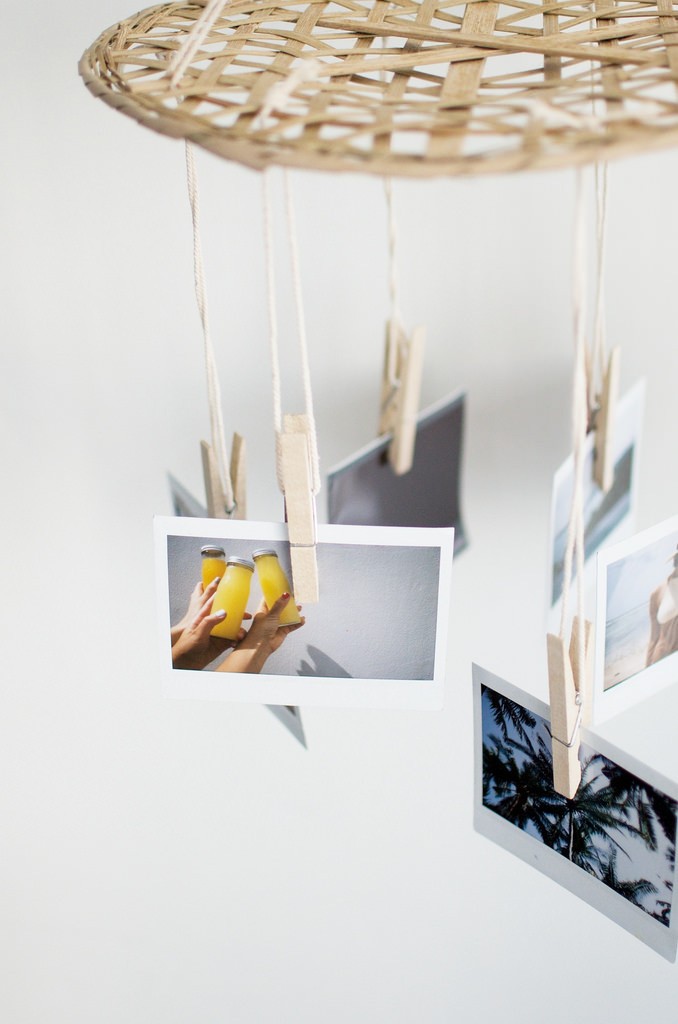
32. HANGING PICTURE CHANDELIER DISPLAY
Hang a chandelier it can be anything from placemat to rattan holder. Use clothespin and burlap thread to hang pictures to display at home.
33. WINDOW VALANCE PHOTO DISPLAY
Have windows to spare for this extremely easy and practical window valance picture display. Just simply hang the pictures with paper clips strung to the rod.
34. SUN CATCHER DIY PICTURE DISPLAY
Acrylic Panels used in this DIY customized sun catcher are good to trap heat in the winters to keep you warm with hanging photo display.
Print quality, size and framing tips
(preservation + visual impact)
- Print resolution: For sharp prints, export images at 300 DPI at the final print size.
- Paper choice: matte for a modern look; archival cotton rag or fine art paper for heirloom prints.
- Mats: add breathing space; a white mat elevates casual photos into gallery pieces.
- UV protection: if your display gets sun, use UV-filtering glass or acrylic to reduce fading over time.?These print and matting suggestions align with professional print labs and design pros who stress archival materials for longevity.
Styling and composition tips from pros
- Choose a focal piece: anchor your gallery with a large print or art piece.
- Mix scale and shape: combine vertical and horizontal frames to create rhythm.
- Include non-photo elements: mirrors, shelves, clocks, or framed textiles add texture.
- Balance color and negative space: allow “breathing room” so the wall doesn’t feel cluttered. These are standard design moves taught by staging and decor experts.
Troubleshooting and common FAQs
1. How high is gallery wall center?
Aim for 57–60” from the floor to the center of your arrangement (average eye level). Adjust if furniture under the wall lowers the visual center.
2. How do you hang frames evenly without measuring 50 times?
Use paper templates for each frame, tape to wall, and mark nail locations—then hang. Efficient and reliable.
3. How can you display photos without frames?
Use adhesive photo corners, washi tape, clipboards, or a wire + clip system.
4. Best way to protect photos from fading?
Print on archival paper, use UV-filtering glazing, and avoid direct sunlight.
A photo display is the easiest way to make a house feel like a home. Whether you build a structured framed wall or string up a dozen instant prints on twine, the key is planning, balance, and quality prints. Start small—try a narrow picture ledge or a clipboard grid—and swap images until the arrangement sings.