This post may contain affiliate links. Please see our full Disclosure Policy for details.
I have been germinating seeds for many years, but after trying many methods I decided to do a thorough research to ensure my seeds grow properly.
A seed starter kit is the most crucial tool for achieving actual seed germination and growing strong seedlings. In this blog, we will delve into the usage of the DIY seedling starting trays and kit, right from the selection of seed starter trays to cultivating your young plant into blooming garden stars. Whether you are a beginner or a skilled gardener, you can master the art of seed starting for a flourishing and colorful garden. So, lets learn together and do it the right way:
In this article, you will find:
- Types of seed starters
- Where to find seed starters?
- Cell seed starter trays and kits
- Homemade and DIY seed starters
- Seed starter pods
- How to use seed starters?
- How to control and avoid fungus growth in seed starter kits?
- Are seed starter kits worth it?
- What is the best seed starting mix?
- What is the best seed starter method?
- What does a seed starter mix recipe contain?
- What is the most difficult seed to germinate?
- Do starter seeds need light?
- What is the best seed starter soil?
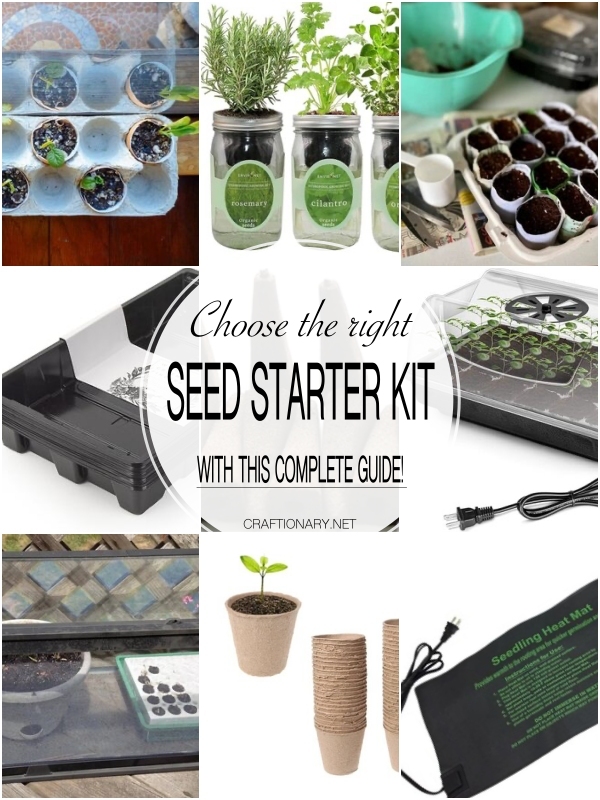
Types of Seed Starters
There are many types of seed starters. We have listed three main types of seed starters which you can use and experiment with which one is the best option for you.
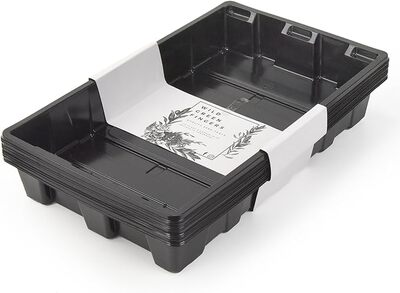
1. Conventional Trays and Cell Flats
Molded plastic seedling trays are famous for 1020 deep trays because their sizes are around 10 inches by 20 inches. They are easy to fill, carry, and recycle. Cell flats, also well-known as plug flats, fit in 1020 seedling trays and are accessible in many sizes. The most popular choices for vegetable transplants are 50’s, 72’s, 128’s, and 200’s cell propagation trays. For larger crops they offer Cell flats with 38 or 24 cells per flat, resulting in large root balls and canopy development.
A new method is to spread seeds in channels for germination; when the seeds begin to show true leaves, they are “bumped up” or “potted up” into cell flats. This marks a 20-row seed flat. Seed flats save area in the germination space or on the seedling heat mat.
Advantages:
Trays and cell flats are usual seed-starting methods for big vegetable farms because they are quick to fill, easy to transport, and recyclable.
Disadvantages:
They can root-bound seedlings, you must prepare and store them because you cannot recycle them. Bleach alternatives with a peroxide basis, such as OxiDate, are advised to avoid illness. You can determine recyclability by the plastic’s makeup and the guidelines of the local recycling skills.
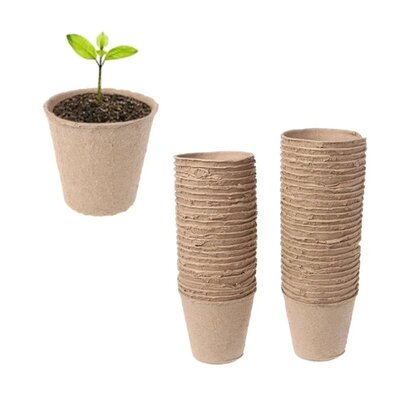
2. Biodegradable Pots
Fertil wood fiber pots serve as separate planting new pots that are used with seedlings. Later, the pot decomposes in the soil, leaving water, soil nutrients, and roots to flow.
Advantages:
Home gardeners and business transplant gardeners use biodegradable pots because they cut the shock of transplants and are easy to plant and non-recyclable.
Disadvantages:
Biodegradable planters take up more room in greenhouses and need to be refilled based on the season. They also need a transport tray. If they remain exposed for a long time, they can cause the root-bound seedlings.
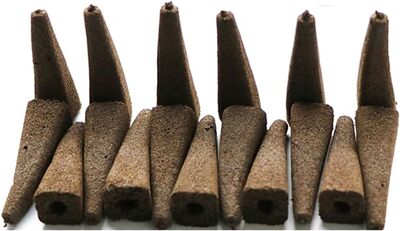
3. Soil Block
Soil blocks are potting media cubes made by Soil-Block Manufacturers that help seedlings reproduce in an independent block. They are available in many sizes, such as tiny ¾” mini-blocks that may be customized with different-sized dibbles to accommodate various seed types.
Advantages:
Soil blocks nurture good plants through the use of air pruning technology in which seedling roots dehydrate and form secondary roots, resulting in a strong root system and rapid seed establishment after transplantation.
Disadvantages:
Soil blocks are a steadfast and effective method for rapid growth, but their labor-intensive nature may make them less profitable for improved producers or those with limited time.
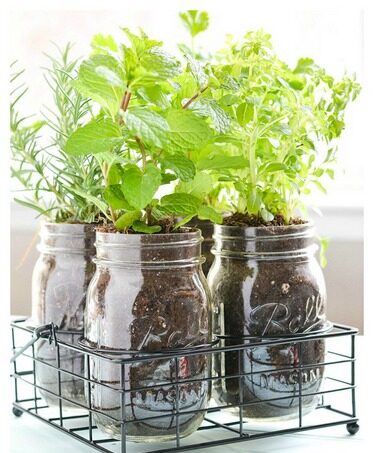
4. DIY Seed Starter Kits:
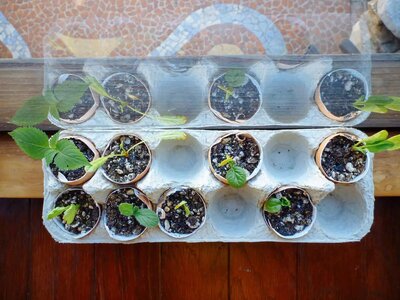
You can make your own seed starters from things available at your home. These include egg cartons, yogurt containers, newspaper pots and other recycled materials. These are very cheap as well as environment friendly.
Where to find seed starters?
You can find seed starters in any garden center, local nurseries, and online retailers like Etsy, Amazon. You may focus on where you can get cheap seed starters without breaking the bank, because if you plant many it can get very expensive. Dollar stores, nearby nurseries and even DIY kits work best. You can also find seed starter materials like air prune trays, peat pallets, soil mix, peat pots and heat mats.
Cell Seed Starter Trays
These cell seed starter trays are crucial for indoor plant seedlings because they offer enough sunlight, and drainage. Cell seed starter also promote healthy growth, assist in managing and growing the prospect of accomplishment and come in various sizes and materials. There are trays with 12 to 128 cells; for small-seeded crops like lettuces and tomatoes, 24 to 48 cells work well. 6-cell trays are also available in the market. These trays get the air-pruning benefits of soil blocking without creating any untidiness and come with plastic lid as well.
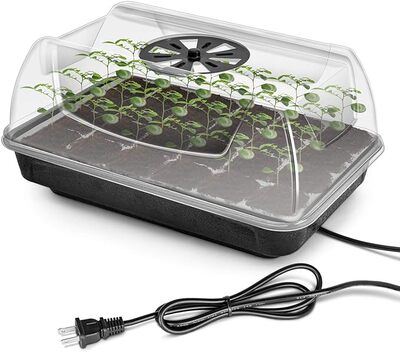
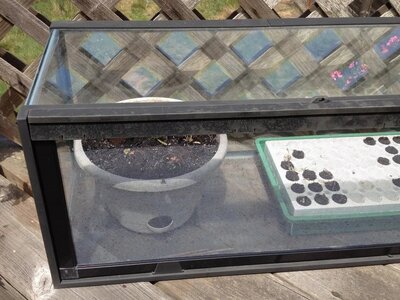
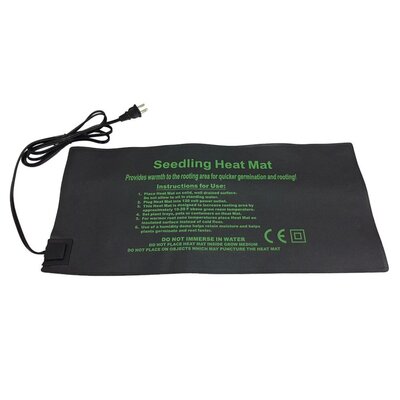
Seed starter box with heater and vent
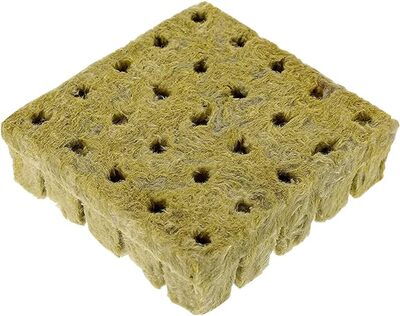
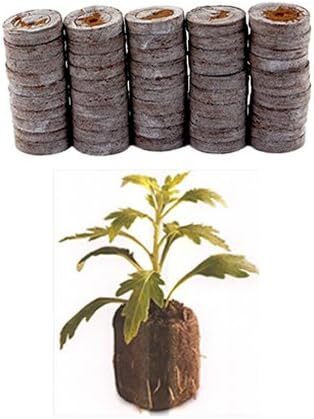
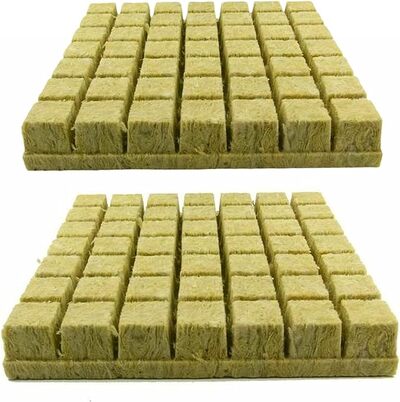
Hydroponic rockwool starter pods
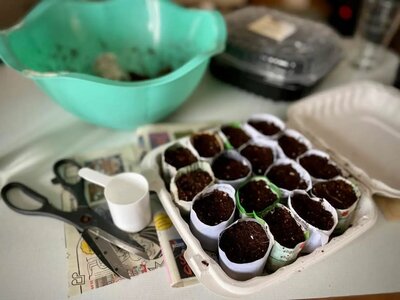
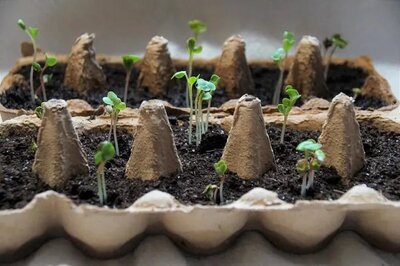
Homemade and DIY seed starters
Recycling bins can be used to make indoor seed starting pots, resulting in rapid growth of plants and food harvesting without spending money on fresh supplies. Here are a few DIY recyclable material ideas to make your seed starter with the things available at home.
However, keep in mind these options are more likely to get mold, so take extra precaution with watering and air circulation.
Transparency helps see the soil to the bottom for easy watering.
You can make a seed starter greenhouse using cell plug trays, pots, and seed starter trays.
Paper roll or toilet paper tubes
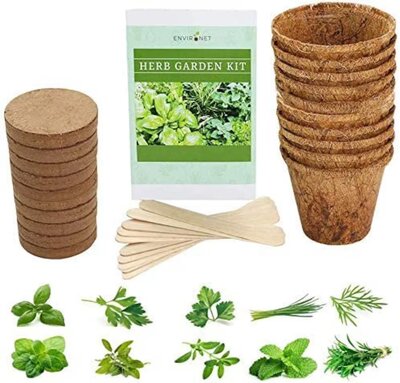
Seed starter pods
These are the best tool for market gardeners who wants to grow more crops at once.

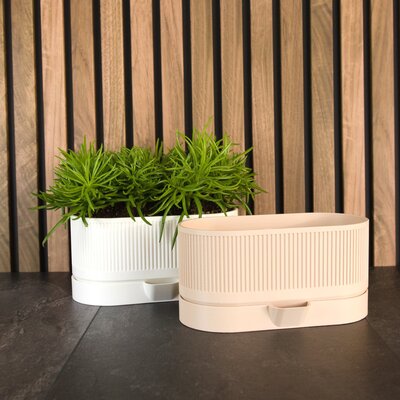
Self-watering seed starter planter
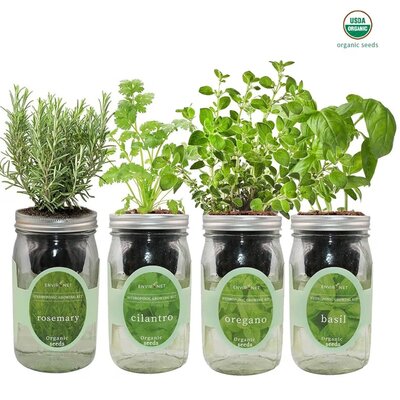
Biodegradable seed starter pots
How to use seed starter trays and kits?
Growing plants from seeds is a wonderful method to start gardening early in the season. You can grow your plants from seeds with the help of accurate light and simple equipment.
1. Gather all the materials:
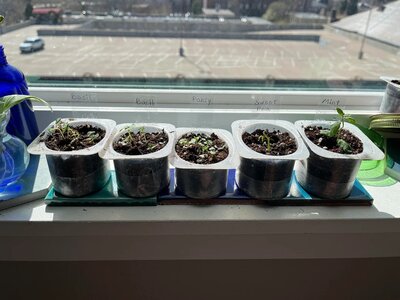
Gather all the materials which include Seeds, pots or required size cell trays, Plant markers, Seed starting mix, seed tray with humidity dome and Spray bottle filled with water.
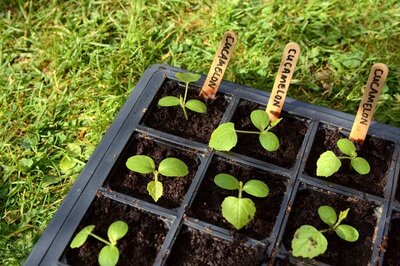
2. Fill your pots or trays with seed starting mix:
Take a large tub or bucket and add your seed starting mix in it then, add the plentiful amount of water and mix it with a trowel or your hand. Add more water as necessary when the seed starting mix begins to absorb the moisture. (This will take a few minutes because the mixtures including peat soak). Damp the mixture like wet sand.
3. Sow your seeds:
Push the seeds into the seed-starting mix. You do not need to cover the larger seeds because they need space for ventilation, whereas smaller seeds can be left open. Larger seeds should be covered with vermiculite or a seed-starting mixture the same height as the seed.
4. Label your planted seeds:
Use inexpensive plastic markers for early seedlings, and save large metal markers for the garden.
5. Keep your seeds moist and warm:
After misting the seeds with water, place pots together on a tray, cover them with a humidity dome and add heat. For ideal humidity levels, place in a warm area. Seeds start germinating after three weeks, but some may take a couple of days to several weeks to do so. Consider self watering planters to ease off your busy schedule.
6. Provide light to seedlings:
Remove the humidity dome and place the seedlings in a sunny light; ensure the mixture is moist but not soggy. Water them every day or every other day because they flourish in little media and do not soak them completely like loftier plants.
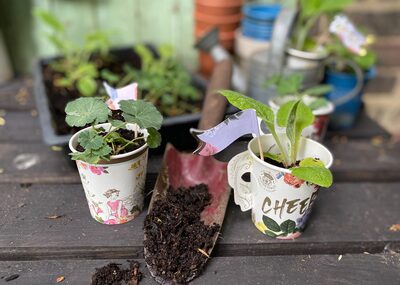
7. Transplant seedlings indoors:
When the first set of leaves appears, move the seedlings. Pick a strong seed and transfer it to a DIY larger pot. Add water to the potting mixture and place it in sunlight every day.
8. Harden off those seedlings:
Your seedling will become resistant to the outdoors if it is allowed to spend extended periods in full daylight after being moved from indirect light at night.
9. Transplant your seedlings outdoors:
After the seasoning period, move your seedling to its ultimate location, either into your garden, a pot or even raised garden bed, and enjoy the fruits and vegetables in a few months.
You will also like: Everything you need to know about growing vegetable garden
How to control and avoid fungus growth in seed starter kits?
- Some experts suggest sterilizing potting mix. Put it in a deep baking tray, wet it until damp cover with foil tightly and bake at 72°C (160 F) for 15 mins. Generally, this applies to 330 grams of soil and kills germs and bugs.
- If you save your own seeds, it is more likely to develop fungus than commercial seeds.
- You can sterilize your garden tools. However, washing all containers and garden tools in a one part bleach to ten parts water mixture works well too.
- Try Planting your seeds in warm (to resemble tropical environment) potting mix.
- If you are a seed saver, keep in mind that saved seeds are more likely to develop fungus than commercial seeds.
- When growing seedlings take precaution not to over-water them. Consider bottom watering your seedlings to avoid mold and root rot.
- crowd one another once they grow. Crowding reduces adequate airflow and can lead to fungus. Therefore, thin out your plants by removing some seedlings once they start to take roots and repot your seedlings without waiting too long.
Are seed starter kits worth it?
Seed starter kits allow you to get a head start on the growing season ensuring that your plants are healthy and strong when ready to transplant. You can save money by using a seed starter kit. But it also depends upon the gardener’s choice or requirements.
You will also like: Fast growing plants for privacy
What is the best seed starting mix?
When you are buying seed starting mix you must consider these things:
- Make sure it is organic with no synthetic fertilizers and has natural ingredients.
- If you select the right seed starting mix it will make sure your plant has good drainage and water retention, with perlite and pumice being lightweight ingredients that allow for quick water drainage.
- Choose a seed starting mix that contains natural fertilizers necessary for development and strong root growth.
- Choosing an accurate mix with a neutral pH balance of 6 to 7 is critical for optimal germination.
- The size and quality of the mix impact the air circulation and water escape. So, pick-sized particles for a dense, aerated growing medium.
- Must use reusable mixes for extensive savings in the long run.
- Always choose a cost-effective mixture and focus on the quality instead of the price.
- Go for local or online seed-starting mixes sometimes. If it is difficult to find a specific option, ask your nearby nurseries for a substitute.
Here are some mixes from the world’s most-followed gardening brand.
-
Eposma
The Espoma Seed Starting Mix is an organic, premium mix prepared with all-natural materials like sphagnum peat moss, perlite, and limestone that stimulate root growth, moisture preservation, and nutrient absorption.
Pros:
- It has organic ingredients for natural growth.
- It encourages strong root growth and moisture maintenance.
- It offers vital nutrients for healthy seedlings.
Cons:
- It is quite expensive than other substitutes.
-
Burpee
The Burpee Seed Starting Mix helps in root growth and seed propagation. It is a sustainable, light-textured, natural growing medium that you can use for both indoor and outdoor plant growth. It is manufactured from reprocessed coconut husks.
Pros:
- It is prepared from recycled coconut husks.
- It is a suitable mixture for growing plants.
- It has more moisture retention.
Cons:
- It tends to mold in certain situations.
-
Miracle-Gro
Miracle-Gro Seed Starting Mix, which includes sphagnum peat moss, compost, and perlite, offers nutrient-rich soil and modest fertilizer.
Pros:
- It is incredibly fluffy and free from debris.
- Miracle Grow Can be used along with other mixes.
- This product works well while starting garden plants.
Cons:
- It takes a long time to absorb water.
-
Jiffy
The Jiffy Seed Starting Mix is a soil mixture that imitates a greenhouse and contains peat moss, vermiculite, and lime to upkeep healthy growth and stable soil. It improves and boosts seed propagation.
Pros:
- This product reproduces greenhouse conditions.
- It holds the nutrients that plants need.
- It takes care of the pH balance of the soil.
Cons:
- It doesn’t hold water like other options.
-
Purple cow organics
Purple Cow Organics Seed Starting Mix is a lightweight 25-pound package brilliant for home-grown gardens. It contains peat moss, perlite, vermiculite, and compost-based soil to encourage healthy seedlings and preserve fertility.
Pros:
- It has the best seed propagation rate.
- It is Light, fluffy, and free of gnats.
- It has Nutrient-rich soil for direct seeding.
Cons:
- This seed starting mix is not suitable for longstanding plant growth.
What is the best seed starter method?
We have listed below some amazing seed starters which every gardener should try. There are three seed-sowing techniques which are listed below;
1. Starting seed indoors:
It is one of the most common options that come into the mind of gardeners. You can plant your seeds in your house for several weeks before you move them to the garden through this method.
Pros:
– You will get an advantage over plants that need more time to grow.
– Seedlings need a few extra weeks to grow so they will blossom or yield food faster.
– You do not need to worry about losing your starts due to weather conditions or pests because you are in charge of the surroundings.
– A firm development rate is simple to achieve.
Cons:
It can be chaotic and space-consuming to start seedlings indoors therefore, they need to provide materials and tools. Preservation and transfer into the garden demand special care.
2. Direct Sowing:
Use this method to grow your plant in the ground. It is used in the spring weather, but some seeds are planted in the fall.
Pros:
This method is simple and mess-free, and it only needs seeds so there is no need for any kit, no transplants. In general, seedlings are harder.
Cons:
Plants may not mature before fall frost because of exposure, weather, pests, late spring freezes, and growth restraint issues.
3. Winter Sowing:
This method has become one of the trendiest in the last decade. Later, sow your plant in a plastic container using this method that serves as a mini greenhouse. Leave them outside in the snow and cold until they propagate in the spring.
Pros:
The benefits of winter sowings are that seeds grown in containers can be sowed sooner than those nurtured in the house or a garden, and they don’t need any spare space in the house or particular equipment.
Cons:
When springtime approaches, cleaning, collecting, and getting ready for small greenhouses may be chaotic, time-consuming, and maintenance-intensive.
What does a seed starter mix recipe contain?
The seed Starter mix recipe contains water, 4 part compost, 2 part peat moss or coconut coir, 1 scoop of vermiculite and 1 scoop of perlite.
Directions:
Mix the ingredients in a wheelbarrow, then add vermiculite and perlite to wet the seed-starting soil mix. Follow the instructions on the seed packet for cultivation, put it in containers, and fill it up according to the need.
What is the most difficult seed to germinate?
Seeds which are difficult to germinate include Avocado, Sweet peas, Spinach, Nasturtiums, Moonflowers, Morning glories, Lupine and Milkweed.
You will also like: winter gardening solutions
Do starter seeds need light?
Yes, Starter seeds need light because proper lighting plays an important role, in perfect seedling care. If we do not provide proper light to seed starters it leads to tall, weak, and leggy plants, limiting their lifetime. Sometimes, you are unable to provide light to your seed starter. Therefore, invest money in buying light to grow a healthier and better plant with a long life. It will help you complete your mission; we have listed below some light options you can buy.
You can buy plant grow bulbs. These bulbs are cheap, easy to find and come in various sizes you can buy according to your needs.
Cool white Fluorescent bulbs are also a good option.
Led grow Lights are the best option for you if you do not want to struggle with assembling.
T5 grow lights are an optimal option for long lights.
What is the best seed starter soil?
If you are a beginner, you need to know which is the best seed starter soil and we have found a suitable answer for this question.
Seed Starting mixes:
The best soil for seed starting is a specific seed-starting mix because it improves moisture-to-seed contact and fertilization. It consists of these material which are rice hulls, vermiculite, sphagnum peat moss, coconut coir, and perlite. It stimulates the sprouting of tender roots and blocks compacting. There is a restriction on seed starters referred to as soilless, soilless mixtures, or potting mixes. A sterilized seed starting mixtures include fewer diseases and weed seeds, making it easier to identify which seeds germinate. Ingredient labels of commercial potting mixes include field soil, sand, and compost.
Potting Soil:
Potting soil is a great choice for container-grown plants because of its thicker texture and organic content. A Seed starter mix may have bigger particles, such as forest products. Potting mix can be prepared at home using natural fertilizer, compost, peat moss, perlite, and powdered azomite. The conditions for certification by the Organic Materials Review Institute are only met by organic mixes and potting soil.
For gardeners, seed starter trays and kits are essential resources that offer an easy and quick way to get started in the garden. Whether you’re producing veggies, herbs, or flowers, choosing high-quality seed starter trays and kits will put you on your way to a successful harvest and garden. Thus, gather your hands, roll up your sleeves, and observe as your seeds blossom into a lovely tapestry of flowers and greenery.
Happy gardening!
Written by: Alveena Nazir