This post may contain affiliate links. Please see our full Disclosure Policy for details.
In an age of digital clutter, a physical multi-task message board is the ultimate brain dump for a productive home or office. A standard cork board is a fine start, but to truly maximize your efficiency, you need a system that categorizes your tasks, holds your pens, and tracks your week at a glance.
Learn how to upgrade a basic pinboard into a professional-grade command center using simple materials and smart layout principles.
1. Planning Your Zones (The Secret to Utility)
A “multi-task” board fails if it becomes a chaotic mess of overlapping papers. To meet high functional standards, divide your board into these four distinct zones:
- The Action Zone: For immediate “To-Do” notes and urgent reminders.
- The Calendar Zone: A dedicated spot for your weekly or monthly schedule.
- The Storage Zone: Vertical holders for pens, scissors, and mail.
- The Reference Zone: A permanent spot for long-term info (WiFi passwords, emergency contacts).
2. Supplies You’ll Need
To move beyond just “pinning stuff,” gather these specific items:
- Large Cork Board: Thick grain is better for heavy-duty pinning.
- Washi Tape or Ribbon: For creating permanent “zone” borders.
- Small Baskets or Tin Cans: To serve as supply holders.
- Bulldog Clips or Decorative Push Pins.
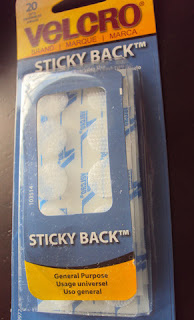
- Adhesive Velcro Strips: For mounting heavier supply holders.
- Laminated Weekly Template: Or a small magnetic whiteboard piece to glue on.
3. Step-by-Step: Building Your Multi-Task Board
Define the Grid
Don’t just wing it. Use a ruler and washi tape to divide your cork board into your planned zones. Visual borders tell your brain exactly where to look for information.
Pro Tip: Use a contrasting tape color (like black or gold) against the natural cork for a high-end, “store-bought” look.
Add Your “Weekly Schedule” Spot
- Instead of pinning a loose piece of paper every week, pin a clear plastic sleeve or a laminated sheet to the “Calendar Zone”.
- Slide your weekly schedule inside.
- Use wet-erase markers on the plastic to update tasks daily without wasting paper.
Mount the Supply Holders
- This is where most DIYers go wrong. Pushing a pin through a cup isn’t stable.
- Take a lightweight tin can or a small plastic basket.
- Apply Command Strips or Industrial Velcro to the back of the holder and the cork.
- This allows you to store pens, highlighters, and even your phone without the holder sagging or falling.
Create a “Pinned Supply” Strip
Glue a small strip of magnetic tape or a row of heavy-duty binder clips along the bottom. This is perfect for holding keys, receipts, or outgoing mail that you don’t want to pierce with a pin.
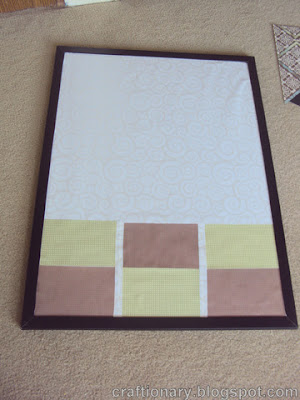
DIY Multi task message board

I bought this bulletin board which came with a rope and hooks (for $3). For a 18″x24″ board I think it’s a really good price.

Next I used some decorative paper to make it pretty.

I ended up using gift wrapping paper. You can also use fabric to cover the board with thumb tacks. Cut the paper to the size of the board. I used double-sided tape to stick paper on board. It helps as it doesn’t ruin the original surface and is changeable. I then used a cuter to remove the excess of paper from the sides for perfection.

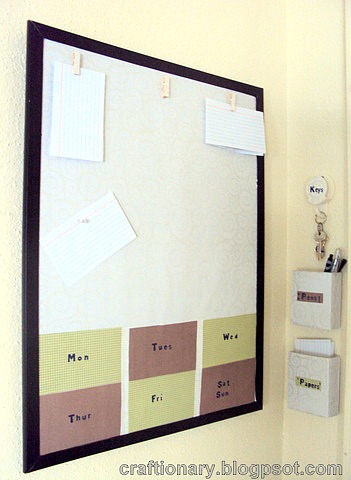
Here’s how it looks so far:
Bulletin board

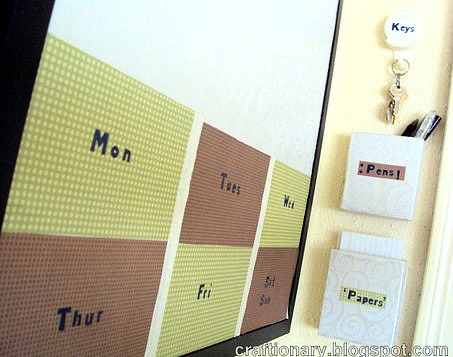
I then measured and cut six rectangles out of decorative paper.

Glued them on the board to use for weekly reminder.
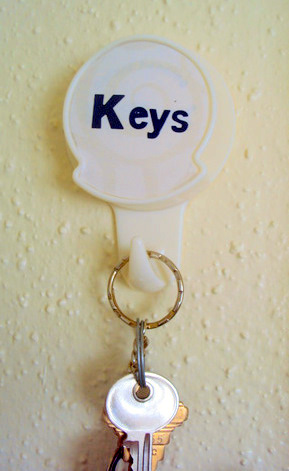
My craft room is where I spend most of my time. Now here’s the cute part. I got this promotional key chain. It has a sticky back which is sticky enough to hold the weight of 5-6 keys.
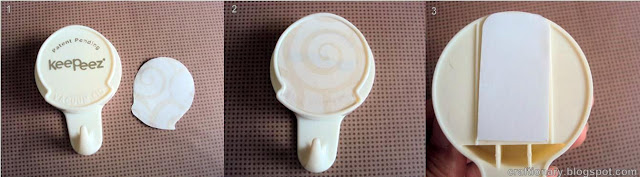
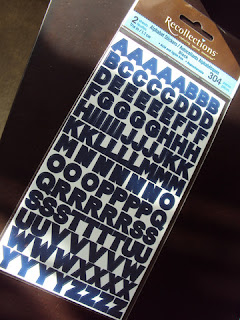
I used stickers to complete the look.
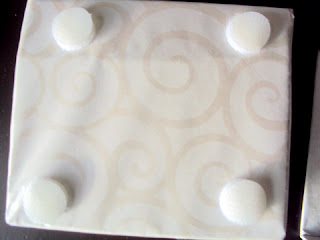
I wanted custom holders to match with the board. And made these using cardboard and decorative paper.
Recycled Cardboard Holders
Learn how to make recycled cardboard holders.
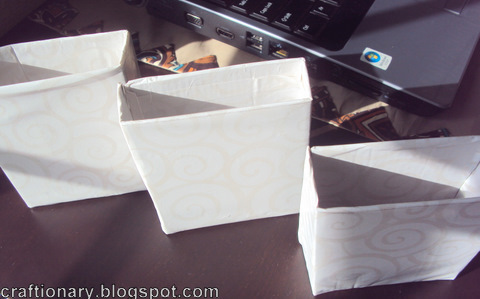
I used sticky back Velcro for hanging the holders on the wall.
Stick both the parts on the holder’s back and press it against the wall.
A final look at the pen holders. You can also use them to hold receipts and business cards.
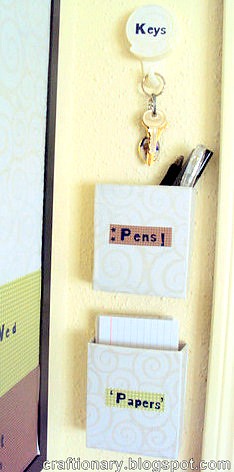
I used letter stickers to label my holders and days of the week.
Sometimes we have important papers we don’t want to punch holes in! So, I bought these office clips. And stuck my pattern paper to the front and sides to match. Finally I glued it on the bulletin board. Initially I added only 1 clip, but when the board was put to practical use I glued 2 more.
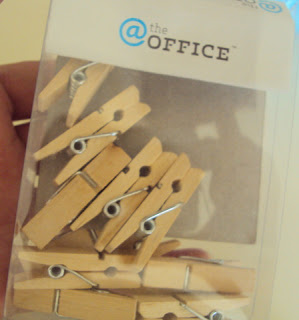
Here’s what the clips look like. These come in very handy.
Command station message board
Common Questions
1. How do you stop my cork board from crumbling?
Frequent pinning can wear out cheap cork. To extend its life, you can self-heal the board by lightly steaming it with a garment steamer, or simply choose a high-density cork (at least 1/4 inch thick) from the start.
2. Can you paint the cork board without rendering it useless?
Yes! Use a thin layer of acrylic paint or fabric spray. Avoid heavy, thick coats of latex paint, as they can create a layer that makes push pins difficult to insert and leaves visible holes.
3. What is the best way to hang a heavy multi-task board?
Because you’ll be adding holders and supplies, the board will be heavier than a standard one. Use wall anchors or heavy-duty mounting strips rather than a single nail to prevent the board from wobbling when you write on it.
To make your board look like a designer piece, consider framing it. A simple wood trim painted to match your desk instantly elevates a DIY project into a piece of functional furniture.
- Color Code Your Pins: Use red for urgent, blue for personal, and green for work.
- Add a Task Light: If your board is in a dark corner, a clip-on LED light makes the Action Zone much more usable.


Hi hani,nice idea.I really liked that paper n pen holder,thanks for the idea…
i forgot something :)… i wanted to introduce a blog tat day,she is my quilling guru Inna! increations.blogspot.comHer creations inspired me a lot and just started this craft 3 months back.Soon going to post my quilling crafts on my blog in craft corner….
thank Geethu.. I am soon going to post it's tutorial.. 🙂
I heart those mini clothes pins!! Thanks for auditioning for OMTWI!! Be sure to put the button on your post or sidebar!
Indeed you created it so beautiful, Thanks for sharing its tutorial.Great work
thanks.. 🙂
That is awesome. I love the days of the week at the bottom. Thank you for linking up to More The Merrier Monday. Can't wait to see what you have in store for next week.
HI I am the post after you on Katie's nesting spot linky party so I thought I'd drop by for a visit. Nice to meet you. I'm glad I did, as I love your organisational system. I need one of those at my house. Pop by blog and visit my Beach House Blue post to see how I organise my media room.Best wishes Carolyn
Thanks Jamie and Carolyn.. I am surely going to visit you both.. I love to hear comments from fellow bloggers and creative friends.. :)Love you all!
What a practical idea… I must go for it… I need one like this for my craft room LoveFarah
thanks.. :)I would love to see yours..
Hi Hani,Thank yOu for visiting my blOg and leaving yOur lOve :).. Your paper Craft, specially Origami is Fabulous, thanx for sharing their Tutorials.Em frOm Punjab, Pakistan.Hugs!SkD!!
Great job! I need to make a bulletin board for my craft room. Thanks for linking up to my Catch a Glimpse party last week! Always nice to see a new face and I hope to see you again this week.
It is certainly interesting for me to read that post. Thank you for it. I like such topics and anything that is connected to them. I would like to read a bit more soon. Whitny Watcerson
It is rather interesting for me to read this article. Thanx for it. I like such topics and everything connected to this matter. I definitely want to read more soon. Natasha Stepman