This post may contain affiliate links. Please see our full Disclosure Policy for details.
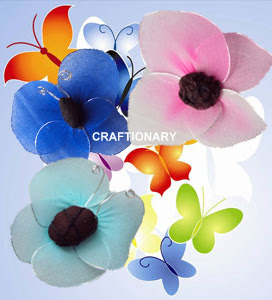
Learn how to create beautiful stocking net butterflies using simple materials—perfect for home décor, gifts, kids’ crafts, and spring projects. Stocking net butterflies (also known as nylon butterflies, pantyhose butterflies, or fabric mesh butterflies) are a classic craft project. Stocking net butterflies are simple, elegant, and incredibly versatile. With just wire and old stockings, you can make décor pieces that look store-bought.
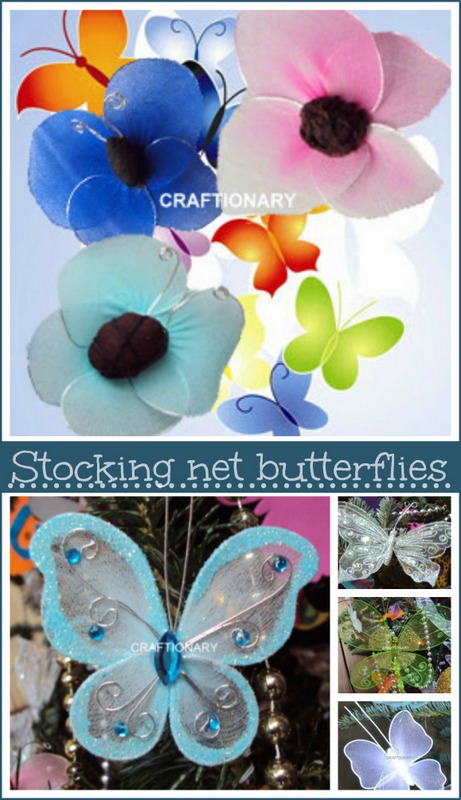
Creative Ways to Use Stocking Net Butterflies
- Home Décor: Wall gallery of butterflies, Table centerpieces, Nursery décor, Picture frame accents, Mason jar toppers, Fairy lights wrapped with butterflies, Spring wreaths, Garland, Christmas tree ornaments, Girl’s bedroom wall art
- Fashion and Accessories: Hair clips and headbands, Brooch pins, Hat decoration, Shoe clips, Bag charms
- Kids’ Crafts and Gifts: Pencil toppers, Gift wrapping embellishments, Party favors, Cake toppers (non-edible decoration)
- Plants and Garden Displays: Butterfly plant stakes, Fairy garden décor, Potted plant accent pieces
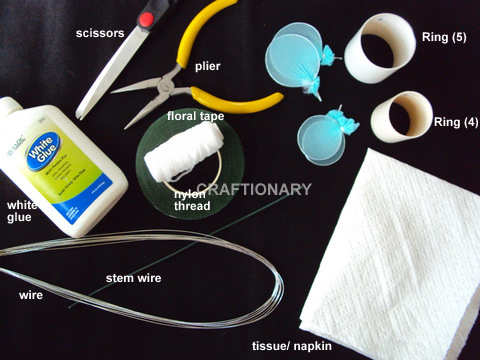
Stocking Net Butterflies Materials:
- Ring size (4) and (5)
- Stocking net/ nylon
- Floral tape
- Nylon thread
- Wire
- Plier
- White glue or mod podge
- Tissue paper or wipe
- Acrylic paints
For complete nylon flowers material information see NYLON MATERIAL.
Stocking Net Butterflies Step-by-Step Instructions:
- Make 4 wings. 2 wings of the size (4) and 2 wings of the size (5) for each butterfly. Now thread the pairs of wings together. In this way you will have 1 pair size (4) and 1 pair size (5) wings for your butterfly.
- Follow the instructions for making petals in the post Basic Nylon Flower.
Learn 3 different types of butterfly bodies for you to try out. Lets check them out:
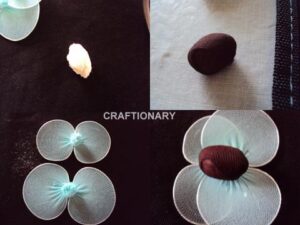
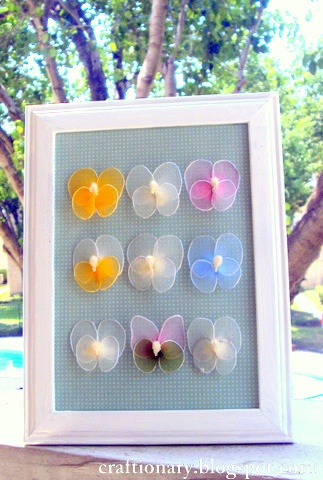
1. Stocking net butterfly with the shaped body
Take a piece of napkin/ tissue paper and shape it in any way you want the body of the butterfly. Also use some water to make the surface soft and easy to mold as you like. Now cover it up with stocking net and thread it at the back.
Dab a lot of glue on one side and press against the wings on the side showing wires. For best results use strong glue. Hold it with pressure for a while to secure it in place. Leave it to dry over-night.
2. Stocking net butterfly with glued leftovers
Secondly, you can try cutting some scraps of nylon and gluing them to the body of the butterfly where the wires are visible and this way also looks really pretty and original.
The white glue becomes invisible on drawing. I took the picture when it was wet which makes it look messier in the picture.

The easiest and most natural look comes from wrapping a piece of tissue/ napkin paper over the wires and glue the ends over. Let it dry and paint it. I used acrylic paints to paint the body of the butterfly.
When done simply use wire and shape the antennas and fit over the body. I wanted to make the butterflies with it’s original colors, you can also use different colored nylon and paints. I am sure it will look more beautiful.
Your little-tiny-cute butterfly is ready. Shape the wings the way you like and your butterflies are ready to fly.
Seal and Finish (Long-Lasting Method)
To make butterflies stiff, durable, and dust-resistant:
- Spray with fabric stiffener
- Or brush lightly with diluted Mod Podge
- Optional: Apply clear acrylic spray (non-yellowing)
This keeps wings crisp for years—especially for décor.
3. Ways to Make Butterflies
You might also like these pretty butterflies that I made earlier as Christmas tree ornaments.
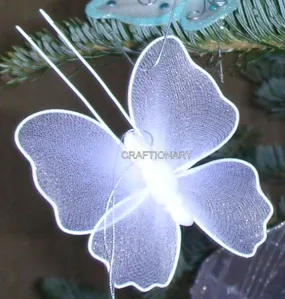
Wave the wings of the butterflies before covering it up with nylon gives your butterfly the look the white butterfly has in the picture below. Roll around the pencil to make waves.
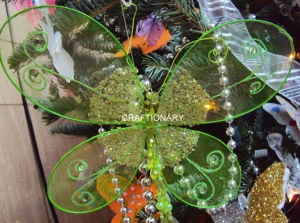
To make this one I used green wire to make the wings. Now loop a wire so that the 2 ends will become the antennas and twist the other end so that the beads don’t run down the wire. Then thread in some pretty beads on the wire and glue it over the wings to form the butterfly’s body. You can also use glittered markers to make fancy motives on the wings.
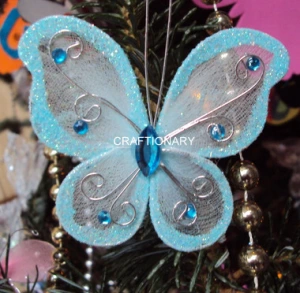
This one has body made with cotton and glitter sprayed all over it. When your wings are ready simply pinch in the wires into the body and glue them to secure in place.
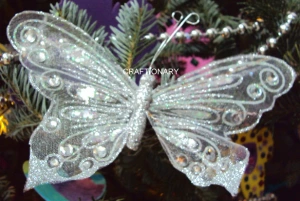
A big colorful bead perfectly fancy the body of butterfly. For the wings apply some glue on the sides of the wings and sprinkle some glitter, shake and remove the excess of glitter and let it dry.
I hope you enjoyed all these different types of stocking net butterflies. Let me know your work when you try your hands at making them and if you already have made some! I would love to learn some more creative ways to make these butterflies.
I also made a wall art with stocking net butterflies.
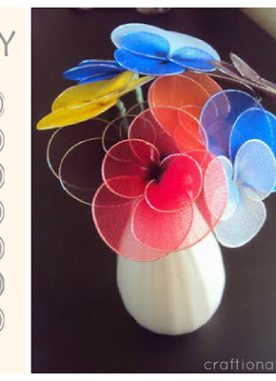
Handmade flowers
For more beautiful flowers made using Stocking. Check out the link below:

FAQs
1. Can you use old pantyhose?
Yes! This is one of the best upcycling crafts.
2. What wire thickness works best?
22–24 gauge: bendable but strong.
3. How do you make large butterflies?
Use floral wire instead of craft wire.
4. Do they work outdoors?
If sealed with acrylic spray, they last well under covered areas.
5. How to make wings symmetrical without rings?
Place wire on a printed template before shaping.
6. How to do fabric bunching behind wing?
Trim excess nylon closer; apply a tiny dot of glue.
7. What to do if the glue showing?
Use clear gel glue and apply from the back only.
You will also like:


Wow – that is so creative!! I shared it on my Tatertots and Jello facebook page and linked to you 🙂 xoxoJen
hey thank you so much!
Hello Hani…Its so nice to see your craft experties… looks very beautiful… A little girl will be the happiest if she has this in her room
This is so great! Thank you for sharing, it is realy amazing!
Thanks.. 🙂
Thank you so much for admiring my blog, Yes I also so glad to see your blog, Really you have shared your skills so generosity.Keep doing this fantastic work and all my good wishes always with you.Rubina
how lovely! I have never thought about making these. now I just have to find out what stocking net is and where to get it!
these are super cool. I'm visiting from Fun To Craft.
Wow! You are so creative! I love your blog 🙂
thanks everyone.. Love your comments they make me so happy.. Hani 🙂
These are sooo cute! I love butterflies. 🙂
The butterflies look beautiful… especially love the white one …
Hi this is Helen. I love to do crafts. I’m not good at it but I have fun trying it. Thank you so much for showing me how to do things. God Bless my you and your family have wonderful Holidays. I’m a widow so this will keep me busy this year.