This post may contain affiliate links. Please see our full Disclosure Policy for details.
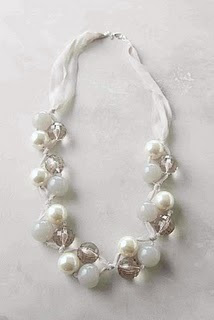
A fun craft to make beaded necklace inspired by Anthropologie pearl necklace using your choice of beads.
Beaded necklace
DIY Beaded necklace
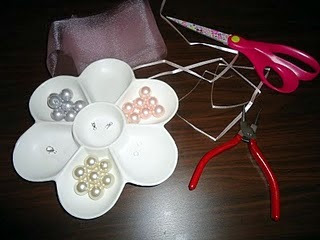
MATERIAL:
- 21 beads (7 beads of 3 different colors)
- 2 meters coordinating color ribbon
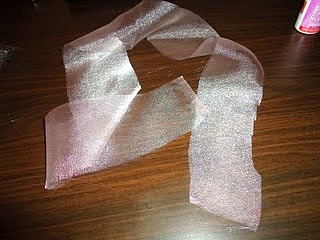
- 1 meter tulle fabric
- Jump rings
- Necklace clasp
- Scissors, pliers, needles and coordinating color thread
- Fray stop (optional)
INSTRUCTIONS:
Start by cutting the length of the fabric in half. Do not worry about the edges ragging like mine, you can trim and fray stop them later. I intentionally fancied the raw look to it. Anthropologie Beaded Necklace.
Add a jump ring through one end of the fabric and tie a knot. repeat for the other piece of fabric.

Attach several rings to the jump ring you added to one fabric piece and a necklace clasp to the other.
Now for the main part, fold the ribbon in half and cut at 1 meter length. Fold again and cut at 1 meter length. Tie the two ribbons together forming a loop.
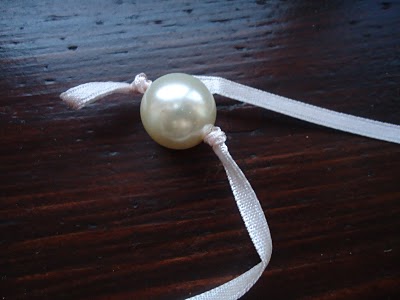
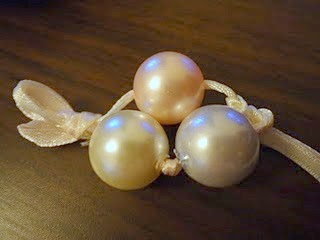
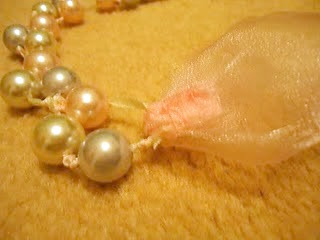
Arrange your beads order and follow the pattern for each set of three beads. Using a needle thread the bead into the ribbon and tie a knot as shown.
Thread the second bead (do not tie the knot yet). Now thread the third one on the other length of the ribbon and tie knot using both the lengths.
Continue beading following the above pattern till you reach the last bead.
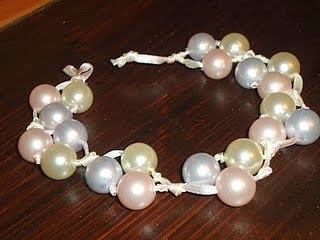
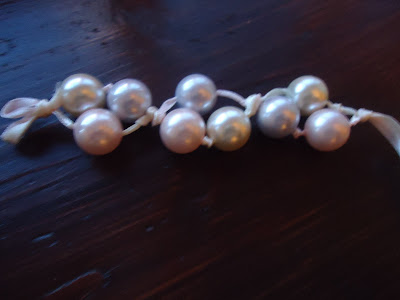
Leave some margin and tie the final knots. Trim the remaining ribbon.
Finally to join the fabric and the ribbon, take the fabric section and feed it through the ribbon loop. Fold it back and sew it together so as to secure the ribbon inside fabric. Do the same on the other side.
Trim and fray stop the edges of the fabric if required. And your done.
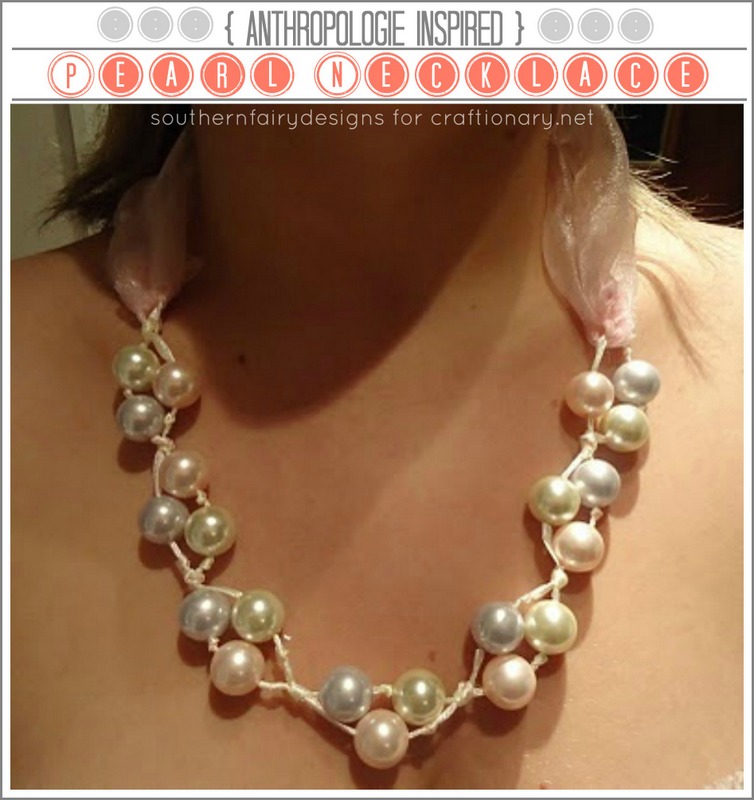
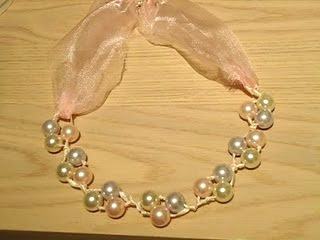
Here’s how mine turned out!
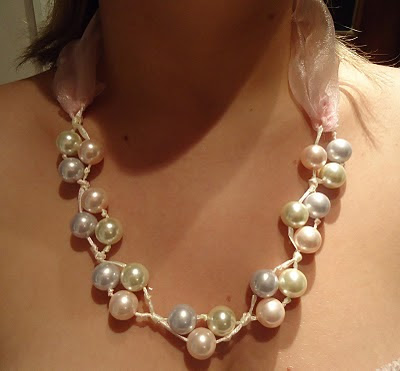
Put it on and show off.
beaded necklace
You will also like:


Good job Steph… like the butterfly canvas very muchIf you love to play with colours and flowers? Please visit me at
I like everything!
Gorgeous!!! It looks just like the inspiration necklace! And, since you said “raid” I'm guessing you made this without buying anything?! Now that's a price tag I can agree with 😀 Shelley
Very pretty … Love the classic look of pearls
didn't have to buy a thing 🙂 just used up scraps from my stash
Hey love your blog! Stopping by from UBP11 and thought I'd say hi.