This post may contain affiliate links. Please see our full Disclosure Policy for details.
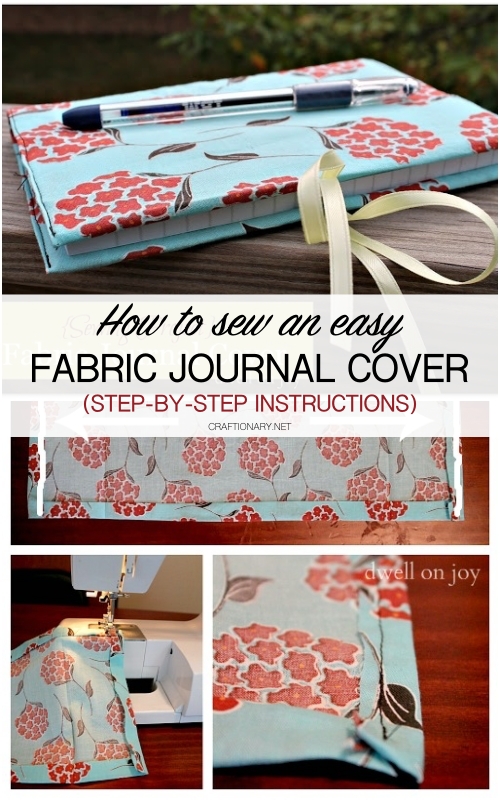
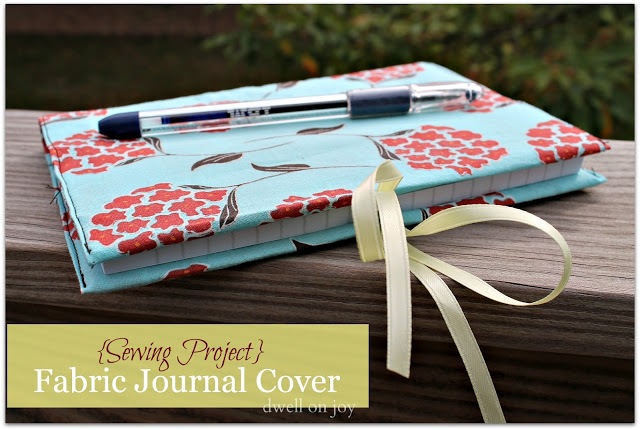
Cover your journal, diaries, recipe books, school textbooks, and notebooks with fabric cover that is easy to make to protect your favorite books. Follow step-by-step instructions with pictures to make DIY fabric book cover for any shape and size journal or notebook.
This tutorial is great for beginners with little sewing skills. No patterns or sewing plan is required to make this DIY book cover. Not only does it keep books safe from wear and tear, but it also adds a personal, stylish touch.
Why Make a Fabric Book Cover?
Before diving into the tutorial, here are some reasons people love fabric book covers:
- Protection – Keep your books safe from spills, tears, dirt, bent, and general wear and tear. This is especially useful for textbooks, journals, and cherished novels.
- Reusable – Can be removed and washed.
- Customizable – Choose a fabric that reflects your personality or seasonal designs. Go for a bold floral, a whimsical print, or a classic solid color.
- Gift Idea – A handmade book cover is a thoughtful and unique gift for any book lover, teacher, or student in your life.
- Sustainability: Use up fabric scraps from other projects and give old books a new lease on life.
Materials Needed
To make your own DIY fabric book cover, gather these supplies:
- Cotton fabric (or other durable fabric like linen or canvas)
- Matching thread
- Scissors or rotary cutter
- Pins or sewing clips
- Ruler or measuring tape
- Iron and ironing board
- Sewing machine (or hand-sewing needle if you prefer)
- Fusible interfacing for extra structure (optional)
- Ribbon, elastic, or button for closure
- Embellishments (appliqué, embroidery, or fabric paint)
Fabric Book Cover Step-By-Step Instructions
1. MEASURE AND CUT FABRIC
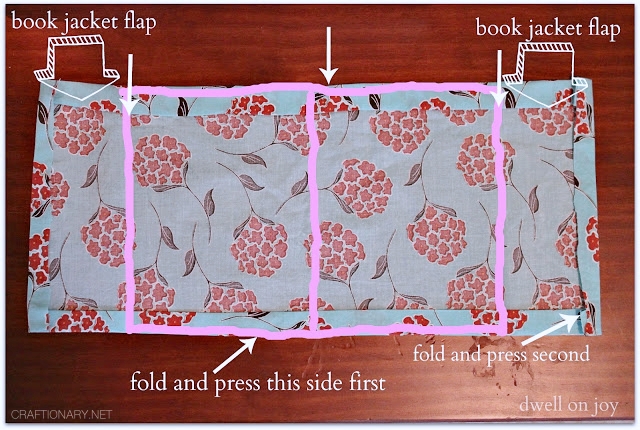
Cut a large rectangle so that when folded in half, the fabric folds over the closed journal to create a flap or book jacket flaps.
The Book Measuring Formula:
You’ll need a single rectangle of fabric. The size is determined by your book’s height and width.
1. Height of Book:
- Measure the Book Height: Measure your book from top to bottom.
- Add a Seam Allowance: Add 2 inches to this measurement. This will be the height of your fabric.
- Example: If your book is 9 inches tall, your fabric height should be 11 inches (9 + 2).
2. Width of Book:
- Measure the Book Width: Open your book and lay it flat. Measure from the outer edge of the front cover, across the spine, to the outer edge of the back cover.
- Add for Pockets and Ease: Add 8 inches to this measurement. This will be the total width of your fabric.
- Example: If your book is 15 inches wide when open, your fabric width should be 23 inches (15 + 8).
2. Iron and Fold Seams
Press the fabric with an iron to remove wrinkles. If using interfacing, iron it onto the wrong side of the main piece.
Fold the top and bottom seams so they are even with the journal edges. Using an iron, press the seams you just created. Fold and make a seam on the other two sides of the rectangle.
Press both that edge, as well as the edge of the book jacket flap where it folds over the cover.
3. Preparing the Fabric (Optional but Recommended)
For a professional-looking finish and added durability, you can use interfacing.
What is interfacing? It’s a non-woven material that is fused to the wrong side of your fabric to give it more structure and stability.
How to use it: Cut a piece of fusible interfacing to the same size as your main fabric piece. Following the manufacturer’s instructions, iron the interfacing onto the wrong side of your main fabric.
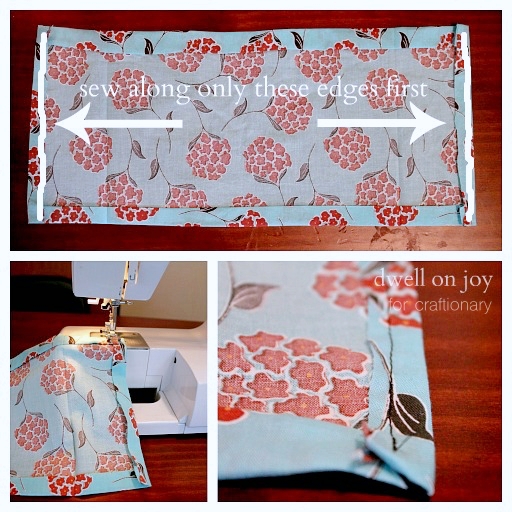
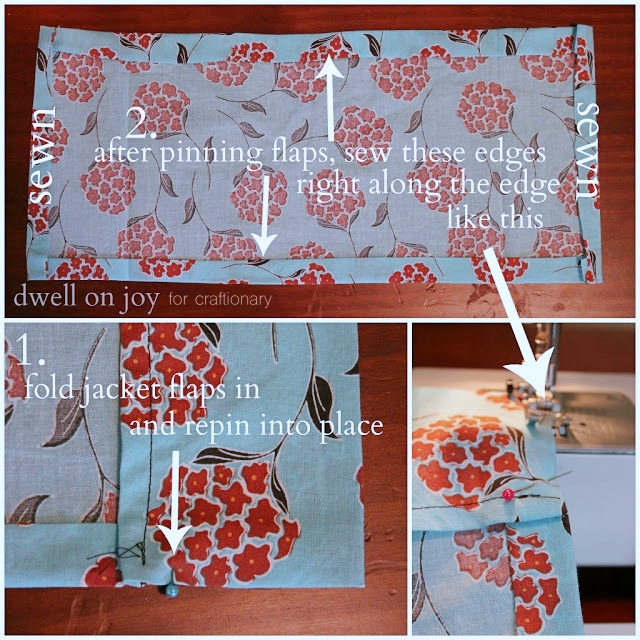
4. Fold and Sew the Edges
Sew a topstitch (a 1/2″ seam allowance stitch very close to the edge) along the side edges highlighted below. This will prevent fraying and give your cover a polished look.
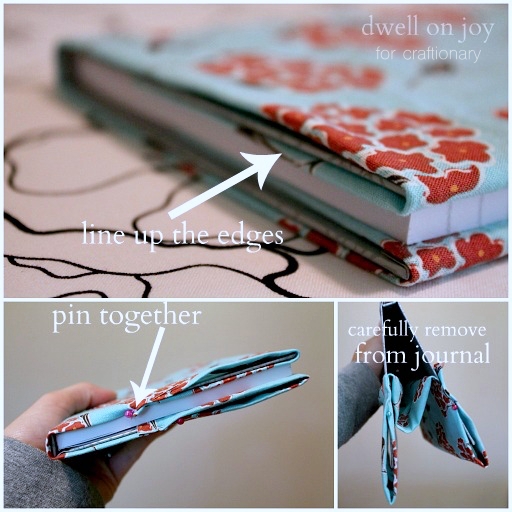
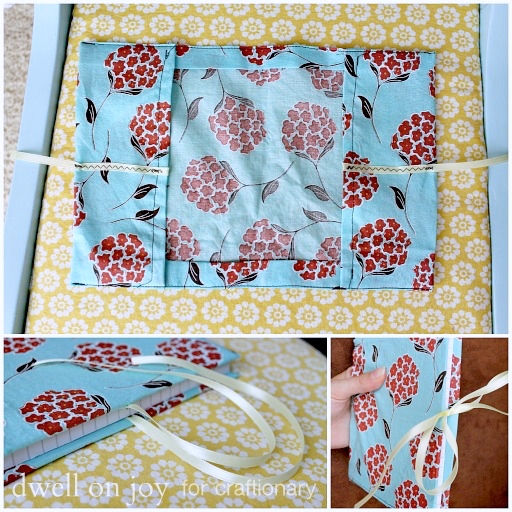
3. Pin and Create Flap Pockets
Place the book on the fabric cover and fold the pressed seams over to put the cover in place. Pin the flaps to the cover and gently remove the cover to finish sewing. Press them firmly with an iron to create a sharp crease.
Measure the Flaps: The flaps should be long enough to securely hold the book in place, but not so long that they meet in the middle. Aim for a flap size of about 4-5 inches.
Sew a straight seam along the top and bottom of each flap, as close to the edge as you can. This will create the pockets that your book’s covers will slip into.
Here’s another view of this instruction:
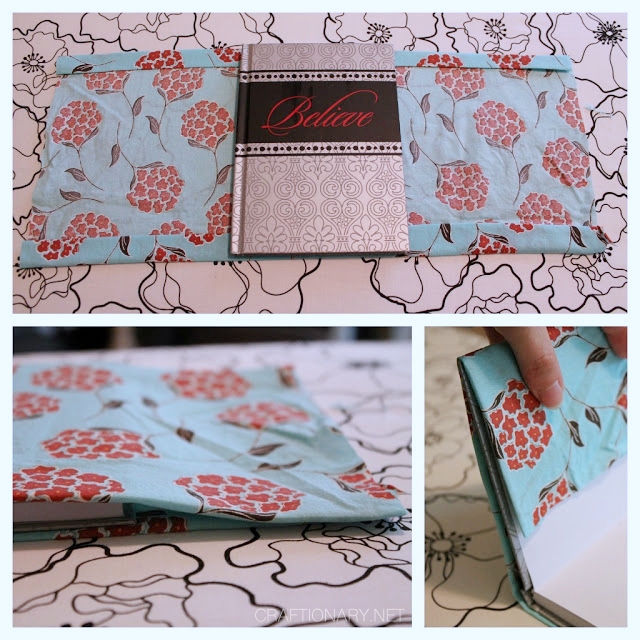
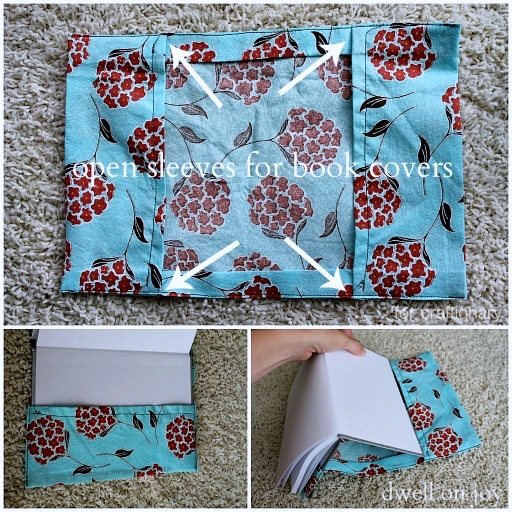
4. Cover the Book
When finished, slide the book into the flaps to see it’s fancy new look!
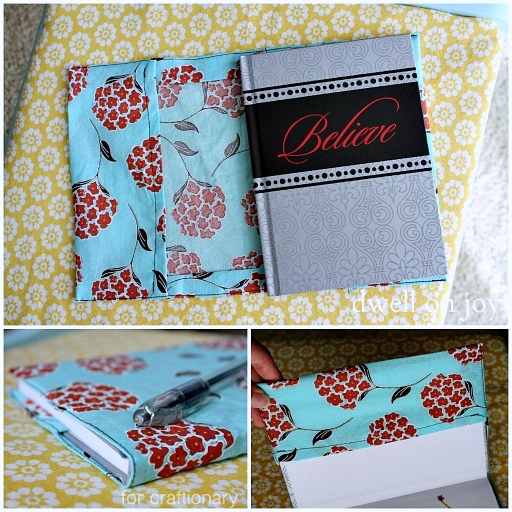
5. Make Ribbon Closure (Optional)
But that’s not all folks! I decided to add a ribbon closure. For privacy. You know!
I used brown thread to sew the ribbons on to show you how I did it.Please use the same thread color as your ribbon. It looks so noticeably “handmade”. I don’t mind for my own.
Measure your ribbon five times the width of the journal flap. Start the ribbon on the inside part of the flap and then wrap around the outside of the flap and pin into place.
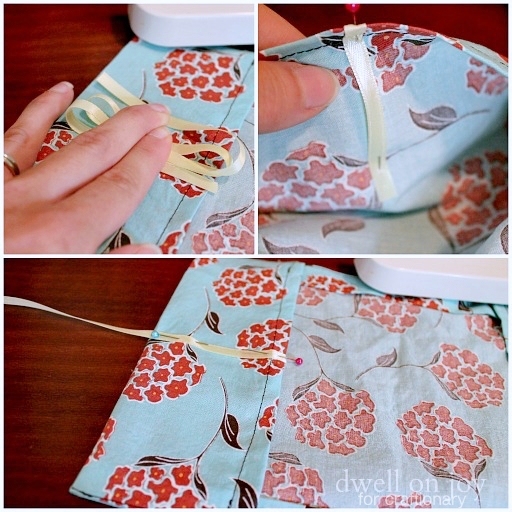
Sew both ribbons onto the flaps (using the same color ribbon, remember?), making sure to sew the ribbon only to the flap, and not the cover.
Insert your journal, close the cover, and tie the ribbons to keep prying eyes away.
Thanks Sarah for such a beautiful fabric book cover and easy to understand tutorial.
Who won’t like to make it for their favorite books! Fabric covers are also good for Family Recipe Books, if something spills while cooking you can just toss the cover into the laundry and bravo!
Tips for Success
- Use cotton quilting fabric if you’re a beginner—it’s easy to sew.
- Add elastic corners for a snug fit on paperback books.
- Decorate with embroidery, fabric appliqué, or iron-on patches.
- If making for children’s schoolbooks, choose sturdy fabrics like denim.
Common Questions About Sewing Fabric Book Covers
1. What type of fabric is best for book covers?
Cotton fabric is most common, but canvas, denim, duck cloth, or linen work well for durability. Avoid stretchy knits or very thin fabrics.
Fabric Recommendations:
- Quilting cotton: An excellent choice for beginners. It’s easy to work with, comes in a huge variety of prints, and is durable.
- Linen: Offers a beautiful texture and a classic, natural look.
- Canvas or duck cloth: Sturdy and great for covers that will see a lot of use.
- Lining Fabric: To give your cover a polished, finished look, you’ll also want to cut a piece of lining fabric to the same dimensions.
2. Can you make a fabric cover without a sewing machine?
Yes, you can hand-sew the seams—it just takes longer.
3. How do you make the book cover washable?
Pre-wash your fabric before sewing for shrinkage. Most cotton covers can be machine washed on gentle.
4. How do you size a cover for different books?
Always measure the book’s width + spine + back, then add seam allowances. This works for novels, journals, or textbooks.
5. Can you add a closure to your book cover?
Yes—sew in a ribbon, elastic loop, or button for extra security.
6. How do you make a book cover with a ribbon bookmark?
Before you sew the two fabric pieces together (Step 3), cut a long piece of ribbon. Pin the end of the ribbon inside the top center of the cover, so it’s sandwiched between the two fabric layers. Sew the ribbon in place with the rest of the seam.
7. How do you make a fabric book cover with pockets?
Add a Pen Loop: Before you sew your final pockets, fold a small loop of elastic or ribbon and pin it to the inside of one of the flaps. When you sew the final seams, you will catch the ends of the loop, creating a perfect spot for your pen or pencil.
Making a DIY fabric book cover is an easy sewing project perfect for beginners and experienced crafters alike. It’s practical, customizable, and makes a wonderful handmade gift. With just a bit of fabric and creativity, you can protect your books while showing off your personal style.
So, grab your sewing kit, choose a favorite fabric, and start stitching your own fabric book covers today!
You will also like:
Inkjet Printing on Fabric using Freezer Paper (Easy Instructions)


Thanks so much for having me Hani!
What a great project and detailed tutorial. Really well made. Completely stylish. The only thing we missed out on, seeing some of her brilliance from what she wrote inside her journal 🙂
I love your book cover! I think I’m going to add an extra ribbon (or two) for book marks. Thank you for sharing!
Love this tutorial! Thank you!
I made one and tagged you in the post!
Bom dia, muito obrigada por compartilhar seu conhecimento conosco.
absolutely adorable (like Sarah) and easy tutorial! I would love to try this for all my books.