This post may contain affiliate links. Please see our full Disclosure Policy for details.
Looking to brighten your space with a touch of handmade charm? A painted spring vase is the perfect weekend DIY project to bring freshness and color into your home. Whether you want to reuse an old jar or decorate a dollar-store vase, this tutorial shows you step-by-step how to create a custom vase inspired by geometric designs, easy and cute spring flowers, and pastel colors.
Easy and quick craft idea: A glass vase, that looks new with some paint in a few minutes.
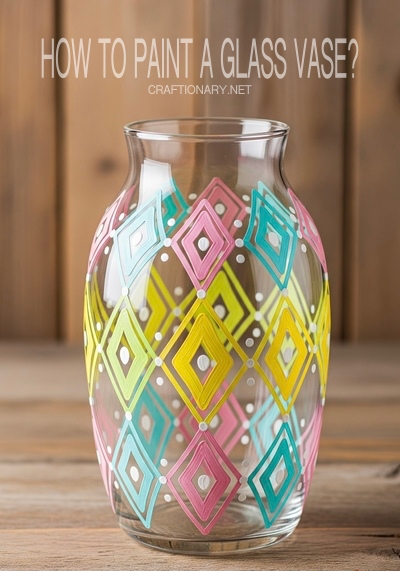
How to paint a glass vase?
Have an old vase at home? Give it a instant fresh look with Just Some Paint.
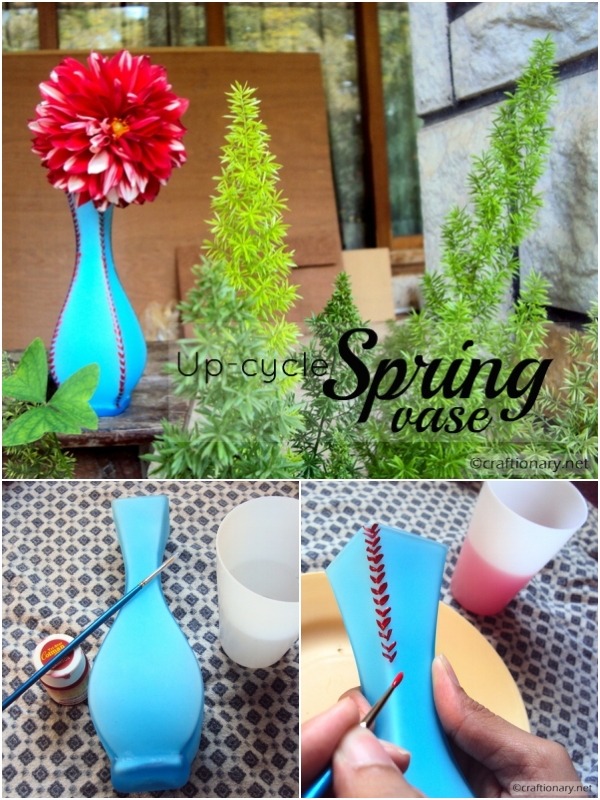
Upcycle Painted Glass Vase
As a lifelong crafter with over a decade of experience in seasonal decor, painting, and upcycling projects, I’ve personally tested this method and selected beginner-friendly tools to ensure anyone can create a stunning vase.
Materials:
To upcycle this vase I used:
- Glass vase or jar – Upcycled or dollar-store
- Washable glass marker – To sketch your design
- Acrylic paints or glass paints – Pastel Spring Colors
- Painter’s tape (optional) – For geometric or stripe patterns
- Paintbrushes (round + flat) – Use foam brushes for smooth strokes
- Rubbing alcohol or vinegar – To clean the vase before painting
- Clear acrylic sealer spray or UV resistant clear gloss – to protect the paint
- Optional: Stencils for florals or butterflies
Related: Complete Guide: How to do DIY glass painting?

How to Paint a Spring Vase: Instructions
1. Clean the Vase
Wipe your glass vase with rubbing alcohol or vinegar to remove oil and residue. This helps the paint stick better.
2. Plan Your Design
Sketch your design idea with a marker, use washable glass marker or fine-tip sharpie. Popular spring themes include:
- Daisies and tulips
- Pastel color blocking
- Abstract watercolor florals
- Butterflies and bees
Tip: If you’re new to painting, go with color-blocked stripes or dot florals for an easy yet pretty finish.
3. Paint the Base Coat
If you want to cover the vase with a paint. Apply 1–2 coats of white or a soft pastel paint as your background. Let each coat dry fully (about 20 minutes) before the next. You can also spray paint the entire vase.
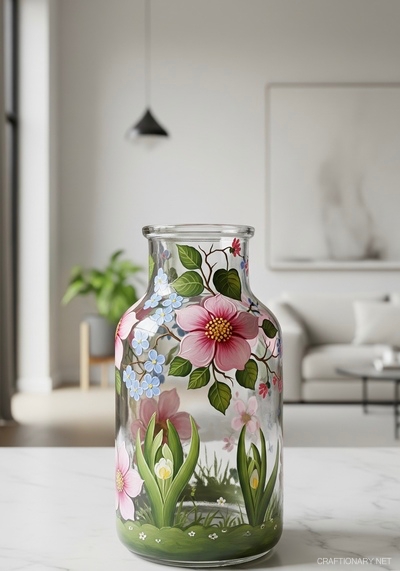
4. Add Spring Motifs
Use fine brushes or stencils to paint:
- Flowers with simple petal shapes
- Green vines with dot leaves
- Cute spring quotes like “Hello Spring” or “Bloom and Grow”
Pro Tips for a Flawless Finish
- Let the vase dry between layers to avoid smudging.
- Use foam sponges for smooth backgrounds.
- Apply a clear sealer spray for durability if using the vase for fresh flowers.
In the picture, I used a paintbrush to make arrows facing downwards on the sides of the vase.
If you want alignment, you can draw before you paint with a pencil. I like the freehand look!

Here’s how the painted spring vase looks! Painting the sides enhances the shape of the vase.

The arrows can be substituted with polka dots, stars, diamonds and so much more to match a theme.

Styling Ideas for Your Painted Spring Vase:
- Fill with fresh tulips or daffodils and place on your entryway table
- Display it empty on a shelf as spring-themed decor
- Add faux cherry blossom stems for a long-lasting display
Tested and Trusted Glass Painting Tips:
As someone who’s painted dozens of jars, vases, and glass candle holders, I’ve learned a lot from trial and error. Glass painting can be frustrating at first—paint may peel, streak, or not adhere well—but with the right prep and materials, your results will be smooth, long-lasting, and beautiful.
1. Always Clean Thoroughly First
- Use rubbing alcohol or white vinegar to wipe your glass clean before painting.
- Oils from your fingers or previous use prevent paint from sticking.
2. Choose the Right Paint
- Use multi-surface acrylic, enamel paint, or paint specifically labeled for glass.
- Craft acrylics may chip unless sealed properly.
3. Apply Thin, Even Layers
- Use a foam brush or sponge dabber for smoother coats without streaks.
- Let each layer dry completely before adding another.
4. Use Stencils or Tape for Sharp Edges
- For crisp lines or shapes, painter’s tape or repositionable stencils work best.
- Remove them while the paint is still slightly wet to avoid peeling.
5. Seal the Final Piece
- Use a clear acrylic spray sealer to protect your design (especially if it’ll hold fresh flowers or be handled often).
- Air cure the painted vase for at least 24–72 hours before sealing.
Related: Best Sealer: How to Waterproof Acrylic Paint on Glass Crafts
6. Practice on Spare Glass First
- Test color combinations and drying times on an old jar or bottle before painting your final vase.
DIY Painted Glass Vase
Troubleshooting Common Issues:
- Paint peeling or chipping: Use rubbing alcohol before painting + clear sealer
- Streaky or uneven base coat: Use foam brush or sponge applicator
- Bleeding around stencils/tape: Press tape down firmly + don’t overload brush
- Paint looks patchy or see-through: Use light colors on a white base coat or apply 2 to 3 layers
- Tape or stencil pulls off paint: Remove tape before paint dries fully and don’t overload brush
- Colors don’t pop on clear glass: Paint a solid base color first or use opaque paints
- Painted surface scratches easily: Let dry 72 hrs + spray with clear acrylic sealer
- Bubbles appear in brush strokes: Use soft bristle or foam brush and apply slowly to avoid air
Common FAQs for Painted Spring Vase Craft
1. Can you wash the vase after painting?
Handwash gently if sealed. Otherwise, for decorative use only.
2. What paints stick to glass best?
Use multi-surface or enamel acrylic paints formulated for glass.
3. How long will the vase last?
With sealing and gentle care, it can last for years!
4. Do you need to prime the glass before painting?
No primer is needed, but cleaning the glass with rubbing alcohol is essential. Some painters use a light white base coat for brighter results.
5. Can you bake the glass to cure the paint?
Some glass paints are bakeable (check the label). Baking can cure and harden the paint—usually 325°F for 30 minutes. Don’t do this if your vase has any plastic parts or labels.
6. How do you make the paint permanent on glass?
Use either: Enamel paint + air cure for 72 hours, or Multi-surface paint + clear acrylic sealer?. Baking (if safe) can also help.
7. What’s the best paint for beginners painting glass?
Look for multi-surface acrylics (e.g., FolkArt, DecoArt) or glass paints like Pebeo Vitrea 160. They’re more forgiving and widely available at craft stores.
8. Can you use Mod Podge on painted glass?
Yes, Mod Podge makes a Dishwasher Safe formula. Use it as a topcoat, but don’t expect the same clarity or gloss as a spray sealer.
9. How long should I let my glass project dry before use?
Ideally 72 hours for full curing. For vases that will hold water or get handled often, seal them and let them cure for at least 3 days.
Painted Spring Vase Inspirations and Ideas
Here are some ideas to help you choose a design and paint your glass vases:
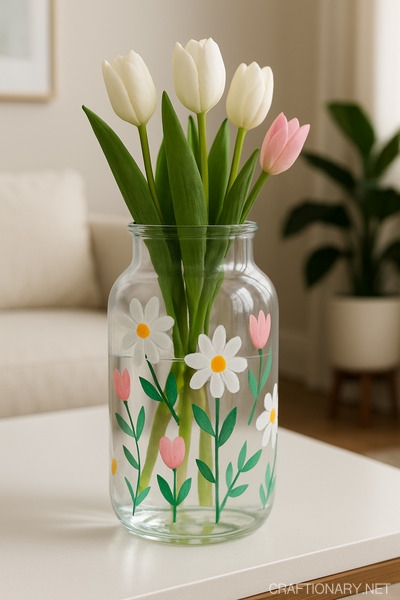
Painted Daisies on Vase

Painted Spring Flowers on Vase
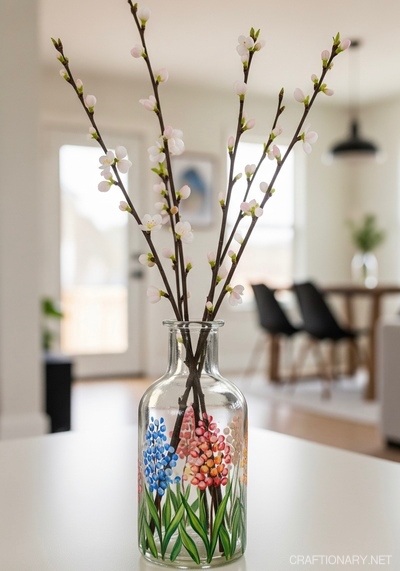
Painted Hyacinths on vase with earbud
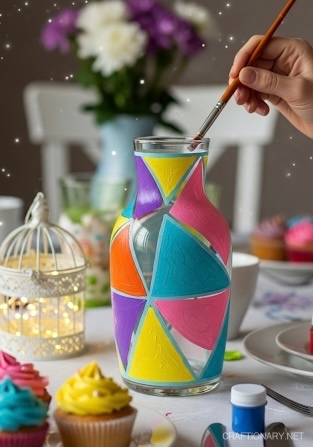
Painted geometric design on vase
Painted fairy garden on vase
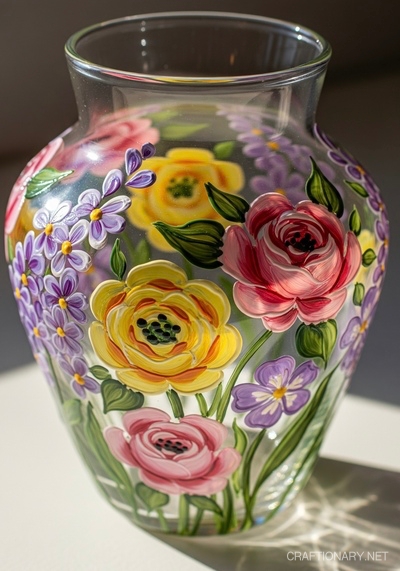
Painted Flower Garden on vase
Painting glass takes patience, but once you get the hang of it, the possibilities are endless—vases, candle holders, ornaments, table settings, and more. Use the tips above as your roadmap, and don’t be discouraged by small flaws. They make your piece uniquely handmade!
You will also like:
Gilding glass with gold leaf sheets
You will also enjoy our Projects to love board on pinterest.


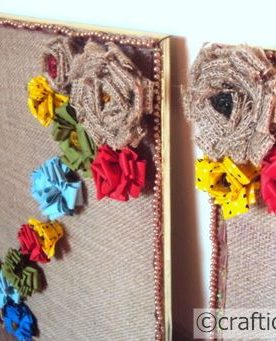
I love how you made the vase look as if it was stitched and the flower is gorgeous! 🙂
Yes! I love before and after photos! So nice to see how far the project came! Such a pretty vase!
HI Hani, I love the shape of the vase. It is very interesting. Tthe new art work really pepped it up. Now it doesnt look so plain. I think it is very lovely and what a smart idea. Makes me want to rumble through my own cabinets for a neat vase to work on. You always make the most interesting things. Keep up the good work.
Kathy Lewis
WOW! A few bits of red and WOW, a brand new vase! BRAVO!
That is an impressive amount of wow factor for a minor expenditure of effort. Well done.
What a nice touch, and simple to do! Very clever of you. I never would have thought of doing that! Really looks good with the beautiful red dahlias.
That's beautiful! It goes so perfectly with the flowers you chose.
i just love this vase! Its so lovely, really creative touch on the painting technique!
Um so cute! Just a few small changes can make a big difference! Thanks so much for stopping by our Naturally-Nifty Party and sharing it there!
What a great idea to paint on the vase! Love it!!
Thanks for sharing at The DIY Dreamer.. From Dream To Reality!
Just a few paint strokes and the vase really looks so great! Love it! Thanks so much for sharing it with us!
Take care,
Trish
Clever idea! I always see old vases at thrift stores, what a great idea to paint them. Thanks for linking up to Refresh your Nest Friday!
Cute idea. We loved having you come to our “Strut Your Stuff Saturday.” We hope you'll be back again soon! -The Sisters
Cute idea. We loved having you come to our “Strut Your Stuff Saturday.” We hope you'll be back again soon! -The Sisters
Wow – I LOVE what you did with it. The little touch of adding red make it a new piece completely!! Love it.
Thanks for linking up at Romance on a Dime! I'm pinning this!
Love the pop if red!! Thanks for sharing at Homemade By You!!
What a quick and easy redo! Thanks so much for sharing at Toot Your Horn Tuesday girl. HUGS!!!
What a fun new touch to make it “new!” Thanks for linking up to Share the Love Wednesday!
Mary