This post may contain affiliate links. Please see our full Disclosure Policy for details.
Declutter your desk sustainably and create a charming and practical paper roll pencil organizer using items you likely already have around the house: toilet paper rolls and kitchen towel rolls! This paper roll pencil organizer is the perfect DIY project for eco-conscious crafters, kids, students, and anyone who loves turning trash into treasure.
Why Make a Paper Roll Pencil Organizer?
Recycling toilet paper rolls and paper towel tubes not only reduces waste but also sparks creativity. This pencil holder idea uses tubes of varying heights to store everything from pencils and pens to paintbrushes and markers. With a decorative twist using scrapbook paper and sleek black interiors, the result is stylish, functional, and sustainable.
This project is great for back to school supplies organizer and home offices. Students can keep it in their lockers or on school desk when working. It’s also a great school project for teaching kids to recycle. A sustainable and stylish organizing solution for art studios and craft rooms.

Paper roll pencil organizer
Paper roll pencil organizer tutorial:
Materials Needed:
- Empty toilet paper rolls (at least 4-5) or Empty kitchen towel rolls (1-2)
- A piece of sturdy cardboard (an old cereal box or shipping box works great!)
- Scrapbook decorative papers of your choice
- Black acrylic paint and Foam brush
- Mod Podge or a hot glue gun (with adult supervision if needed)
- Scissors
- X-acto knife and self-healing mat
- Pencil and Ruler
Instructions:
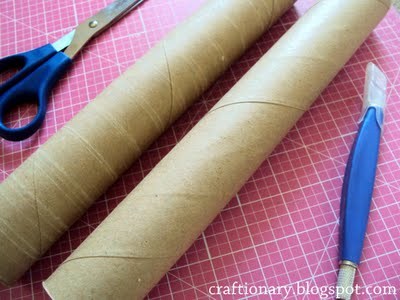
1. Prepare Your Paper Rolls
Decide on the different heights you want for your organizer. Use your x-acto knife to cut some of the toilet paper rolls and the kitchen towel rolls to various lengths. This will create visual interest and help you organize different types of stationery.
Make sure none is taller than the pencils or the pens. The tallest one in my design is for keeping the paint brushes.
Empty paper rolls
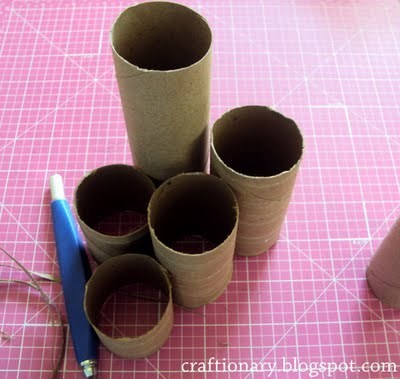
Empty paper rolls organizer
2. Paint the Insides of Tubes
Paint the inside of the tissue rolls with acrylic paints using foam brush or paintbrush. I painted it black, you can paint it any color you like. This gives a clean and polished look to your organizer. Let the paint dry completely.
3. Choose and Cut Scrapbook Paper
Choose your favorite scrapbook papers—floral, geometric, or minimalist—and cut pieces to fit around the outside of each roll. Use glue to adhere the paper smoothly. Mix and match patterns for a fun look or stick to a single theme for a cohesive feel.
Now for the fun part! Measure the height and circumference of each paper roll tube. Cut pieces of your chosen scrapbook decorative papers to fit.
The simplest way to do this is by first rolling the paper over the tissue roll. Next mark the length and width of the roll. Once you have marked all the papers, it is easy to cut them to the right sizes. Make sure you leave some excess just in case, more is better than less.
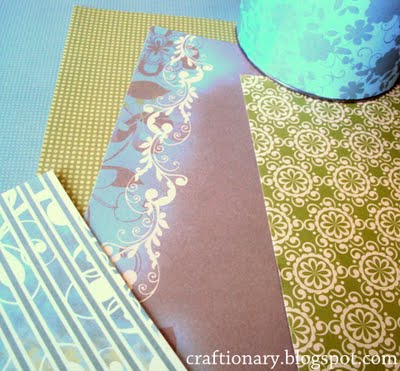
Scrapbook paper to decorate tubes
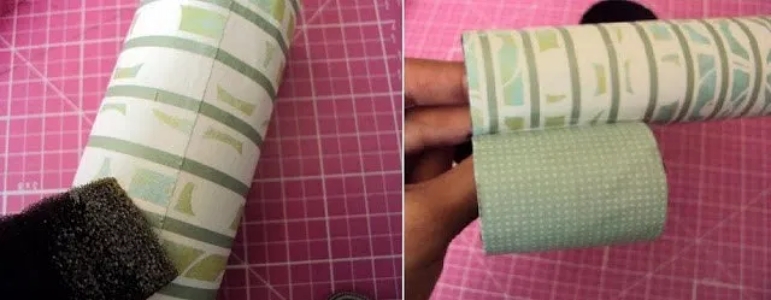
4. Wrap the Outside with Scrapbook Paper
Apply mod podge to the outside of each tube and carefully wrap it with the decorative paper. Smooth out any wrinkles with a foam brush. Next cover the paper with Mod Podge to seal it. Let it dry.
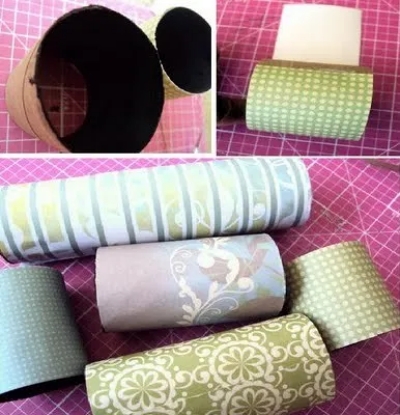
Wrap the outside of paper rolls
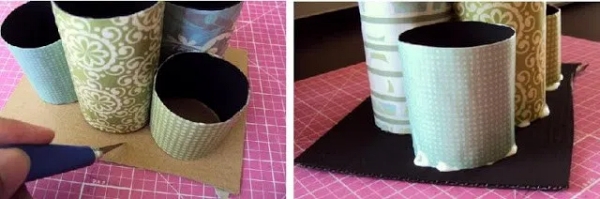
5. Join the Paper Rolls
Use mod podge to join the tubes together by holding them together as shown in the picture.
Join the paper rolls
6. Attach the Paper Rolls to the Base
Place your prepared paper roll tubes on the cardboard and trace around the outer edges of all the tubes to determine the size and shape of your base. Cut out the cardboard base and paint it black.
Apply mod podge to the bottom of each paper roll tube and carefully attach it to your cardboard base. Place acceptable book weight on top to ensure they adhere well. Let the glue dry completely.
Glue the base
You will need some paint touches on the edges.
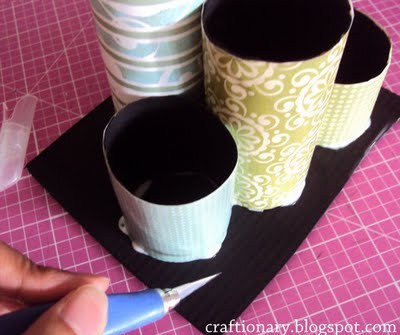
Glue and cut alternatively
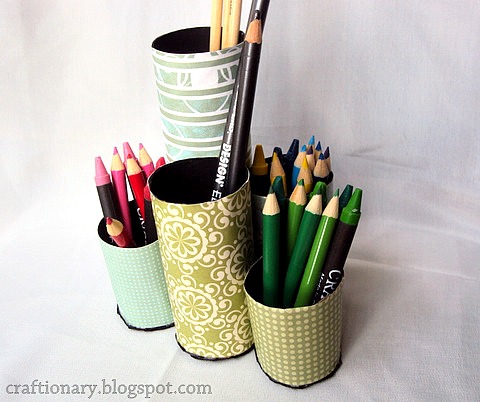
Once all the glue is dry, your paper roll pencil organizer is ready to use! Fill it with your pens, pencils, markers, or even paintbrushes. Enjoy your newly decluttered and stylish desk.

Paper roll pencil organizer
Tips and Variations:
You can design it anyway you want, here are some options:
- Get creative with your scrapbook decorative papers! Mix and match patterns and colors.
- Add embellishments like buttons, ribbons, or stickers for an extra personal touch.
- This organizer isn’t just for pencils! Use it for paintbrushes, small craft supplies, or even makeup brushes.
- Add a ribbon or lace trim around the base.
- Use metallic scrapbook paper for a glam look.
Paper roll organizer
Say goodbye to desk clutter and hello to sustainable style. Our paper roll pencil organizer, crafted from recycled toilet paper rolls and kitchen towel rolls, and adorned with beautiful scrapbook decorative papers, is the perfect addition to any organized and eco-conscious workspace. The thoughtful touch of the black painted inside elevates its look and feel.
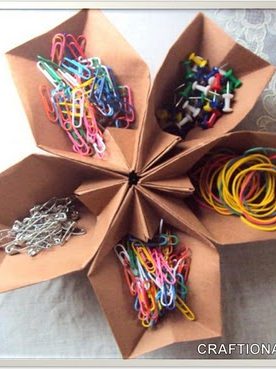
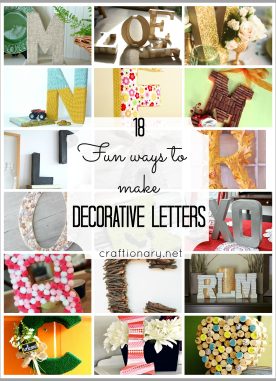
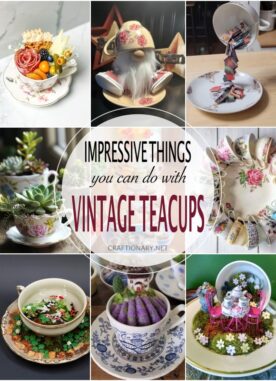
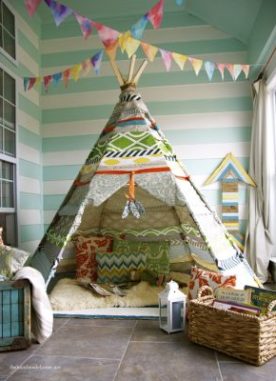
You will also like:
Teaching kids with color wheel
Find more trending craft ideas on our pinterest boards.


Hi dear, its a cute organizing idea..
by the way i think its again inspired by my TP roll organizers 🙂 isn't it? well thanks for sharing! keep rocking 🙂
HOLA HANI!!!! QUE SENCILLO Y PRACTICO!!!!! SALUDOS DESDE ESPAÑA.
Olá Hani,
Muito criativa sua ideia de organizar os lápis.
Gostei muito, parabéns!
Beijos,
Lelê
I think I'll try this out sometime this week since I really need something to organize all my pens, markers and paintbrushes. My desk is a huge mess.
I love this idea! I am saving this in my inspiration folder for future use, thanks so much for sharing! I'm your newest follower and came over form the simply sweet home link party!
Brie from darlingdoodles.blogspot.com
I love recycling and this is a perfect idea! 🙂
You come up with some of the cutest organizing ideas! Love this! 🙂 Thanks for sharing on Fancy This Fridays Hani!!
This makes a great idea. But do take care of bugs also…this is what really scares me…
Love this! Would be the perfect idea for on top of a kids desk.
what a fun idea!! came by from A Vision to Remember-would love if you stopped by my post too End of Summer Purse
Great idea! NEver thought of that! Thanks for sharing!
What a neat idea! I'll have to try this sometime!
Thanks for sharing with So Sweet Sundays! I'm your newest follower. 🙂
I wrote a post recently on repurposing TP and papertowel rolls, so this really made me smile! 🙂 These turned out great!
I'm always wondering what to do with the leftover rolls when the paper towels or toilet paper is finished. This is a great craft and has so many possibilities. Thank you for sharing your idea and the instrucitons. I saw your post over at Home Savvy A to Z.
Sorting by color is such a good idea!
Okay, you may think I'm weird, but I love this idea for me!~ for organizing my craft table, in the midst of the crafting! Thanks for sharing!
great idea!!
Really cute! This is one of those ideas that makes me slap my forehead and say, “Why didn't I think of that?!” Thanks for sharing!
Thank you so much for linking up at HomeSavvyAtoZ.com's Savvy HomeMade Monday this week!
Fantastic! Love this project very creative and I have everything I need to make them, thanks! Thank you for stopping by my Wednesday blog hop too. 🙂
What a fun way to keep organized
What a great craft for kiddos. I'm going to feature this
Thanks for linking to Take-A-Look Tuesday
love it great way to stay organized and love it that it was recycled material
Great, creative idea! I love recycled projects!-caroline
i love this! i've been looking for ideas for using things i already have like this.
Wonderful idea. I loved how you joined the pieces together.
What a thrifty idea! Too bad we just finished off a roll of paper towels and I threw the tube away. Next time… I also wanted to let you know it'll be featured at this weekend's party
Very fun! I love the way you did the base. Great idea!
I love simple and recycled organizing ideas! This is so cute.
This is such a labor of love! Thanks for linking up at Creative Bloggers' Party & Hop 🙂
Lo
Love the different levels! Cute!
So Cute xx
Would love it if you could share this on Serenity Saturday over at serenityyou.blogspot.com
xxx
Great repurposed paper roll idea – we're always looking for more and this one is SO cute! Thanks for sharing 🙂
LOVE IT! I hope you will link up to Scrappy Saturdays linky party @ candacecreations.blogspot.com
Hani! These are WONDERFUL what a great and clever idea!!! I'm so glad I found you over at Tatertots and Jello, thanks for linking UP! I'm your newest follower! I'm definitely going to have to try this out!!XOXOXO,Lilli
I love to use trash for my treasures..I use coffee cans cover with pretty paper or fabric of choice.You did awesome jobvery cute..love your blog…Hop over and visit mine when you get a chance. I do monthly giveaways. Some of my giveaways are worth lots of money. Hope you see you there. Join my site and be sure to leave comments on as many top 5 post.I get so much inspiration by visiting these blogs. Ladies you all have Talent.ThanksChris
Awesome…I love to use trash for treasures…..You did awesome jobvery cute..love your blog…Hop over and visit mine when you get a chance. I do monthly giveaways. Some of my giveaways are worth lots of money. Hope you see you there. Join my site and be sure to leave comments on as many top 5 post.I get so much inspiration by visiting these blogs. Ladies you all have Talent.ThanksChris
WOW! This is amazing. I would have never thought to use paper rolls to make something like this.
Thank you for linking up to Sew Woodsy last week. We hope you'll join us for another edition of What's Up Wednesday's!
I love it, what a great upcycle project!
Hani,
Thank you so much for visiting my party. I shared your project on my FB page… so CLEVER!
Love this idea! I am going to use this in my classroom for my desk… Thanks for the inspiration.
LOVE THIS! I featured you on my Favorites of the Week! Erin @ How to Nest for Less
GREAT idea…I've been saving (and my friends too!) TP and paper towel rolls for just this kind of project. I'm going to use it with the kids I teach crafts to at the Transitional Housing apartments (formerly homeless families) to! Thanks for reminding me how cute this is. ~~Robyne~~
great looking!
dear hani, u did nice job. i really like these holders. keep it up
Very resourceful these are awesome and perfect for the kids! This is a very creative and innovative way to do a pencil holder. We did a toilet paper roll snake project out of the same materials you used.
So creative!
Thanks for this pencil organizer idea, Hani!
Very beautiful, but simple to do.