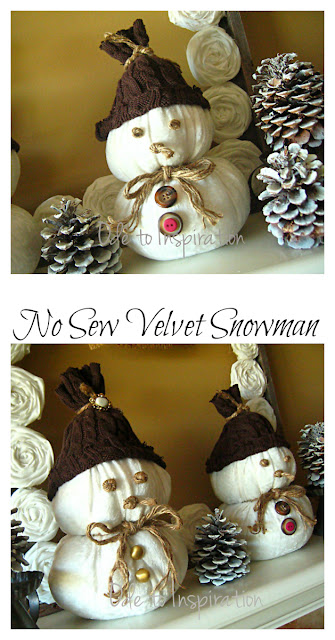
How to make a no sew craft snowman tutorial with fabric and polyester stuffing for home decoration in winter. Cute stuffed snowman instructions. Make your winter funtastic with DIY snowman made with velvet fabric. A fabric snowman tutorial for home decoration.
Hello Craftionary readers! I’m Maysem from Ode to Inspiration, a blog about being inspired and inspiring others. I’m so excited to be here and to be able to share one of my creations with you today. I love winter! One of my favorite things about the winter time are snowmen! They are so stinkin’ cute! But sometimes it’s just too cold to go outside or sometimes there’s no snow to make a snowman, so how about just making one right at home where it’s warm and cozy.
2 Minute Craft Easy snowman tutorial
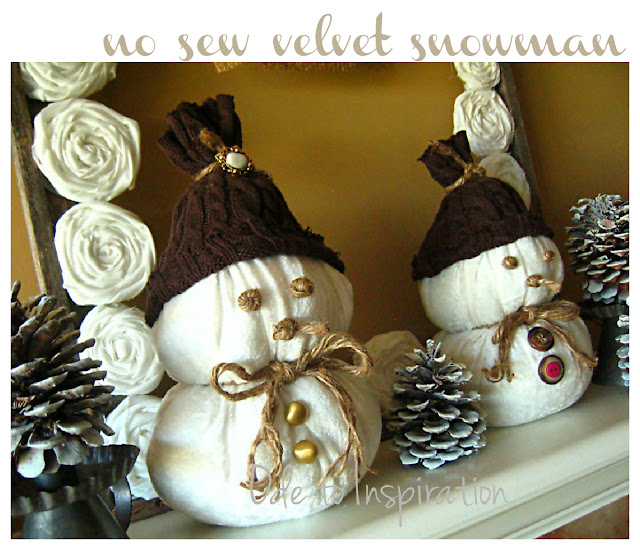
Hey, sit in front of your fireplace if you would like. I promise he won’t melt away!
Make a Snowman tutorial
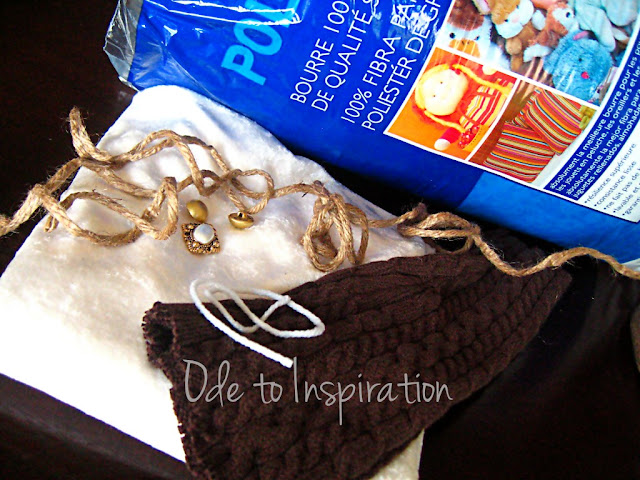
Grab the following supplies and let’s get started!
Craft snowman material
- White crushed velvet fabric (37″ inches x 31″ inches)
- A sleeve from an old sweater
- Fiberfill
- Jute (6 ply)
- Piece of yarn
- Buttons
- Hot glue gun
- Scissors
DIY Snowman Instructions
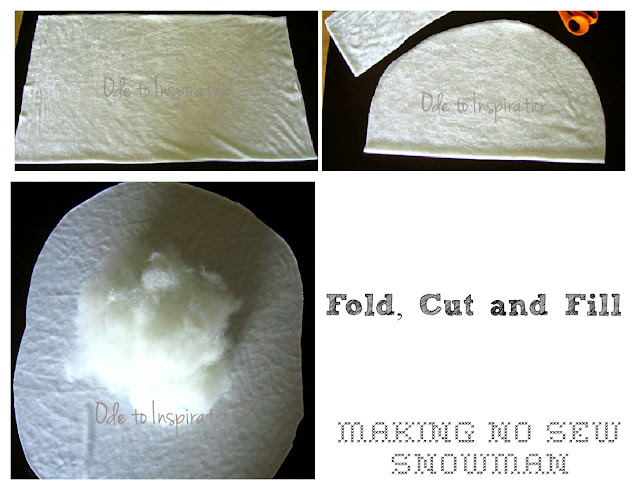
Fold your fabric with the shorter ends together, and cut out a wide half oval shape. Don’t worry, it doesn’t have to be perfect. Unfold your oval with wrong side of the fabric up, and fill with fiberfill.
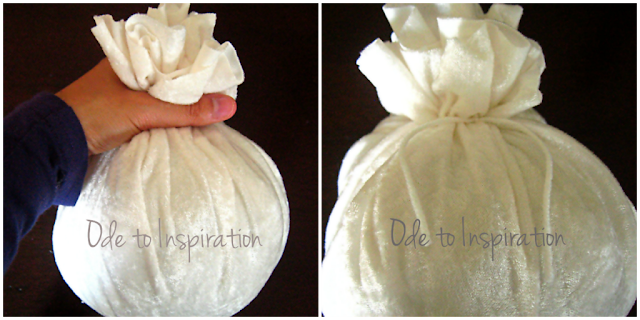
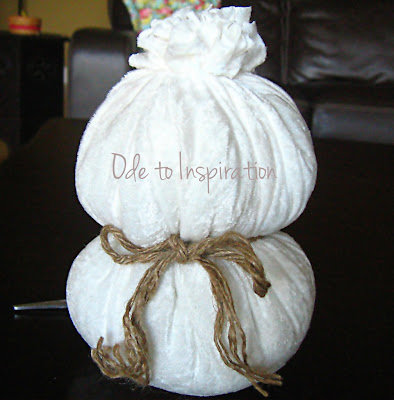
Gather the ends of the oval together. At this point, you can add or subtract the fiberfill if needed. Once satisfied with the amount of fiberfill, tie off the gathered end with a piece of yarn and trim the long ends of the yarn.
Take a long piece of jute and wrap it at the center of the oval to create two “snowballs” making the top half slightly smaller than the bottom. Tie your jute into a bow and separate the ends into strands. Also, at this point, go ahead and trim off the access fabric from the top of your snowman’s head.
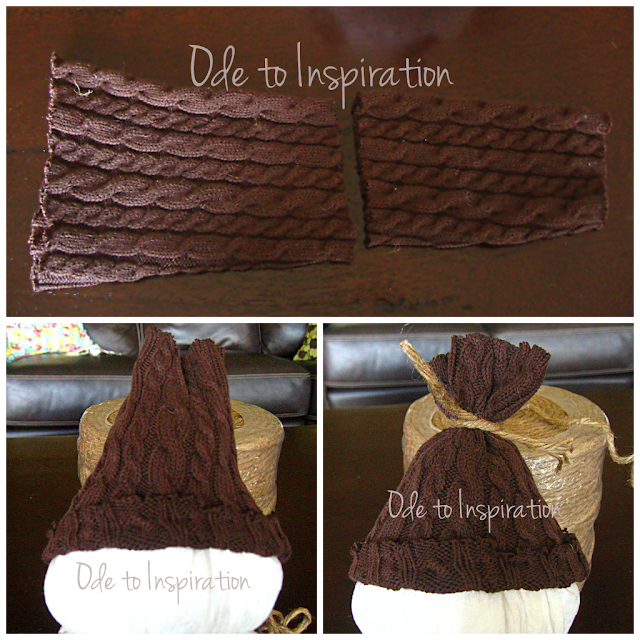
Take the sweater sleeve and cut it a bit more than half way from the wider end. Place the larger sleeve half on top of the snowman’s head, fold the bottom end of the sleeve up, and tie off the top end with a piece of jute with a double knot.
Optional: With your glue gun, glue the hat to the snowman’s head. All you need is one dot of glue on the front, back, and sides.
Snowman craft tutorial
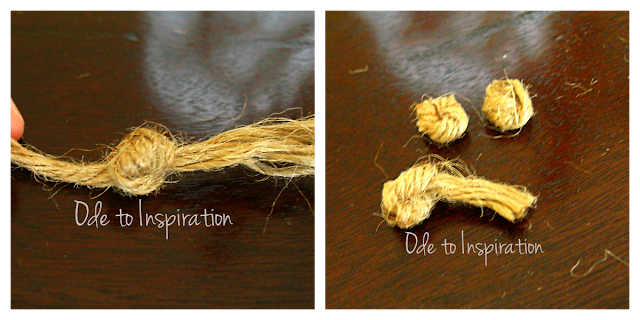
Take a smaller piece of jute and tightly double knot it with the second knot directly on top of the first knot. Make three. Then for two of the knots, cut off both ends. These are the eyes. For the the third knot, cut off only one end and trim the other if needed. This is the “carrot” nose.
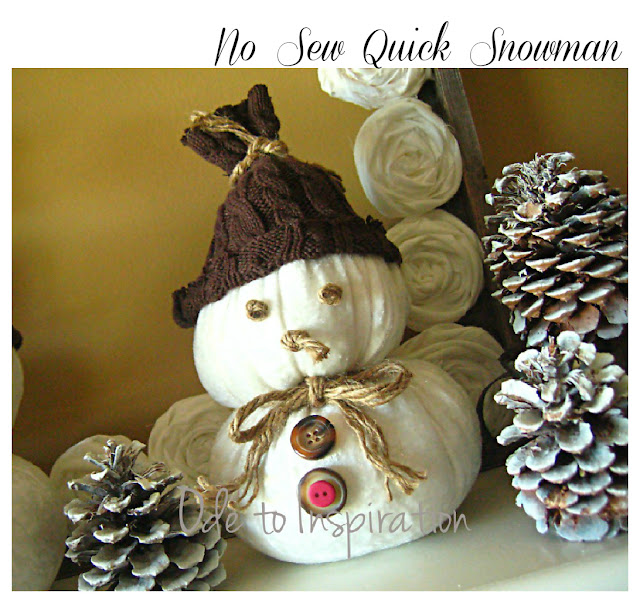
With your hot glue gun, glue on the eyes, nose and buttons.
Optional: embellish your snowman’s hat with a button, pendant or jewelry pieces.
Your no sew snowman is all done!
Decorate your snowman any way you would like. Use different fabric too! Have fun with it!
I hope you enjoyed my tutorial! Thanks Hani for inviting me over!
Aren’t these snowmen the cutest you have ever seen! I love how easy they are to make using most of the things at home or recycle old clothes. Thanks Maysem for making our winter cozy and warm with snowmen inside our homes.
Check out Ode to Inspiration for more fun ideas like:
anthropologie inspired vase * Fall wreath * moroccan lanterns
You will also like:
DIY snow globes
20 DIY Snowman Crafts
Popsicle sticks Olaf




Thank you Hani! So honored to have been able to contribute my little something in your part of town;)