This post may contain affiliate links. Please see our full Disclosure Policy for details.
How to make nylon flower rose? I am sharing a very easy tutorial to make nylon flower rose with step-by-step instructions. The details from making a rose bud to shaping the petals to form a nylon rose are with pictures. I have tried my best to make the tutorial understandable. This nylon flower rose is a result of my own trial after studying a natural rose and counting it’s petals. Some people also refer to nylon flowers as stocking net flowers or pantyhose flowers.
Nylon flower rose

Make nylon flower rose
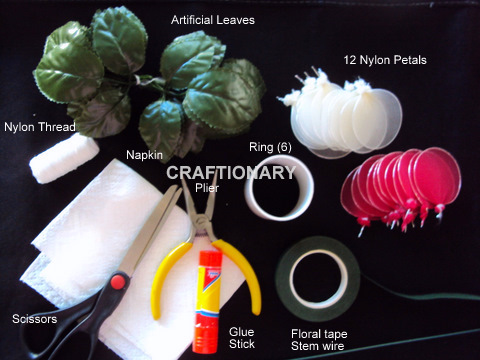
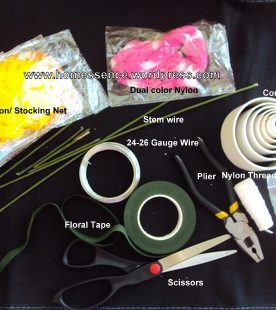
THINGS YOU NEED:
- Ring size 6
- White and red stocking net (or any color rose you desire to make)
- Floral tape
- Nylon thread
- Stem wire
- Wire
- Plier
- Napkin/ tissue paper
- All purpose school glue/ glue stick
For complete nylon material information see NYLON MATERIAL.
GET CRAFTY:
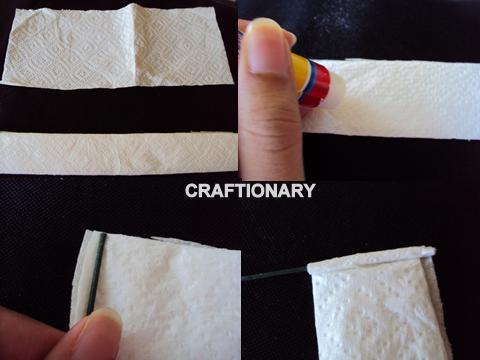
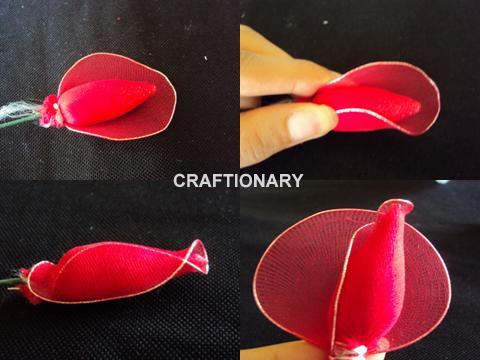
- Cut the napkin in half and then fold it to form the bud of the rose. Apply glue on the napkin, place the stem wire on it, at one end and roll.
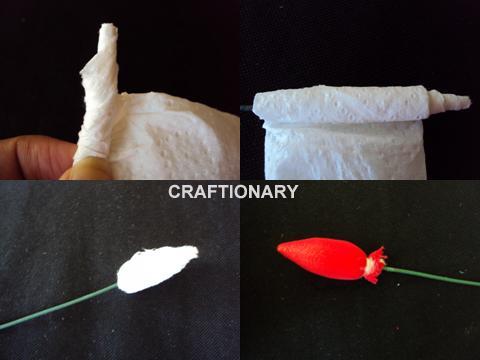
- Keep shaping the bud while wrapping. Stick the end when you’re finished.
See the picture below:
- Now wrap the white/ red stocking net over the bud 2 or 3 times.
- Follow the instructions for making petals and assembling the flower in the post Basic Nylon Flower.
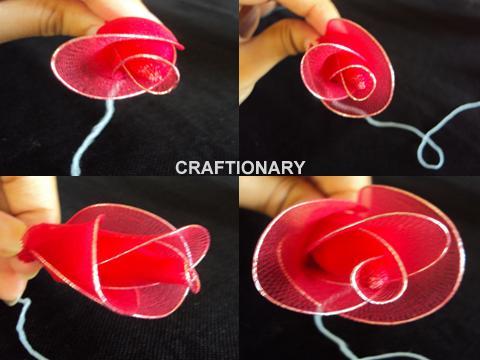
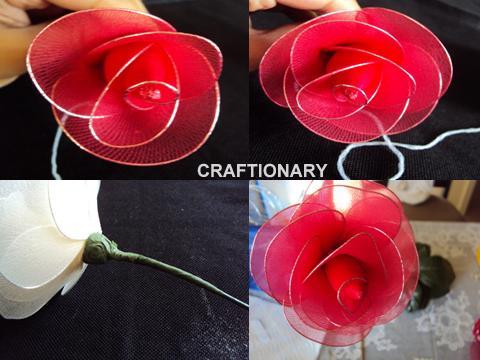
- Thread a petal to the bud and shape it; as shown below:
- Now thread all the remaining petals; in the order 3-4-4.
- Meaning 3 petals gathered around the bud closely, next 4 petals a little opened and then the last 4 petals completing and forming the rose.
- Wrap floral tape around the wires.
- Shape the petals to give the rose a final touch.
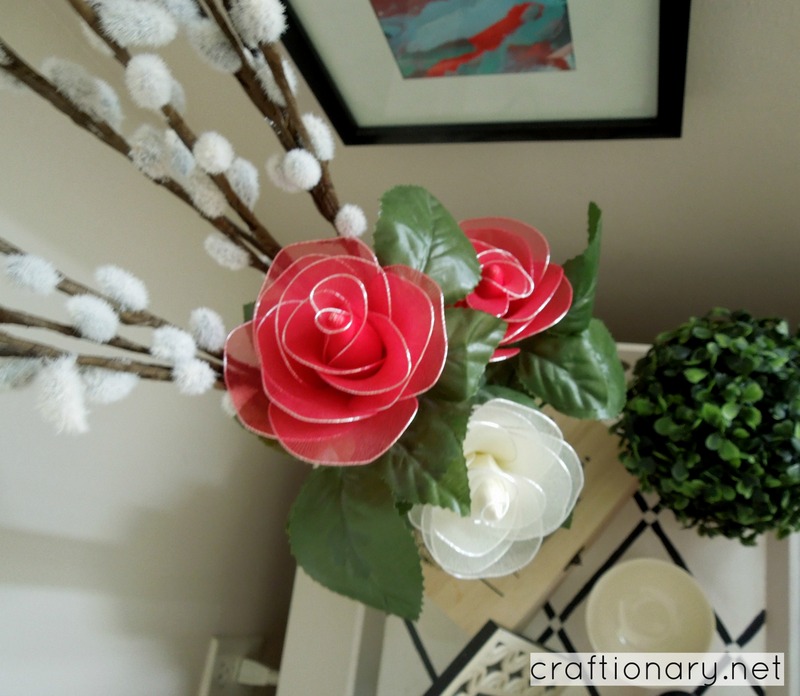
- Now join the leaves. Roses are incomplete without leaves.
- And place them in your vase.
I hope you enjoyed this easy nylon flower rose tutorial.
A lot of people ask me about nylon flowers. You can find all the information about material and more HERE.
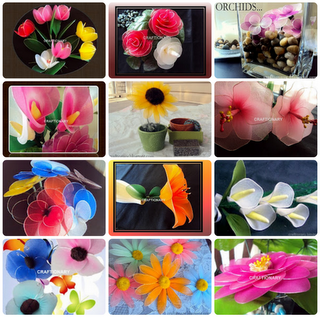
More tutorials on Nylon Flowers. Find tutorials to make all the flowers you see in the image above.
You will also like:
Spring burlap flowers
.
Ribbon flowers tutorial
Make nylon tulips (tutorial)
Looking for more great ideas?


v natural roses.plz guide how can v arrange them in different ways
thanks.. :)you can arrange them in flower vases or hang them over your walls.. if you like you can also accessorize them as hair bands, pins and on clothes.. they look really pretty..
Very sweet! Visiting from Fun to Craft.Love meeting new crafty peeps. :)Cheers!Jencariboobutterflycrafts.blogspot.com
Fabulous! And a great tute, too! Thanks for linking! I've scanned your blog and will be featuring several of your other wonderful flower tutes. Please join again any time!
Thanks for this, I've been making these nylon flowers for ages ever since I got back from Pakistan where they make a tonne of them!!! 🙂
Love,
The Creative Muslimah @ http://www.thecreativemuslimah.blogspot.com
First time I've seen these – absolutely lovely! Where do you purchase the supplies?
thanks.. 🙂
OMG! I haven't made these in years! They are gorgeous! Great tutorial.
Thanks.. you should give it a go again, it's always fun to try old crafts after a long time.. i'll love to see your creativity.. 🙂
omgoodness I was just thinking the other day about how I use to make these when I was a kid. so fun, & pretty!dominiquescraftcouture.blogspot.com
Yeah!! these flowers are back to the craft world after a long forgotten time.. 🙂
These are lovely! Thanks for your tutorial!
Just beautiful – the edging on the petals really stands out too. Thanks for linking to Craftastic Monday:)
oh, I am such a sucker for all things flower and these are beautiful! Thanks for linking up to Fantastic Friday. I hope that you will join us again this week.
Oh my gosh…these are so pretty. You are one creative lady!
These are ablolutely BEAUTIFUL! Love them! Such a great, thorough tutorial!
ladycreate-a-lot.blogspot.com
Gorgeous. 🙂 Lol my husband already went to bed. He's all like “Oh great you found another blog to spend hours on.” 🙂 I love it! But I better hit the sack. I'll be back! Have a great night!
thanks fostera..@ TJ Thanks.. I better go off to bed now too, this time changing thing has delayed my routine by an hour.. good night to your too..
hi fantastic work and easy tutorial
Beautiful! Thank u for sharing
Lovely!
Very pretty, my Grandmother use to make flowers from nylons. Brings back wonderful memories!
What an incredibly cool project! I can't wait to make some. Featuring your post on my Facebook page today. Thank you for linking up to “A Little Birdie Told Me…” at Rook No. 17!
Jenn
Thank you for the rose directions now if I can follow then I’m in business. Lol. Helen.