This post may contain affiliate links. Please see our full Disclosure Policy for details.
Loom knitting projects are extensive. When you search for loom knitting as a beginner you get overwhelmed as to where to start to understand if you will continue with this craft and make extraordinary loom knit blankets, sweaters, bags and more with free patterns online.
There are thousands of loom knitting patterns and how to use knitting looms. Most common is the circular loom knitting also known as round loom knitting available in stores readily. There are single knitting, double knitting as well as sock loom knitting tutorials. There is an excellent resource for cast on and bind off, along with techniques and stitches at learn to loom knit.
However, before we make the decision to buy supplies and get into making larger projects, my aim today is to share simple loom knitting instructions using a TP tube and yarn that produces knitting patterns without investing into knitting supplies, kits and looming tools as starters.
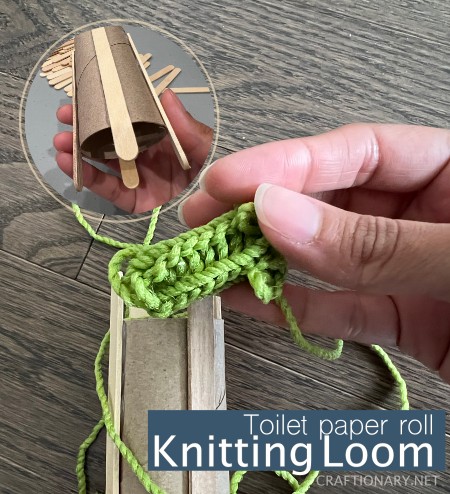
We are going to work on a simple knitting loom that is made using toilet paper roll. This loom knitting for beginners is a great project to make bracelets, friendship bands or garlands. You will find materials, written instructions and a video tutorial in this post. It is also ideal to start young girls and children into the knitting hobby and build patience skills as they practice making simple projects. The aim is to have fun before great things happen. Once that is achieved, ‘the world is your canvas’.
Beginner supplies for loom knitting
- Yarn
- An empty toilet paper roll
- Four pencils (chopsticks, popsicle sticks or straws) They should be 2 cm longer than the TP roll
- Tape or glue gun
Toilet paper roll corking tool for loom knitting
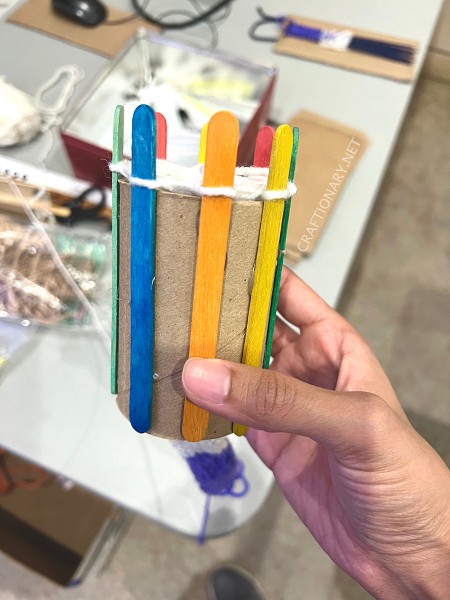
1. Casting On
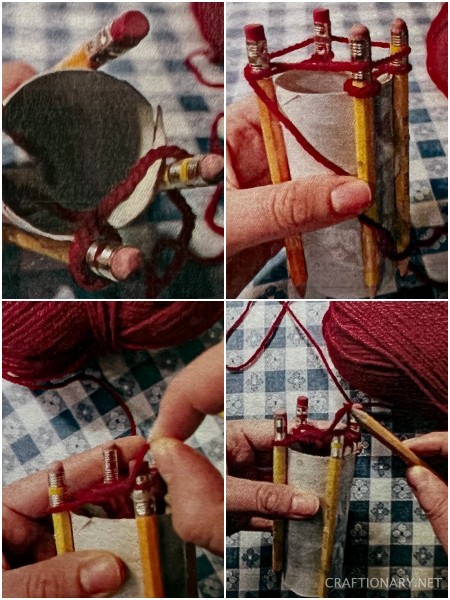
Tape the four pencils (or other sticks) to the toilet paper roll, spacing them out evenly. You can mark the spaces before taping them in place. Instead of using tape you can use glue gun to stick the pencils to the roll as well.
The pencils form the pegs of the knitting loom. You can also use more then four pencils for different sizes and patterns, but this is the basic beginner’s pattern for toiler paper roll corking for first timers.
2. Foundation stitches
Choose a favorite color for your working yarn.
Take the toilet paper roll and pull the yarn through it. Leave a little yarn at the end.
Hold the yarn in place with your left hand, and use your right hand to wrap the yarn clockwise around the first peg. Continue moving clockwise around the loom until you wrap each peg.
When all pegs have been wrapped with one loop of yarn, wind the yarn around the outside of all first peg to make loom knitting stitch. From the first peg take the bottom loop of yarn and lift it over the peg, as it passing the top loop over the peg and away. Make sure that the top loop stays on the peg. Do this with each peg.
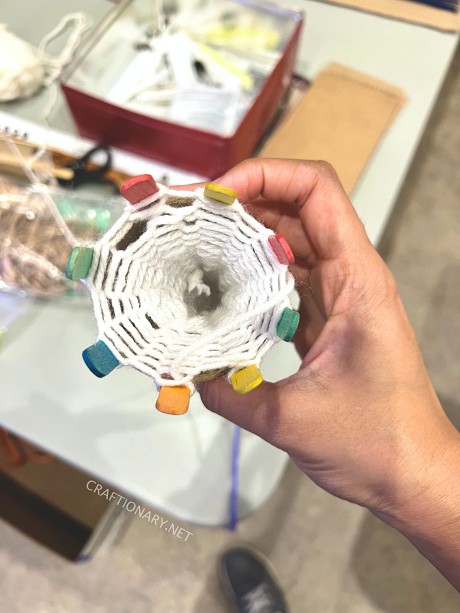
You have now made four stitches. In knitting, this is called casting on.
3. Get corking
Continue wrapping the yarn around the outside of the pegs and pulling the bottom loop of yarn over the top of the peg. If you like, use another pencil to help move the stitches over the top of the peg. Your cord will begin to emerge from the bottom of the toilet paper roll.
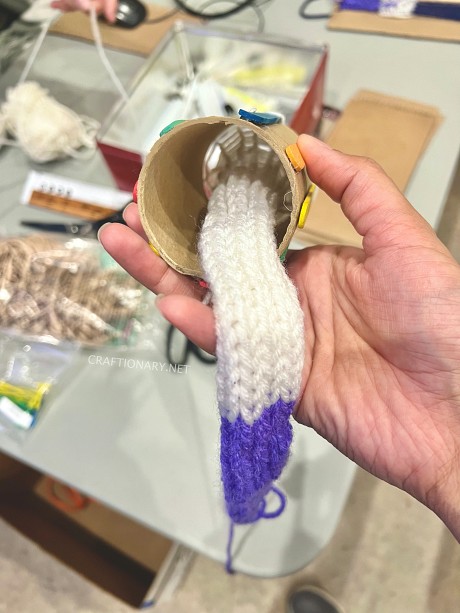
Repeat the same process, around and around, until your cord is as long as you want it to be.
Or you want to change the color. You can do this by cutting the previous colored yarn and joining the new color with a knot and continue.
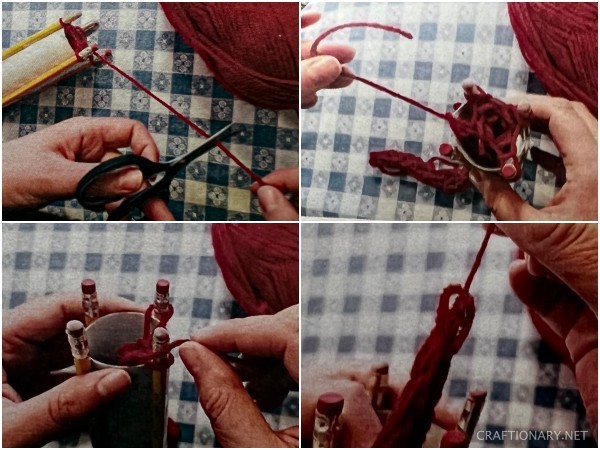
4. Casting off
Properly cast off your stitches to finish off corking. If this step is skipped the cord will unravel when you remove it off the loom.
Cut the yarn from the ball, leaving a tail of about 6 inches long.
Pull the end of the yarn through the last stitch you made. The yarn pulls off the peg as you do this. Make sure to pull tight.
Continue to the next peg and make a stitch on it. Repeat the pulling technique on each peg to make a stitch as it comes of the peg.
Repeat this step with the remaining two pegs and pull tight once more! You can now pull the finished cord out.
How to make a knitting loom from a TP tube
Here’s the detailed video showing how to make a toilet paper tube corking tool for beginners by Sophie’s World.
I hope you enjoyed this post.
You will also like:
Learn to warp and weft using cardboard loom
For latest project details stay connected with me on instagram.