This post may contain affiliate links. Please see our full Disclosure Policy for details.
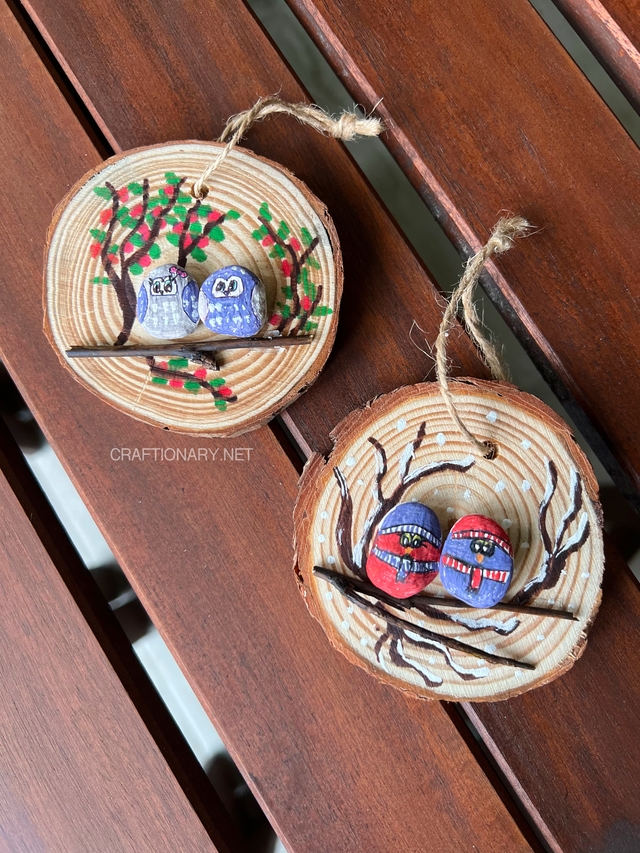
Make easy and cute owl rock painting on wood slice ornaments. This craft is fun to make with kids for winter, spring, summer and Fall.
The two natural materials rocks and wood slices are popular for crafts and DIY projects. Painted rock art for kindness and kids craft that we shared earlier and pebble art ideas are not only phenomenal artwork display but will inspire you to create more projects. While the use of wood slice ornaments in today’s craft is effective as a hobby or weekend project, don’t miss out these wood log and slice home decorations.
Let’s get crafting cute rock painting with owl on wood slice ornaments. You can use this painting to make birds on branches during different seasons too. It can be bluejay, robin, norther cardinal, or any of your favorites birds.
Related: Hand Painted Wood Slices: Easy Flower Painting Mindful Crafting
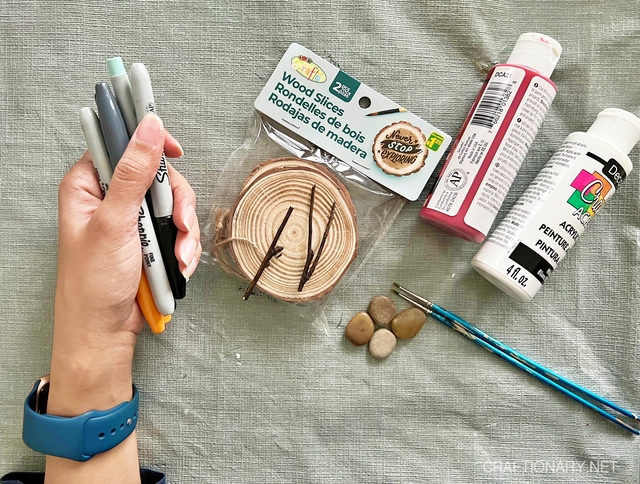
Material for rock painting:
Wood slices – for base. Use wood slice ornaments so you can hang them easily.
Twigs – for branches from the nature.
Smooth Stones – preferably round for owls.
Acrylic paints – white color to paint the rocks and snow. You can also use White gel pens for details and fine designs.
Fine Tip Paintbrushes – size 1 and 2 as we are working with small surface area.
Black pens or micro pens for outlining. Available in a variety of sizes for different thickness. Use it on dry paint to avoid damaging the tip of your pen.
Regular markers – sharpies, Permanent markers or metallic markers for doodling and fine detail drawing. Be sure to paint the rock base white before using these markers for best results. I am using sharpies brush tip for coloring and extra fine tip for details.
Hot glue gun – to stick the twig and rocks to the wood slices.
Related: Best Sealer: How to Waterproof Acrylic Paint on Rocks and Wood
Instructions for owl rock painting on wood slices:
Follow the video step-by-step instructions if you prefer visual painting tutorial.
Start by picking some rocks and twig that sets well in your wood slices! Once you are satisfied with the arrangement its time to start painting! While keeping them on the wood slice as indicators use a brown marker to roughly sketch your branches.
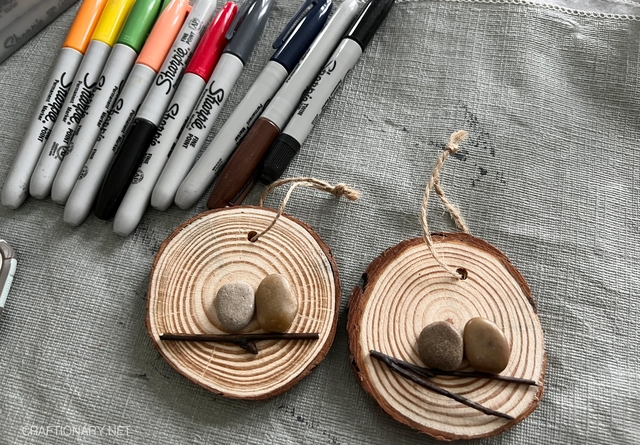
If your stones are dark in shade like mine, you will have to brush them with white acrylic paint such that when we make rock owls the colors are bright and visible!
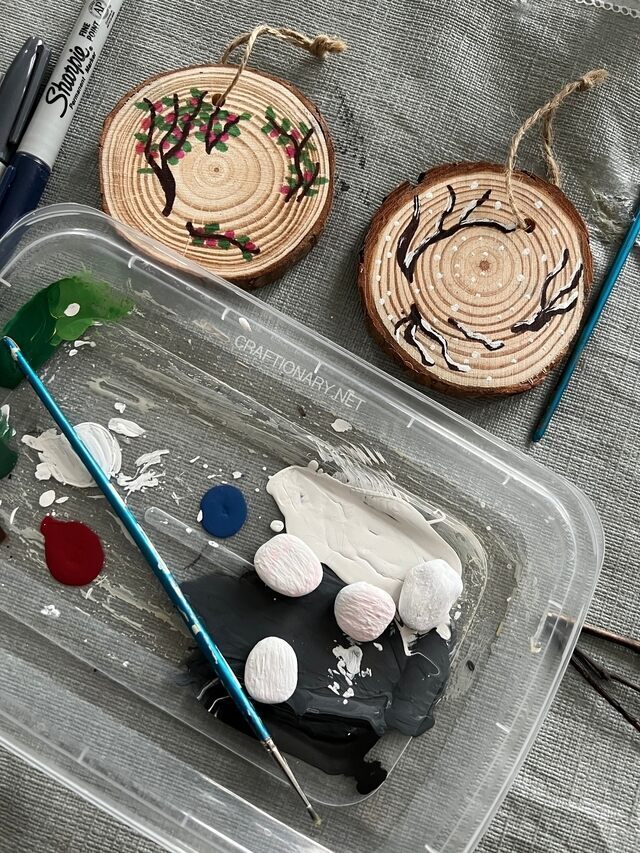
Let them dry and re-coat twice or thrice. You can expedite this process by using blow dryer to dry the stones!
Meanwhile set the twig in place and use brown marker to draw branches on both the wood slices! This can be random and as your heart pleases.
Winter Wood Slice
Use white acrylic paint to shade the upper side of the branches roughly not covering entirely to look like snow covered branches. Then dip the paintbrush in little paint and remove the excess. Use the tip to tap on the wood slice to make snow.
Spring Wood Slice
On the other wood slice create a blossoming branch. Paint with green marker for leaves and pink for blossoms. You can also use varying shades of green and pink to make it most interesting. Also note that your blossoms can be any color. Use a fine tip marker to outline leaves and blossoms.
Now that your base is ready, lets paint the rocks. You can lookup painted owls for other options or follow my design to make your owls.
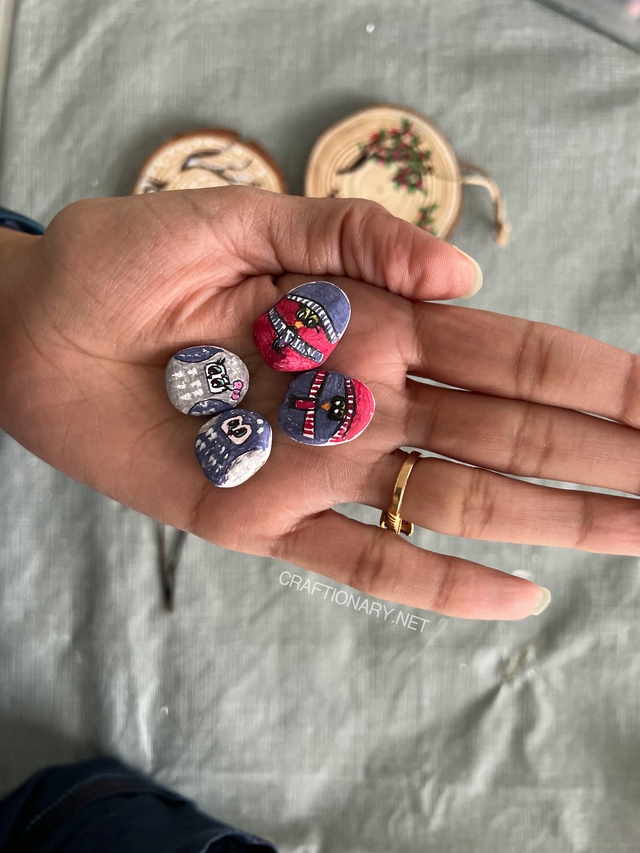
Winter Owl Rock Art
I chose to dress my owls in warm blue and red colors. They are wearing a hat, sweater, and scarf to stay warm and comfy.
Tip #1: Make sure your stones are completely dry before using markers to avoid damaging the tip.
Tip #2: You can always paint the surface white and start again if you make a mistake.
Start by using a extra fine tip black marker to outline the parts. Make a curve for the hat and oval eye sockets with upside down triangle for beak. Outline the scarf as well.
Now use red and blue markers to color the white spaces leaving the eye sockets and scarf areas white.
Draw vertical lines to make some patterns on the scarf and hat border. You can do anything your heart desires to dress up your owls here. The ideas are endless.
Now make large eye balls leaving white space for cuteness. Make eyelashes for the lady owl. Use yellow to paint the outer part of the eye and orange for the beak.

Spring Owl Rock Art
I used blue and grey to make these cute owls for summer.
Start by drawing curves on the sides to replicate the wings of the owl with a extra fine tip black marker. Make the eye area as shown in the picture and draw oval eyes and beak inside. The eyes should look like they are seeing each other. Keep the space white. Draw eyelashes and use green marker to color the outer part of the eyes.
Make a bow clip on the side of the lady owl and color it pink or any color you like.
Use blue and grey sharpies to shade the wings and body areas of the owls. Now use a size 0 paintbrush and touch it in paint such that very little paint is on the paint brush. Dab the brush on the body and wings of the owl to look like feathers.
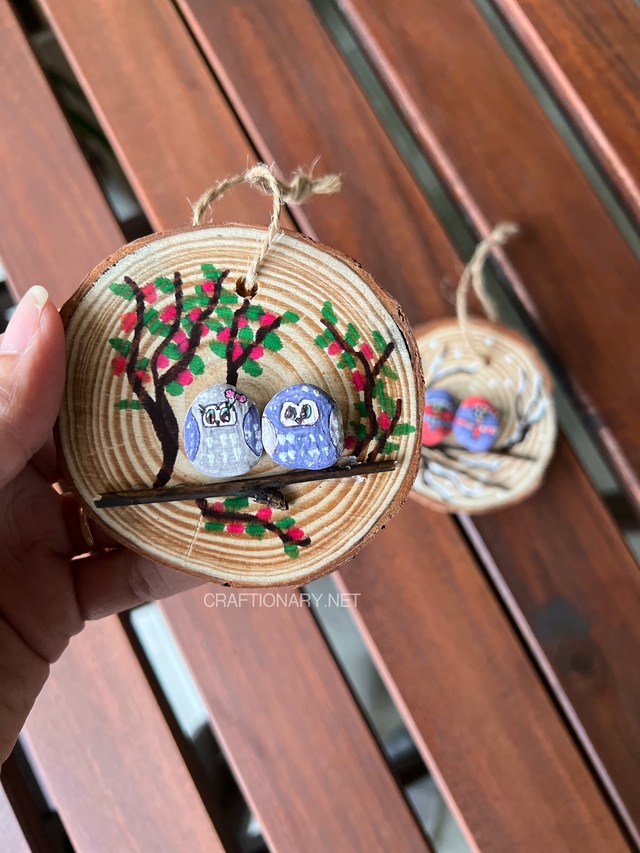
The rock owl paintings are ready to complete the wood slice craft for seasons. You can follow these instructions to create a cute scene for Fall and Summer as well. Use orange and yellow markers for Fall branches and green markers for Summer branches.
Rock Owl Painting Wood Slice Craft
Use hot glue to stick the twig and painted rocks on the wood slices and its ready to hang as ornaments on a Christmas tree or as I prefer as decorations in my indoor garden.
I hope you enjoyed this tutorial! Till next time!
You will also like:
Rock Painting: Charming Cottages on Rocks With Free Printable