This post may contain affiliate links. Please see our full Disclosure Policy for details.
Yarn rosettes are one of the most versatile and beginner-friendly crafts you can make. With just yarn and simple braiding, you can create soft spiral flowers that work beautifully for home décor, gift wrapping, hair accessories, wall art, clothing embellishments and handmade cards. These yarn rosettes resemble crochet flowers.
Learn how to braid yarn and spiral it into a rosette, producing neat, dimensional yarn flowers that look impressive but are very easy to make.? To make yarn rosettes you only need yarn or embroidery floss. The thicker your yarn is the bigger flower you get from a small braid. Scrap yarn works perfectly, making this a sustainable craft project.

Materials Needed for Yarn Rosettes
You only need a few basic materials.
Essential Supplies
- yarn (any type)
- scissors
- needle and thread or craft glue
Optional Tools
- crochet hook (for tightening braids)
- felt circles (for backing
- fabric glue
- hot glue gun
Best Yarn Types
For defined rosettes use:
- cotton yarn
- acrylic yarn
- lightweight wool yarn
- Very fluffy yarn may hide the braid pattern.
How to Make Yarn Rosettes?
Here’s a tutorial to help you learn how to make rosettes with yarn.
1. Prepare the Yarn Strands
Cut three equal strands of yarn.
Recommended length:
- 18–24 inches for small rosettes
- 36 inches for larger flowers
Tie a small knot at one end to hold the strands together.
2. Make a Yarn Braid
Braiding yarn is the foundation of a structured rosette.
How to Braid Yarn
- Separate the three strands.
- Cross the right strand over the middle strand.
- Cross the left strand over the middle.
- Repeat until the entire length is braided.
- This is the same technique used in hair braiding.
- Keep the braid slightly loose so it spirals smoothly later.
- When finished, tie another knot at the end.
3. Flatten the Braid
For a cleaner rosette shape:
- gently press the braid flat
- adjust tension evenly
- straighten any twisted sections
- This step helps the spiral sit evenly.
4. Start the Rosette Center
Now transform the braid into a flower.
- Take one end of the braid.
- Roll it tightly into a small spiral.
- This becomes the center of the rosette.
- Hold it firmly between your fingers.
5. Spiral the Braid Around the Center
Continue wrapping the braid around the center.
- Important tips:
- spiral slowly
- keep braid flat
- adjust spacing
- This technique naturally creates petal-like layers.
- The braid texture gives the rosette a beautiful dimensional look.
6. Secure the Yarn Rosette
Once the spiral reaches your desired size you can secure it with a variety of choices:
- Sewing – Use needle and thread to stitch through the back of the rosette.
- Glue – Apply small dots of craft glue between layers.
- Felt Backing – Glue the rosette onto a small felt circle to stabilize it.
7. Shape the Rosette
- Gently adjust the spiral layers.
- Spread outer loops slightly to mimic flower petals.
- Your yarn rosette flower is now complete.

Here’s how the rosettes look. The purple one is made with thread. And the pink with yarn.

Creative Yarn Rosette Variations
Once you master the basic technique, experiment with different styles.
Multi-Color Rosettes
- Use three strands of different colored yarn.
- This produces beautiful gradient effects.
Chunky Rosettes
Use thick yarn to create larger statement flowers.
Mini Rosettes
Use embroidery thread or thin yarn for delicate flowers.
Twisted Rosettes
Instead of braiding, twist yarn strands before spiraling.
- Tie the threads at the beginning point.
- I used 6 threads per side to make thicker braids.
- Now twist the two together, and tie at the other end.

Roll the twisted braid into a rosette, and use glue and felt to finish.

Easy as a pie! You will have tons of pretty rosettes like these in an hour. Have fun, mix and match different colors and make yarn rosettes.

You can use these to decorate many things. Like a lamp, jewelry box, vase, wreath or wall art.
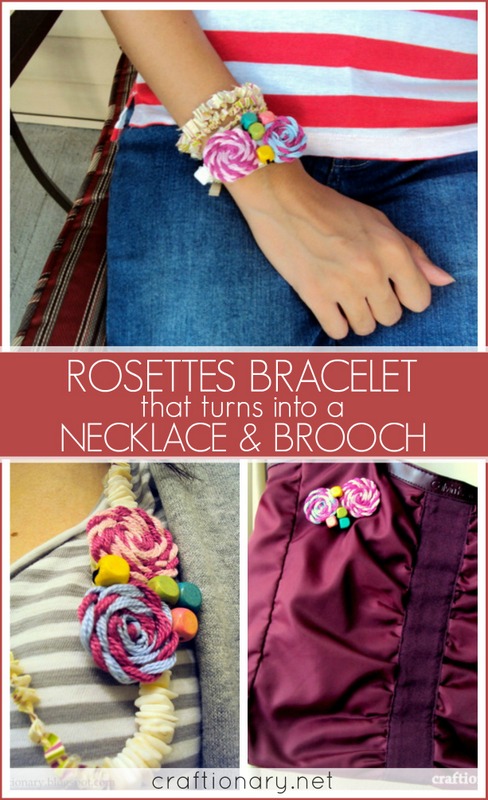
Yarn rosette jewelry
I made a Yarn rosettes DIY necklace that can also be worn as a bracelet or brooch. Perfect for spring and summer parties.
Jazz up your old jewelry with a girlish touch. Just like these rosette earrings.

or add a flower to a beaded bracelet.

How about a bunch of flowers on the strings? Make cute necklace.


I also used these flowers to decorate tin organizers. Recycle tin cans into organizer.
Creative Projects Using Yarn Rosettes
Yarn rosettes can decorate many handmade projects.
1. Home Decor
- wall hangings
- wreaths
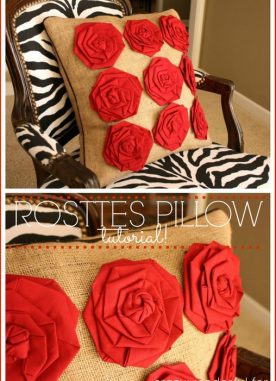
- decorative pillows
- picture frames
2. Fashion Accessories
- headbands
- brooch pins
- hair clips
- scarves
3. Gift Wrapping
Replace bows with yarn rosettes for a handmade touch.
4. Craft Projects
- scrapbook embellishments
- greeting cards
- fabric art
- textile collage
Tips for Perfect Yarn Rosettes
These techniques improve results.
- Keep Braid Tension Even: Uneven braids create uneven flowers.
- Use Soft Yarn: Flexible yarn spirals more easily.
- Secure the Center First: If the center loosens, the entire rosette shifts.
- Experiment With Size: Different braid lengths produce different flower sizes.
Common Problems and Solutions
- Rosette Looks Loose – tighten the center spiral before continuing.
- Rosette Won’t Stay Flat – glue onto felt backing.
- Braid Twists While Spiraling – flatten braid before rolling.
Frequently Asked Questions
What yarn is best for making yarn flowers?
Medium-weight acrylic or cotton yarn works best because it holds shape without becoming bulky.
How long does it take to make a yarn rosette?
Most rosettes take 5–10 minutes once you learn the technique.
Yarn rosettes are a simple craft with beautiful results. With just yarn, basic braiding, and spiraling techniques, you can create soft handmade flowers that enhance countless creative projects.
Whether you are decorating a gift, making a textile art piece, or simply enjoying a relaxing craft session, yarn rosettes are a rewarding and versatile craft to learn.


Very pretty Hani!! Have you been by the blog lately? If not… maybe you should venture over and check out Monday's post!
What a great idea, thankyou! another flower to make 🙂
Nice, these look really easy too!
Very cute. I'm book marking this to do as a summer time craft activity.
Very cute. I'm book marking this to do as a summer time craft activity.
Cute! Please stop by and join our link party:
These are soooo cute! Thanks for sharing such a clear tutorial! Awesome!
Thanks for sharing such an amazing and useful tutorial… !!! All the flowers and the colors of yarn is looking fabulous.
so awesome. you can seriously do so much with them…love itxoxo ash
How cute & smart rosettes 🙂
thanks a lot for the idea & nice tutorial..keep rocking!!!
Real good stuff Hani. Love to see all the work done by you. Keep doing this kind of job.
So cute! I love to crochet too : )
Fun stopping by to visit with you!
Kindly, Lorraine
I really like the simplicity of these roses!! Very cute
These are really cute! Thanks for the tutorial!
Cute! Love this version of rosettes.
thanx for the tute Hani!!.. will try it out soon!hugs, mini
OH MY GOSH!! These look great!! I gotta go get some yarn! 🙂
Love these! thanks for the tutorial, I pinned this 🙂
I make these but I have always just done a single crochet stitch then rolled them. I love yours too. Thanks for linking to Bacon Time.
Wow very creative and pretty! 🙂
love these!!!! I´ll feature on my blog
hope you don´t mind
hugs from Brazil
So cute! Thanks for linking up last week. Can't wait to see what you have for thursday's party!
cute post..Icame herefrom craftgossip…if you are interested in fabric jewelry I have a giveaway running currently in my blog…please come
Hani these rosettes are so sweet!! Thanks for linking up to Think Pink Sundays! I featued them today.
I love these! I just featured them on a vision to remembers check me out saturday highlights. You can find them
Lovely! Thanks for sharing!
Now I know what to do with all my yarn leftovers! How cute! We would LOVE to have you link this up to our giveaway and party!
These are so, so cute!!
I'm visiting from TT&J.. Have a great week!!
Cute idea!
very pretty and Endless possiblilities!!!come and link it up at woot woot wednesdays!
These look fantastic. I have made them with ribbon but these would be perfect for making smaller ones!Thanks for sharing :-)Lowri
This is such a great idea – love it and going to have to make some! : )
Cute! I have more yarn than I know what to do with, this might help the stash!Emily
These are amazing. I love how crocheted flowers look but I don't have a clue how to make them. These look wonderful. I would love it if you would stop by and link this up at the crafty link party going on right now at Lines Across My Face. I hope to see you soon,Rachel.
Cute! I know what I'll be doing with my yarn scraps!
Very sweet! I love it! I hope you will link up to Scrappy Saturdays linky party
What a fantastic idea! I'll have to try this for my baby headbands. Even my 10 year old will have no hassles making these! Thanks for sharing :)Cass
What a brilliant idea, these would look great on headbands, cards, scrapbooking anything. Thanks so much for sharing, have pinned and will definitely be using!
Great ideas and love it! thanks
Love your yarn rosettes. They are really cute. And they look really simple to make. Thank you for sharing your wonderful tutorial. I just featured them on my blog.
Very nice! Thanks for sharing.
What lovely rosettes – and so easy to make. Just shows that things don't have to be difficult to make to be beautiful.Thank you very much for sharing these.
I love these. They seem to be easy to make. I love handmade flower decorations.