This post may contain affiliate links. Please see our full Disclosure Policy for details.
Jewelry organization has shifted away from hidden storage toward functional art. Whether you’re protecting high-end heirlooms or displaying bold costume pieces on jewelry organizers, the right DIY setup prevents the two biggest jewelry enemies: tarnishing (oxidation) and tension tangles.

New Jewelry Organizers
There are many repurposing options to keep your jewelry organized creatively like dress form, paint stick, cork board, twigs, flower pot, thread spools, repurposed birdcage, cheese grater, tennis racket, vase, fancy bottles, pegboard, mini bottle containers, lamp, thread spools, muffin tray, egg tray, driftwood, ladder, animal horns, vintage teacups, secret art jewelry box, secret old book jewelry box, pill case, ice cube trays.
1. The Strategy: Location and Preservation
Before building, consider the environment.
- Avoid Humidity: Never store silver jewelry in a bathroom; moisture accelerates tarnishing.
- Direct Sunlight: Prolonged UV exposure can fade certain gemstones (like Amethyst or Rose Quartz).
- Accessibility: Place your everyday pieces at eye level and special occasion items in protected, dust-free zones like cabinets or shadow boxes.
2. Wall-Hanging Organizers: The Space-Savers
Vertical storage is the most efficient way to keep chains from knotting.
- The Naturalist Driftwood Branch: Use a piece of sun-bleached driftwood, drill small pilot holes, and screw in brass cup hooks. This creates an organic, high-end look.
- Industrial Copper Pipe: Use 1/2-inch copper pipes and S-hooks for a sleek, modern aesthetic that fits Maximalist or Industrial room themes.
- The Upcycled Rake: A vintage garden rake head (cleaned and sealed) is the perfect width for hanging heavy statement necklaces.
- The Luxe Wood Block: Stain small hexagonal wood blocks and attach brass dowels. Arrange them in a geometric pattern on your wall for a modular, art-gallery feel.
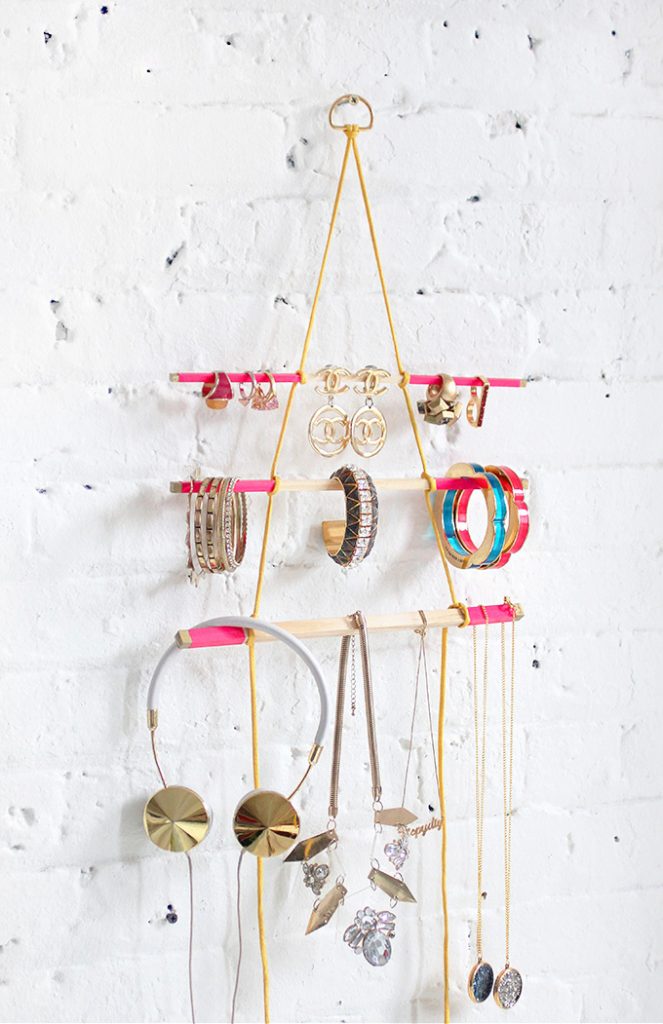
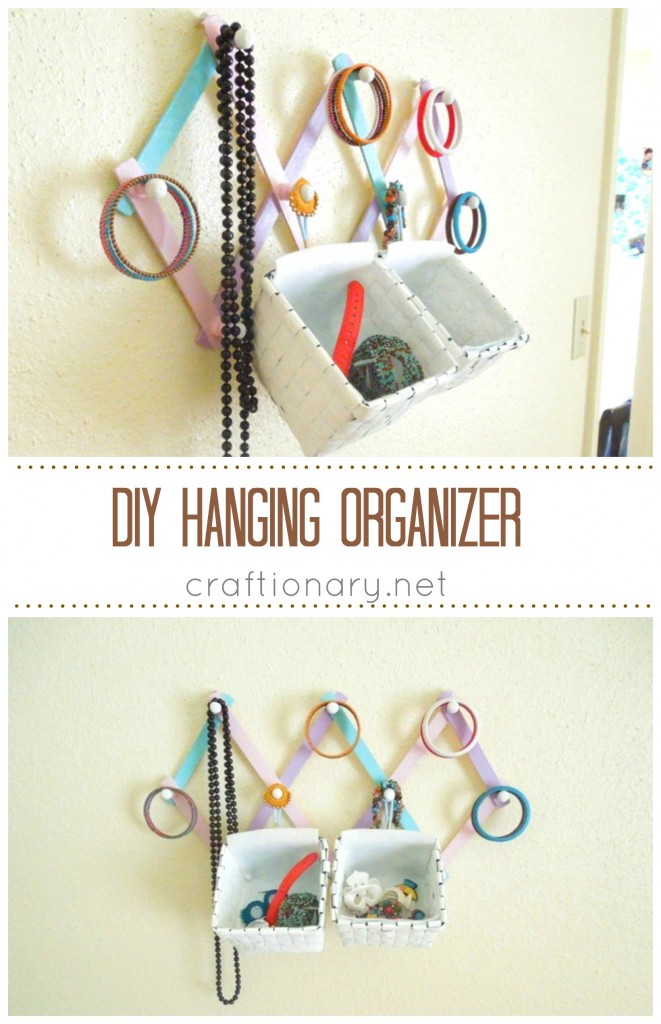
DIY hanging jewelry holder is made with dowels and paracord and decorated with gold paint and washi tape.
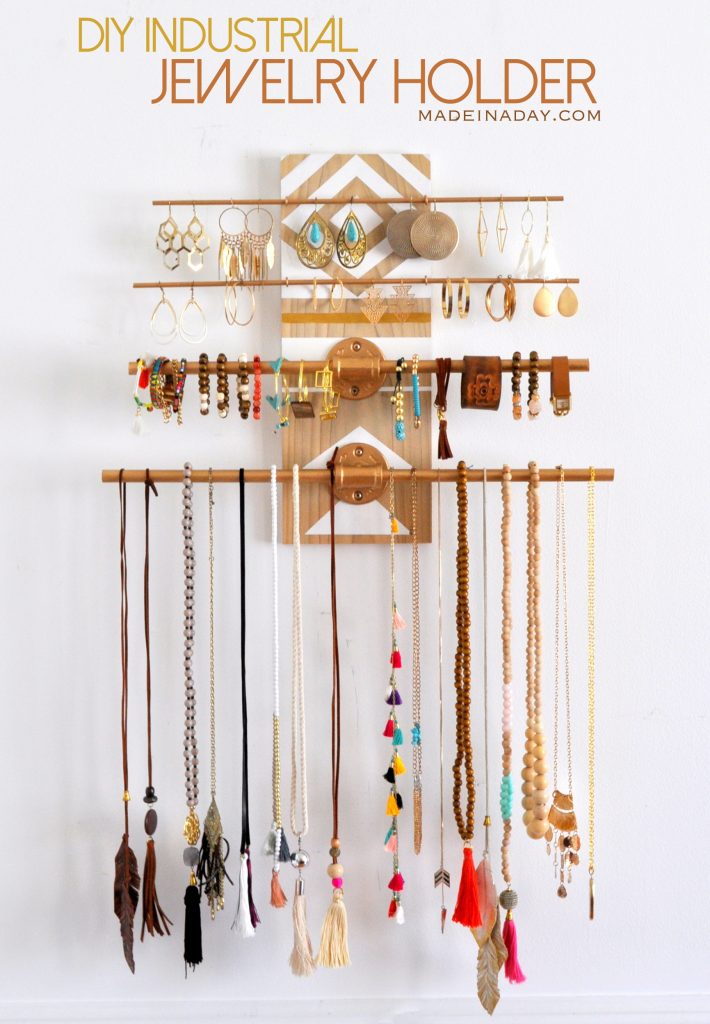
DIY geometric industrial wall jewelry organizer made with rods screwed into a wood panel that is sturdy and impressive.
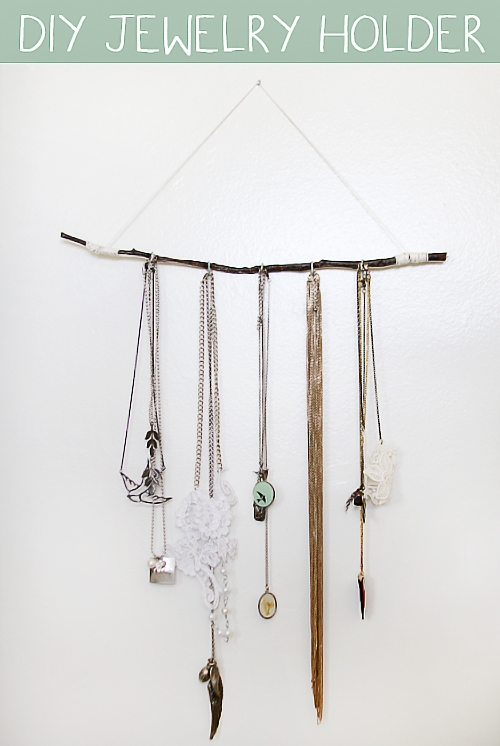
DIY Eco-Friendly Jewelry Holder with DIY twig and thread.
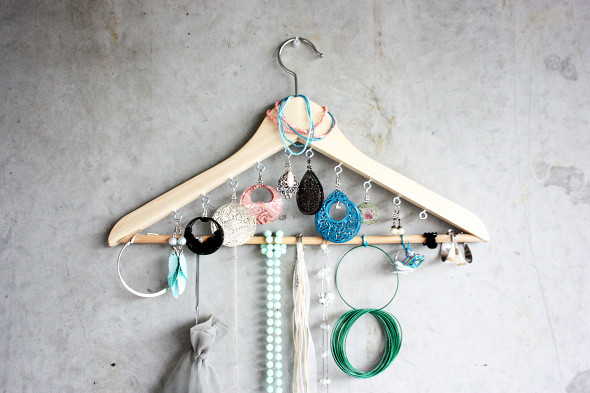
Coat Hanger Jewelry Organizer – Screw a few hooks into a coat hanger
Arrow Jewelry Holder
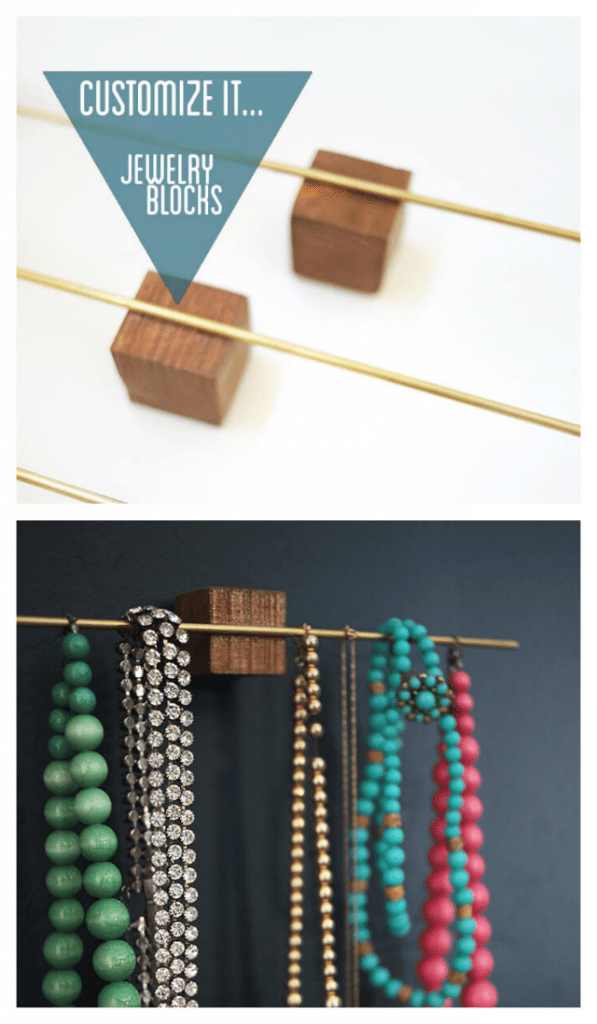
Jewelry organizer with stained wood blocks and brass dowels

Drill holes in driftwood board and use wood glue to connect wood sticks to the board. Use vibrant watercolors to decorate it.
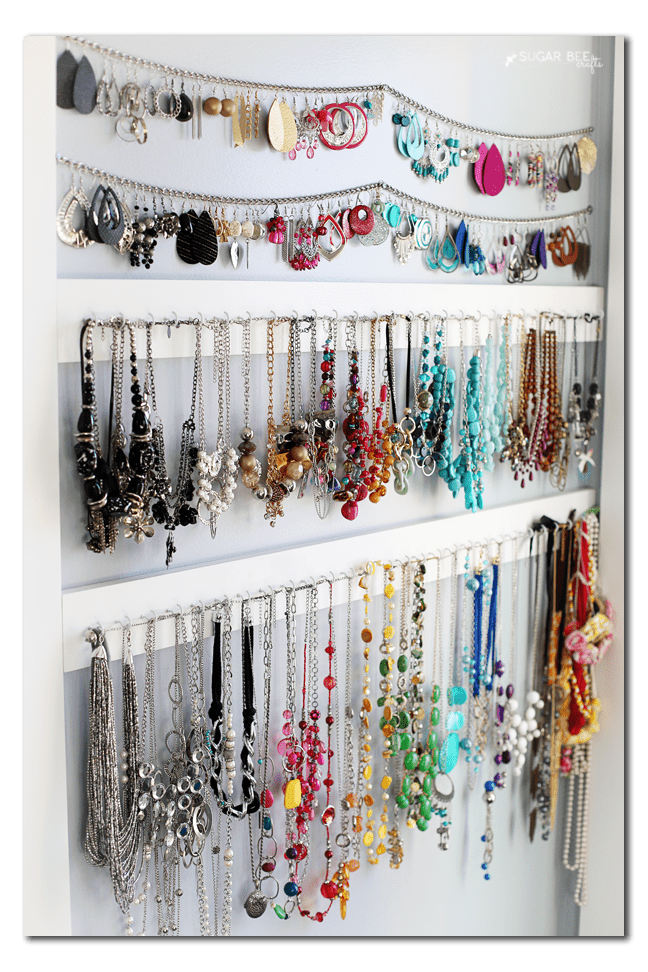
Screwed hooks on the wood log to hang necklaces and hang a chain on for earrings on a wood panel for a large jewelry collection.
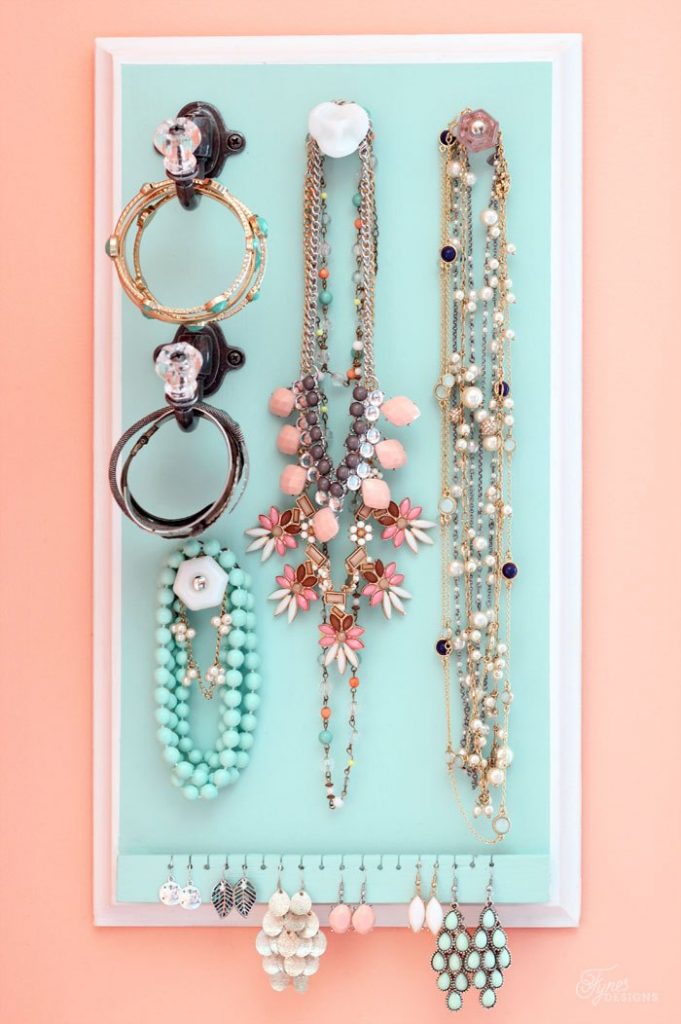
Jewelry organizer made using a wood board or frame and door knobs.
DIY hanging organizer with coat rack. Cute and easy to make for teenagers and girls.
3. Cabinet and Hidden Storage: For the Minimalist
If you prefer a clean room aesthetic, use the hidden real estate inside your furniture.
- The Secret Door Panel: Attach a corkboard or felt-lined panel to the inside of a closet door using Command strips. Use decorative push-pins for earrings and hooks for necklaces.
- Repurposed Utensil Trays: A wooden kitchen utensil tray fits perfectly inside most dresser drawers. Line the compartments with velvet or felt to prevent scratching.
- The Shadow Box Cabinet: Use a deep frame with a hinged door (a shadow box) to keep dust off delicate pieces while still keeping them visible.
Shadow Box Jewelry Holder

Medicine cabinet to jewelry organizer
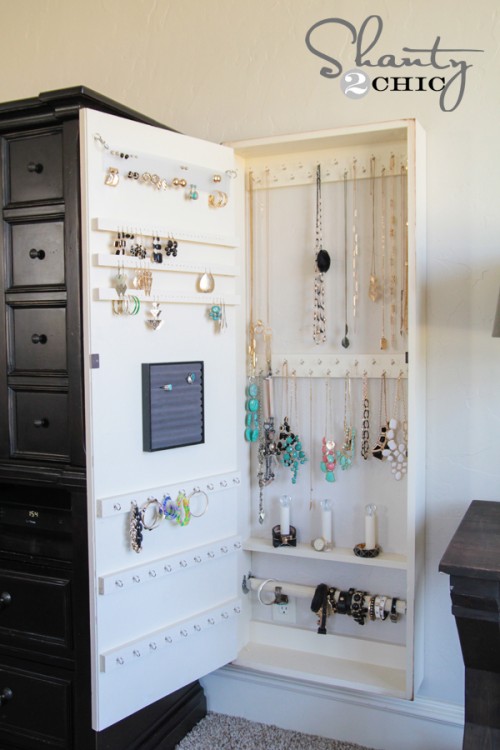
Make your own custom jewelry cabinet from scratch and keep your jewelry neat and proper on the side of the dresser.
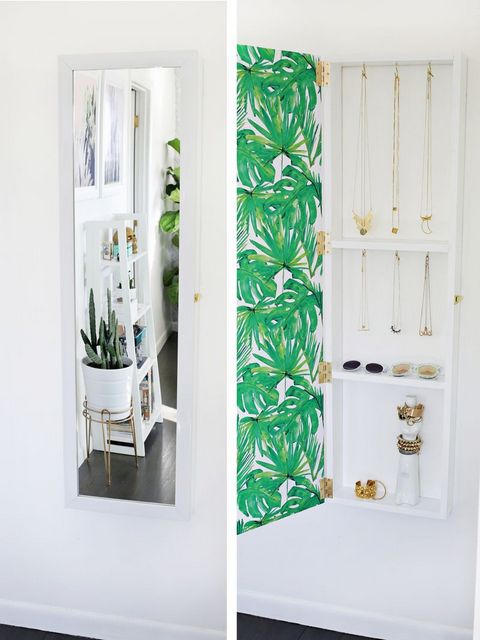
DIY mirror jewelry cabinet
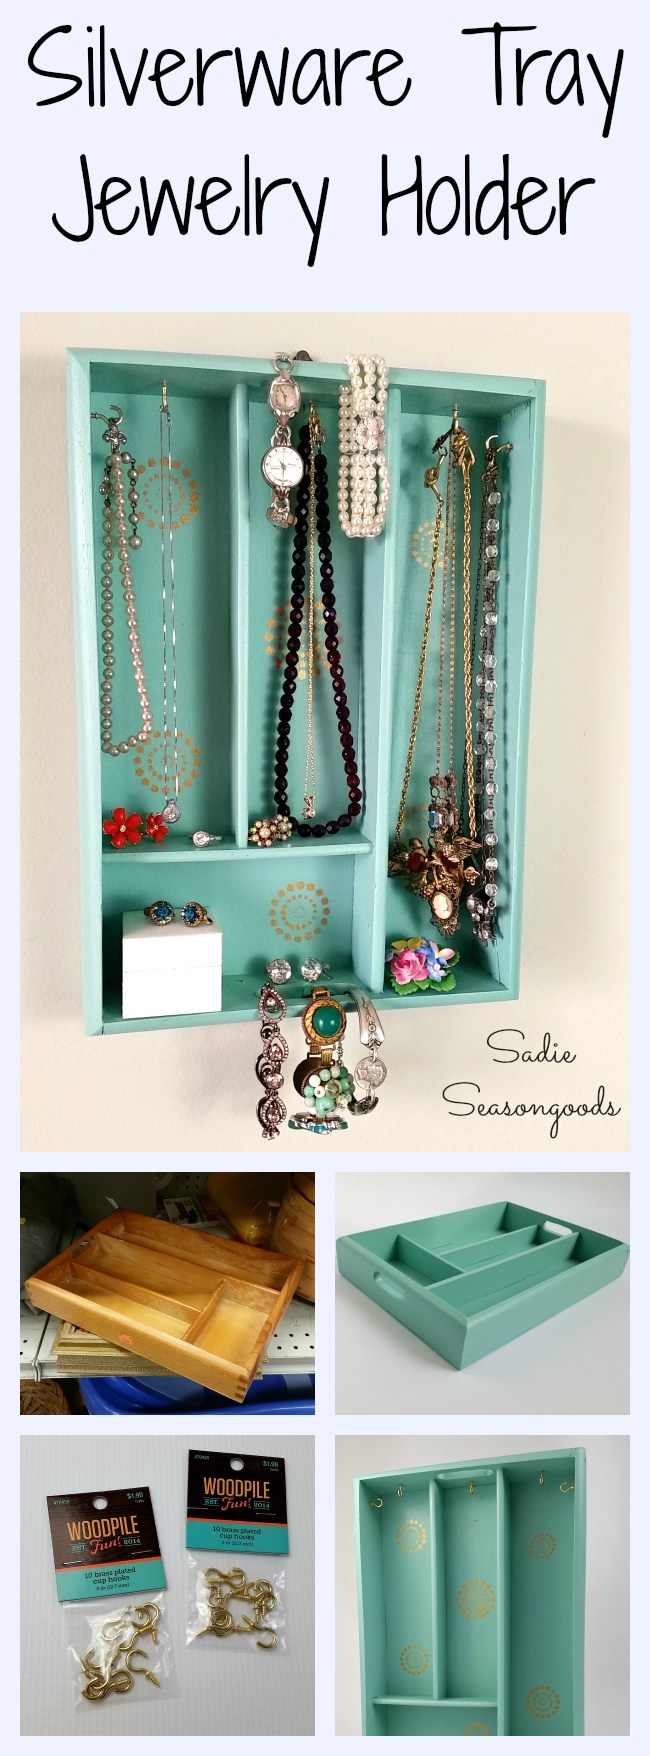
Repurpose utensil tray for jewelry storage
4. Framed and Tabletop Displays: Functional Art
- The Hardware Store Frame: Take an ornate vintage frame, remove the glass, and staple decorative radiator metal sheeting or chicken wire to the back. This is the ultimate zero-tangle solution for hook earrings.
- Tiered Thrift-Store Trays: Glue a mismatched tea saucer, a salad plate, and a dinner plate together using a glass candlestick as the pillar between them. Spray paint the whole unit a matte black or champagne gold.
- The Boho Dreamcatcher: Use a macramé hoop and weave a loose web of twine. Hook your earrings directly into the twine for a soft, textural display.
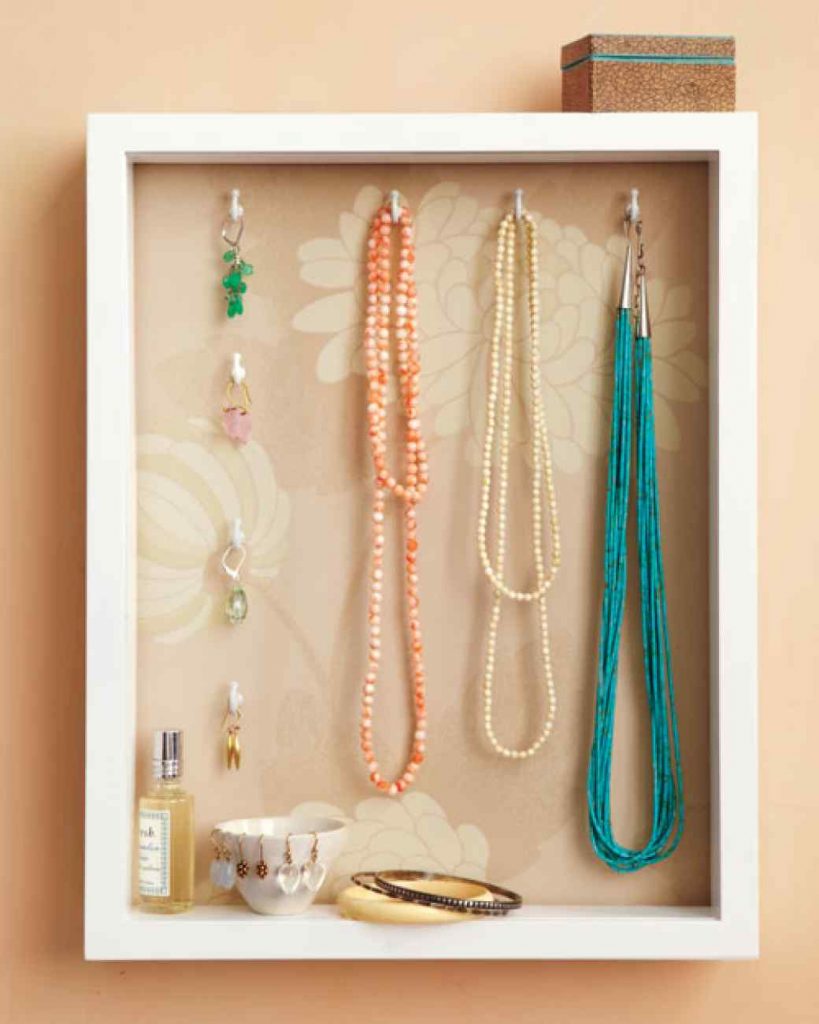
Picture Frame Jewelry Organizers
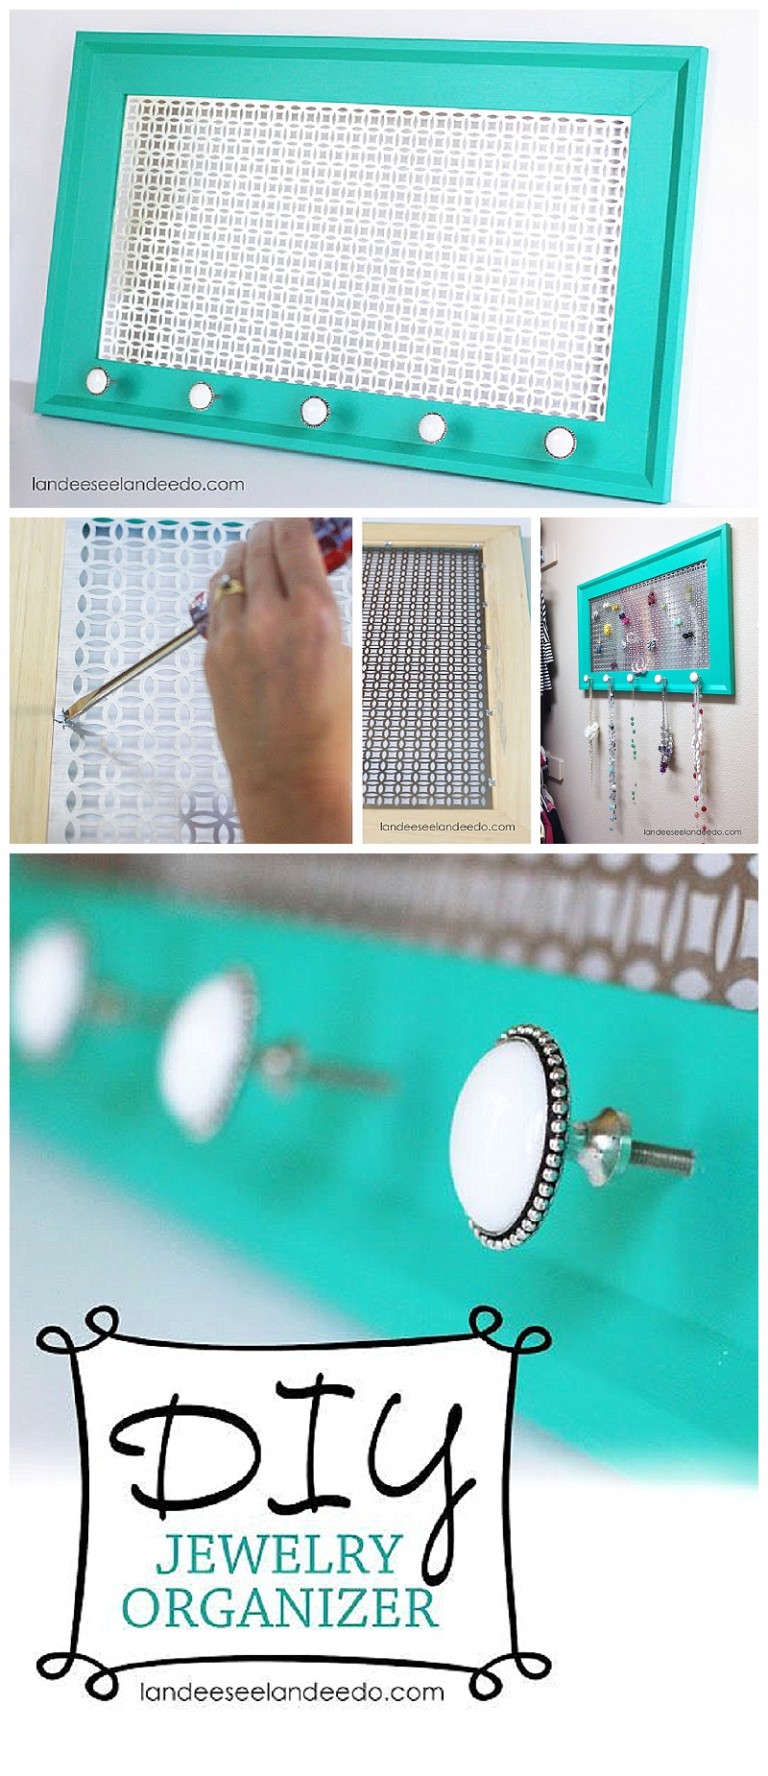
Turn a frame into hanging organizer with decorative metal sheet, knobs and hooks.
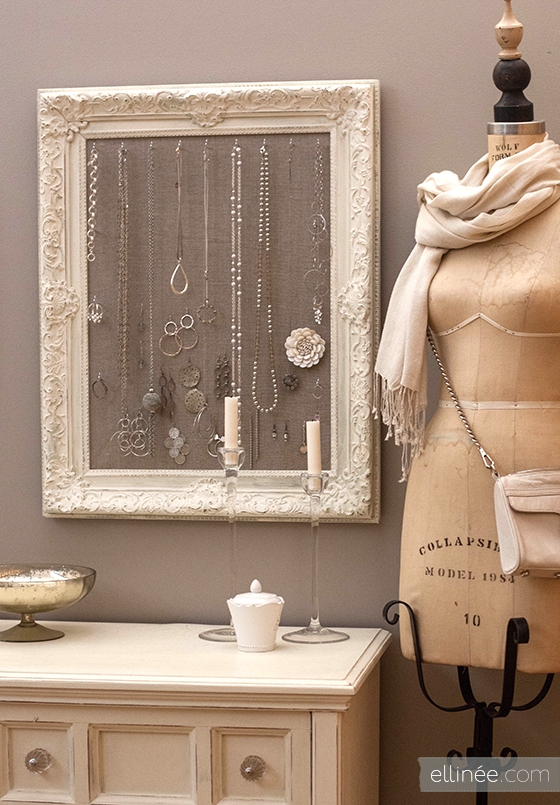
Fabric Covered Antique Frame Jewelry Holder
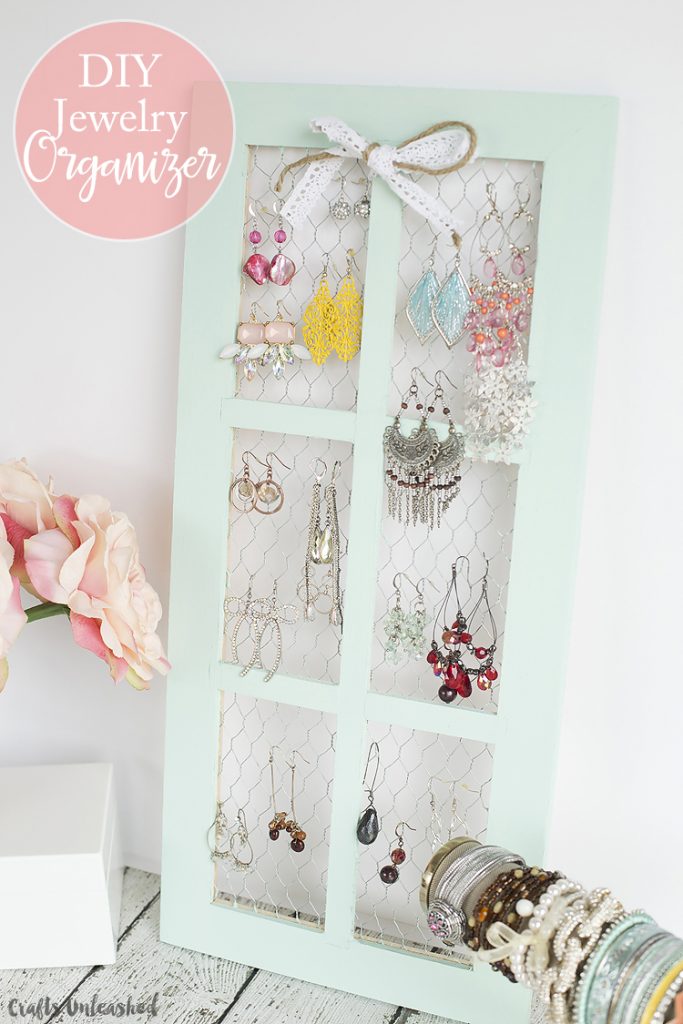
Use a wood stapler to attach chicken wire to an old window sill after removing the glasses.
Related: 40 Efficient Uses for Old Windows Ideas

Cover a cork board with your choice of fabric to make a hanging jewelry holder.
Table Top Jewelry Organizers
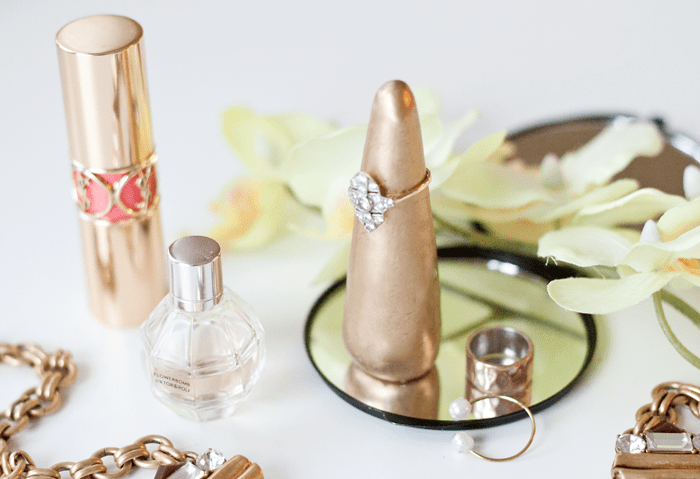
Gold Painted Clay Ring Holder
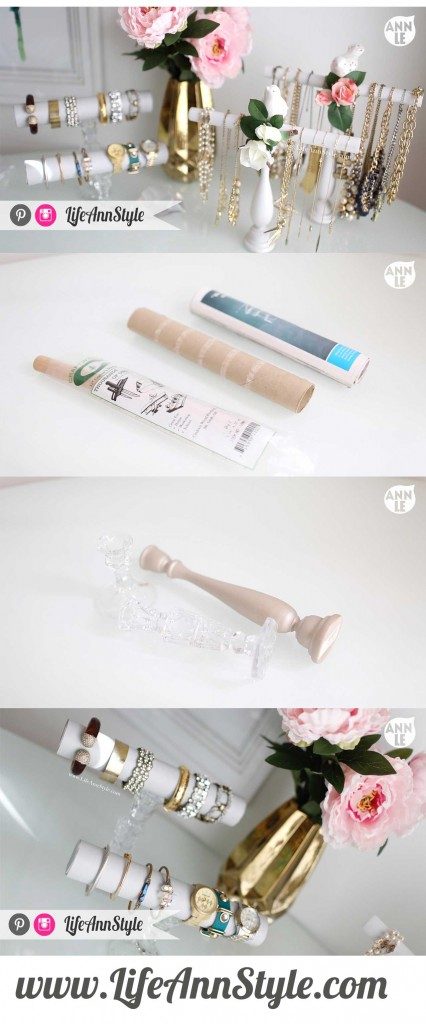
Use pvc pipes rolls and candle holders to make an easy and decorative display for your bracelets and necklaces.
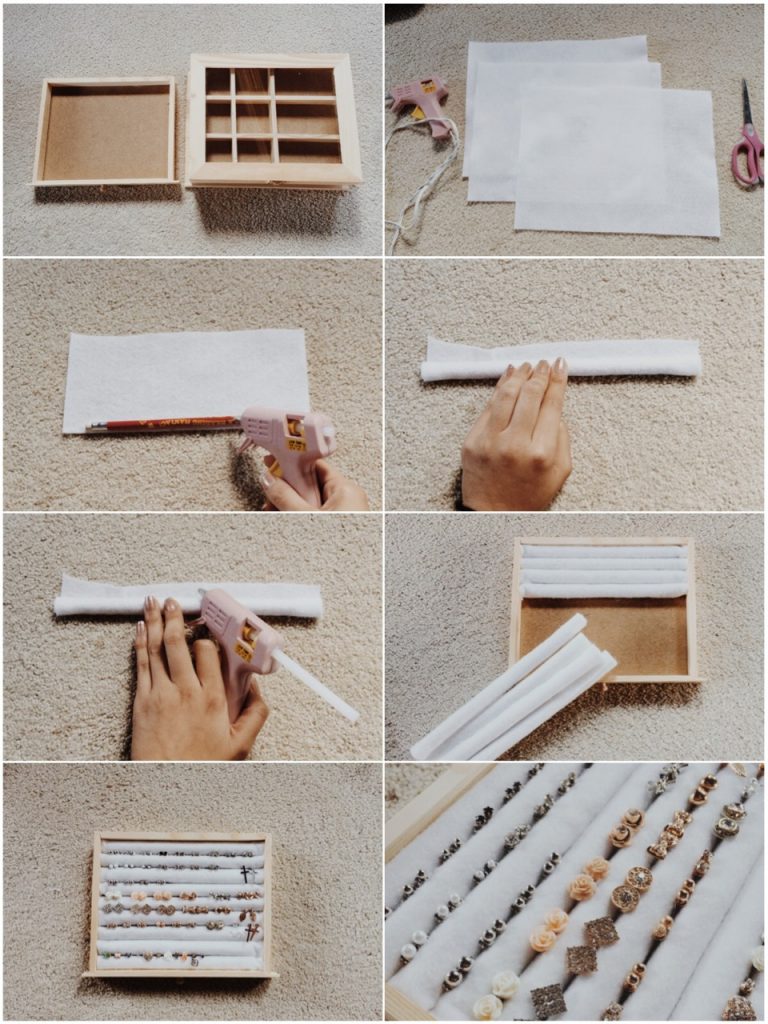
Roll sheets of felt and hot glue the ends. Stack them in a wood tray to organize earrings.

Repurpose thrift store finds with glue and spray paint to make a three tier jewelry display.
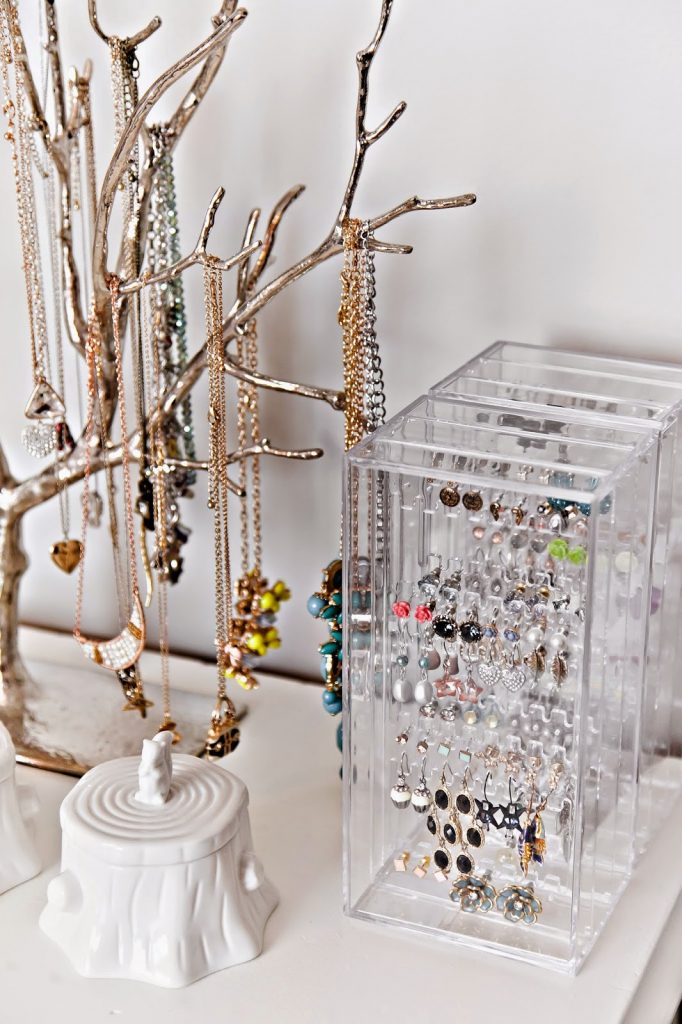
Decorative jewelry stands
5. The Industrial-Chic Brass and Clay Earring Bar
For those who want a professional look with minimal tools.
Related: 30 Polymer Clay Jewelry Ideas to Help You Get Started
Unique Materials:
- Air-Dry Polymer Clay: (Terra cotta or marble effect).
- 1/8-inch Brass Rods: (Found at hobby or hardware stores).
- Micro-Drill or Needle: To create holes in the clay.
Related: The Ultimate Guide to Clay Crafts: Air-Dry Clay vs. Polymer Clay?
Instructions:
- Base: Roll the clay into two thick rectangular blocks (roughly 2 inches long). These will be your anchors.
- Prep: While the clay is wet, press the ends of two brass rods into the blocks to create the sockets.
- Details: Use a needle to poke small, evenly spaced holes through the brass rods (if using hollow tubes) or simply use the rods as horizontal bars for dangle earrings.
- Finish: Once the clay dries, sand the edges for a stone-like finish. Insert the rods. You now have a high-end, weighted tabletop display that looks like it came from a boutique.
6. Travel Solutions: Protection on the Go
Don’t let your jewelry suffer in a plastic baggie.
- The Pill Case Vault: Use a weekly plastic pill organizer for small stud earrings and rings. It keeps pairs together and prevents crushing.
- The Button Trick: For stud earrings, sew them through the holes of a large spare button before placing them in your pouch. You’ll never lose a butterfly back again.
- The Straw Thread: Thread a delicate chain through a recycled paper straw and clasp it. This keeps the chain rigid so it cannot physically tangle during transit.
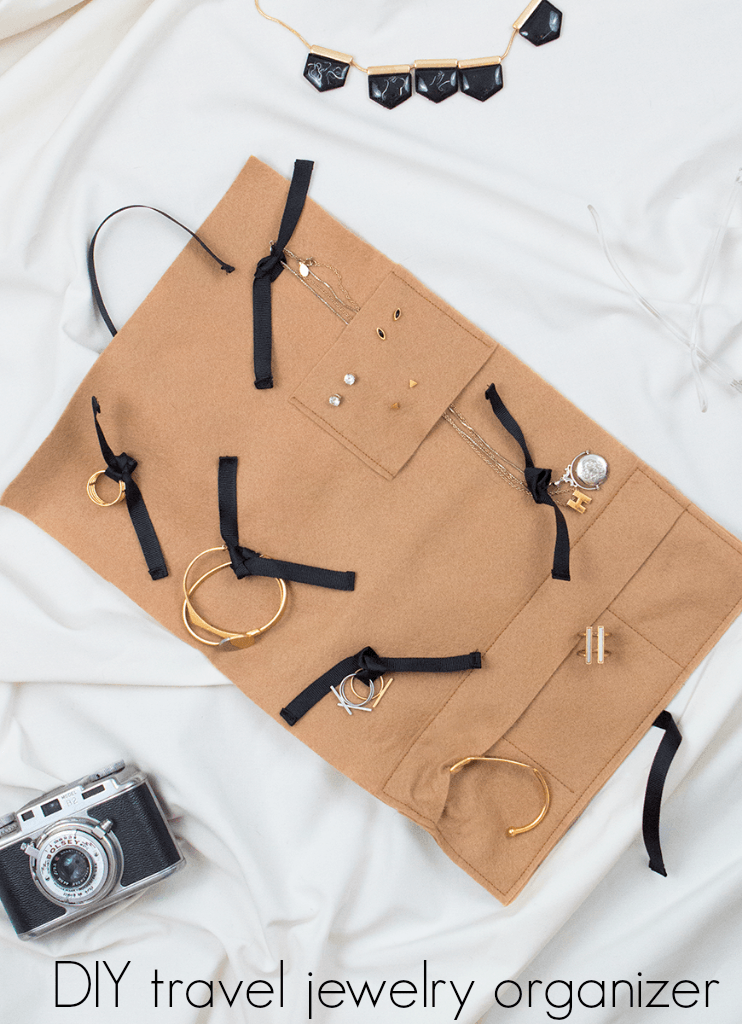
Sew a felt jewelry holder with felt that folds.
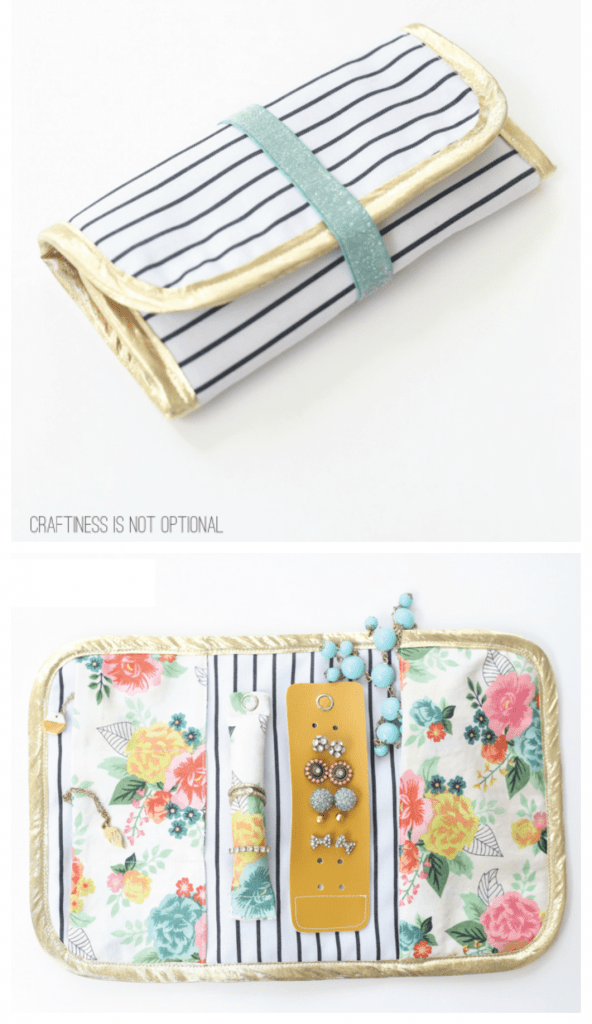
A beautiful fabric stitched jewelry clutch for traveling
Frequently Asked Questions
1. How do you prevent your jewelry from tarnishing in an open organizer?
Add a few anti-tarnish strips (silica packets or specialized paper) near your silver pieces. These absorb the sulfur in the air that causes the black film.
2. What is the best way to clean thrifted organizers like cheese graters or rakes?
Always soak metal items in a 50/50 solution of white vinegar and water, then scrub with a wire brush. Seal with a clear matte acrylic spray to prevent any old rust from transferring to your jewelry.
3. How do you organize jewelry in a small apartment with no wall space?
Use a jewelry tree or a tiered spinning rack on top of a dresser. If that’s too cluttered, look for over-the-door full-length mirrors that open to reveal a hidden jewelry cabinet.
You may also like:
25 Crafty Jewelry Art Ideas using Broken or Old Family Items


thanks so much for the feature~!