This post may contain affiliate links. Please see our full Disclosure Policy for details.
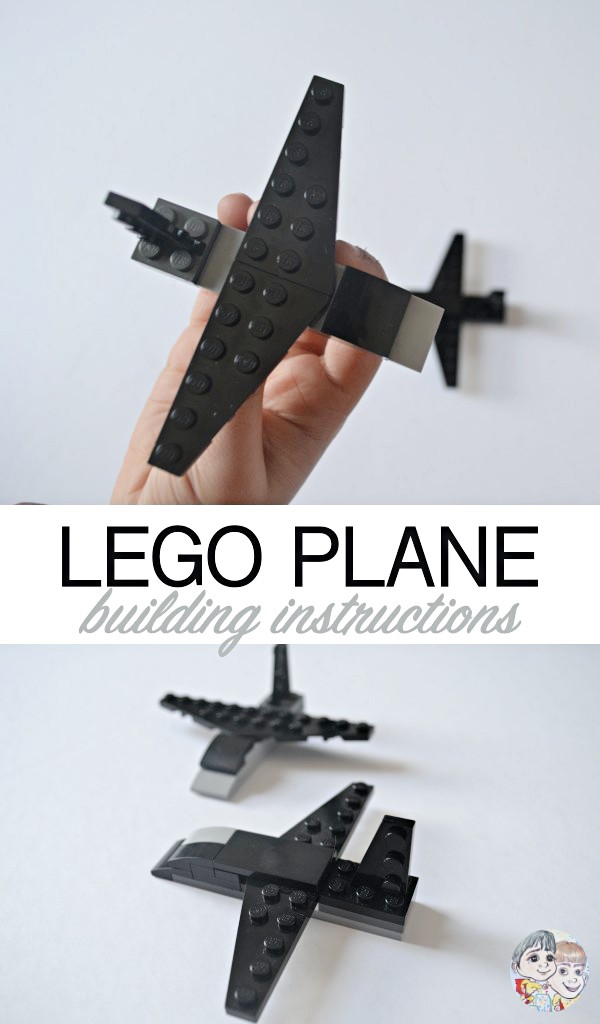
Building with LEGO® bricks is so much fun. Our boys love to create fun and interactive LEGO® projects. They create their own LEGO® version of things and play imaginary with it. Today I am sharing Lego plane building instructions. The LEGO® planes are made by a five year old who loves to make paper planes all the time. So, he made these adorable two versions of planes that are so easy to make and take only a few minutes.
I think if your kids play with LEGO®, they might already have these LEGO® parts in their stash. However, if you are missing any I am sharing the parts lists at the bottom of the post. Moreover, you can substitute these parts with what you already have as with most of the Lego projects. Encourage them to make their own LEGO® designs with different parts to modify the ones here. You may also choose your own colors if the ones we are sharing are not available.
Here you will find Lego plane and Lego CN Tower building instructions with picture showing all parts required for each project followed by written instructions. The video instructions to make these projects is found at the bottom of the post. I hope you enjoy!
Video instructions Lego planes and Lego CN tower
You may also like: How to make bleyblade spinner.
For more ideas to create using LEGO®, pattern blocks, magnetic tiles and more follow Build with Brothers.
Lego plane building instructions
We have two different lego designs for the plane. Both are super easy to make for younger kids in kindergarten or even preschool. However, their is no age limit to have fun with smaller projects.
For your reference: The standard Lego pieces are bricks. Flat pieces are plates or tiles. Plates have studs and their height is 1/3 of Lego brick, however, tiles are flat with no studs. The shape and size of Lego piece is referred by stud count. For example, a 4×6 brick means 4 dots wide and 6 dots long.
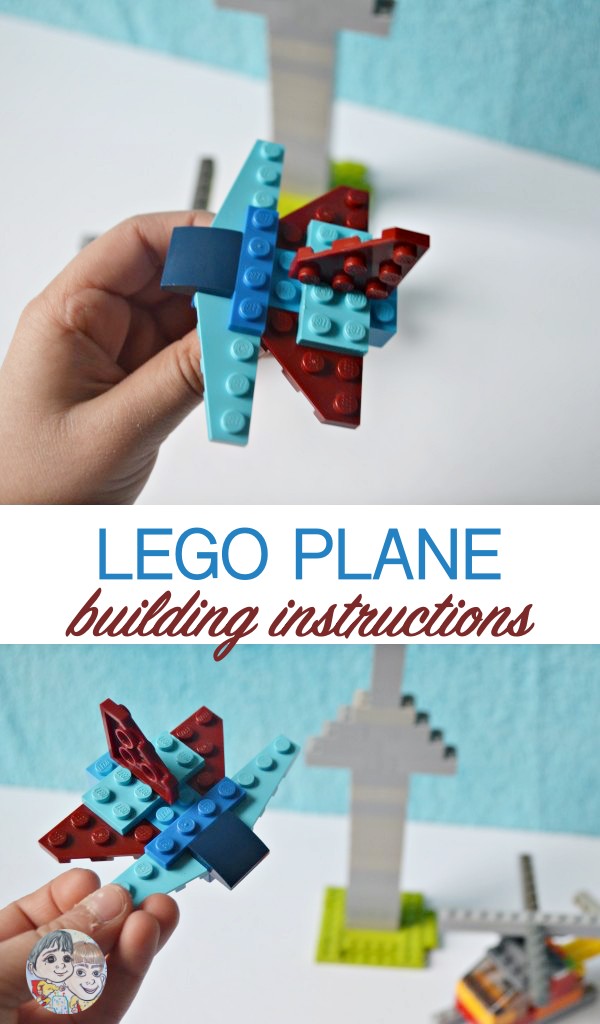
Instructions to Build Lego plane in blue
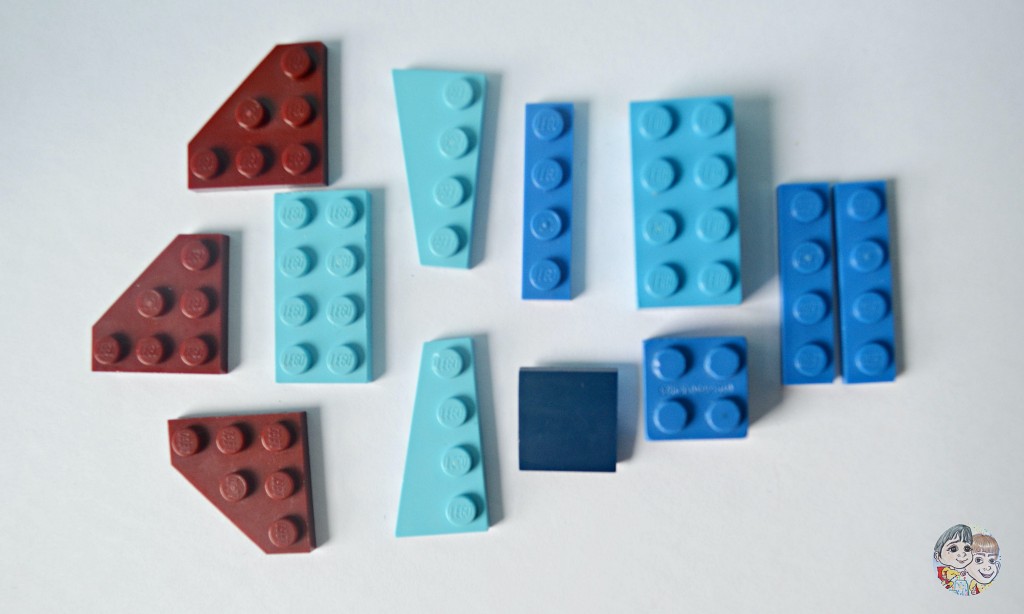
Step 1: Gather the LEGO® plates as shown in the picture
Step 2: You will start by connecting the 1×4 blue plates with the 2×4 and 2×2 light blue and blue plates.
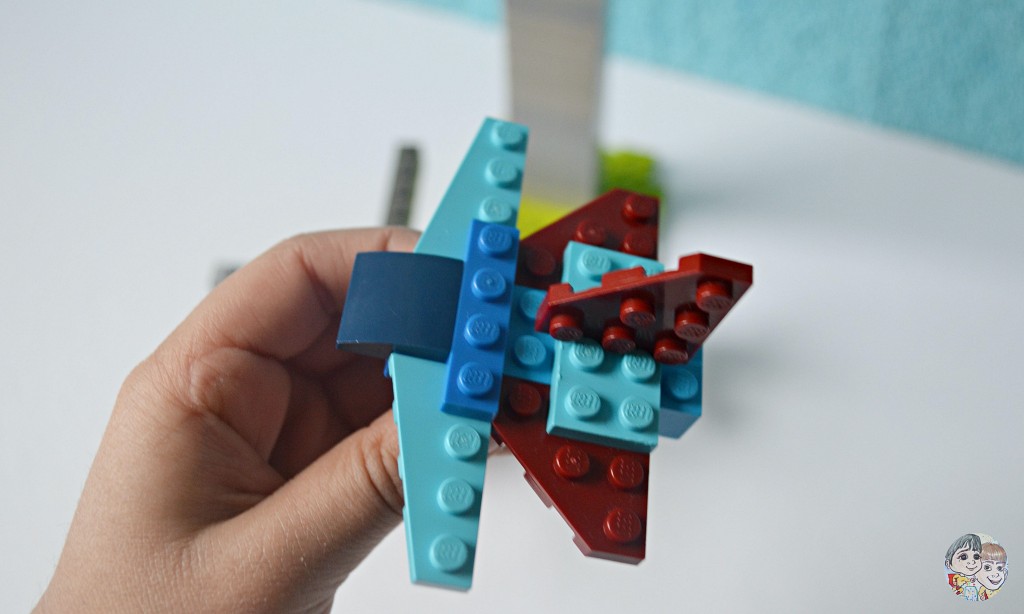
Step 3: Next you connect the 2×2 tile at the end of the blue plate to make the plane front. The 2×2 tile looks like a slate with a spouted angle at the end. Then connect 2×4 light blue plate to the back of the plane.
Step 4: Stick the trapezoid shaped 1×4 light blue plates to make the wings of the plane as shown below.
Step 5: The 1×4 blue plate will join the two wings.
Step 6: Now use the 2×4 light blue plate to connect the brown plates to make the back wings of the plane. The last brown plate connects as shown below to complete the LEGO® plane.
To make a slightly different Lego plane, see the design below using fewer parts. The design can be modified in many different ways.
Instructions to Build Lego plane in black
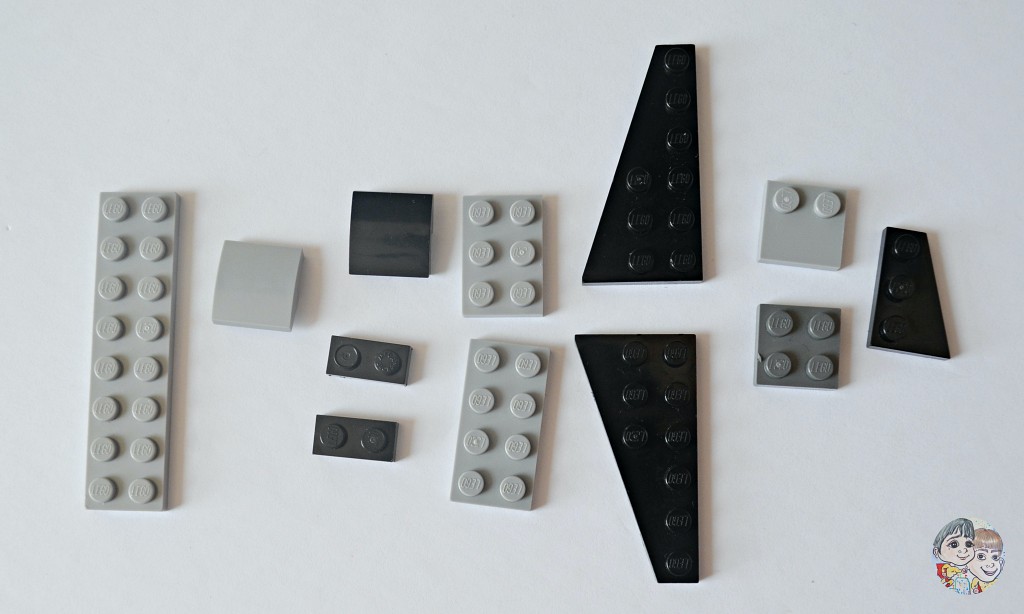
Step 1: Gather the LEGO® plates as shown in the picture together.
Step 2: Now connect the 2×8 gray plate with the 2×2 tile to make the front of the plane.
Step 3: Next join the two 2×1 black plate behind the 2×2 tile over each other. You can replace it with 2×1 brick.
Step 4: Place the second 2×2 tile over the black plates as shown below.
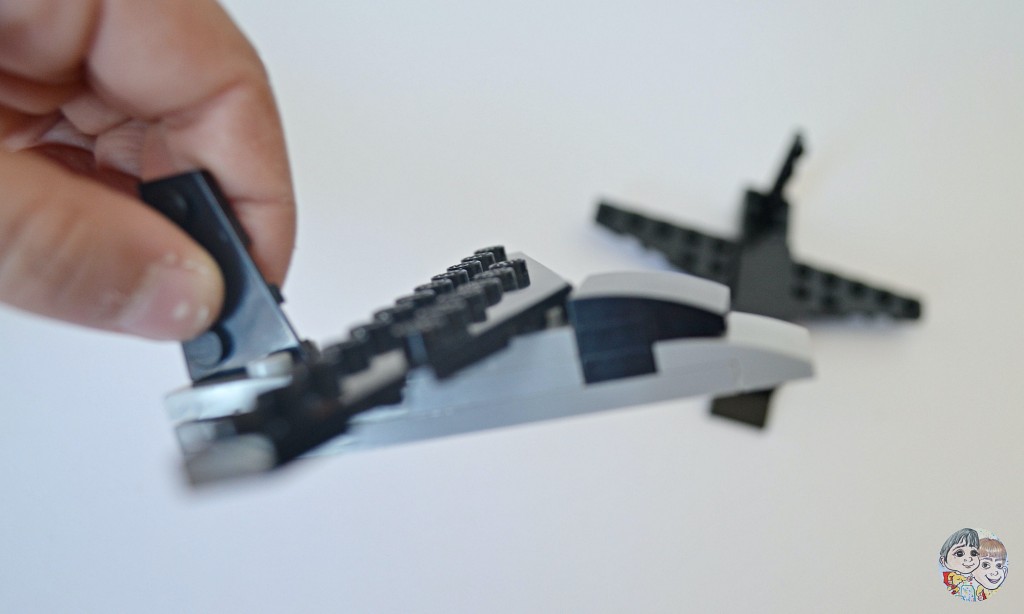
Step 5: Connect the 2×4 and 2×3 gray plate to the 2×8 gray plate at the center. You can replace these by 2×4 brick. You now connect the 2 wing shaped Lego plates to make the plane wings.
Step 6: Now connect 2×2 black plates at the end of the 2×8 plate and fix the 1×3 trapezoid shaped plate to make the end wing. You can replace the 2×2 black plates by 2×2 brick here as well. The LEGO® plane is ready to fly.
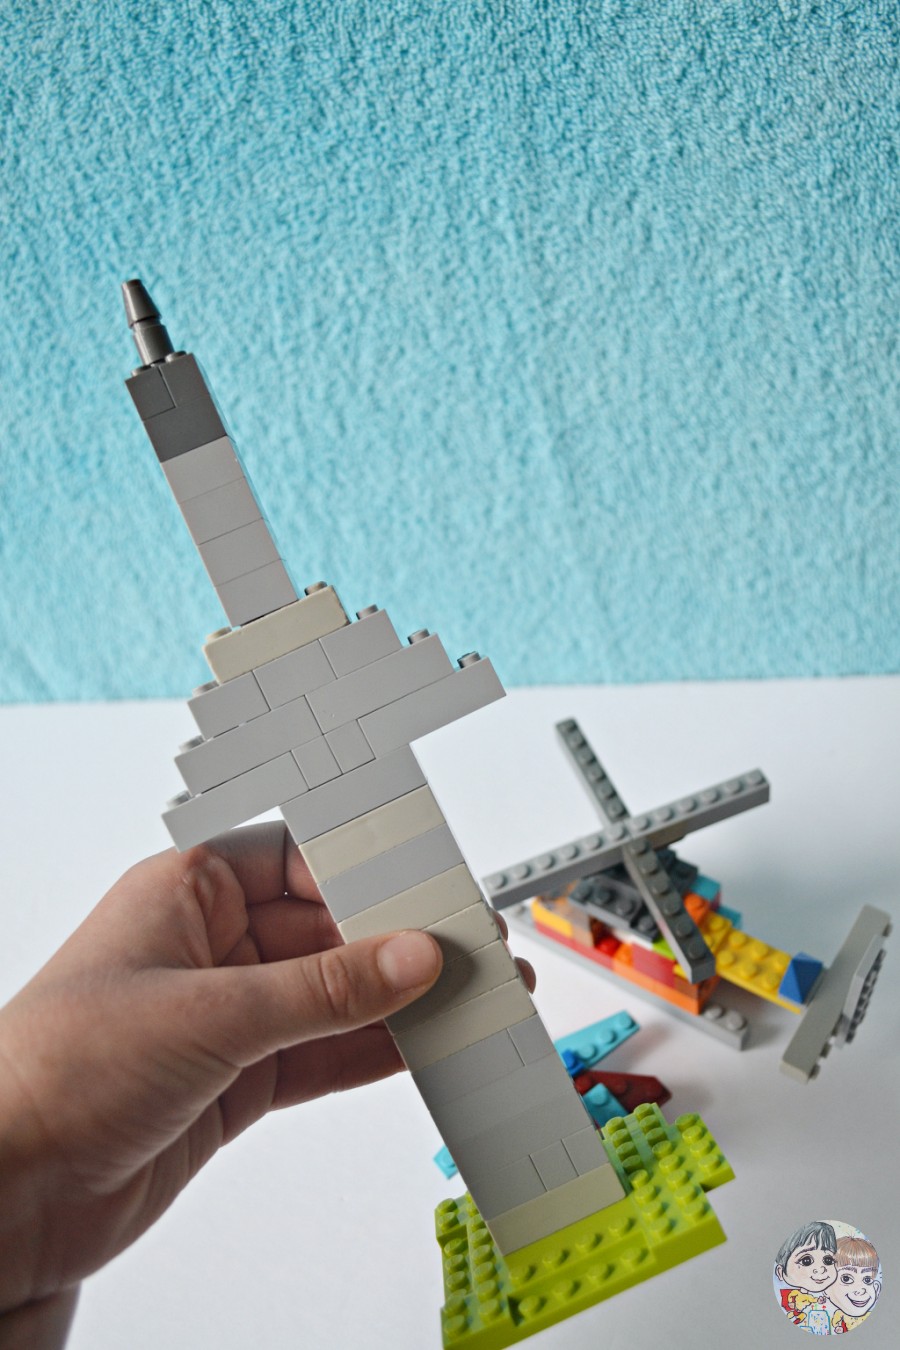
Here’s a bonus project that has so many different possibilities as kids love to build towers. My five year old is always fascinated to see the CN Tower. As a child, he always enjoys passing by the Downtown in to see it light in different shades at night. During the day trips he likes to spot the tower from far distances. He made his own version of CN Tower, Toronto in Canada. And we are sharing it with you here.
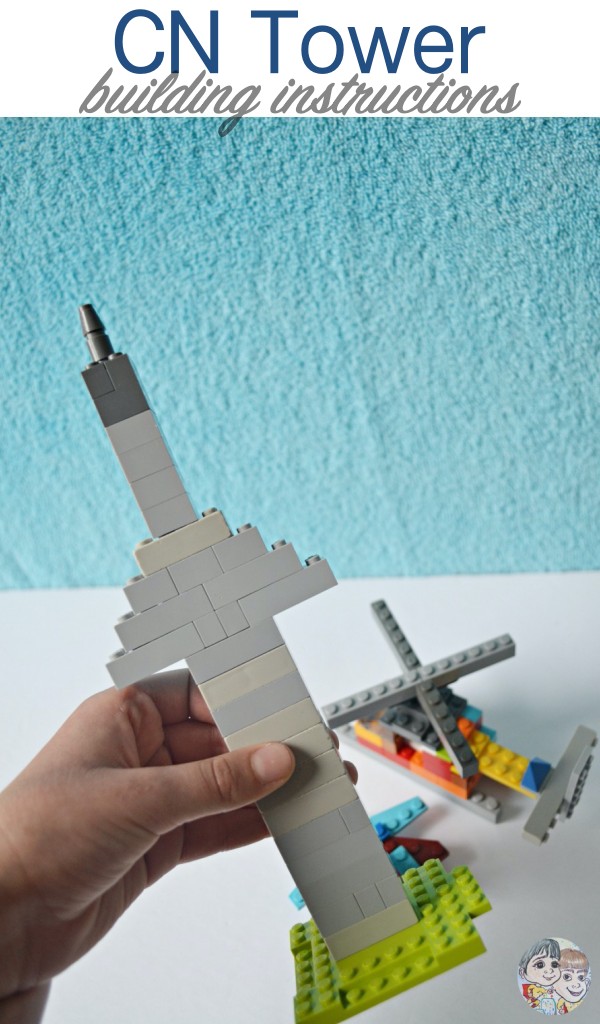
Instructions to Build Lego CN Tower Toronto
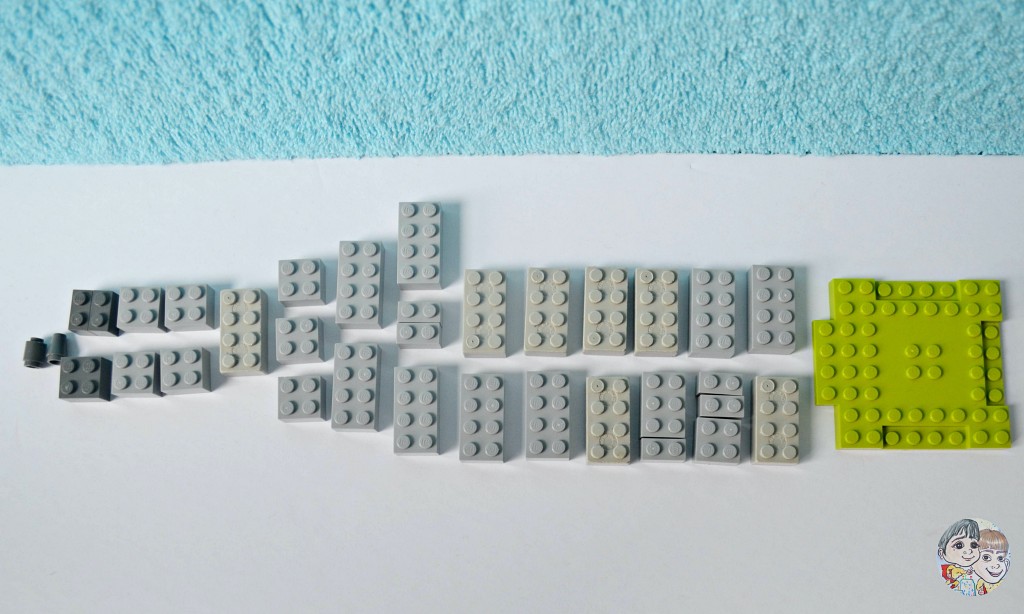
Step 1: Set the LEGO® bricks as shown in the picture after you gather the parts.
Step 2: Now this project can be designs in so many different ways so encourage your child to make their own. Connect the pieces as arranged from right to left as shown in the picture above.
Step 3: Next the last six 2×2 Lego bricks on the left go over each other to extend the height of the tower.
Step 4: Finally the circular disk-shaped Lego parts make the top of the CN tower.
I hope you enjoyed these three amazing projects that can be used as a LEGO® play set. There is a Lego helicopter that completes the scene here. Find Lego helicopter building instructions!