This post may contain affiliate links. Please see our full Disclosure Policy for details.
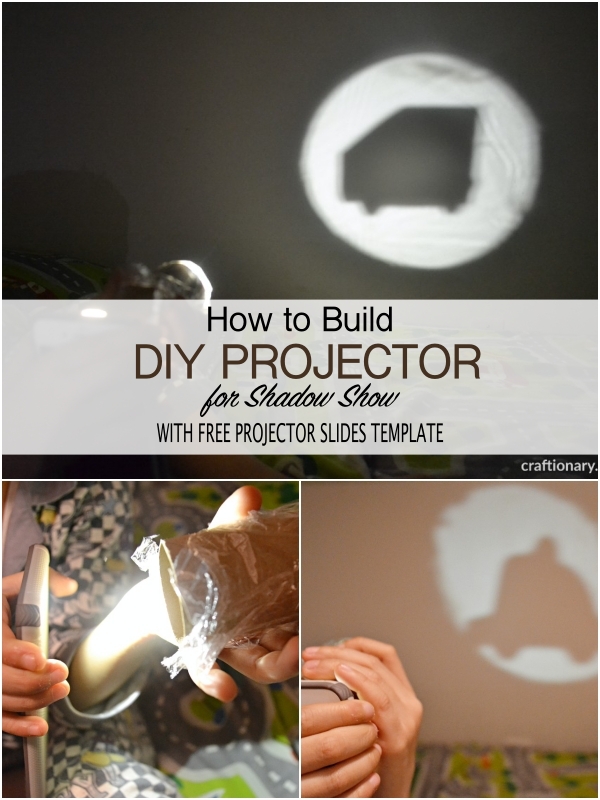
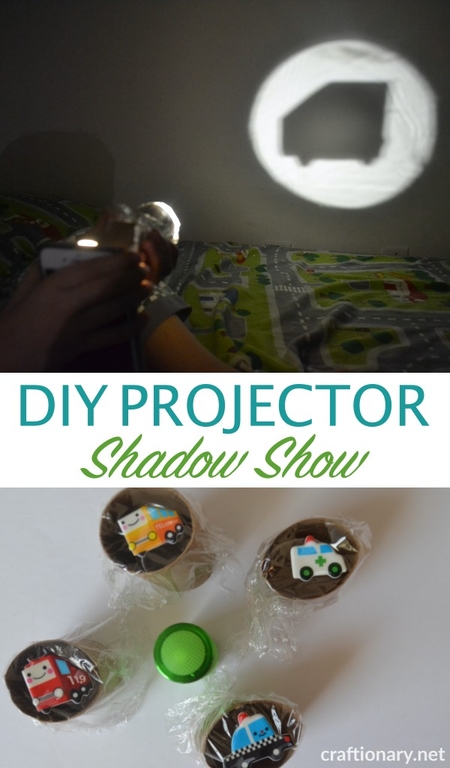
Looking for a fun, budget-friendly science and craft project that sparks creativity and curiosity? Learn how to make a DIY projector using a toilet paper roll — a simple, hands-on way to teach kids about light, lenses, and shadow play.
This STEM-inspired craft is perfect for curious little minds, ideal for rainy days, classrooms, family craft nights, or weekend fun.
What Is a Toilet Paper Roll Projector?
A DIY toilet paper roll projector uses basic materials (like a magnifying glass or plastic lens, a flashlight, and a paper roll) to mimic how real projectors work — by shining light through an image to project it onto a wall. It’s an excellent science-meets-art activity that helps kids understand light, focus, and magnification in a fun way.
DIY Shadow Show for Kids
First we need to build projector and then we are set for the shadow show. You only need five minutes to setup the projector.
Related: Puppet theater shadow show story planner
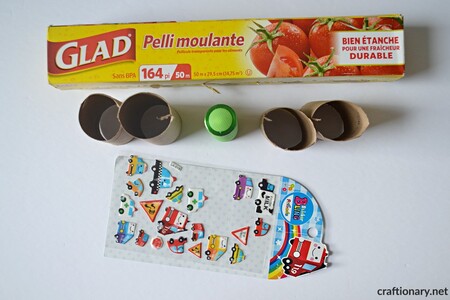
Material needed to make kids projector at home
- 1 Empty toilet paper roll or TP roll – projector tube body
- Cling wrap or magnifying glass or plastic lens from old toy or dollar store – for focusing the light
- Clear plastic sheet or transparency film – to draw the image to project
- Stickers (can be foam stickers, regular stickers or any other opaque material) – to project
- Tape or rubber band – to assemble and hold film in place
- Flash light or phone light – light source
- Marker or fine-tip pen – to draw the image
- Scissors or craft knife – for cutting ends or fitting the lens
Optional: Black paper (to block excess light), additional cardboard tube (for extending focus range)
Step-by-Step Instructions: How to Build Your DIY Projector
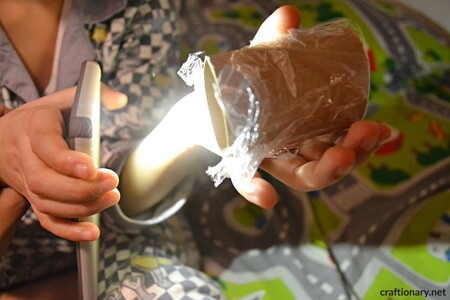
1. Cut a Hole for the Lens
Cut a piece of cling wrap to wrap it around the toilet paper and secure it using rubber band or tape.
(Optional) Trace the magnifying glass onto one end of the toilet paper roll and carefully cut it out so it fits snugly. Insert and tape or glue the magnifying lens into the hole. This will help focus and enlarge the image.
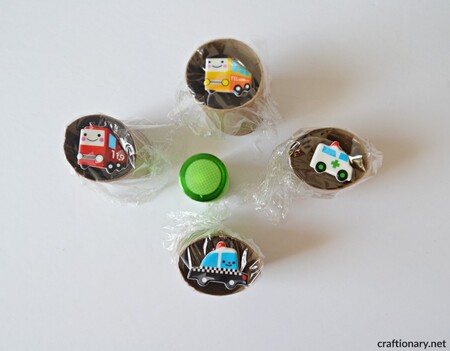
2. Create the Film Frame
- Use the cling wrap from step 1 and stick different stickers to create scene lens.
- (Optional) Cut a square of clear plastic (from food packaging, transparency film, or plastic folders). Draw a simple image or shape (like a heart, star, rocket, or letter) using a black permanent marker.
TIP: You can either keep changing cling wrap films for scenes or create clear plastic sheets like flashcards to bring in front of tube covered with cling wrap as the scene changes.
3. Attach the Image
Stretch the plastic film over the opposite end of the roll and secure it tightly with a rubber band. This is your image to project.
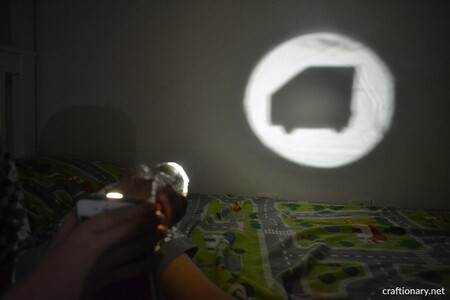
4. Add Your Light Source
In a dark room, shine the flashlight into the open end of the tube (behind the film). Position the projector about 3–6 feet from a wall and adjust the distance to bring the image into focus.
TIP: Move the tube forward or backward slowly to get the sharpest projection.
Get ready for the shadow show with your flash light.
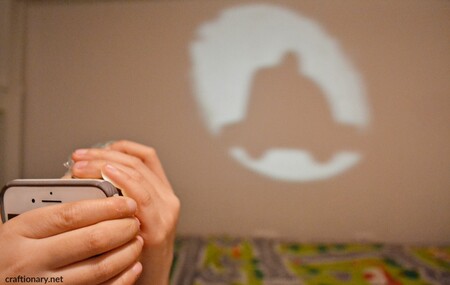
Lights off – camera – action!
Video: Kids DIY Shadow Show
Our kids have put together some fun stories about the transportation heroes. Check it out and have a good laugh! Enjoy!
Want to see on the channel: Kids transport show
What Kids Learn from This Project
As a craft and homeschool mom with a love for DIY learning, I’ve found this activity teaches kids:
- How light travels through lenses
- How images are focused and enlarged
- Basic projector mechanics
- Hands-on problem-solving and design thinking
Pair this craft with a simple science talk about how real projectors, cameras, and even eyes work!
Fun Variations and Extensions
- Storytime Projector – Make multiple film slides and tell a bedtime story with images on the wall.
- Alphabet Practice – Create transparent letters to help toddlers learn the alphabet in a fun way.
- Space Show – Draw planets or stars to turn the room into a mini galaxy.
- Color Lenses – Add colored cellophane over the flashlight for a glowing effect.
Free Printable: Projector Slide Templates
Download these free printable shadow puppet story templates with shadow character cutouts for projector slideshow, featuring:
- Fairy tale characters (dragon, knight, princess)
- Jungle animals
- Outer space explorers
- Simple story scenes
- Blank templates for kids to design their own
FAQs About DIY Toilet Paper Roll Projectors
Does this projector work with a phone?
No — this version uses a flashlight and simple lens, not phone screens. (Phone projectors use a different method.)
Can you use paper instead of plastic for the image?
No, the image won’t be as sharp as paper is opaque. Clear plastic works best because light passes through it.
What lens works best?
A small convex lens or dollar-store magnifying glass provides the clearest projection.
Why is the image blurry?
Adjust the distance between the lens and the wall, or change how far your image is from the light source.
Creating a DIY projector using a toilet paper roll is more than just a fun craft — it’s a gateway to STEAM learning, storytelling, and creative exploration. It’s easy, affordable, and fascinating for both kids and adults. Whether you’re crafting for curiosity or fun, this activity is a glowing success!
Try it today — and watch your drawings come to life on the wall!
You will also like:
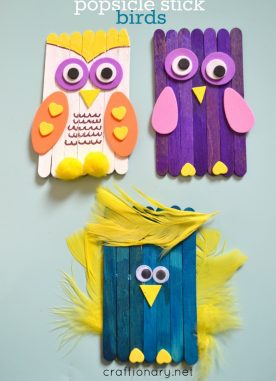
25 Best egg carton crafts for kids and adults