This post may contain affiliate links. Please see our full Disclosure Policy for details.
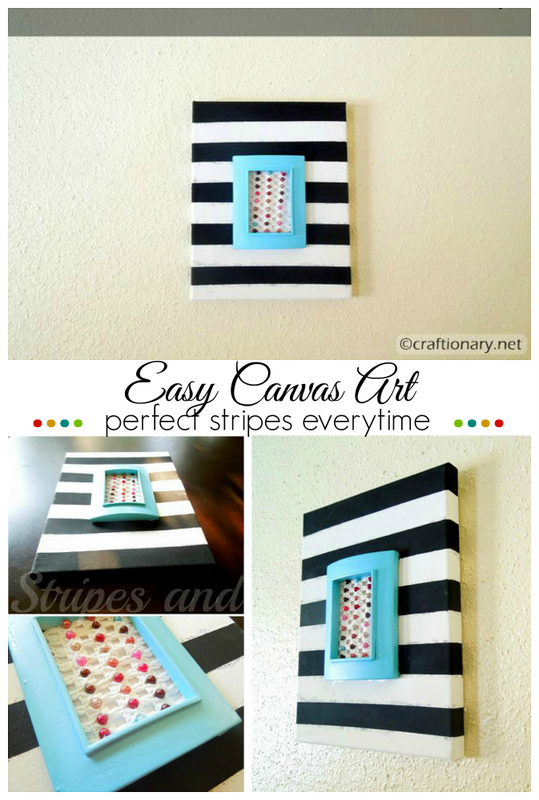
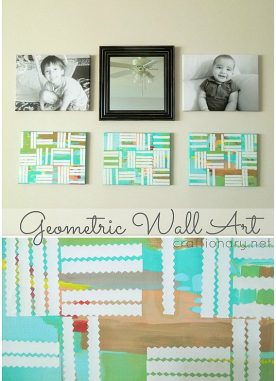
Looking for a modern, high-impact DIY wall art project that even beginners can master? Painting black and white stripes on canvas is a timeless design choice that fits almost any space — from minimalist to eclectic.
Find step-by-step process to create crisp, bold black-and-white striped canvas art, based on my experience in home decor DIYs and simple painting techniques.

Why Black and White Stripes?
Black and white stripes are:
- Timeless and elegant
- Perfect for modern or farmhouse decor
- Customizable — go vertical, horizontal, or even diagonal
- Affordable — paint, tape, and canvas are all you need
This art piece looks professionally made and can be a focal point in any room — especially when paired with gold accents, greenery, or colorful accessories.

Make this black and white stripes and frame box canvas in less than 20 minutes.
Material to paint black and white stripes
- Blank Canvas any size – stretched canvas or board
- Acrylic paint – matte or satin finish is recommended
- Paintbrush or foam brush – Foam brush helps avoid brushstrokes
- Painter’s tape or mesh tape – for clean and crisp lines
- Ruler or measuring tape – to evenly space out stripes
- Pencil or chalk – for marking lines
- (Optional) Sealer or varnish – for a protective finish
Related: How to Use a Stencil to Paint on a Board (Without Bleeding)

Paint Black and White Stripes Step-by-Step Instructions
1. Prep Your Canvas:
- Lay your canvas flat on a covered surface.
- If your canvas is unprimed, coat it with gesso first and let it dry.
2. Measure and Mark Your Stripes:
- Decide on the stripe width — 2” or 3” is popular for bold contrast.
- Use a ruler and pencil to lightly mark the stripes.
- You can go horizontal for a calming effect or vertical for height and drama.
3. Apply Painter’s Tape:
- Carefully tape off every other stripe. Press edges down firmly to prevent bleeding.
- I didn’t use painter’s tape (recommended), but instead was curious if a self-adhesive mesh tape would work! It actually did a pretty neat job.
- Spread the tape on the canvas measuring the distance. Flatten the edges with your nails for good result. Make sure little pores are sealed with your nail tips.
- TIP: Use a credit card edge to smooth the tape.
4. Paint the Stripes:
- Start with white or black depending on your background.
- Use thin, even coats. Let dry between coats for better coverage.
- Dip and take off excess paint from the foam brush, to dap only what is needed on the canvas.
- This protects paint from bleeding.
- TIP: Paint away from the tape edge, not toward it.
5. Remove the Tape Carefully:
- Peel tape slowly while the last coat is still slightly damp for cleaner edges.
6. Touch Up If Needed:
- Use a fine brush to fix any small bleeds or uneven edges.
7. Seal (Optional):
- If you want to hang this in a humid area (like a bathroom), seal your finished art with a clear varnish.
Related: How to Waterproof Acrylic Paint on Canvas?
8. Add Embellishments:
- While it dries, spray paint the mini frame and add a pretty lace piece inside. Glue the mini frame for contrast with lace piece using hot glue or tacky glue.

Styling Ideas for Your Striped Canvas Art
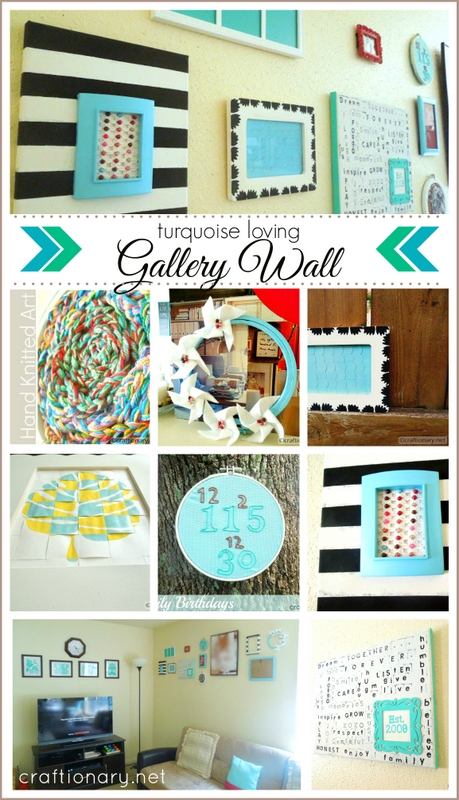
- Gallery wall with gold frames and quotes
- Over a fireplace for modern contrast
- Layered with plants and textures for a chic studio feel
- Customize with gold foil, glitter stripes, or hand lettering over the stripes
Related: Gilding glass with gold leaf sheets
Expert Tips
As someone who’s worked with both novice and advanced crafters, here are a few trusted tips:
- Use Frog Tape or painter’s tape made for delicate surfaces to prevent damage.
- Don’t rush drying times — this is key to keeping edges sharp.
- Use canvas panels if you’re a beginner — they’re budget-friendly for practicing.
I’ve made these for gallery walls and they never fail to get compliments!
FAQs
What kind of paint works best for canvas stripes?
Acrylic paint is ideal — it’s easy to work with, dries fast, and is durable.
How do you keep your stripes straight?
Measure carefully, mark guidelines, and use quality painter’s tape for clean, straight edges.
Can you use spray paint?
You can, but it requires even more taping, masking, and ventilation. Brush-on acrylic is safer and more beginner-friendly.
How wide should the stripes be?
For a standard 16”x20” canvas, stripes between 2–3 inches wide work well. Adjust based on your desired effect.
Black and white striped canvas art is one of the easiest, boldest ways to make a DIY statement on your walls. Whether you keep it simple or personalize it with metallic touches, this project brings professional-looking results — no art degree required.
Have you tried this project or want to share your striped masterpiece? Drop a photo or comment below — I’d love to see your version!
Do you love to make easy wall decor for home? I would love for you to check out my Gallery Wall reveal.
You will also like:
How to frame a canvas with gift bag to make art


So beautiful, and fun 🙂
This is really cute! Love the splash of blue! 🙂 We'd love it if you would come share your ideas at our link party this weekend! -The Sisters
http://www.sixsistersstuff.com/2012/05/strut-your-stuff-saturday-link-party_25.html
this is so great! i have a piece of canvas i want to do something great to and i love this. i am really excited to see what else you've got for the wall gallery!
thanks so much for linking this up to the party, have a great weekend!
{love} lauryn @ lovenotesbylauryn.blogspot.com
So creative and unique! Very contemporary cool. I love seeing your process and letting us know your secrets to making this lovely piece. And yes, of course blue goes with everything!
Wow it looks amazing:) I'm a new follower from the blog hop:)
Fantastic – it looks great!
very neat! Your stripes look perfect. Thanks for sharing at Etcetorize this week!
Thanks for linking up to Make it Monday! I LOVE the stripes!
Nice stripes!! Oooh – I'm excited for your wall decor series!!
Thanks for linking up at Romance on a dime.
Love the stripes….I would love if you linked up to my new link party.~Taylor-Ann
Not sure why you posted this on Susan's tablescaping forum. You might consider posting on her site on Mondays, which is reserved for “metamorphosis.”
I can't wait to see next week's project
what a fun little piece that packs a punch :)! Thanks for linking up at Beyond the Picket Fence.
oh I think that is super cute! If you have a chance come link up to Handmade Tuesdays Kristen
I LOVE THIS!!! I love this crisp stripes against the aqua blue…very pretty! I look forward to your series. Thanks for linking up and sharing with us @ Toot Your Horn Tuesday.
Erin
who doesn't love strips!! Love it Hani! 🙂
This is so sweet! Thanks for linking to Sweet Sharing Monday- you were featured this week!
Thank you so much for linking up in our Saturday Showcase this past week! We were thrilled to have you and hope that you stop back in on Saturday and link up more crafty ideas! Have a super weekend!Susie at Bowdabra
so pretty
Cant wait to see what you link up later today on Serenity Saturday
Natasha xxx
that turned out pretty and cute! thanks for sharing. have a fab weekend!Hugs,Lelanie
I think everything can look pretty in blue… However.. you make EVERYTHING look pretty! 🙂
Thanks so much for sharing at The DIY Dreamer.. From Dream To Reality!
I love this so much I featured it this morning on. Thanks for linking up to Make it Great Monday! Cheers,
Me toooo
I would hang this in my home! BRAVO!