This post may contain affiliate links. Please see our full Disclosure Policy for details.
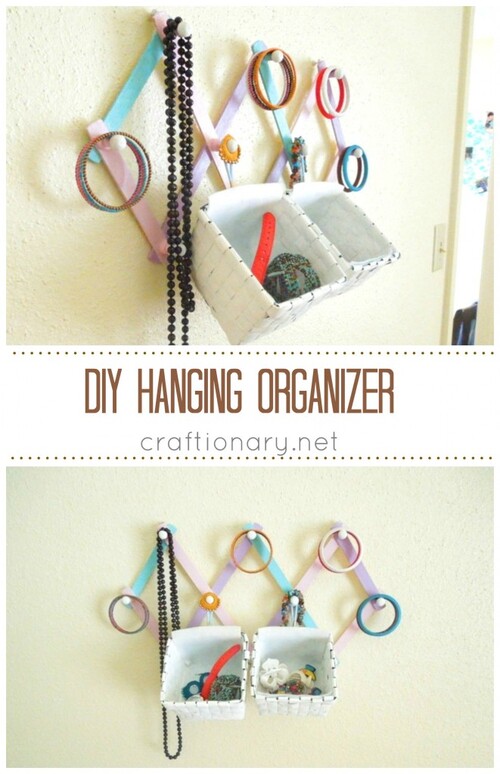
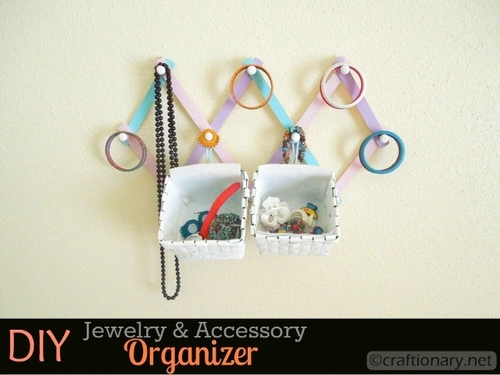
Looking for a creative and space-saving way to store your jewelry and accessories? This DIY hanging organizer made from a wooden rack or hanger and small woven baskets is the perfect blend of form and function. It’s a practical solution that doubles as wall art — ideal for bedrooms, dorms, or closet doors.
Whether you’re a beginner crafter or just looking to declutter your vanity, this tutorial will show you how to make a jewelry and accessory organizer at home using items you already have or can find easily at your local dollar store or thrift shop.
Why This DIY Organizer Works
This project is becoming one of the most searched jewelry storage DIYs because it’s:
- Affordable and beginner-friendly
- Aesthetic and natural-looking with boho vibes
- Ideal for small spaces — no drilling required
- Easy to customize for earrings, necklaces, sunglasses, scrunchies and more
How to Make a Hanging Organizer with a Wooden Hanger
Materials
- 1 Wooden rack hanger
- 2–4 small woven or rattan baskets
- Jute rope, twine, or S-hooks
- Command hooks or a wall nail for mounting
- Optional: small clips or mini clothespins for earrings
- Scissors
- Hot glue gun (optional for securing baskets)
Step 1: Prep Your Hanger
Choose a sturdy wooden hanger or rack with a horizontal bar or flat edge. You can leave it natural or paint/stain it to match your decor style.
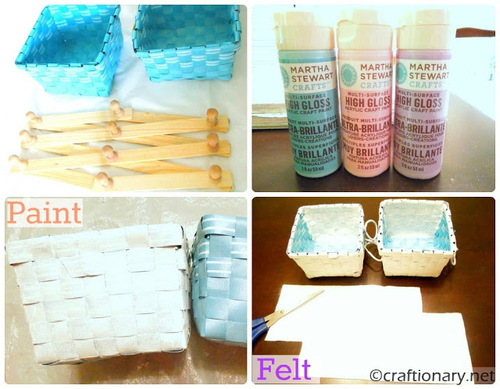
The blue baskets were very shiny. I painted them white with a paintbrush. You can spray painting them if you prefer! I also padded the boxes with felt fabric for a soft base for jewelry.
Step 2: Attach Hanging Rope or S-Hooks
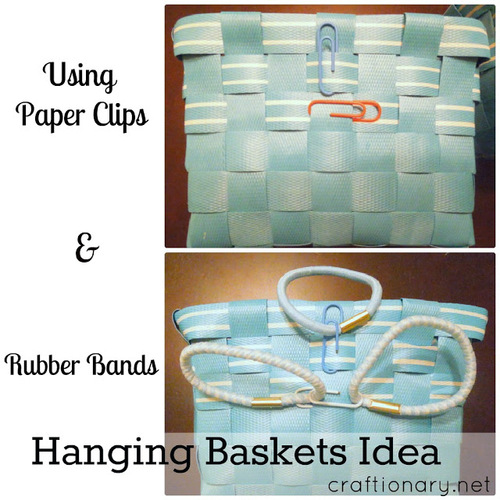
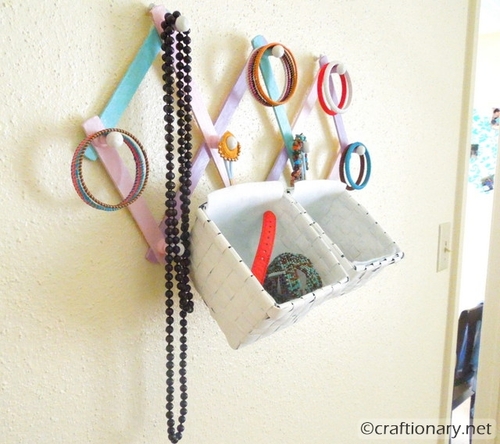
Cut equal lengths of rope (about 12–15 inches depending on basket size and desired drop). Tie one end to the handle of the woven basket and the other to the wooden hanger. Alternatively, use S-hooks to hang baskets directly. I tried paper clips and sturdy rubber bands and it worked too.
Tip: Vary the lengths slightly for a tiered look or keep them even for symmetry.
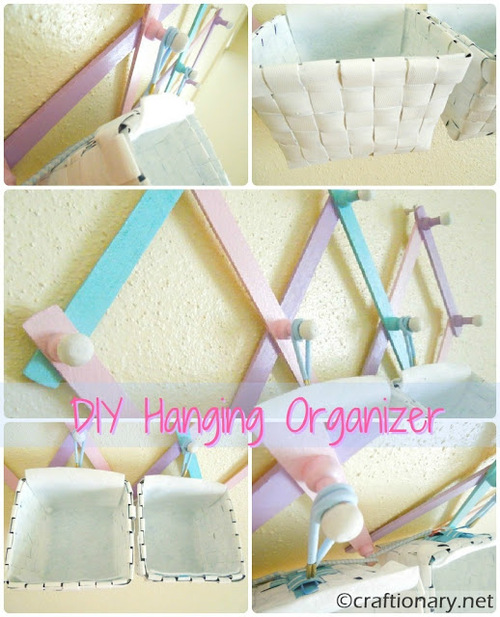
Step 3: Mount the Organizer
Use a removable adhesive hook or a small nail to hang the organizer from its hook. Make sure it’s secure enough to hold the weight of the baskets and your accessories.
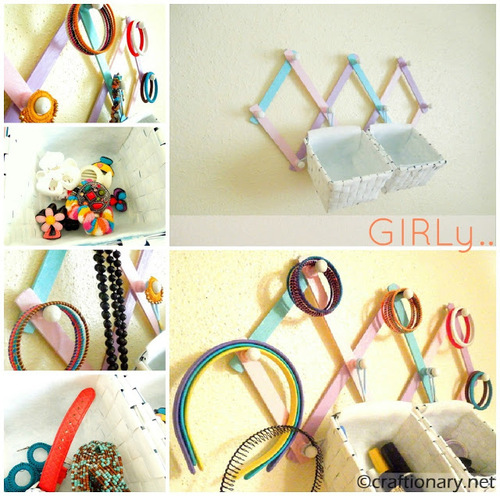
Step 4: Fill with Accessories
- Use small baskets to hold rings, scrunchies, or sunglasses
- Clip earrings onto the edges or weave them through the basket holes
- Drape bracelets or necklaces from the hanger bar or hook inside the baskets
- For bonus functionality, hang additional items like scarves or hair ties from the bottom bar with curtain rings or shower hooks.
How to use these hanging baskets at home?
There are a variety of ways to use this hanging organizer.
1. Jewelry organizer
2. Accessories Organizer
3. Everyday supplies organizer
4. Makeup Organizer
I actually ended up using it for my daily used jewelry, hair accessories and makeup.

or even craft supplies or office supplies in a small space.
Styling and Design Ideas
- Boho Look: Use rattan baskets and jute twine. Pair with macrame wall art or plants.
- Minimalist Style: Stick to white or natural wood tones and sleek wire baskets.
- Colorful and Fun: Spray paint the hanger and baskets in pastel tones. Great for kids or teens’ rooms!
Variations to Try
- Use metal baskets for a more modern industrial vibe
- Add label tags to each basket for categories like “Earrings,” “Rings,” or “Hair”
- Paint or stencil a design onto the wooden hanger for a personal touch
- Use a branch or driftwood instead of a hanger for a nature-inspired version
FAQs: DIY Jewelry and Accessory Hanging Organizer
What kind of baskets work best?
Small woven, rattan, or wire baskets with handles are ideal. They should be lightweight but sturdy enough to hold accessories.
Can you use plastic baskets instead?
Yes! Just ensure they’re light and have a way to hang (like built-in handles or holes for rope/S-hooks).
Will this damage the wall?
No! If you use adhesive wall hooks, it won’t damage the surface. Perfect for renters or dorm rooms.
How much weight can the hanger hold?
Standard wooden hangers can typically hold up to 5–7 lbs, but always test it first before loading with items.
This DIY hanging jewelry organizer with woven baskets is proof that organizing can be both beautiful and practical. It’s quick to assemble, easy to move, and customizable to your storage needs. Plus, it’s a perfect way to display your favorite pieces where you can actually see (and use) them!
So grab that wooden hanger, gather your baskets, and create a functional wall-hanging organizer you’ll actually love to use every day.
You will also like:
You will also enjoy the Jewelry Organizers Board.


Its beautiful and handy…love it!!!
Clever way to hang the baskets, your a genius. 🙂
How clever–and I love all your colorful jewelry!
I LOVE how you used the hair “elastics” to hang your baskets! 😀
Neat idea. I have one of those “hat hangers” and maybe I can use this idea in my new craft area. Thanks for the idea.
This is a great idea much better than the jumble of my jewellery box
GENIUS!!! I just happen to have a wooden hanger!!! Gotta make one!
Thanks so much for sharing this at The DIY Dreamer.. From Dream To Reality!
Fun and clever.
I'm a new follower. I love this idea. I have one of those with sticker packages hanging from it. I bought another one with no ideas of how to use it. Now I need to find a spare wall!
What a cute idea and I love that you painted it as well!
you have the cutest ideas!!!! :o) I LOVE this!!!! Thank you SO much for linking up and sharing over at my place!!!! You are the best!
Jaime from crafty scrappy happy
So pretty and so colorful! Thanks for linking up to Share the Love Wednesday!
Mary