This post may contain affiliate links. Please see our full Disclosure Policy for details.
Pencil holder made with origami. Make a cute paper tulip origami holder to hang on your message board or bulletin board with paper folding.
Pencil holder made with origami for bulletin board
Origami is really fun and making things with origami is an amazing experience. You can also use patterned papers for a really vibrant look and matching any theme you have. I personally think origami can not be used for home decor but this craft is really fun. So, I am sharing with you a few good origami ideas that are useful and not just fun to make. I love origami so much that I actually have made a board in my crafts room with my origami collection. I am so thrill to share it with you once it’s finished.
Origami is an art you can never get bored off. Making flowers with origami is a really fun way of passing your time. Here is how I make my origami flower lily and used it as a pencil holder on my bulletin board. Make it yourself and send me your beautiful lilies. Your art is worth showing off.
Pencil holder tutorial
MAKE IT:
- Take a square paper (9 1/2 x 9 1/2) and fold it in half such that the bottom corner folds onto the top corner. Keep the pattern-side down.
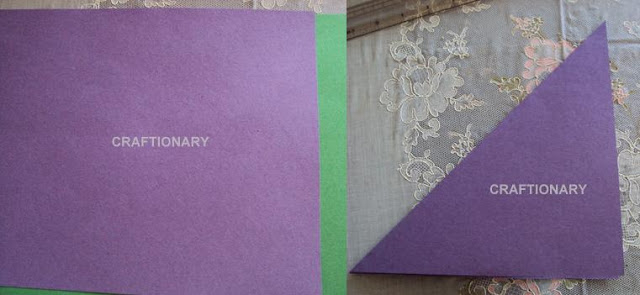
- Fold it in half again, such that right corner folds onto the left corner.
- Now open the top half of the triangle and flatten into a diamond shape.

- Flip the paper over. Open and fold the fin to the top left and flatten into a diamond shape again.

- Open and fold the left flap and flatten it into a pyramid shape.

- Flip the paper and repeat flattening into pyramid shape with the other 3 sides.( Note: be careful not to fold wrong corners, you have to fold the four sides of the diamond)
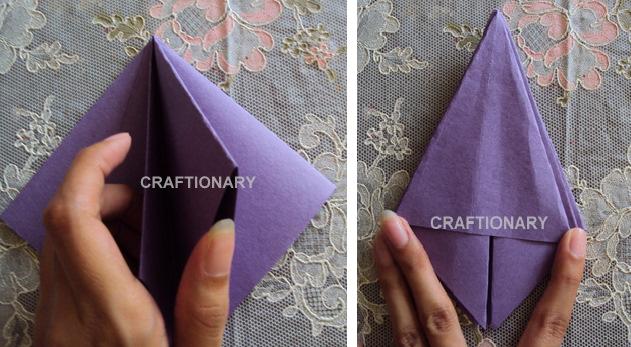
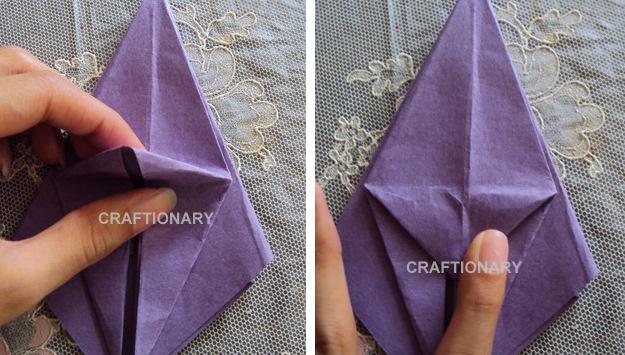
- Fold the edges to the center line, open the flaps, as pictured below and flatten into a diamond shape at the bottom. Flip the paper and repeat with the other 3 sides.
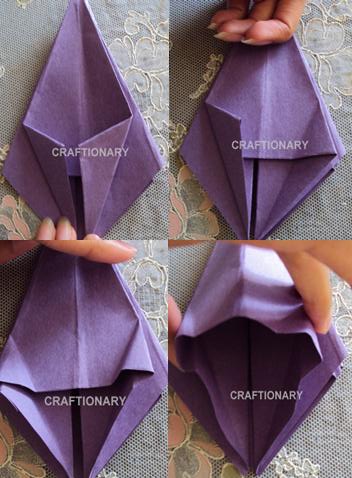
- Flip the triangle of the diamond and fold it down as shown in the picture below. Repeat with the other 3 sides.
- Rotate (flip) flaps you will get a clear surface as shown below. Now fold the top right and top left edges to the centre line like before. Flip the paper and repeat on the other 3 sides.
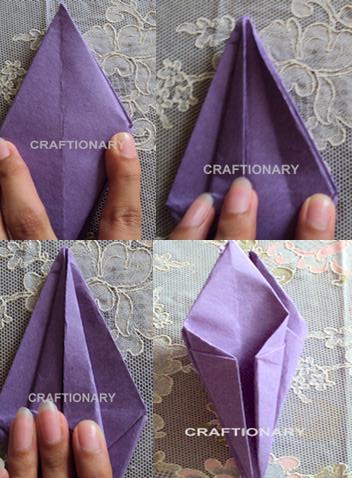
- Fold top triangles down, as shown in the picture below. Open the flower and your lily is ready. Enjoy!
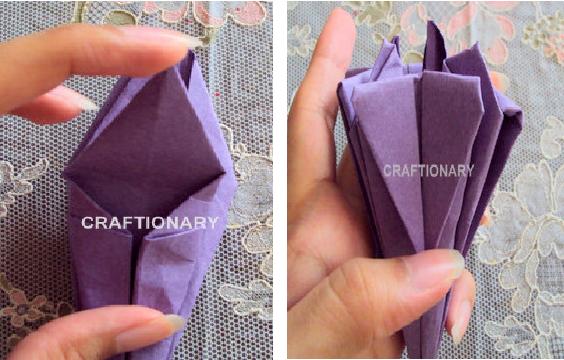
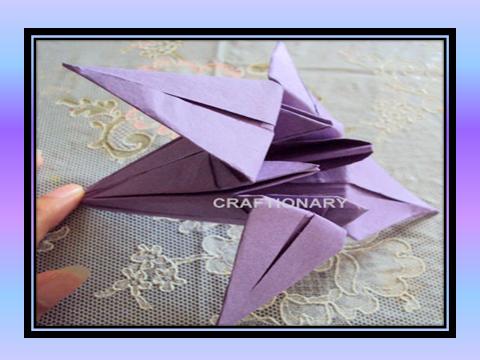
I hope it was fun making pencil holder with me!
Till next week
Stay happy and keep smiling
You may also like:
Cute office supplies organizer
Origami box tutorial
“This post first appeared on Craftionary.net”


it looks nice and easy, but by the third photo and instruction i couldnt do it. its way to difficult for me.