This post may contain affiliate links. Please see our full Disclosure Policy for details.
If your walls are feeling bare or uninspired, why not bring them to life with a beautiful DIY acrylic flower painting gallery? Whether you’re an artist or a beginner, floral canvas art is an easy and rewarding way to express yourself and decorate your home with warmth, color, and charm.
This article will guide you through the process of painting roses, crafting artistic pieces and curating a stunning gallery within your home.
Why Acrylic Flower Paintings?
Acrylic paint is versatile, beginner-friendly, and fast-drying—making it perfect for home art projects. Pair that with the timeless beauty of flowers, and you’ve got an art style that suits every room and aesthetic. Benefits of using acrylics as beginners:
- Quick drying time
- Bold, vibrant color
- Easy to layer and fix mistakes
- Ideal for canvas
Floral designs are equally versatile, from minimalist line art to expressive, textured blooms.

Supplies and Material:
To get started on your floral wall art, gather these basics:
- Canvas (varied sizes)
- Acrylic paints (flower and leaf tones)
- Paintbrushes (flat, round, detail)
- Palette and water container
- Pencil (for sketching)
- Varnish or clear acrylic sealant
- Hanging materials (hooks or adhesive strips)
- Optional: Texture paste, palette knives, stencils
Related: 50 Easy Acrylic Paintings of Flowers for Beginners

Step-by-Step: Paint Your Flower Art
The first and most important thing before starting to paint is to feel happy and motivated.
- Pick a Theme or Color Palette: Observe the beauty of flowers around you – in gardens, photographs, or even your imagination. Consider the types of flowers (roses, daisies, sunflowers), season (spring pastels, fall tones), or style (abstract, realistic) that you love, their unique shapes, and the colors that resonate with your home’s aesthetic.
- Sketch Lightly: Use a pencil to draw flower shapes lightly on the canvas. Don’t overthink it—just map out placement and form.
- Paint in Layers: Begin with a background color. Then, build up petals and leaves using darker base tones and add lighter highlights for depth.
- Add Details: Use finer brushes to paint details like veins in leaves, petal folds, or stamens. Experiment with dry brushing or impasto for texture. Consider adding highlights and shadows to give your flowers dimension and realism. White and darker shades of your base colors will be essential here.
- Dry and Seal: Let each painting dry thoroughly before applying a clear acrylic varnish for shine and protection.

How to shade a rose?
Use 4-5 shades of Red for shading the rose:
- Red: For the outline and last finishes if required.
- Red+ a dab of white: For shading petals near the outline.
- Red+ 2 dabs of white: For shading the petals far from the bud.
- White+ dab of red: For shading the petals near the bud.

Shading a rose flower

Painting flowers on canvas
Tips for painting flowers
- The dark shades are ideal for forecasting shadows and light tones for the sunlight. Use fine detail paintbrush for shading.
- Thin but not watery paint is best for fine strokes and shading.
- If you are a beginner use an embroidery rose photo as reference photo as you paint.
- Roll the brush in paint to pick your color and keep the tip of the brush sharp not frayed.
- Move the brush by applying force on the fingers holding the brush and do not move your wrist, these constant jerks clear fine controlled line.

Curating Your Home Art Gallery
Creating a visually appealing gallery wall is just as important as the individual pieces themselves. Consider these tips:
- Variety in Size and Orientation: Mix canvases of different sizes and orientations (portrait and landscape) to create a dynamic arrangement.
- Theme and Color Palette: While your theme is floral, consider unifying your gallery with a consistent color palette that complements your existing decor.
- Arrangement: Lay your paintings on the floor first to experiment with different arrangements before hanging them. Consider a grid layout for a formal symmetrical look or a free-form organic layout for a salon-style hang.
- Hanging with Precision: Use appropriate picture hooks or nails for your wall type. Leave consistent spacing between the frames for a cohesive feel. A good starting point is 2-3 inches.
- Personal Touches: Feel free to incorporate other art forms or decorative elements that complement your floral paintings, such as botanical prints, framed photographs, framed quotes, or small sculptural piece on shelf for variety.
- Compliment the wall: Incorporate negative space for a clean, modern feel.
Related: What Color to Paint Your Walls?

Seasonal & Style Inspiration
Here are a few ideas to theme your gallery by season or home decor style:
| SEASON/STYLE | FLOWER IDEAS | COLOR PALETTE |
| Spring | Cherry Blossoms, tulips | Soft pink, mint green, lavender |
| Summer | Sunflowers, poppies | Bold red, yellow, orange |
| Fall | Marigolds, dahlias | Warm browns, burnt orange, gold |
| Winter | White lilies, poinsettias | Icy blue, cranberry, forest green |
| Boho/Minimalist | Wildflowers, eucalyptus | Earth tones, muted pastels |
| Modern | Abstract petals, silhouettes | Monochrome, metallics |

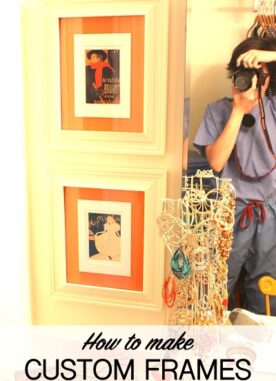
These cool vintage-styled colorful flower paintings with the nylon butterflies specimen frame and mother’s day canvas look perfect for Spring.
Creating an art gallery at home with acrylic flower paintings is a beautiful way to add personality and handmade elegance to your space. Not only do you get a wall full of art—you create a space that blooms with your creativity.
So pick up a brush, let the colors flow, and start painting your personal floral sanctuary.
You will also like:
How to stencil a magnetic board
List of DIY paints for furniture
You will also enjoy DIY Techniques and Home DIY Projects we pin regularly.


Hi dear, this is a cute piece of art, i like the colors..wall art is having lots of options..well its cool 🙂
Your paintings are beautiful Hani! Nice job! I love the vintage look too. And I must say that painting with music is a must. I can't paint without it 🙂
Hani, those paintings are gorgeous! You are so talented!
gorgeous, but I don't think I'd be able to do it.
How fun and pretty!
So bright and beautiful!
Hopping over from Ladybug Blessings linky party….
What a wonderful crafty project 🙂
I'd like to invite you to link your projects up at my weekly linking party at Craft Junkie Too. We'd love to have fabulous projects to share….:)
Tracy
T.G.I.F. Linky Party at Craft Junkie Too
Oh, very pretty! Nice work!!
They really do look vintage! Come see a stylish toilet seat!
Wow I think it's really good! I could never pull that off. I definitely think they're worth keeping.
Love what you did here. I am practicing on painting some flowers myself for one of the projects I am working on now.
Cuteness! I've been wanting to paint something lately.
those are beautiful!
Estou encantada com o seu talento, bom gosto e criatividade.
Parabéns
Lelê
Those are beautiful! You are really so talented!
Wow, your work is gorgeous!
Love the art wall! It turned out so cute. And I love the orchids too! Very clever. Thanks for sharing. 🙂
Thanks for linking this up to my Wickedly Crafty Saturdays! Get ready to show me some more wickedly awesome stuff!