This post may contain affiliate links. Please see our full Disclosure Policy for details.
The Day I Dropped an Acorn Into a Bowl of Swirling Nail Polish and Never Looked Back.
I’ll be honest with you — I stumbled onto nail polish dipping art completely by accident. I was cleaning out a junk drawer one October afternoon, found about thirty crusty nail polishes I’d been hoarding for long, and decided they needed a purpose. My kitchen windowsill had been collecting acorns my kids dragged in from the backyard, and something about the combination of those little brown caps and those glossy, forgotten bottles just clicked.
What happened when I dropped that first acorn into a shallow bowl of swirling nail polish on water was nothing short of magic. The surface wrapped itself around the acorn like it had been waiting to do exactly that. I spent the next hour dipping everything that wasn’t bolted down.
That was my introduction to what crafters call nail polish water marbling — a technique that goes by several names (hydro dipping, water marbling, ebru painting, nail polish dip art) but comes down to one beautifully simple concept: nail polish floats on water, you swirl it into patterns, and you dip things through it.
After testing a variety of natural object — acorns, dried leaves, pine cones, seed pods, dried orange slices, walnut shells — I’ve learned what works, what doesn’t, and all the tricks that nobody tells you the first time. This is the guide I wish I’d had.
What Is Nail Polish Dipping Art? (And Why It Works So Well on Nature Finds)
Before we get into the how, it helps to understand the why.
Nail polish is an enamel-based product. It’s formulated to be adhesive, flexible, and water-resistant — which is exactly what makes it brilliant for coating objects. When you drop nail polish onto the surface of water, it spreads out into a thin film almost instantly because the surface tension of the water holds it. It doesn’t dissolve. It floats.
That floating film is what you’re working with. You swirl it into patterns, then dip your object through the surface, and the film wraps itself around whatever breaks through. The result is a marbled, swirled, iridescent coating that’s completely unique every single time.
Related: Nail Polish Flowers: How to Make Wire and Nail Polish Petal Art?
Why natural objects specifically?
Natural items — dried leaves, acorns, seed pods, pine cones, small branches — have organic surface textures that hold the nail polish film exceptionally well. Their irregular shapes catch light at different angles, making the marbled patterns look even more dimensional. There’s also something deeply satisfying about the contrast: a wild, hand-harvested acorn wearing a coat of rose gold and cobalt blue.
The other reason natural items are ideal beginners’ objects? They’re free, endlessly available, and if you mess one up, you just go get another one from outside.
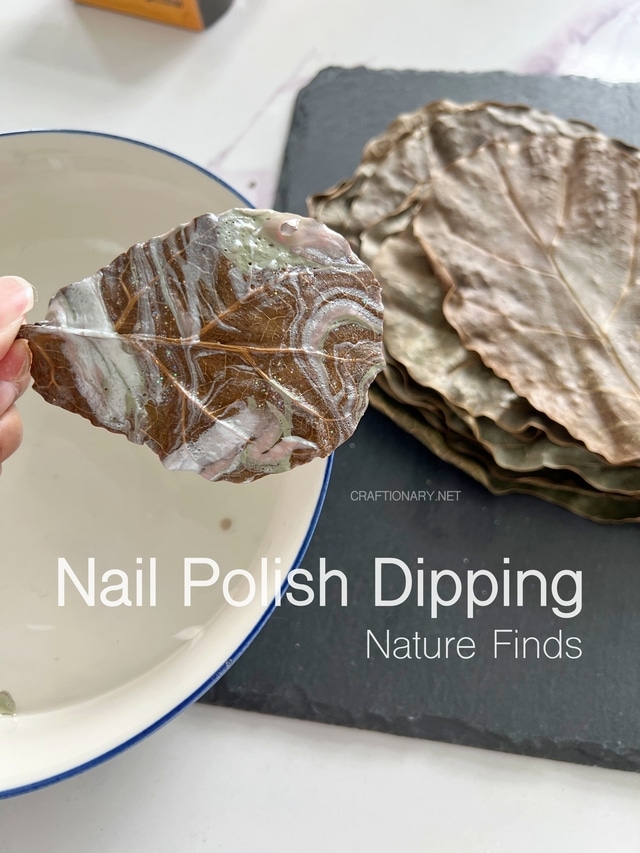
What You’ll Need: The Full Materials List
You don’t need much. That’s part of the appeal.
Essential supplies:
- Nail polish in 2–5 colors (old, cheap, or dollar-store polish works perfectly — you don’t need good polish for this)
- A wide, shallow bowl or container (disposable aluminum pans work great)
- Room-temperature water (cold water slows spreading; hot water speeds it up too fast)
- Toothpicks, skewers, or a craft stick for swirling
- Tweezers, chopsticks, skewers, or floral wire bent into a hook for holding items
- Petroleum jelly or cooking spray (for keeping your fingers clean — more on this below)
- Newspaper, a silicone mat, or wax paper for drying
- Paper towels and acetone/nail polish remover for cleanup
- Clear sealant spray (optional but highly recommended)
Your natural objects:
- Acorns (with or without caps — both work beautifully)
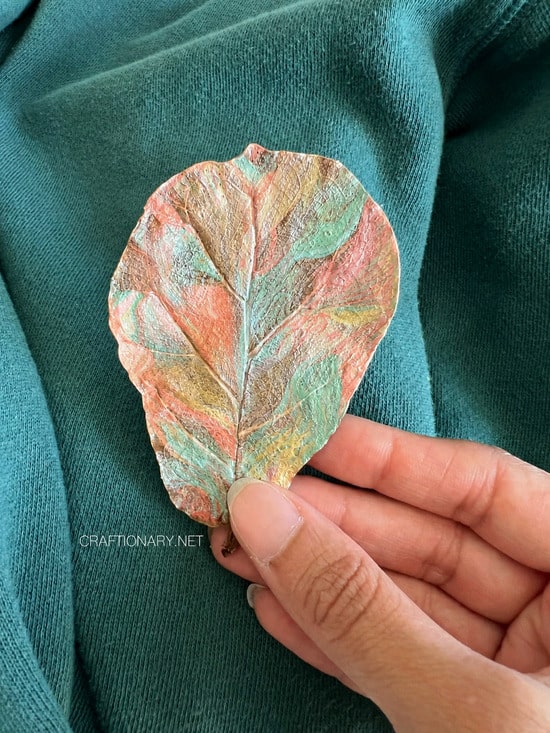
- Dried leaves (the crispier and drier, the better)
- Pine cones (mini ones are especially fun)
- Seed pods, dried flowers, small branches
- Walnut shells, other types of shells, dried orange slices, dried gourds
On nail polish selection: You want polish that spreads well. Older polish that’s slightly thickened tends to not spread as nicely. If you open a bottle and it’s become stringy or gummy, thin it with a few drops of nail polish thinner (not remover — thinner). Regular cream polishes, glitters, shimmers, and metallics all work. Chrome and mirror polishes create knockout results. Holographic polishes are absolutely stunning.
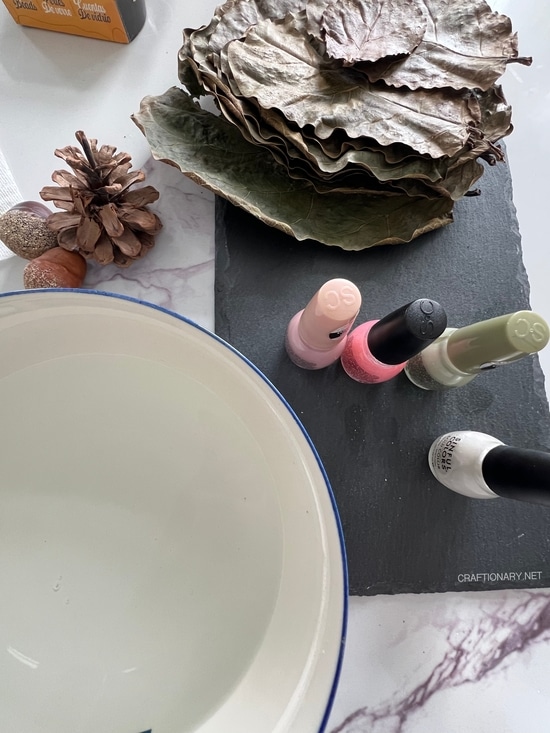
Step-by-Step: How to Water Marble Nature Objects with Nail Polish
1. Prepare Your Natural Objects
Your objects need to be completely dry. This cannot be overstated enough. Any moisture on the surface of a leaf or acorn will cause the nail polish film to slide right off or create fisheye bubbles.
If you’re working with freshly fallen leaves or acorns, spread them out on a tray and let them sit indoors for at least 24–48 hours. A week is better. For leaves specifically, press them under heavy books while they dry — this keeps them flat and prevents curling, which makes dipping dramatically easier.
For acorns:
- Remove any loose dirt or debris. A soft brush works well for getting into the ridges of acorn caps.
- Some people prime them first with a thin coat of white or light-colored spray paint, which makes the marbling colors pop more vividly. This is optional, but I strongly recommend it if you want really saturated, vibrant results. Let the primer dry completely before dipping.
2. Set Up Your Dipping Station
Fill your bowl with about 2–3 inches of room-temperature water. You want enough water that your objects won’t touch the bottom when you dip them, but you don’t need it deep.
Set up your workspace on a covered surface — newspaper, a plastic tray, or a silicone mat.
- Have your paper towels ready.
- Have your tweezers or skewers ready.
- Have your nail polish lined up with the caps loosened so you can open them quickly.
Speed matters a little once you start. The nail polish film doesn’t wait forever.
3. Apply Petroleum Jelly to Your Hands (Do This Before You Touch Anything)
This is the tip that changed everything for me.
Coat your fingers — especially your fingertips and nails — with a thick layer of petroleum jelly (Vaseline) before you start. If nail polish gets on your petrolatum-coated skin, it peels right off in one satisfying piece rather than staining your fingers orange for three days.
Alternatively, wear disposable gloves. But I find the petroleum jelly method gives you more dexterity while still protecting your skin.
You can also use it strategically on the part of an acorn you’re holding — apply a bit of petroleum jelly to the very tip of the acorn cap where your fingers will grip it. The jelly prevents the nail polish from sticking there, giving you a clean holding point.
You can also apply petroleum jelly to the object where you don’t want the nail polish to cling, giving you more control on your marbling art.
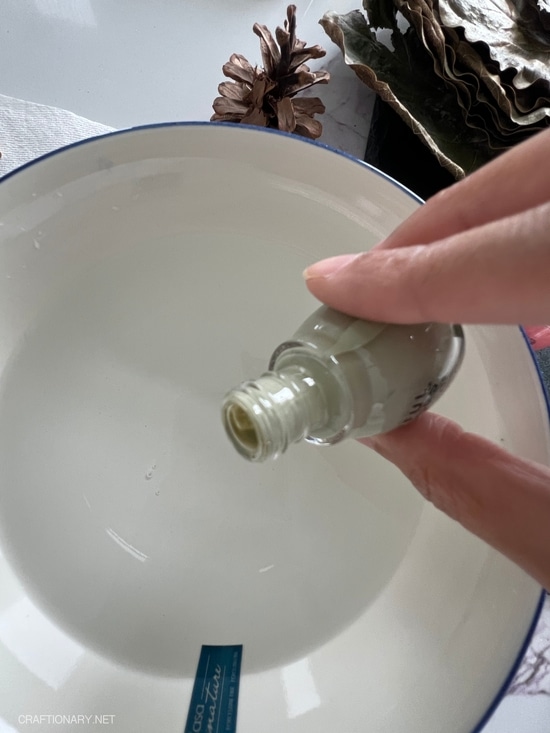
4. Drop Your Nail Polish onto the Water
Open your first color and drop 2–3 drops onto the water surface. Watch it spread out into a circle. Drop your second color in the center of that circle — it will push the first color outward. Drop a third, a fourth.
Work quickly. Most nail polishes give you about 60–90 seconds before the film starts to set and becomes less workable. Older polish or thicker polish may set even faster.
How many colors? Two or three colors is a great starting point. Five or six creates more complex patterns but can get muddy if the colors aren’t chosen thoughtfully. Contrasting colors — dark and light, warm and cool — give the most dramatic results. Analogous colors (like coral, orange, and gold) create a gorgeous, blended look.
If a color sinks: It’s too thick or old. Thin it or swap to a different bottle.
Here’s a quick video demonstrating the process.
5. Swirl Your Pattern
Using a toothpick or skewer, drag it through the surface of the polish. You can make simple swirls, zigzags, feather patterns, or concentric spirals. Every movement you make changes the design.
A few patterns worth knowing:
- Classic marble: Drag the toothpick in loose S-curves from edge to edge
- Feather/chevron: Draw lines in one direction, then drag perpendicular lines back through them
- Starburst: Start at the edges and drag toward the center from all sides
- Free swirl: Just go wild — it always looks beautiful
Whatever you do, do it gently. Pressing too hard through the water disturbs the pattern beneath. You’re working on the surface, not stirring the water.
6. Dip Your Object
Hold your object with tweezers, a skewer poked through it, or carefully with your petroleum-jelly-coated fingers. Approach the surface of the water at an angle — don’t plunge straight down. Think of it as rolling the object through the surface film rather than dunking it.
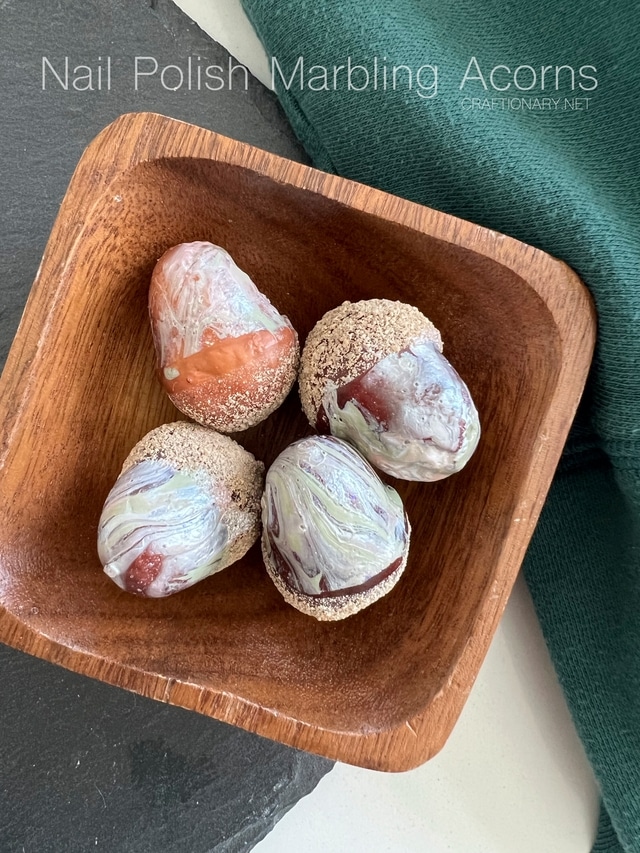
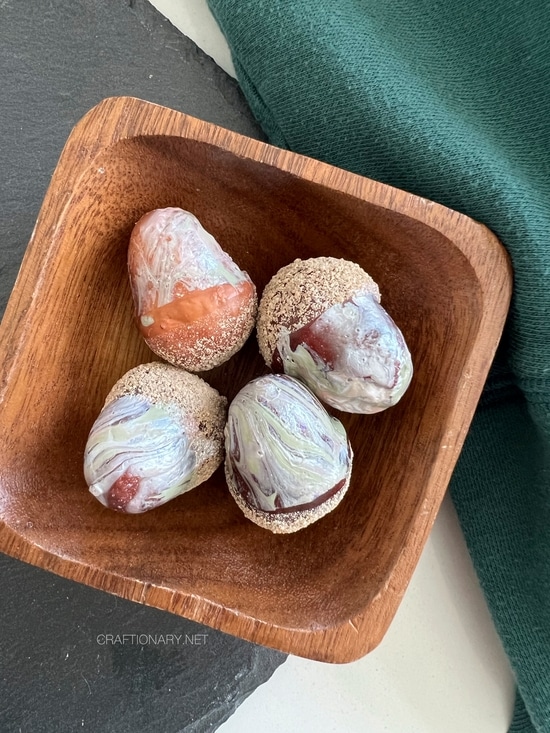
- For acorns: Lower them slowly until they touch the surface, then gently roll them or pull them through the film. The polish wraps around as you pull up.
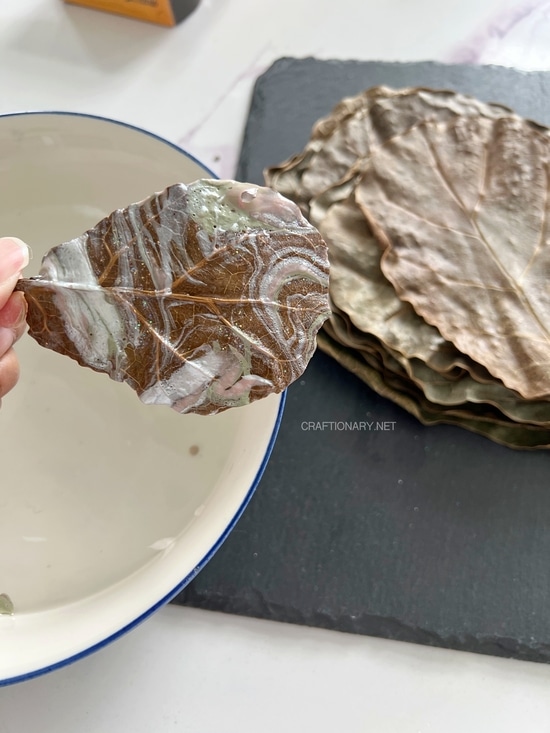
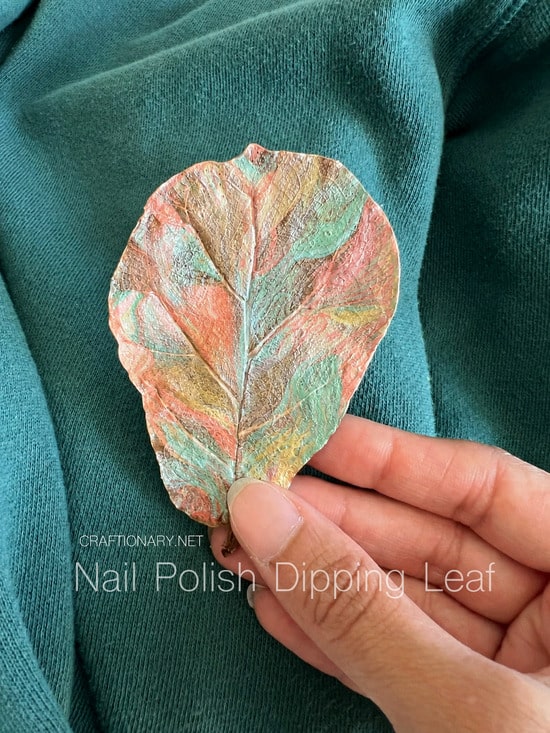
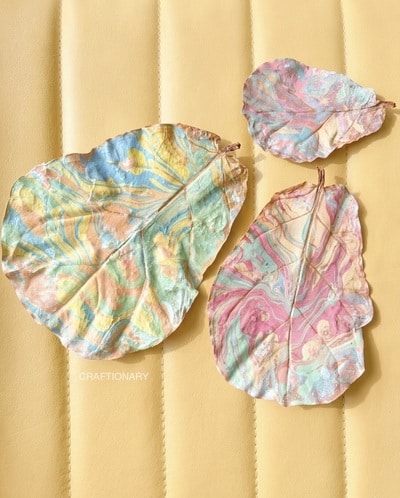
- For leaves: This is trickier because leaves are flat and large. Lower one end of the leaf into the water first, then slowly lower the rest, dragging it through the film. You can also lay the leaf flat on the surface and press it gently — but pulling through at an angle gives cleaner results.
- For pine cones or irregular objects: Lower them slowly and rotate gently as they pass through the film. The texture catches the polish beautifully.
Once your object is through the surface, blow gently across the water to move any remaining film away from your object before you lift it out. This prevents trailing strings of polish from dragging across your finished piece.
7. Clear the Water Surface Between Dips
After each dip, the remaining nail polish film needs to be removed from the water before you add fresh polish. Otherwise you’ll be dipping into a cloudy, already-set layer.
Drag a paper towel across the surface of the water to pick up the leftover film. A few sweeps and the surface is clean.
Change the water entirely every 5–6 dips, or sooner if the water becomes murky or the polish stops spreading well.
See the instructions in action in this short video:
View this post on Instagram
Tips for Dipping Without Making a Mess
- Work outside or on a fully covered surface. Nail polish spatters are not forgiving on countertops, grout, or fabric. Lay down a large sheet of plastic sheeting under your entire setup.
- Loosen all your nail polish caps before you begin. You’ll be surprised how stressful it is when you’re racing the clock and the cap won’t budge.
- Keep a dedicated dirty container nearby for soaking your tweezers or skewers between dips. A small cup with acetone keeps the tools clean.
- Don’t panic when strings happen. Nail polish strings — fine threads of polish that trail off the object — are normal. Let them dry and then pick them off with a fingernail or tweezers once dry.
- Work in small batches. Prep twenty objects at a time, dip them, let them dry, then move to the next batch.
- Keep the acetone/nail polish remover away from your finished pieces. The fumes alone can cause the polish to dull before it dries.
How to Keep Your Hands Clean?
Here’s the full strategy:
- Petroleum jelly on fingers before you start — the single most effective thing you can do
- Use tools whenever possible — tweezers, skewers, floral wire hooks — and reserve hand contact for objects you absolutely need to hold
- Have acetone-soaked cotton balls ready — if polish does get on your skin, hit it fast before it dries fully
- Use disposable gloves if you hate the petroleum jelly feel — thin nitrile gloves give decent dexterity
- Don’t touch the sides of the bowl — the rim always has a ring of dried polish that transfers to everything
How to Place Dipped Items for Drying?
This part matters more than most tutorials acknowledge.
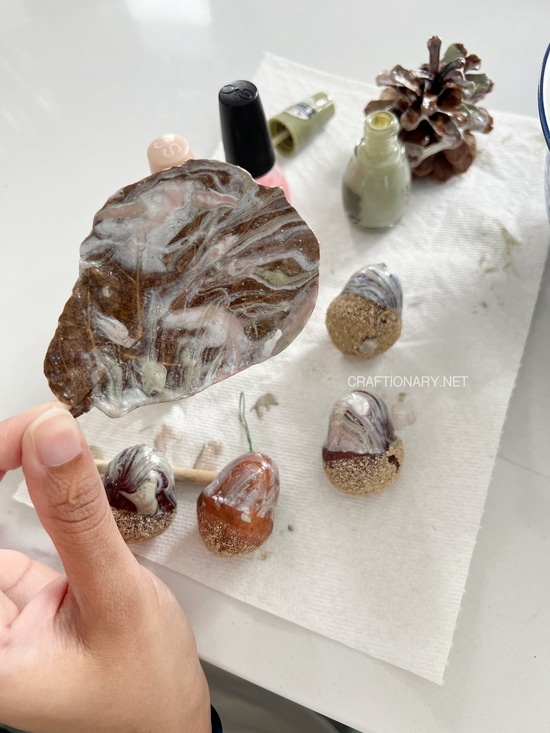
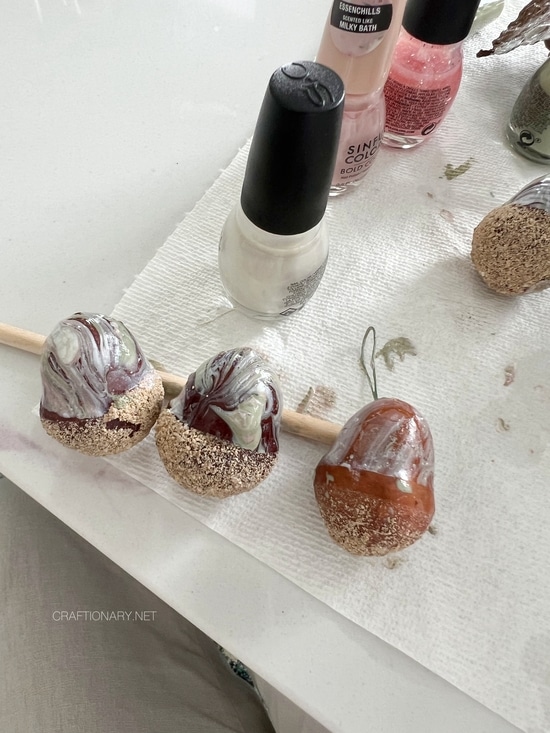
- For acorns: Place them on a piece of wax paper or a silicone mat, cap-side down. This prevents the bottom of the acorn (the rounder end) from getting a flat spot where it rested while wet. Alternatively, poke a toothpick into the base of each acorn and prop them in a piece of foam or a florist’s block so they hang suspended while drying. This gives the most even coat.
- For leaves: Lay them flat on wax paper. Don’t stack them — they will stick to each other. If you want to preserve a slight curl in the leaf, drape it over a rounded object (like a dowel rod or the edge of a cup) while it dries.
- For pine cones or irregular objects: Rest them in a cardboard egg carton — each cup holds one piece perfectly without it rolling around.
Drying time: Most nail polish dips are touch-dry in 15–20 minutes but fully hard in 2–4 hours. Don’t handle the pieces much in the first hour. Let them sit overnight before stacking or storing.
Avoid moving air while they’re wet. Fans speed drying but also blow dust particles onto the tacky surface. Work in a low-traffic area.
How to Seal Your Dipped Natural Objects for Long-Lasting Results?
The nail polish film, while durable, benefits enormously from sealing — especially on natural objects that are porous, flexible, or likely to be handled.
Why seal?
- Prevents the nail polish from chipping or peeling off the organic surface
- Protects against humidity (dried leaves especially are hygroscopic — they absorb moisture from the air and expand slightly, which can crack a nail polish coating)
- Adds a uniform finish (matte, satin, or glossy — your choice)
- Makes the pieces suitable for handling, gifting, or using in arrangements
Best sealants for nail polish dip art on natural objects:
- Mod Podge (Gloss or Matte): The classic. Brush it on in thin coats. Two coats is usually sufficient. Let each coat dry fully before applying the next. It dries clear, it’s flexible, and it’s widely available.
- Clear acrylic sealant spray (like Krylon Crystal Clear or Rust-Oleum Crystal Clear): My personal favorite for this application. One or two light passes from 10–12 inches away, let dry 30 minutes, do a second coat. The spray application means you don’t disturb the nail polish film with a brush, and the coverage is very even.
- Triple Thick Glaze: Creates a thick, glossy, glass-like surface. Beautiful on acorns if you want a high-shine look. More brittle than Mod Podge.
- Nail topcoat: Works beautifully for small items and gives the most compatible bond with the nail polish underneath. Best for acorns and small objects where you can brush it on efficiently.
Related: Best Sealer: How to Waterproof Acrylic Paint on Rocks, Wood, Glass Crafts
Tips for sealing:
- Let the nail polish dry for at least 4–6 hours before sealing
- Apply sealant in a ventilated area
- For leaves, let the first sealant coat soak in slightly before adding the second — the first coat often soaks into the leaf fiber and needs a second to provide full protection
- Don’t use oil-based sealants — they can cause nail polish to lift or cloud
Related: How to Collect and Preserve Leaves for Art without Discoloration
What to Do With Your Dipped Acorns and Leaves?
This is where the real fun begins. Once you have a collection of marbled, sealed natural pieces, the possibilities are genuinely beautiful.
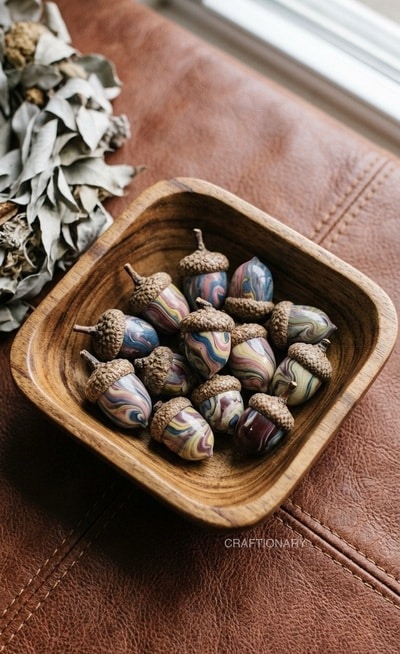
- Bowl and Vase Fillers: Fill a large glass apothecary jar or hurricane vase with a mix of nail-polish-dipped acorns.
- Scattered Table Decor: Scatter dipped acorns and curled leaves down the center of a table runner as an effortless tablescape. They photograph beautifully and cost almost nothing.
- Gift Topping and Wrapping Accents: Tie a few dipped acorns to a ribbon on a wrapped gift. Tuck a marbled leaf under the bow. These small touches elevate packaging from pretty to genuinely memorable, and people often keep the accents long after the gift is opened.
- Wreaths and Garlands: Hot-glue dipped acorns onto a grapevine wreath for an autumnal showpiece. Thread small dipped leaves through a twine garland.
- Shadow Boxes and Frame Art: Arrange a collection of dipped leaves, small seed pods, and acorns in a shadow box frame. This is a surprisingly sophisticated piece of wall art, especially with a neutral linen backing.
- Place Card Holders: Write names on small tent cards and set a dipped acorn against each one as a place card holder at Thanksgiving or a dinner party.
- Fairy Garden Accents: If you keep a fairy garden, terrariums, or a succulent arrangement, dipped acorns make unexpected, whimsical little decorative stones.
- Teacher Gifts, Party Favors, and Homemade Ornaments: Bag a few dipped acorns in a small cellophane bag with a ribbon for the easiest, most charming fall gift ever. Drill a tiny hole through a dipped acorn and thread wire through it for a tree ornament that looks like it came from a boutique shop.
Common Questions About Nail Polish Dipping Art
Does nail polish stick to acorns?
Yes, very well — especially if the acorn is fully dried and you’ve applied a light primer coat first. The slightly rough, porous surface of an acorn actually holds the nail polish film better than smooth plastic or glass objects.
Can you use any nail polish?
Most nail polishes work. The key is that it spreads easily when dropped on water. Older, thickened polish may not spread well — thin it first. Gel nail polishes generally don’t work for this technique because they don’t float on water the same way. Shellac and gel-in-a-bottle formulas are a no-go.
What water temperature works best?
Room temperature is ideal. Cold water slows the spreading of the polish, which can be useful if you want more time to work but can also make for a less fluid film. Hot water makes the polish spread very quickly but can also make it harder to control. Start with cool-to-room-temperature water and adjust from there.
How do you keep nail polish from spreading too quickly?
Drop it from higher up (3–4 inches above the surface) — a higher drop creates a wider initial spread. Adding a tiny amount of dish soap to the water can also slow spreading if needed.
Why is your nail polish sinking?
The polish is too thick. Thin it with nail polish thinner, not remover. Alternatively, the water is too hot, causing the polish to break down and sink.
Can you dip pine cones?
Absolutely. Mini pine cones are especially wonderful for dipping. Because of their irregular surface, the polish hits differently on each scale and creates a really striking effect. The technique is the same — just rotate the pine cone slowly as you pull it through the surface.
Do dipped leaves hold up over time?
With proper sealing, yes. Unsealed dipped leaves are fragile — they’re already dried and brittle, and the nail polish alone doesn’t fully protect them. Two coats of clear acrylic sealant spray makes them reasonably durable for decorative purposes. They’re still delicate, but they’ll hold together for a season or longer.
Can kids do this project?
With supervision, yes — it’s a popular project for older children and teens. Nail polish fumes require good ventilation, and the cleanup products (acetone) need to be handled by adults. For younger children, there are water-based acrylic paint versions of the marbling technique that are much safer and still produce beautiful results.
What’s the difference between hydro dipping and water marbling?
In common craft usage, these terms are used interchangeably. Technically, hydro dipping (also called hydrographics or water transfer printing) is an industrial process using a printed film and an activator chemical. Water marbling with nail polish is a simplified, accessible version of the same principle. When people say hydro dipping with nail polish at home, they mean water marbling.
Can you re-dip something if you don’t like the first result?
Yes! Let the first dip dry completely, then dip again. You can build up multiple layers of marbling. You can also wipe off a fresh dip with acetone if you don’t like it and start over.
Advanced Tips for Better Results
Layered dipping for depth: Dip your object, let it dry completely, then dip again. The second layer creates a dimensional, layered effect that looks incredibly complex but is simple to achieve.
- Gold leaf accent: After dipping and before sealing, apply tiny bits of gold leaf to edges or high points. The nail polish creates adhesion for the leaf. The result looks extraordinarily luxurious.
- Chunky glitter accent layer: Dip a dried item in plain Mod Podge, then roll it in fine glitter before it dries. Then seal. The combination of a marbled nail polish base with a glitter overlay is absolutely stunning on acorns for holiday decor.
- Color story collections: Rather than using random colors, pick a palette and stick to it for a batch. A set of acorns all dipped in the same 3-color combination (say, dusty rose, antique gold, and cream) looks like a deliberate design collection. This matters when you’re using them as a bowl filler or gift set.
- Use black or dark-tinted water: Adding a few drops of black ink or dark food coloring to your water before dipping makes the nail polish colors pop dramatically. Especially effective with metallic polishes.
Quick Reference: Best Nail Polish Colors for Natural Objects
- For Fall: Burnt orange, copper, deep burgundy, antique gold, forest green, chocolate brown
- For Winter: Silver chrome, white pearl, icy blue, midnight navy, holographic glitter
- For Spring: Blush pink, mint, lavender, soft yellow, peach coral
- For year-round wow factor: Black with gold, white with rose gold, navy with silver, deep plum with bronze
Key Takeaways
- Nail polish water marbling works beautifully on dried natural objects — acorns, leaves, pine cones, seed pods
- Objects must be completely dry before dipping; primer paint improves color vibrancy
- Room-temperature water, quick color drops, and gentle swirling create the best patterns
- Petroleum jelly on fingers is the single best trick for keeping hands clean
- Prop dipped objects to dry without flat spots; drying time is 2–4 hours minimum
- Always seal finished pieces with clear acrylic spray or Mod Podge for durability
- Dipped natural objects make stunning bowl fillers, table decor, wreaths, gift accents, and more
Whether you have a windowsill full of acorns from your kids, a pile of autumn leaves begging for a purpose, or a bag of old nail polish you keep meaning to throw away — this is the project that makes all of it worthwhile. Set up a bowl of water on the porch on a Saturday morning and see what happens. I promise you won’t stop at one.
Popular Nail Polish Dipped Projects
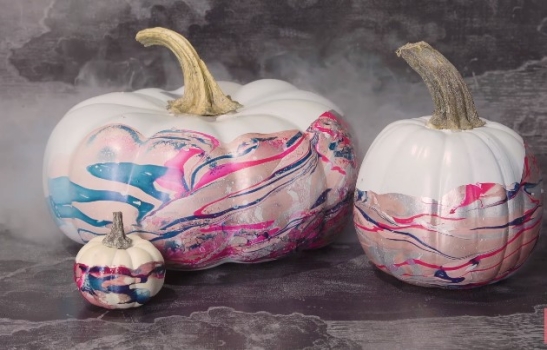
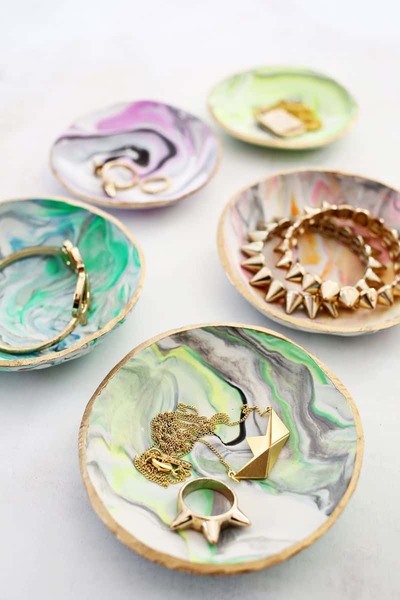
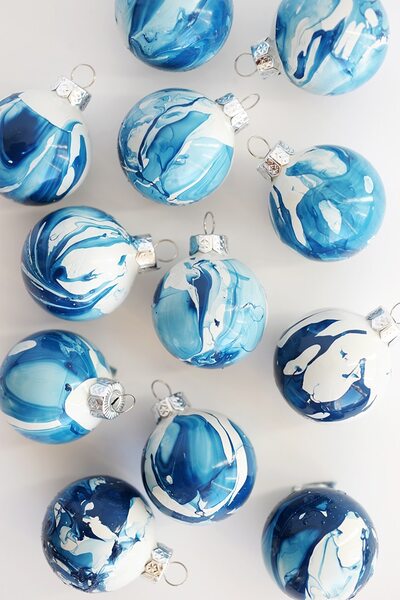
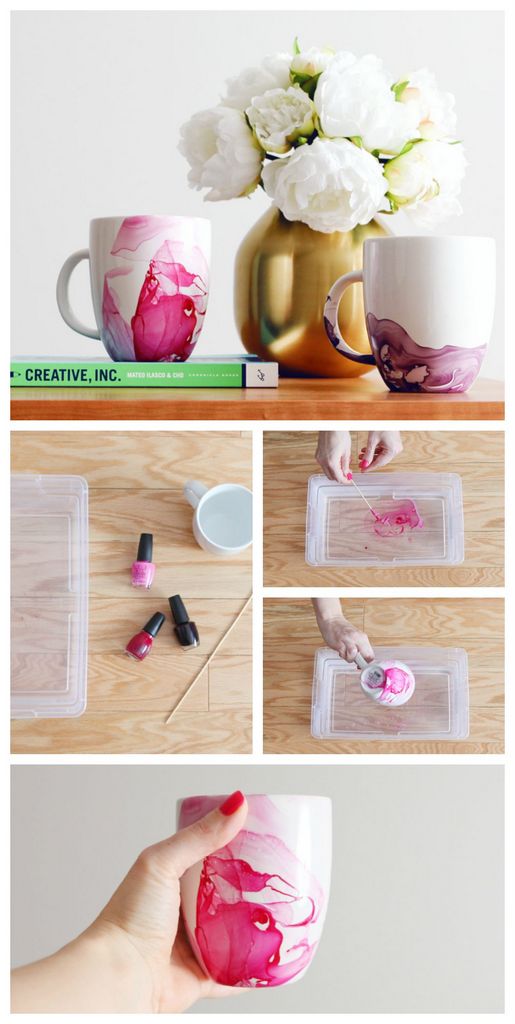
Here are other trending items that you can use with this technique:
1. Pumpkins
2. Clay Dishes
3. Ornaments
4. Mugs
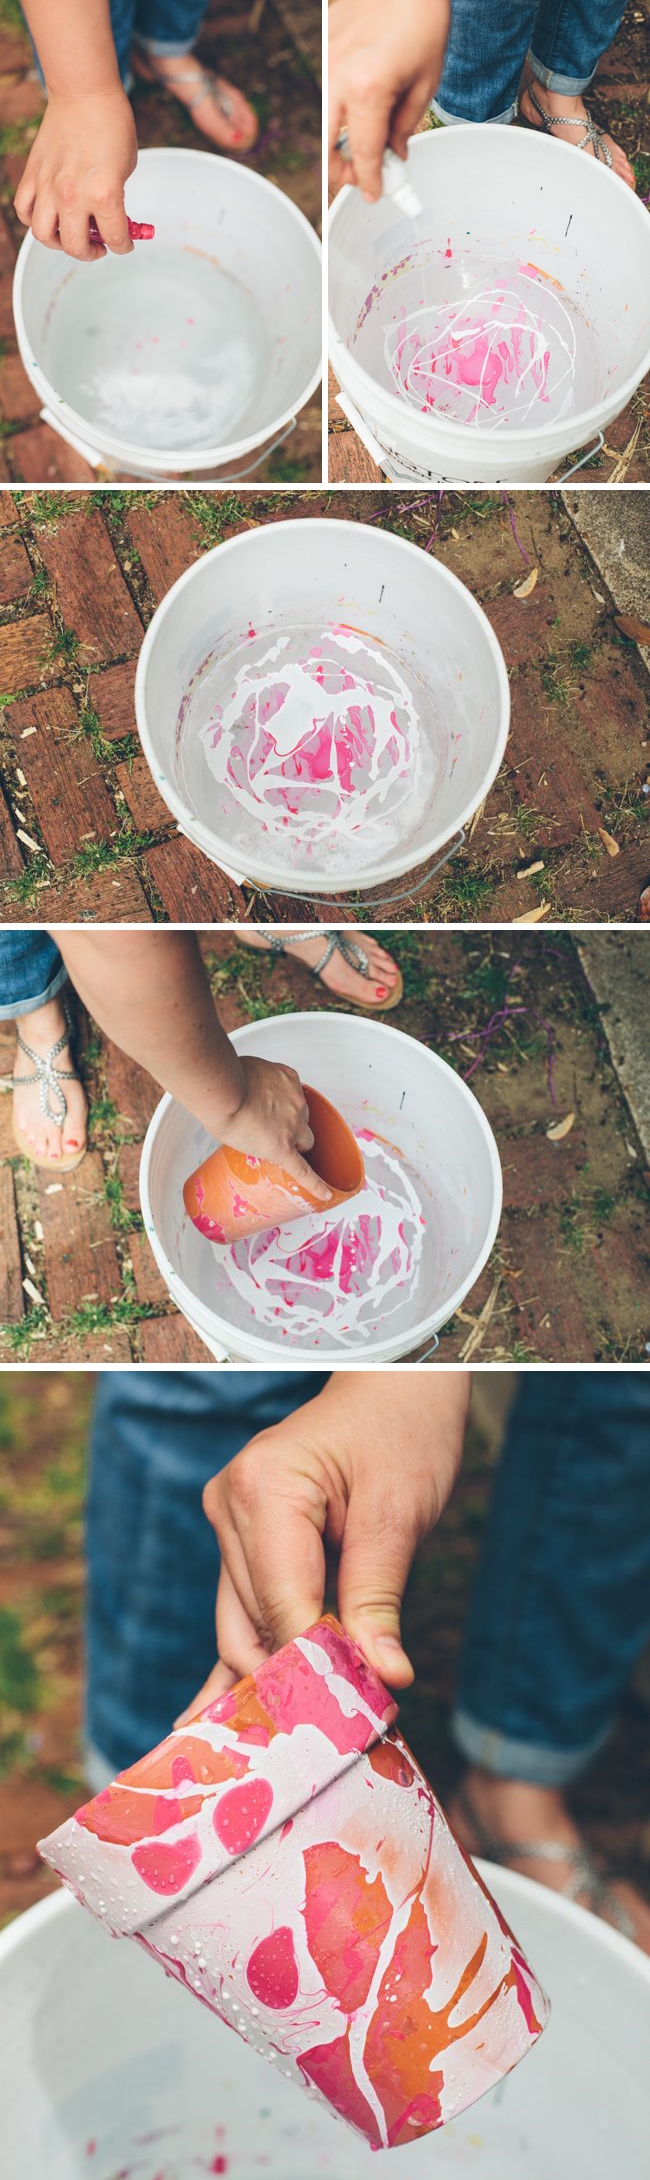
5. Flower pot
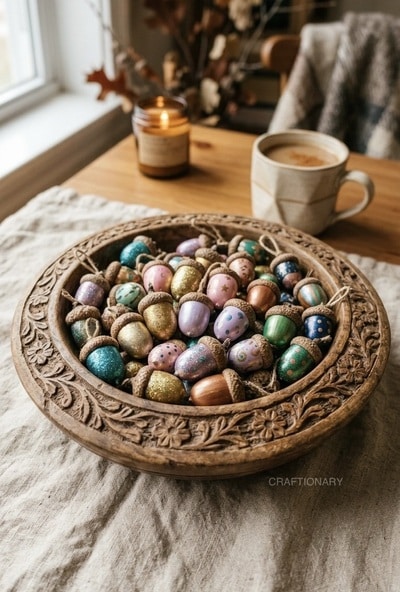
These acorns are hand painted with nail polish as paints.
You will also like:
30 ways to make Abstract Art projects