This post may contain affiliate links. Please see our full Disclosure Policy for details.
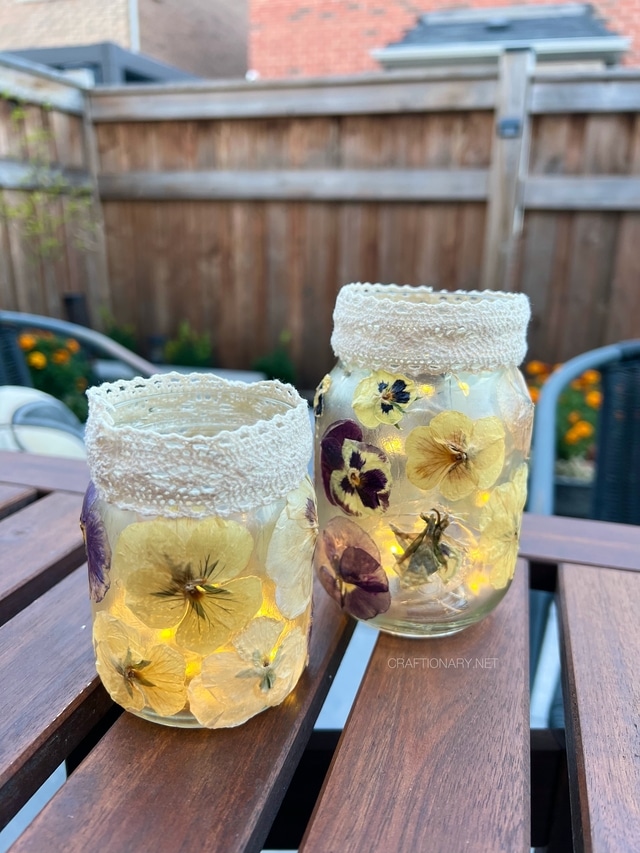
There’s a particular kind of magic in a backyard evening lit by jars full of flowers — the kind of glow that makes you want to sit outside just five more minutes with your tea. That’s exactly what pulled me into this project. I’d been growing pansies all summer (they’re ridiculously generous bloomers if you deadhead them), and instead of letting the last flush go to waste, I pressed and dried a handful, decoupaged them onto mason jars with mod podge, and slipped string lights inside. The result: two glowing little luminaries that now live permanently on my patio table.
If you’ve been searching for dried flower mason jar luminaries, you’re probably picturing something similar — and the good news is, this is one of those crafts that looks far more impressive than it is difficult. Here’s everything you need to know to make your own, plus the details that actually make the difference between a jar that looks pretty for a week and one that holds up all season.
Mason jar luminaries sit at the intersection of three things people constantly search for:
- Budget-friendly home decor
- Ways to preserve garden flowers
- Cozy outdoor lighting ideas
What makes the dried-flower version stand out from plain painted or frosted mason jar lights is texture — real botanicals catch candlelight or LED glow in a way that printed patterns or paint never can. Every jar is genuinely one-of-a-kind because no two pressed flowers dry or place exactly the same way.
It’s also a wonderful use for flowers that are past their vase life. Pansies, in particular, are ideal for this because they’re naturally flat-faced, which makes them press and dry beautifully without a ton of bulk to fight against later.
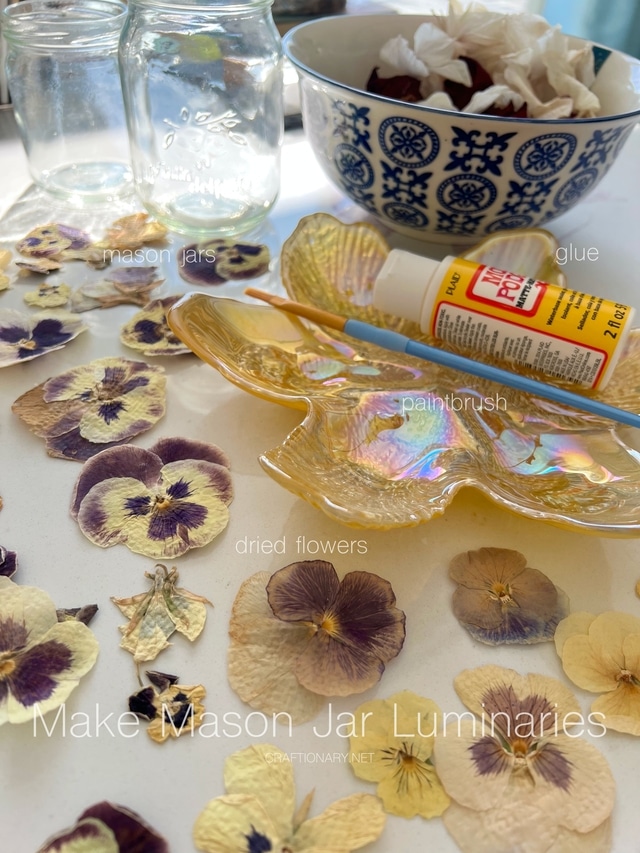
Materials You’ll Need
- Clean, dry glass mason jars (labels fully removed — a soak in warm soapy water dissolves most adhesive, and a little rubbing alcohol handles the rest. I like to use goo gone for stubborn adhesives)
- Dried or pressed flowers (pansies, violas, ferns, baby’s breath, and small daisies all work beautifully)
- Mod Podge (matte finish is popular for a natural look; gloss gives more shine and shows off the glass)
- A soft flat paintbrush
- Tweezers (for precise flower placement — a genuine game-changer with small, delicate petals)
- Battery-operated or plug-in string lights, mini fairy lights, or micro LED strands
- Wax paper or a drying mat, if pressing your own flowers from scratch
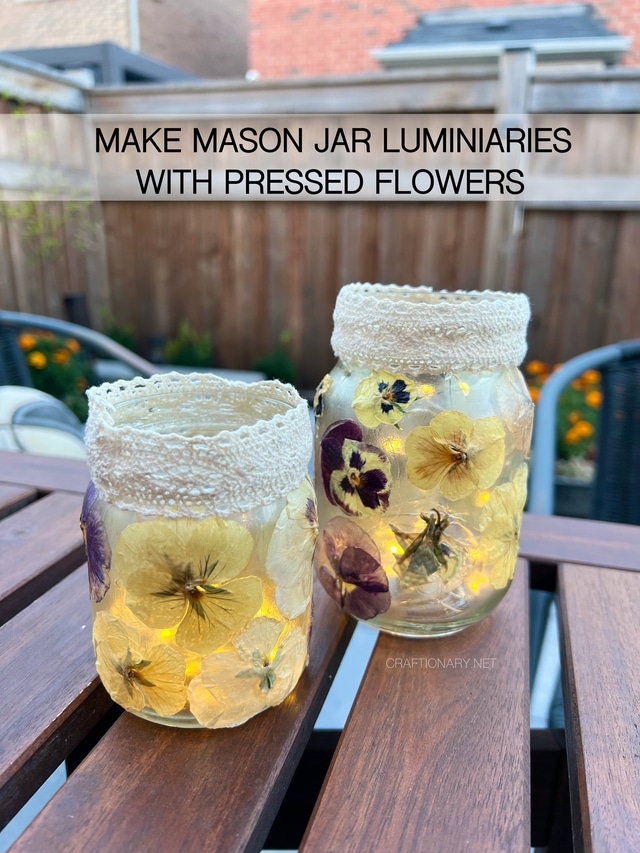
How to Make Dried Flower Mason Jar Luminaries?
1. Press and dry your flowers properly
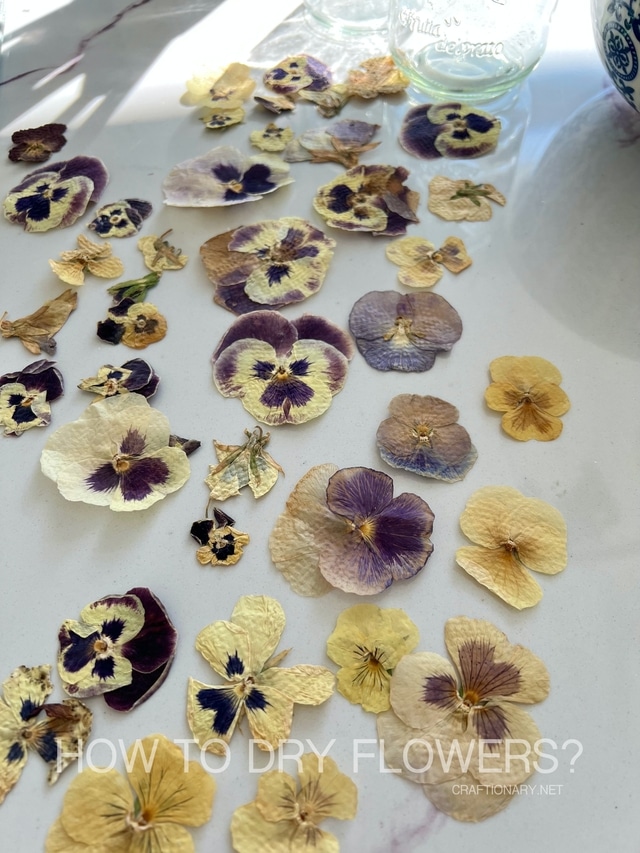
If you’re picking fresh, like pansies straight from the garden, timing matters. Choose flowers that are just fully open, not yet fading — they hold their color best. Press them between sheets of parchment or wax paper inside a heavy book, or use a flower press if you have one, and give them at least one to two weeks. Pansies are thin-petaled, so they dry relatively fast, but rushing this step is the number one reason decoupaged flowers turn brown or brittle too early. Fully dried petals should feel papery and stiff, not cool or flexible.
Related: Vintage PRESSED FLOWERS in frame of gold in seconds
2. Clean and prep the jar
Wash the jar thoroughly and let it dry completely — any moisture or residue will interfere with the mod podge bonding to the glass. If you want a slightly frosted, softer glow later, this is also the stage to consider a light coat of glass frosting spray on the inside before you start decoupaging the outside (more on this below).
3. Brush on the base layer
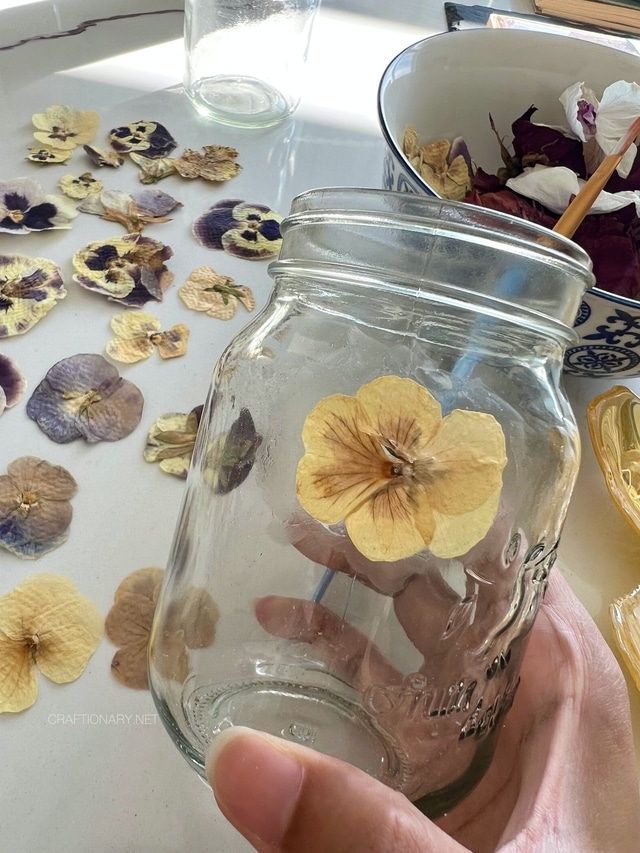
Using your flat brush, apply a thin, even layer of mod podge exactly where you plan to place each flower. Working in small sections rather than coating the whole jar at once keeps the glue from drying out before you get your flowers positioned.
4. Place your flowers
This is the step where tweezers earn their keep. Dried petals are fragile and can tear or crack under fingertip pressure, especially something as delicate as a pansy. Lay each flower down gently, then use the flat side of the brush (not your finger) to press out any air bubbles from the center outward.
5. Seal with a top coat
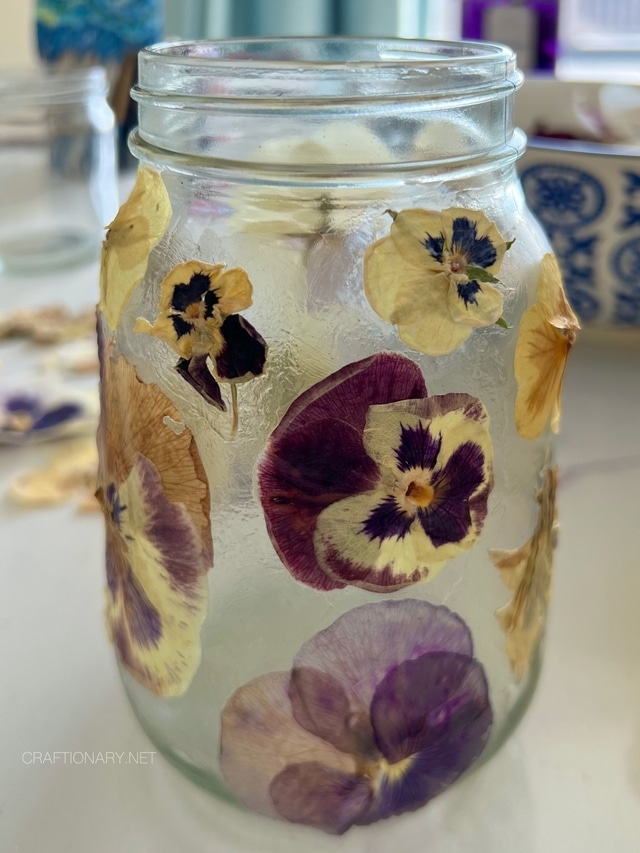
Once your flowers are placed, brush a second layer of mod podge directly over them to seal them against the glass. Go slowly and use light pressure here — dried petals will sometimes lift or shift if you brush too aggressively. Let this dry completely, usually 20 to 30 minutes for a workable set and a full 24 hours for a true cure.
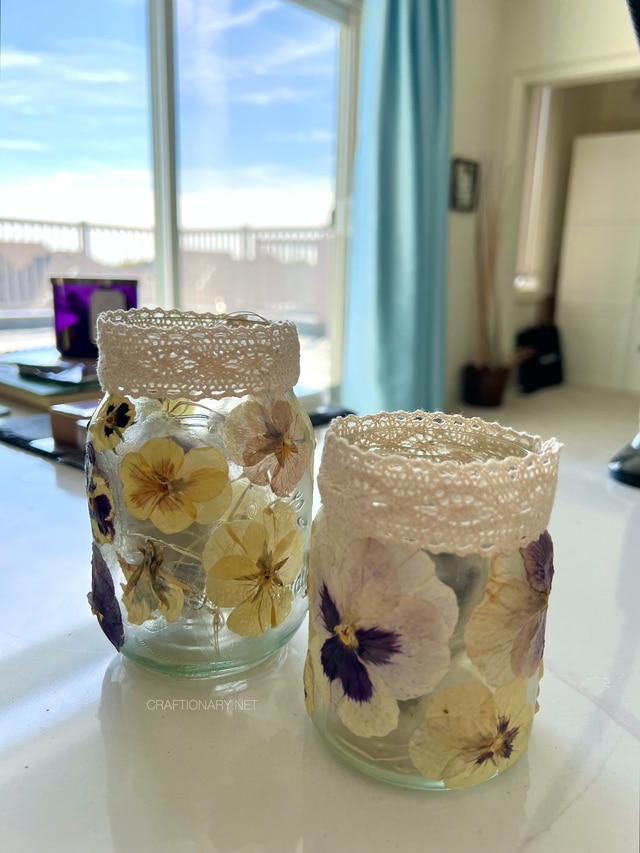
Decorate the top of the jar with string or use double-sided tape to glue a ribbon.
6. Add your light source
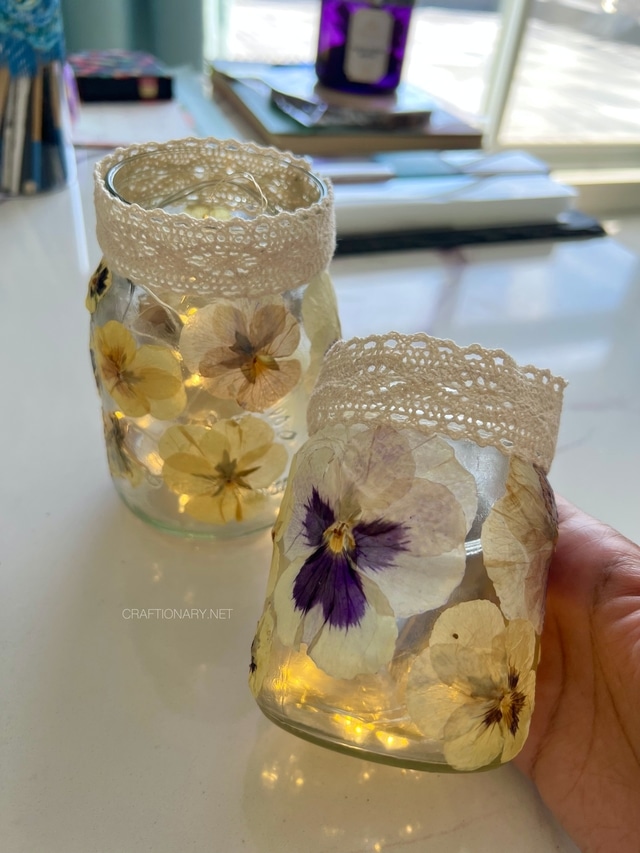
Once fully dry, drop in your string lights, mini fairy lights, or an LED tea light. Battery-operated strands are ideal for outdoor luminaries since you’re not managing a cord, and warm white (not cool white) light gives dried flowers a golden, sunset-like glow instead of a stark, clinical one.
Tips That Make a Real Difference
- Use a UV-resistant top coat for outdoor jars. Regular mod podge will hold, but sun exposure fades dried flower color over time. A spray-on UV-protectant sealant or a mod podge outdoor formula on top of your final coat significantly extends how vibrant your flowers stay through the season.
- Layer flowers of different sizes for depth. A single pressed pansy looks sweet, but combining a large flower with smaller sprigs of baby’s breath or fern fronds around it creates a fuller, more dimensional look once the light hits it.
- Frost the inside for a diffused glow. If direct light through clear glass feels too harsh, a light interior coat of frosted glass spray softens the light into more of an ambient wash, which reads beautifully at dusk.
- Group jars in odd numbers. Three or five jars of varying heights along a table or path reads more intentional and designed than a single jar or an even, matched set.
- Save your prettiest flowers for the jar’s front. Since you’re often seeing these from one primary angle (on a table, along a path), concentrate your best blooms on the side that faces outward.
- Try color families instead of mixed bouquets. A jar entirely in purples and violets (perfect for pansies) or entirely in yellows and golds tends to photograph and glow more cohesively than a rainbow mix.
Creative Variations to Try Next
- Seasonal rotation jars: pansies and violets for spring, dried hydrangea or baby’s breath for summer whites, marigolds and mums for a warm fall palette
- Wedding or event luminaries: line a garden aisle or reception table with a whole set, using flowers that match the event’s color scheme
- Gift jars: add a ribbon and a small tag with the flower’s meaning (pansies traditionally symbolize thoughtfulness and remembrance) for a genuinely personal handmade gift
- Herb and flower combos: pressed lavender or rosemary sprigs alongside flowers add a subtle scent story when the jar warms slightly from the light
- Two-toned ombre jars: cluster lighter petals near the top and deeper colors near the base for a gradient effect
Common Questions About Dried Flower Mason Jar Luminaries
1. Can you use fresh flowers instead of dried ones?
Fresh flowers will decoupage initially but will mold or discolor under the sealant within days, since moisture gets trapped against the glass. Flowers need to be fully pressed and dried first for a luminary that lasts.
2. How long do dried flower luminaries typically last?
With a proper seal and reasonable sun protection, these can look great for six months to over a year. Indoor luminaries, protected from UV and weather, often last even longer.
3. Can these jars go outside in the rain?
Mod podge isn’t fully waterproof on its own, so it’s best to bring jars in during rain or heavy dew, or finish them with an outdoor/weatherproof mod podge formula and a spray sealant for extra protection.
4. What flowers press and dry best for this project?
Flat-faced flowers like pansies, violas, cosmos, and daisies press cleanly. Ferns, baby’s breath, and small leaves are great fillers. Thicker or fleshier flowers like roses need more time and sometimes silica gel drying instead of simple pressing.
5. Is mod podge safe to use with string lights inside the jar?
Yes. LED string lights and battery-operated fairy lights run cool, so there’s no fire or heat risk from the mod podge or the dried flowers. Avoid using real candles inside a decoupaged jar, since open flame is a different safety consideration entirely and can scorch both the glue and the glass.
6. Will the flowers fade over time?
Some fading is natural, especially outdoors, but a UV-protectant sealant slows this considerably. Indoor jars or ones kept out of direct sun will hold their color far longer — often a year or more.
What makes this project worth doing isn’t just the finished glow — it’s that it turns flowers you grew yourself into something that keeps giving you evenings outside. A pansy that bloomed in July is still catching the light on your patio table in October. That’s the whole appeal of dried flower mason jar luminaries: they’re low-cost, genuinely handmade, and they turn a handful of garden flowers into ambiance you get to enjoy long after the growing season winds down.
Written by: Hani Shabbir
You will also like:
Nine Proven Methods to Dry Flowers