This post may contain affiliate links. Please see our full Disclosure Policy for details.
|
Hello Everyone
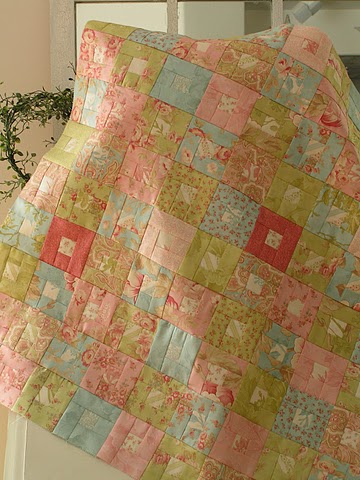
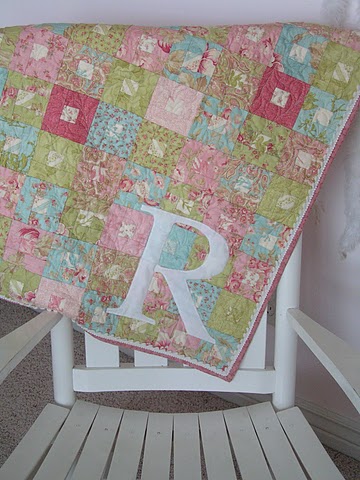
I am Sachiko from over at Tea Rose Home It took me over a year to decide how I wanted to finish the quilt. My daughter is so excited, finally it’s complete. Here is how I did it.
|
| Finished 27″ x 30″ (Constructed using 90 3″x3″ squares) |

YOU WILL NEED:

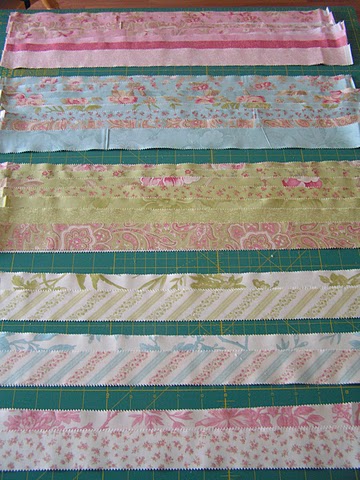
I used Honey Buns from Moda, but you can make your own 1 1/2″ wide strips by the fabric’s width and use them instead. I used 36 strips to make this quilt.
HOW TO:
Sort and group the strips by color
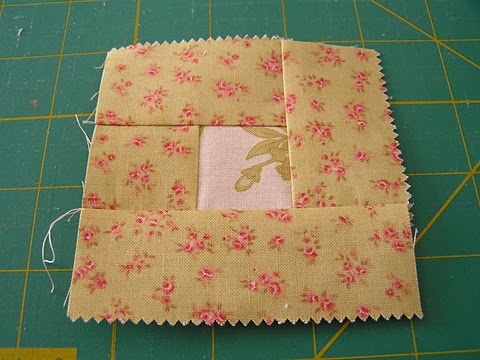
Cut 90 squares (1 1/2″x 1 1/2″) from the light color fabrics
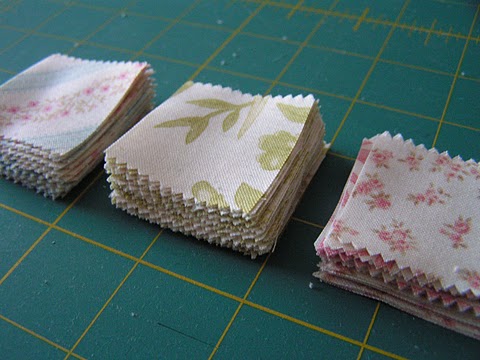
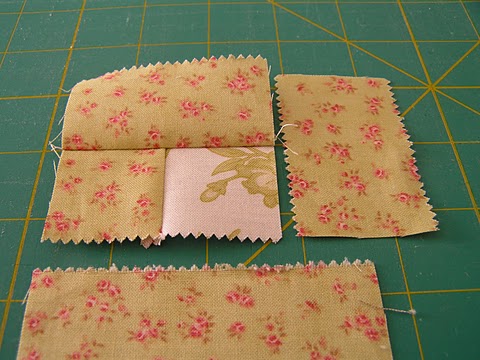
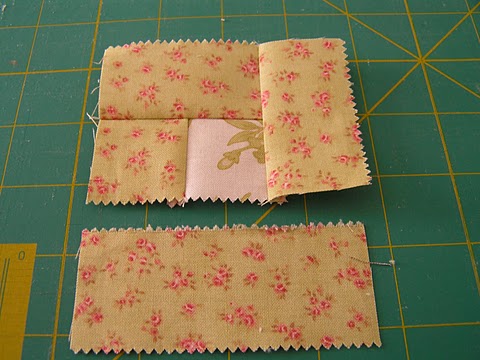
Cut 90 squares (1 1/2″x 1 1/2″), 90 rectangles (1 1/2″x3 1/2″) and 90 rectangles (1 1/2″x2 1/2″) from the dark color fabrics
My Honey Buns had three main colors: pink, green, and blue. Since I made this quilt with 90 blocks, I made 30 pink blocks, 30 green blocks, and 30 blue blocks. When you are making this from scratch, this will make it easier to pick out the fabrics. You only need four different color schemes, one light, three darks.

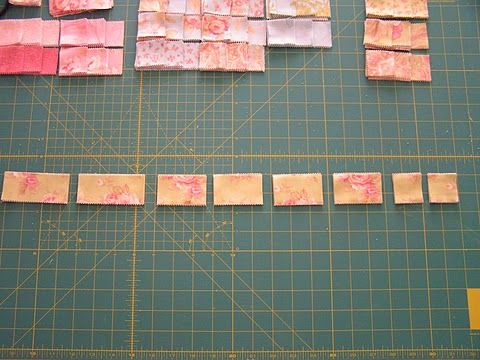
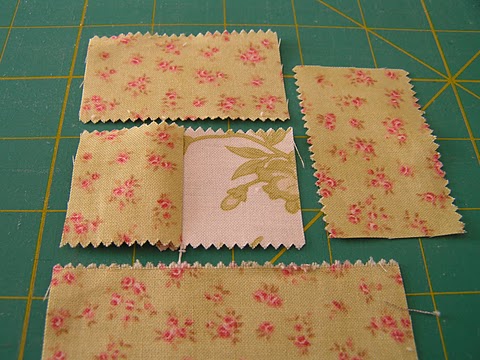
Arrange the pieces together to make blocks. See the pictures for guideline. Don’t forget to press the seam after each step. It will make quite a difference on the finished quilt.
Lay all the blocks together to see how you want it to look. Sew them together first side by side
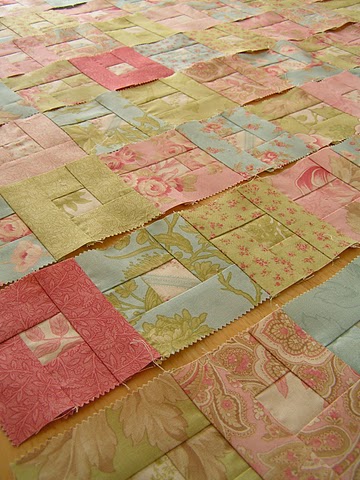
Then row by row
Since I made this for Rachel’s room, I appliquéd her initial “R” and added small pom-poms around the edge. I machine quilted this myself.
Thanks Sachiko for the wonderful tutorial
A few more of Tea Rose projects that I am loving:


Felt Banner
I hope you will come and join the fun!
Thank you Hani to having me here today at your lovely blog, it is such a treat. 🙂
I hope you will come and join the fun!
Thank you Hani to having me here today at your lovely blog, it is such a treat. 🙂
The post has been truncated for copyright safety. Thank you so much for understanding! “This post first appeared on Craftionary.net”


Such a pretty quilt!!! I love how the R makes is personalized, but still looks super classy!! Great guest post!
How big of a quilt does this make?