This post may contain affiliate links. Please see our full Disclosure Policy for details.
Learn to sew a beautiful square in square quilt with this handmade quilt making tutorial with steps and pictures to guide you.
The Square in a Square quilt pattern is a classic and versatile design that quilters of all skill levels can enjoy. This timeless pattern features a smaller square centered within a larger square, creating a clean, geometric look that works well in both modern and traditional quilting projects. Whether you’re a beginner or an experienced quilter, this step-by-step tutorial will guide you through the process of making your own Square in a Square quilt block.
What is the Square in a Square Quilt Pattern?
The Square in a Square (SIS) quilt pattern is a fundamental block design where a smaller square is framed by four triangular pieces, forming a larger square. This block can be used as a standalone design or combined with other blocks to create intricate quilt patterns.
Why Choose the Square in a Square Pattern?
- Beginner-Friendly: Easy to sew with simple straight stitches.
- Versatile: Can be used in traditional and modern quilt layouts.
- Scrap-Friendly: Great for using up fabric scraps.
- Customization: Can be resized to fit various quilt projects.

square in square quilt tutorial
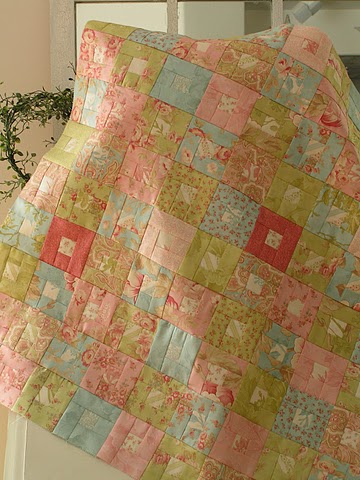
Finished Handmade Quilt 27″ x 30″ (Constructed using 90 3″x3″ squares)
Materials Needed:
- Fabric for the center square (main fabric)
- Fabric for the outer triangles (contrast fabric)
- Rotary cutter and quilting ruler
- Cutting mat
- Sewing machine
- Thread
- Iron and ironing board
Square in a Square Quilt Tutorial
Gather your fabric and try this tutorial. Experiment with different fabric choices to make a quilt that’s uniquely yours.
Cutting the Fabric
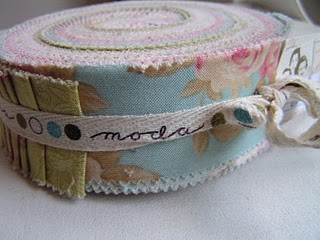
I used Honey Buns from Moda, but you can make your own 1 1/2″ wide strips by the fabric’s width and use them instead. I used 36 strips to make this quilt.
Beautiful pattern and colors for quilting
Sort and group the strips by color
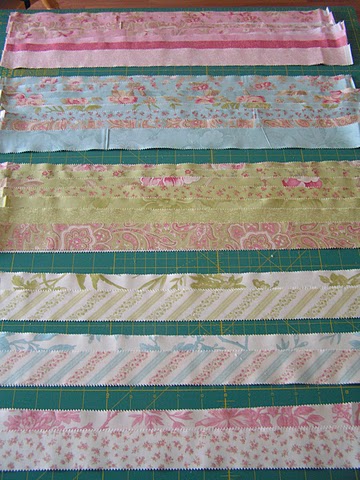
Sorting and arranging fabric strips
To create a basic 3-inch Square in a Square quilt block, cut the following pieces:
- Center Square: Cut 90 squares (1 1/2″ x 1 1/2″) from the light color fabrics.
- Outer Squares and Rectangles: Cut 90 squares (1 1/2″ x 1 1/2″), 90 rectangles (1 1/2″ x 3 1/2″) and 90 rectangles (1 1/2″ x 2 1/2″) from the dark color fabrics.
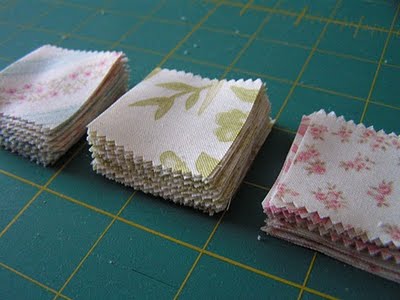
Cut light fabric squares for quilt
Tip: Adjust the size of your center square and rectangles if you want a larger or smaller block.
Cut dark fabric squares for quilt
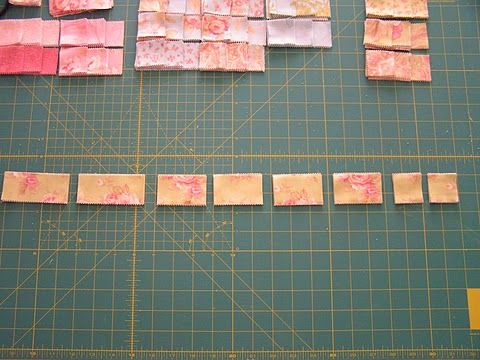
This quilt has three main colors: pink, green, and blue. This quilt is made with 90 blocks, 30 pink blocks, 30 green blocks, and 30 blue blocks. When you make this from scratch, this will make it easier to pick out the fabrics. You only need four different color schemes, one light, three dark.

Arranging fabric squares for ease of sewing
Sewing the Triangles to the Square
1. Attach the first two squares:
Arrange the pieces together to make blocks. See the pictures for guideline. Don’t forget to press the seam after each step. It will make quite a difference on the finished quilt.
- Align 1 square at the center and the other on left side.
- Sew using a ¼-inch seam allowance.
- Press the seam open with an iron.
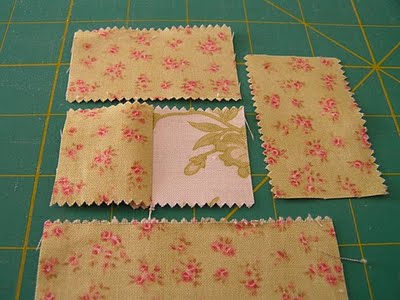
Attach first two squares
2. Attach the remaining three rectangles:
- Align and sew the remaining three rectangles on the other three sides of the square.
- Press the seams open again for a flat finish.
Tip: Trim any excess fabric to ensure the final block maintains a clean, square shape.
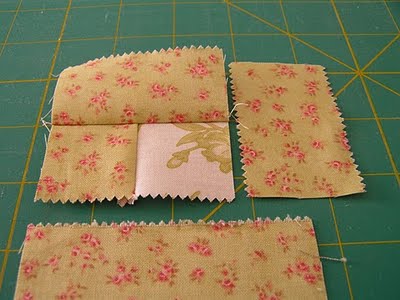
Attach the upper rectangle
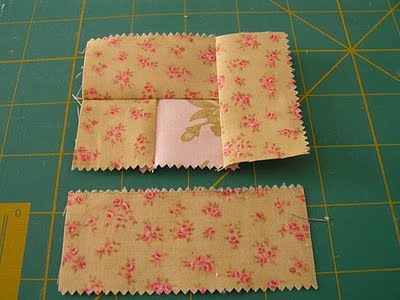
Attach the right side rectangle
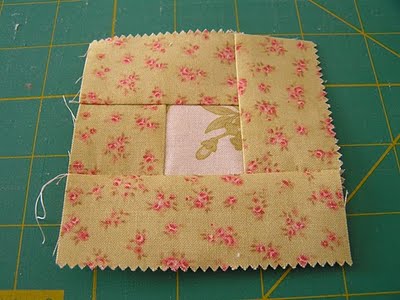
Attach the bottom rectangle
3. Assembling Your Quilt
Once you’ve made multiple Square in a Square blocks, arrange them in a grid pattern or mix them with other quilt block designs. Sew the blocks together, ensuring seams align properly. Add a border or sashing for a polished finish.
Lay all the blocks together to see how you want it to look. Sew them together first side by side.
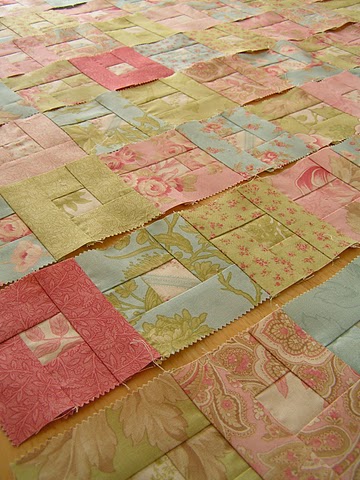
Sew square in square quilt side by side
Then row by row
Sew square in square quilt row by row
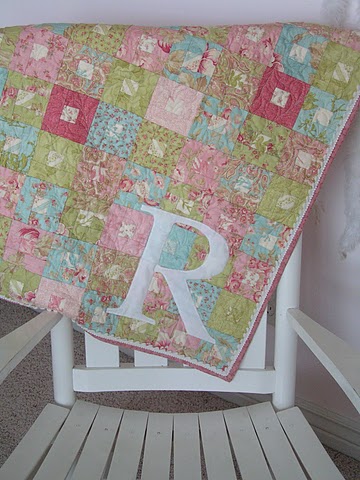
You can also appliquéd name initial and added small pom-poms around the edges for customization with using your sewing machine.
4. Design Variations of Square in a Square Quilts
- Double Square in a Square: Add an extra frame of triangles around the original block.
- Scrappy Look: Use different fabrics for each triangle to create a colorful, scrappy quilt.
- On-Point Layout: Rotate the blocks to form a diamond-like arrangement.
Sewing Tips
- Press Seams Properly: Always press seams open or to one side for a flat and professional look.
- Accurate Cutting: Use a rotary cutter for precise cuts to ensure blocks fit together perfectly.
- Chain Piecing: If making multiple blocks, sew in a continuous chain to save time.
The Square in a Square quilt block is a must-learn technique for quilters who love geometric patterns. With endless design possibilities, it’s perfect for creating beautiful quilt tops, pillow covers, and wall hangings. Whether you’re making a single block or an entire quilt, this pattern is a fantastic way to enhance your quilting skills.
Gather your fabric and try this tutorial today! Share your creations and experiment with different fabric choices to make a quilt that’s uniquely yours.
You will also like:
50 Bead Embroidery Kits and Ideas


Such a pretty quilt!!! I love how the R makes is personalized, but still looks super classy!! Great guest post!
How big of a quilt does this make?