This post may contain affiliate links. Please see our full Disclosure Policy for details.
Make a stunning landscape scenery inspired by roman classic mosaic to make this DIY mosaic art using colorful glass tiles and grout.
I am so excited to share this project. This has been one of those projects that I completed with full dedication.
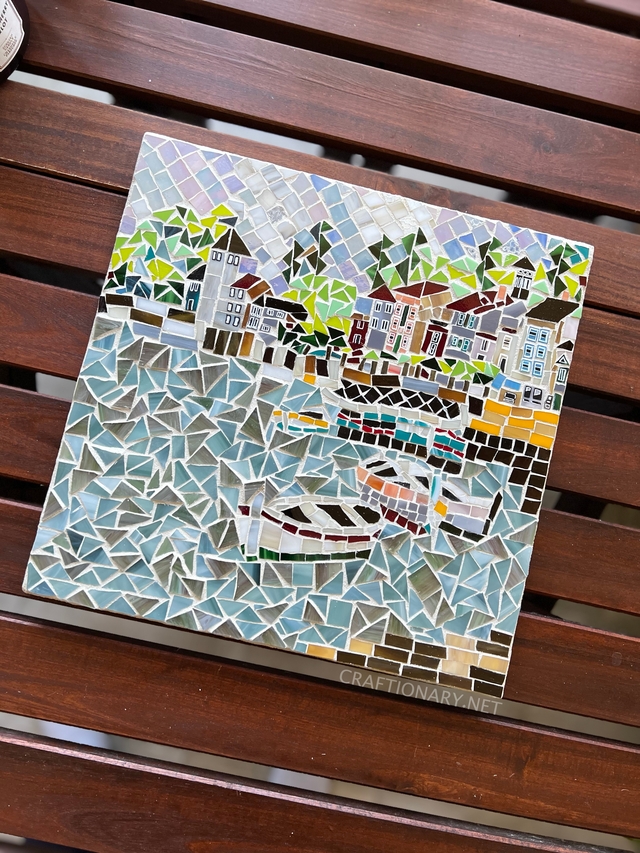
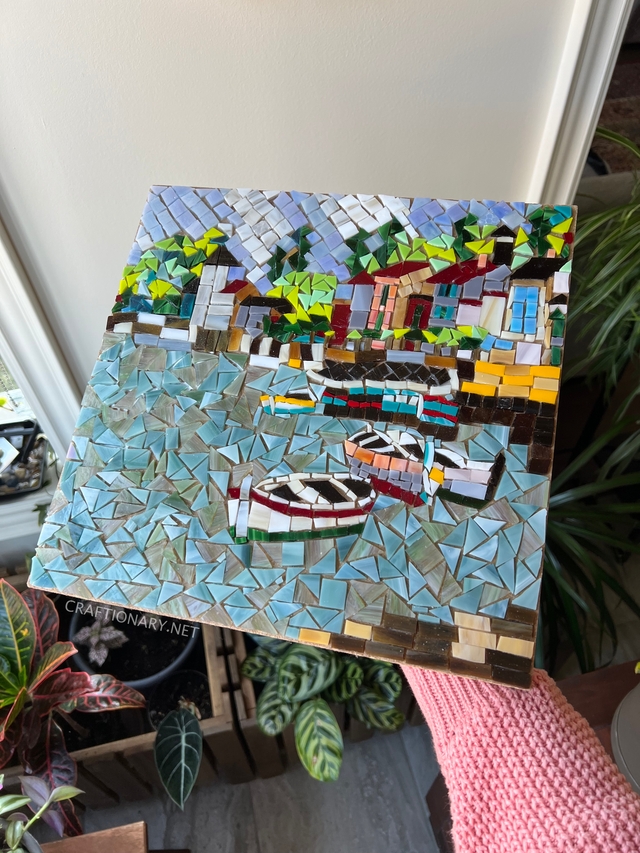
It’s a beautiful landscape DIY mosaic art with a scenery of boats at the bay of the lake or seaview with houses and trees on the land on a sunny day made with small pieces of stone, glass, ceramic and stained glass tiles (aka tesera).
You can also use opaque, mirror, frosted, and even tempered glass tiles. Tempered glass is perfect to show a painting done underneath the tile on the surface for cool effects.
The inspiration for this landscape comes from classic roman mosaic art of a vintage painting.
For full details on how to mosaic please see mosaic coasters.
DIY Landscape Mosaic Art
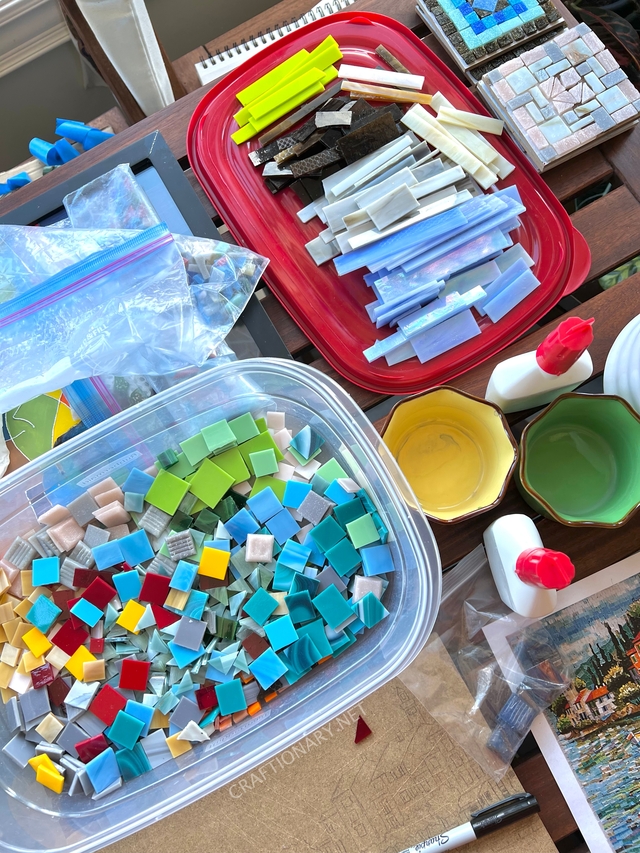
Material:
Gluing:
- Substrate – Can be wood, canvas, cement board or other rigid surface suitable for mosaic work. MDF wood board cut to any size you like is ideal for this project.
- Glue or mosaic adhesive (Weld Bond dries fast and non-slippery. A type of glue that you use to stick glass tiles for mosaic)
- Squeeze bottle with a tip for easy application (if you buy glue in bulk).
- Mosaic pieces or tiles (ceramic, stone, or Glass tiles)
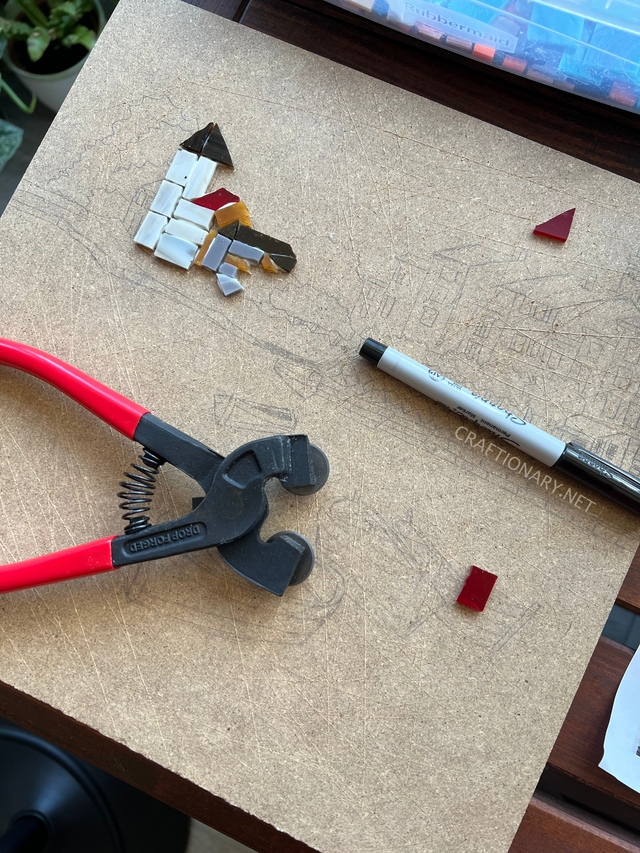
- Glass cuter (I recommend buying mosaic tools set. This handy set has all the tools you need including heavy duty mosaic tile cut nipper, tweezers, double-ended hook, sponge, spatula, and scraper).
- Retractable Blade (for scratching the surface)
- Wide painters tape
Grouting:
- Grout – (Using Polyblend Plus in Snow White color)
- School glue
- Chopsticks (or wooden skewers)
- Disposable gloves and tablecloth
- Rag (pieces of old tshirts or other soft materials)
- Spray bottle
Framing:
- Shadow box frame
- Gorilla wood glue
Others:
- Glasses for eye protection when cutting tiles.
- Grout float
- Gloves
- Hammer
You will also like: DIY Glass Tile Indoor Garden Art
Instructions:
Plan you design:
Find an inspiration to follow for your design. I prefer to print it as it gives you a clearer perspective.
Now use a pencil to roughly draw the main elements of your landscape art.
Use a paper blade to strike on the wood surface to make the smooth surface rough. This allows tiles to affix firmly.
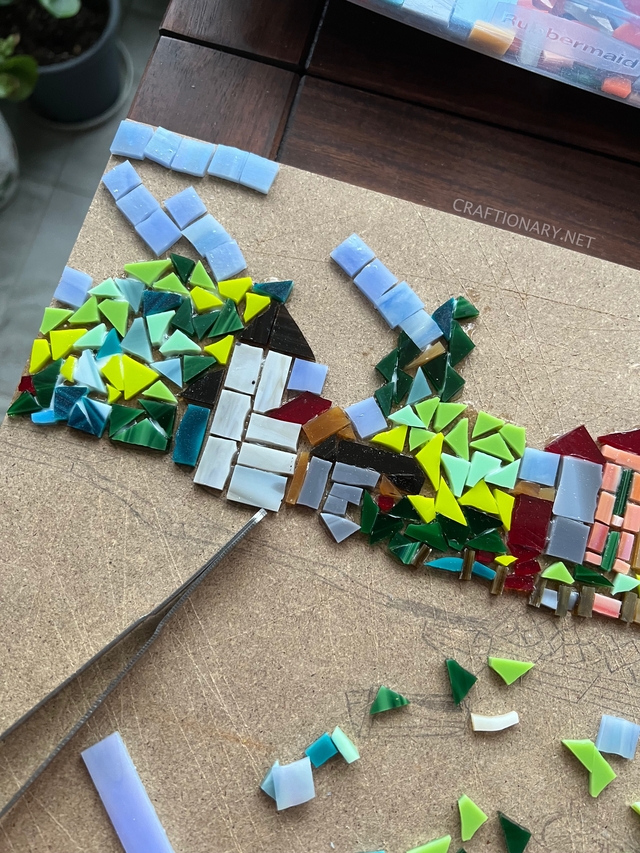
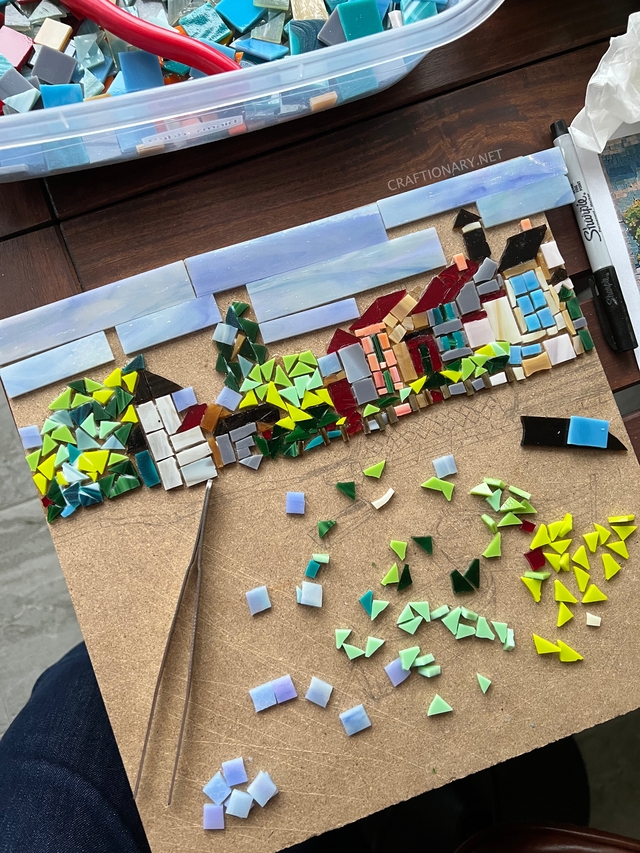
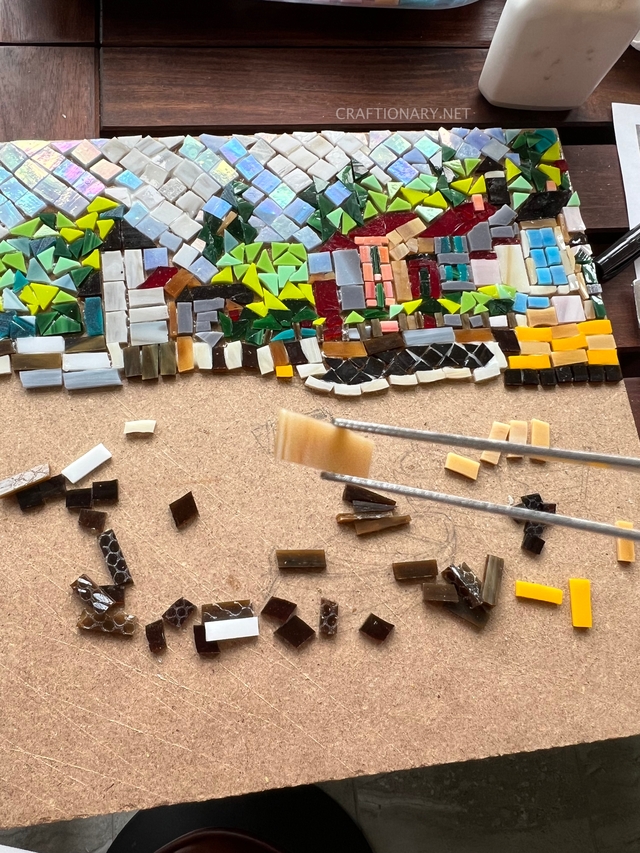
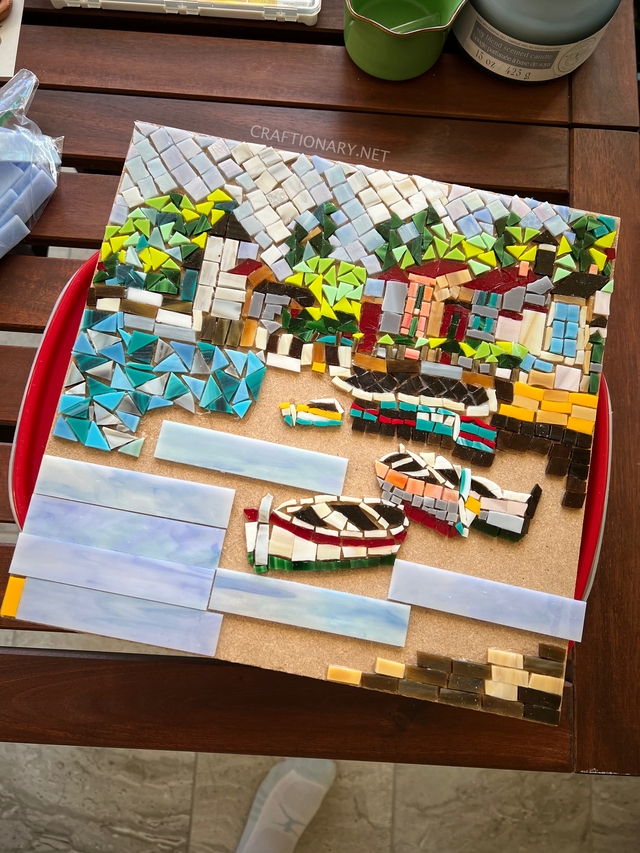
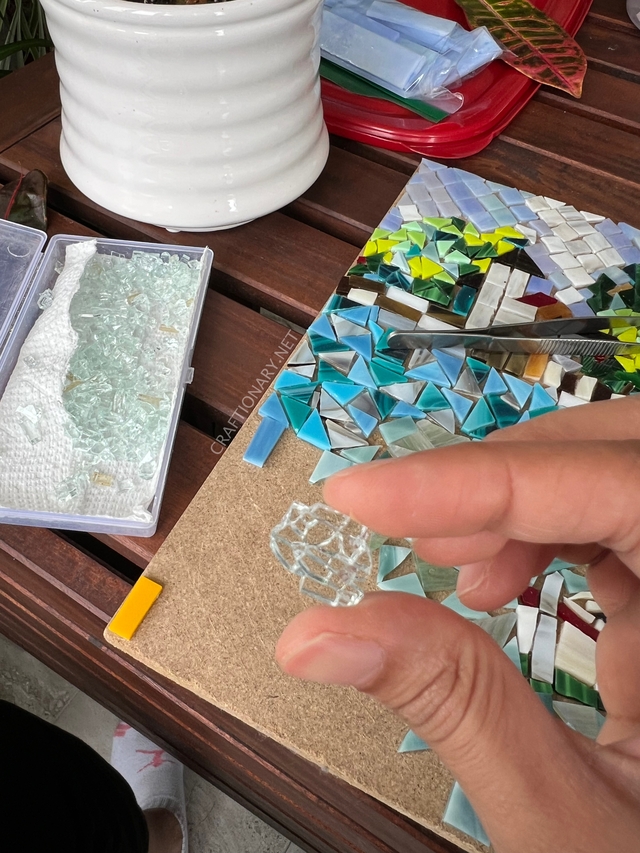
Work in portions to focus when working with a variety of tiles (aka tesserae). I started with the houses and trees, then I filled the sky. After that I completed the boats and finally did the sea view.
Cut your tiles to fit into your drawing and reference the drawing if required for colors. Once you have all your glass tiles ready, use glue to fit them in place.
It’s a good idea to keep even space between the tiles for a neat look when you grout.
Continue with the rest of the scenery. Here’s a quick video to assist you with this project.
Tips:
Cut glass tiles in variety of geometric shapes to bring your elements to life. Use rectangles, squares and triangles in my design.
For the main elements houses and boats I used cubes and rectangular shapes.
To give a contrast the sky is diagonal.
While the trees and water are cut into triangular shapes.
Mosaic Tile Art
It is always a great idea to place tiles on your board to see how it looks against all elements as well as to estimate how many tiles you will need in total.
You can also use clear and translucent glass tiles like the tempered glass tiles.
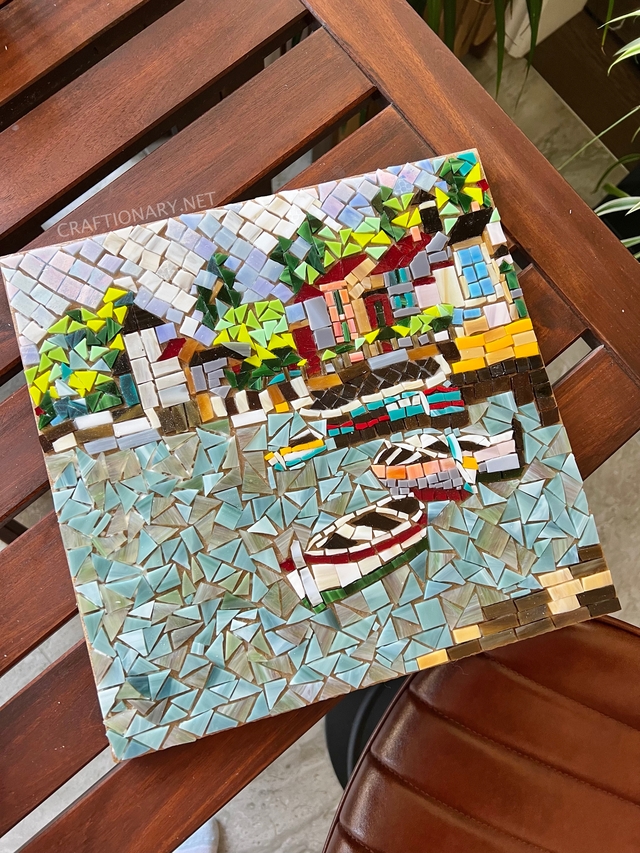
I started with bright turquoise colors for the water, but then settled for the more dull earth tones of blue which allowed the homes and boat to standout.
If you glue your tiles and don’t like the look. You can remove them, check out the video for instructions.
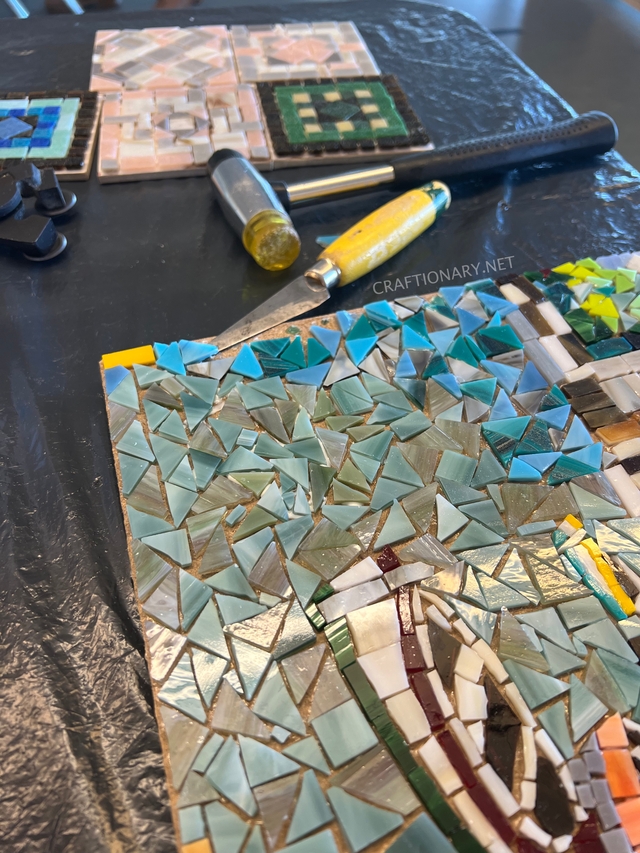
Use a sanding block to smooth any pointy edges on the sides.
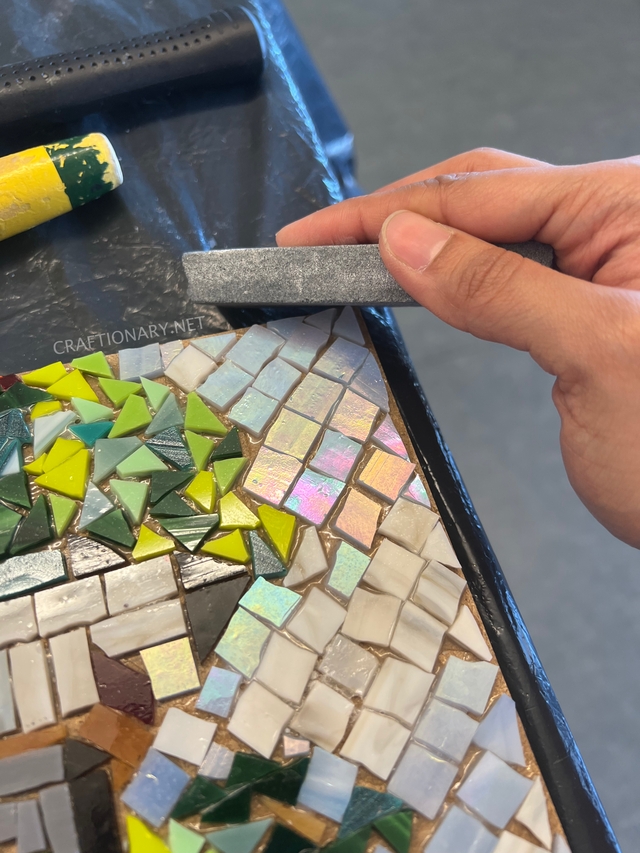
Once you have glued all the tiles and it is dry. Grout the project.
Mosaic Art Before Grouting
For details on how to grout checkout mosaic coasters.
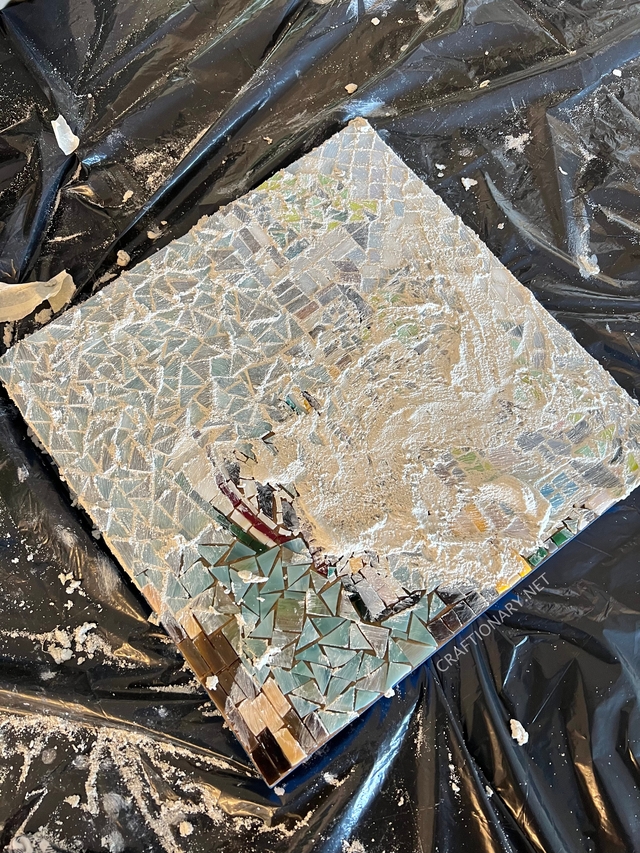
Grouting
Add details to houses using posca markers.
Mosaic Art After Grouting
Use wood glue to stick my art in a shadow box I bought from Michael and framed it. I love how it came out.
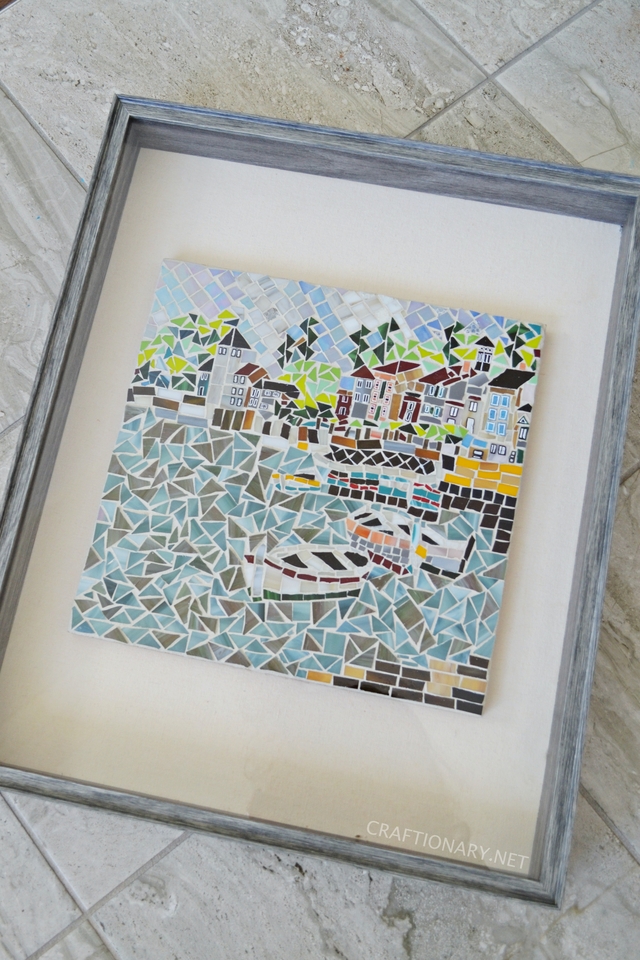
Landscape Mosaic
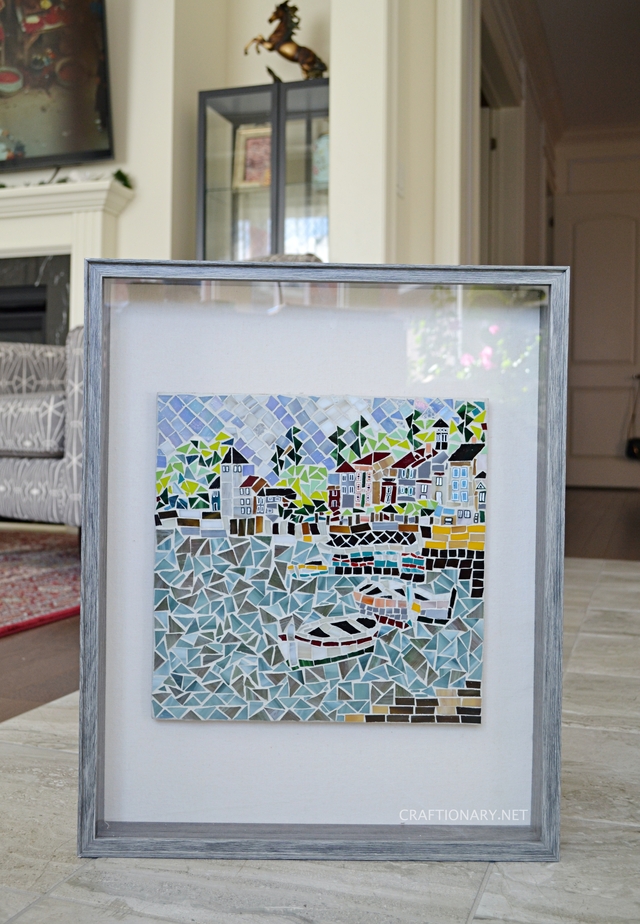
Mosaic Art
I hope you enjoyed this project!
You will also like: