This post may contain affiliate links. Please see our full Disclosure Policy for details.
Hey everyone! I’mElise from Grow Creative
and I’m super excited to be guest posting on Hani’s fun and amazing blog today- thanks Hani for the opportunity!
A little about me…. I’m a stay at home of an energetic two year old boy and whenever I’m not chasing around with him outside I’m usually working on something artsy or crafty. I started out as an artist and eventually found my way into the craft world through all those addicting craft blogs out there.
Hence, my blog is an arts and crafts mix- the best of both worlds!
Today I’ll be showing you how to make a decorative canvas for your wall using patterned paper and modge podge- gotta love that stuff!
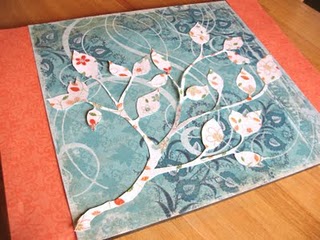
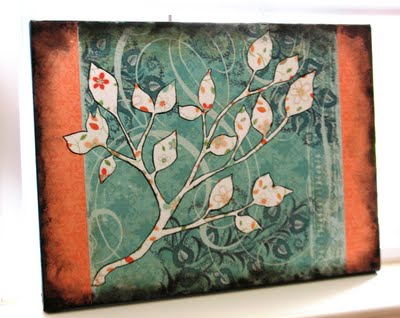 decorative canvas
YOU WILL NEED:
- Canvas
- Black spray paint
- Patterned paper
- Black ink
- Sponge
- Mod podge
- Foam brush
- Exact-o-knife/ scissors
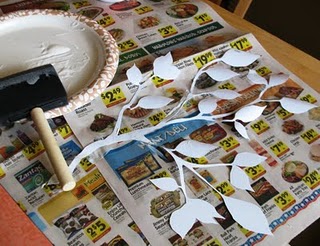
MAKE IT:I recycled a canvas from one of my previous wall art ventures. It needed a makeover!Spray paint your canvas black. The middle of the canvas does not matter much since we will be covering it up, but make sure the sides are well covered.

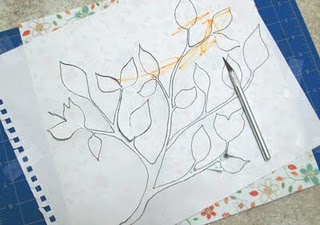
Print or draw your design on a trace paper. You can also trace designs from books and magazines using the trace paper. I drew my own design, but if you don’t feel so inclined, there are loads of copyright free images on the web.
(p.s. kindly disregard the orange scribbles- my son got to it while I wasn’t looking!)

Choose a pattern paper for the design. I chose the paper to match with my living room, which is where it is now hanging 🙂 Tape and secure your design on the pattern paper. With an intricate design like this, I decided to use a small exact-o-knife and self-healing mat. But if scissors are all you have, I’m sure they would work fine too.
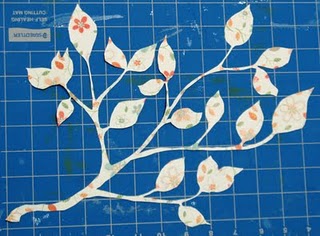
Arrange you design and other pattern papers of your choice on the canvas to be sure everything looks good
Mod podge is a little tricky, it dries quickly and you have to make sure there are no bubbles and wrinkles left. Decoupage one paper at a time and wait till it dries before decoupaging the other one. Use a roller to smoothen and remove any bubbles below the surface. Decoupage the design in sections onto the canvas. I mod podged the whole thing at once and it stuck to the newspaper it was sitting on and ripped in a few places 🙁 Luckily I was able to modge podge it back together on the canvas 🙂
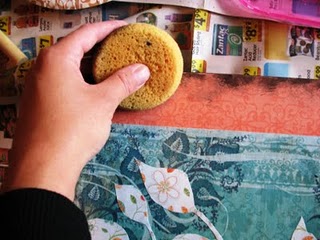
Distress the edges of the canvas using a sponge dabbed in some ink. This gives it more of an antique look. You may need to do this step last, depending upon the type of ink you use as some ink will smear when you apply mod podge over it (do a little test on a scrap paper just to be sure)
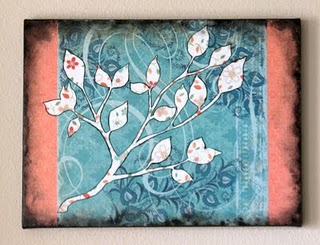
Outline the design with a sharpie or any black pen will do the trick also. Let it dry completely and then apply Mod podge to seal and prevent the canvas.
Your done!
Thanks Elise for sharing this wonderful idea!
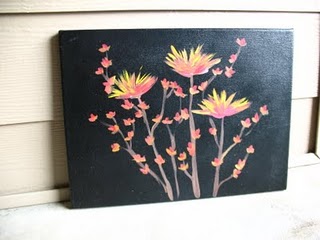
Do check out Elise’s blog for these lovely ideas:

Spring wreath from scratch

Lid Magnets
and my favorite
Her Art Gallery
The post has been truncated for copyright safety. Thank you so much for understanding! “This post first appeared on Craftionary.net”


I love it Elise! The colors you chose are so pretty together. Once again, I'm jealous of your talents.
Very nice canvas! Nice thing to do on week ends 😉
Thanks Hani!